Choosing Your First Trail Camera
July 16th, 2017 by BTC Editor
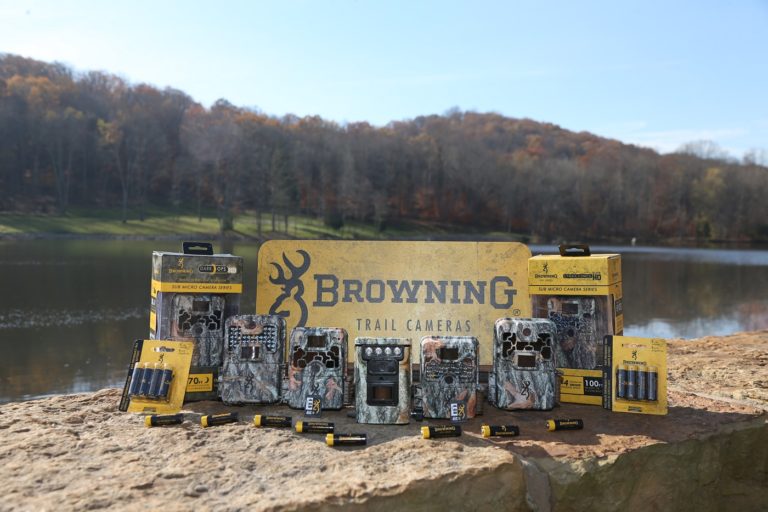
Trail camera technology has really improved over the years and there are more features than ever, allowing you to customize your trail camera experience to your liking. For someone who is new to hunting or the trail camera world, picking out your first game camera can be somewhat overwhelming, especially if you don’t know what features you need or what the features even do. After someone recently asked me for advice on what they need to look for when purchasing their first camera, I decided to share a few things that I feel are “must-haves”, as well as some bonus features and accessories that may be an asset to you.
Features
I really feel a lot of features on trail cameras are user specific and depend on user preference. I’ll briefly explain the features that I feel are the most important when considering which camera to buy.
Flash Type
The flash types are: White flash, Black flash (Invisible, or No-Glow), and Standard IR (InfraRed / Low-Glow). Tom Rainey of Browning Trail Cameras wrote a really great article for this blog explaining each flash type and their effect on trail camera picture quality: http://btc-omrc.com/nighttime-trail-camera-images-putting-light-on-the-subject/
Basically, the highest quality nighttime photos will be from White Flash cameras, then IR cameras, and then Black Flash cameras, but that’s not to say that the quality of the nighttime images from Black Flash cameras are bad. You just may notice a little more motion blur on them.
So, a few things to consider when choosing the flash type:
Where will you be putting your cameras?
If you are going to be putting them on public land or in an area that is known to have a lot of trespassers, you will probably want to go with a Black Flash camera. Otherwise, one of the previous two flash options may be what you would prefer.
Do you feel a White Flash or Standard IR camera will spook the game you are hoping to get pictures of?
If so, a camera with Black Flash may be best for you. My personal experience with Standard IR and White Flash cameras is I feel the animals get used to them. I haven’t noticed them spooking deer in the years that I have been running trail cameras. Everyone has their own opinion on this and each location may be different, so again, go with your own personal preference here.
Detection Range
The location where you plan on putting your game cameras will help you decide which camera may be best for you in regards to detection range. If you are running trail cameras primarily in the woods or have it set up over pinch points and travel corridors, the detection range can be quite a bit lower. But, if you are watching over larger areas, such as fields, the detection range needs to be a little higher, especially if you aren’t quite sure where the wildlife are traveling.
For example, the Browning Command Ops has a detection range of 55 feet with a 60-foot flash range, which is great. But the Browning Recon Force Extreme has a detection range of 80 feet with a 120-foot flash range, which is quite a bit more. So, you can see how the higher detection range could be quite a bit more beneficial in certain situations.
Trail Camera Accessories
Obviously, SD Cards and batteries are must-have accessories for your trail cameras. But there are a couple other accessories that you may want to look into purchasing for your first trail camera, depending on the location the camera will be in and how often you plan on checking it.
Security Box
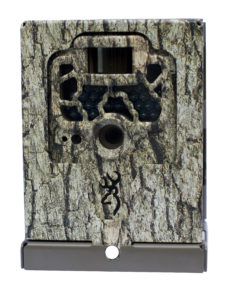 As I mentioned above, the location really is a key factor to consider when purchasing your trail camera. The same goes for deciding whether or not you need a trail camera Security Box. A couple things to keep in mind here: Do you expect there to be trespassers, or will the camera be on public land? Also, what types of animals are in your area? Do you have a high bear population? If you answered “Yes” to any of those questions, I recommend getting a Security Box. Browning makes one that fits all of their camera models (excluding the Defender 850). It can also be locked using a standard padlock or a Master Lock Python Cable so your camera stays safe and stays put.
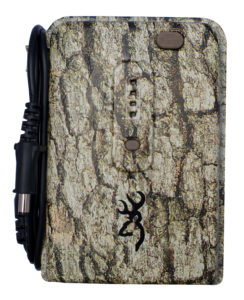
Trail Camera Power Pack
The Trail Camera Power Pack will extend the battery life of your Browning Trail Camera in the field. This is a great option if you don’t plan on checking your trail cameras very often. It holds holds 8 AA batteries in the same easy to use battery tray used in the trail cameras. Other features include a built-in battery tester and a twist lock plug to lock the power adapter to your Browning Trail Camera.
Bonus Trail Camera Features
Here are a few “bonus” features that you may also want to take into consideration when choosing your first trail camera. I personally don’t feel that these are features that you absolutely have to have, but I do feel they will enhance your trail camera experience. Personal preference comes into play here as well. Here are a few of my favorite features on the Browning Trail Cameras:
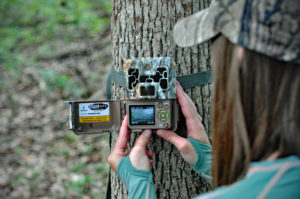
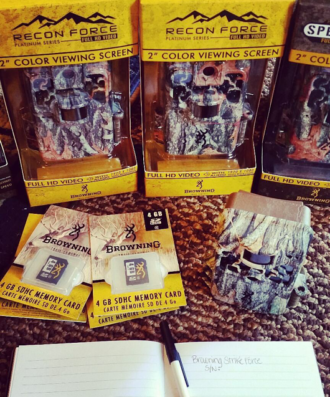
Viewing Screen
This is an internal viewing screen on some of the Browning Trail Camera models. It’s great for viewing trail camera photos in the field, and it really comes in handy when positioning the camera while you are setting it up.
Timelapse Mode
The Timelapse function allows you to set up your camera in the field, and program it to take pictures automatically at fixed intervals. This feature is helpful when you set a camera up in a new location such as a large field or food plot where you are not sure where the wildlife are entering the field. The camera will take images of the entire field, so you will end up capturing game at 200 + yards away, where a conventional game camera would not normally trigger a picture. All Browning Trail Camera models come with this feature, as well as the Timelapse Viewer Plus Software, so you can playback a whole day’s worth of activity in just a few minutes, much like watching a video.
Multi Shot / Rapid Fire Mode
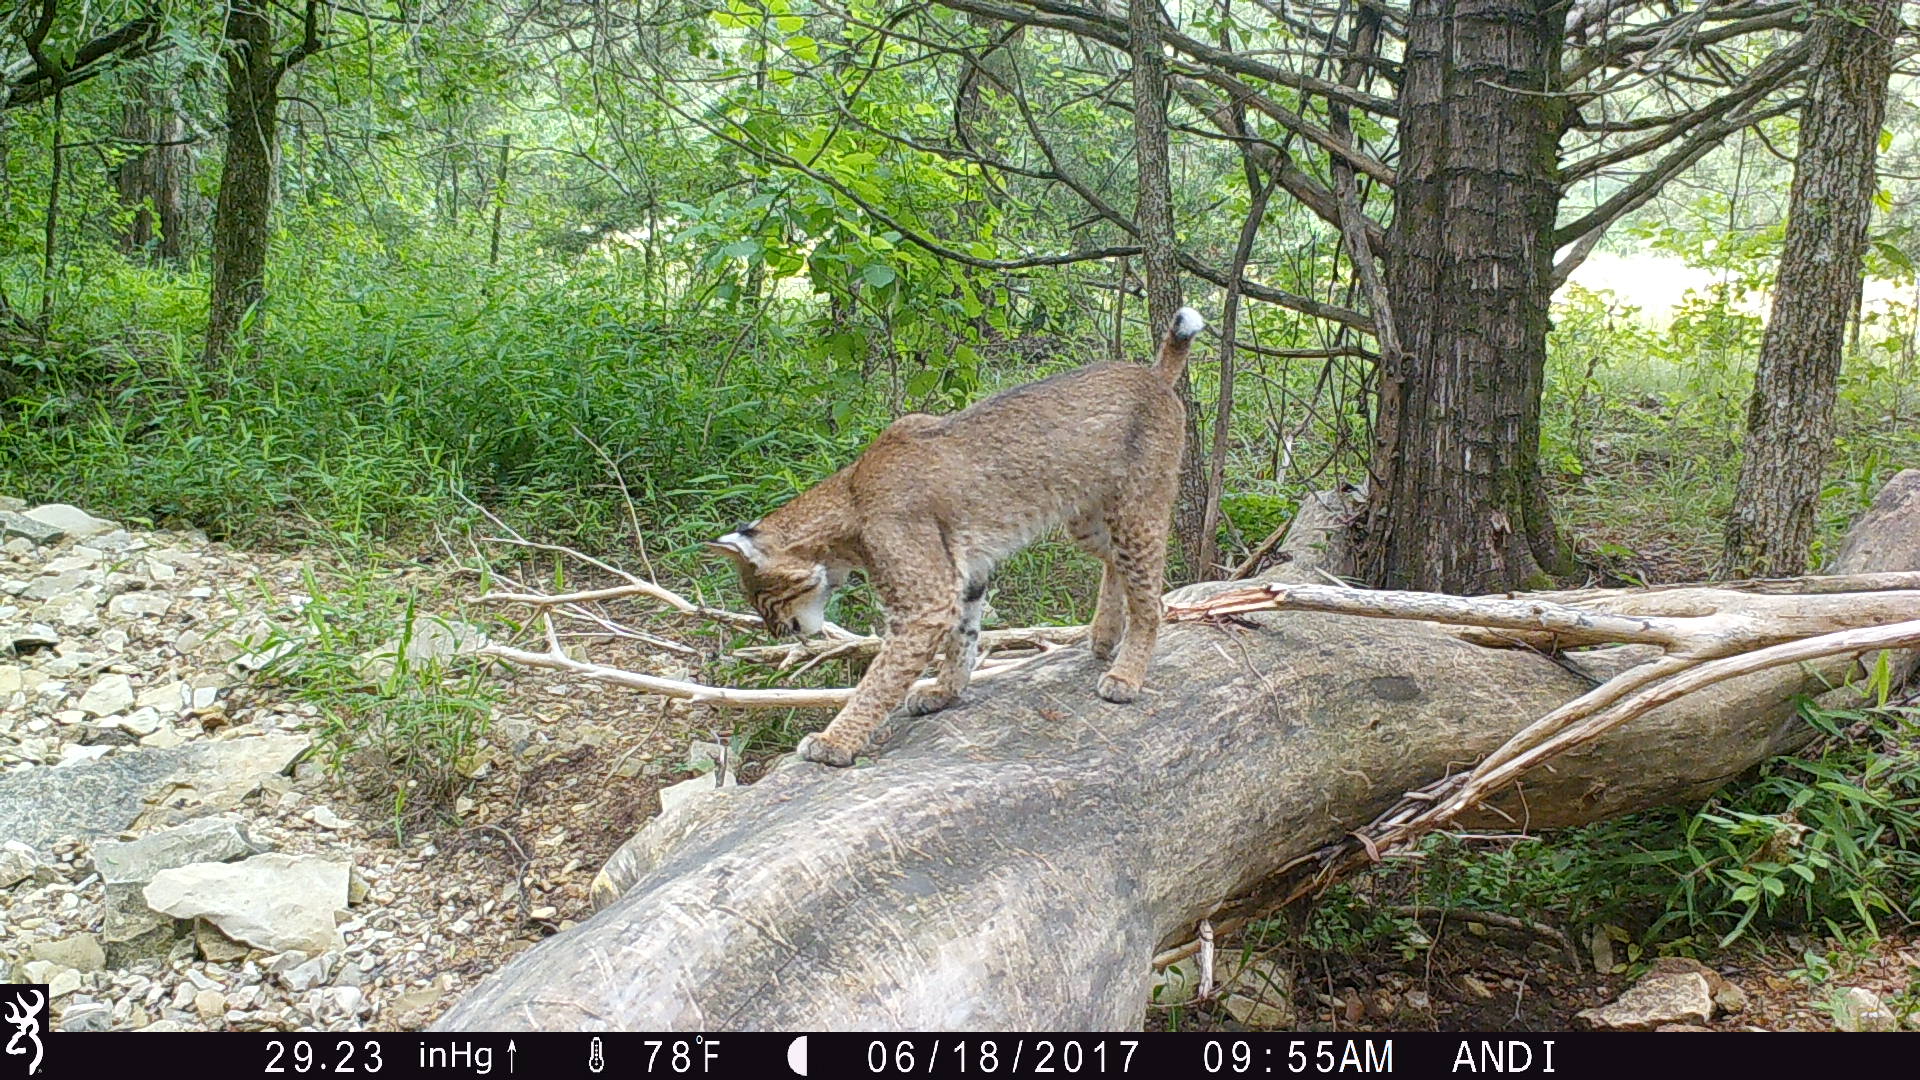
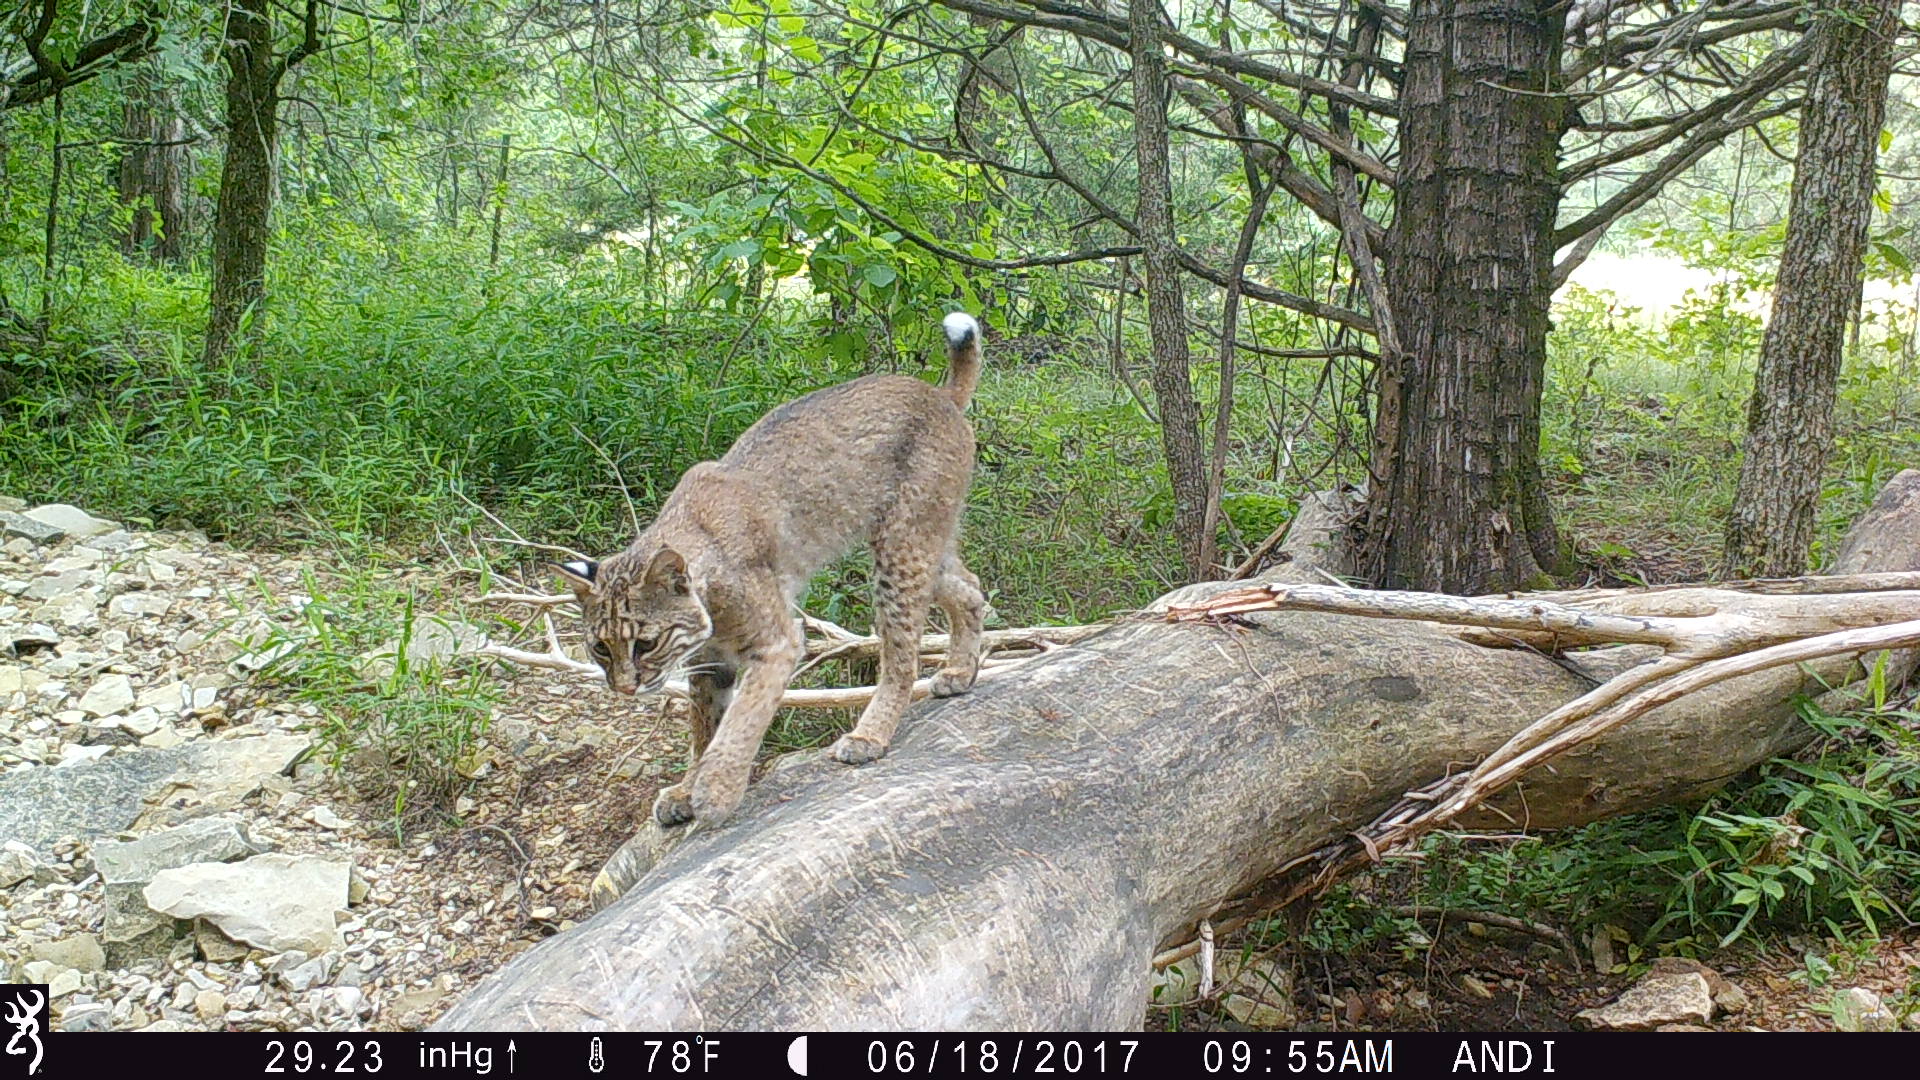
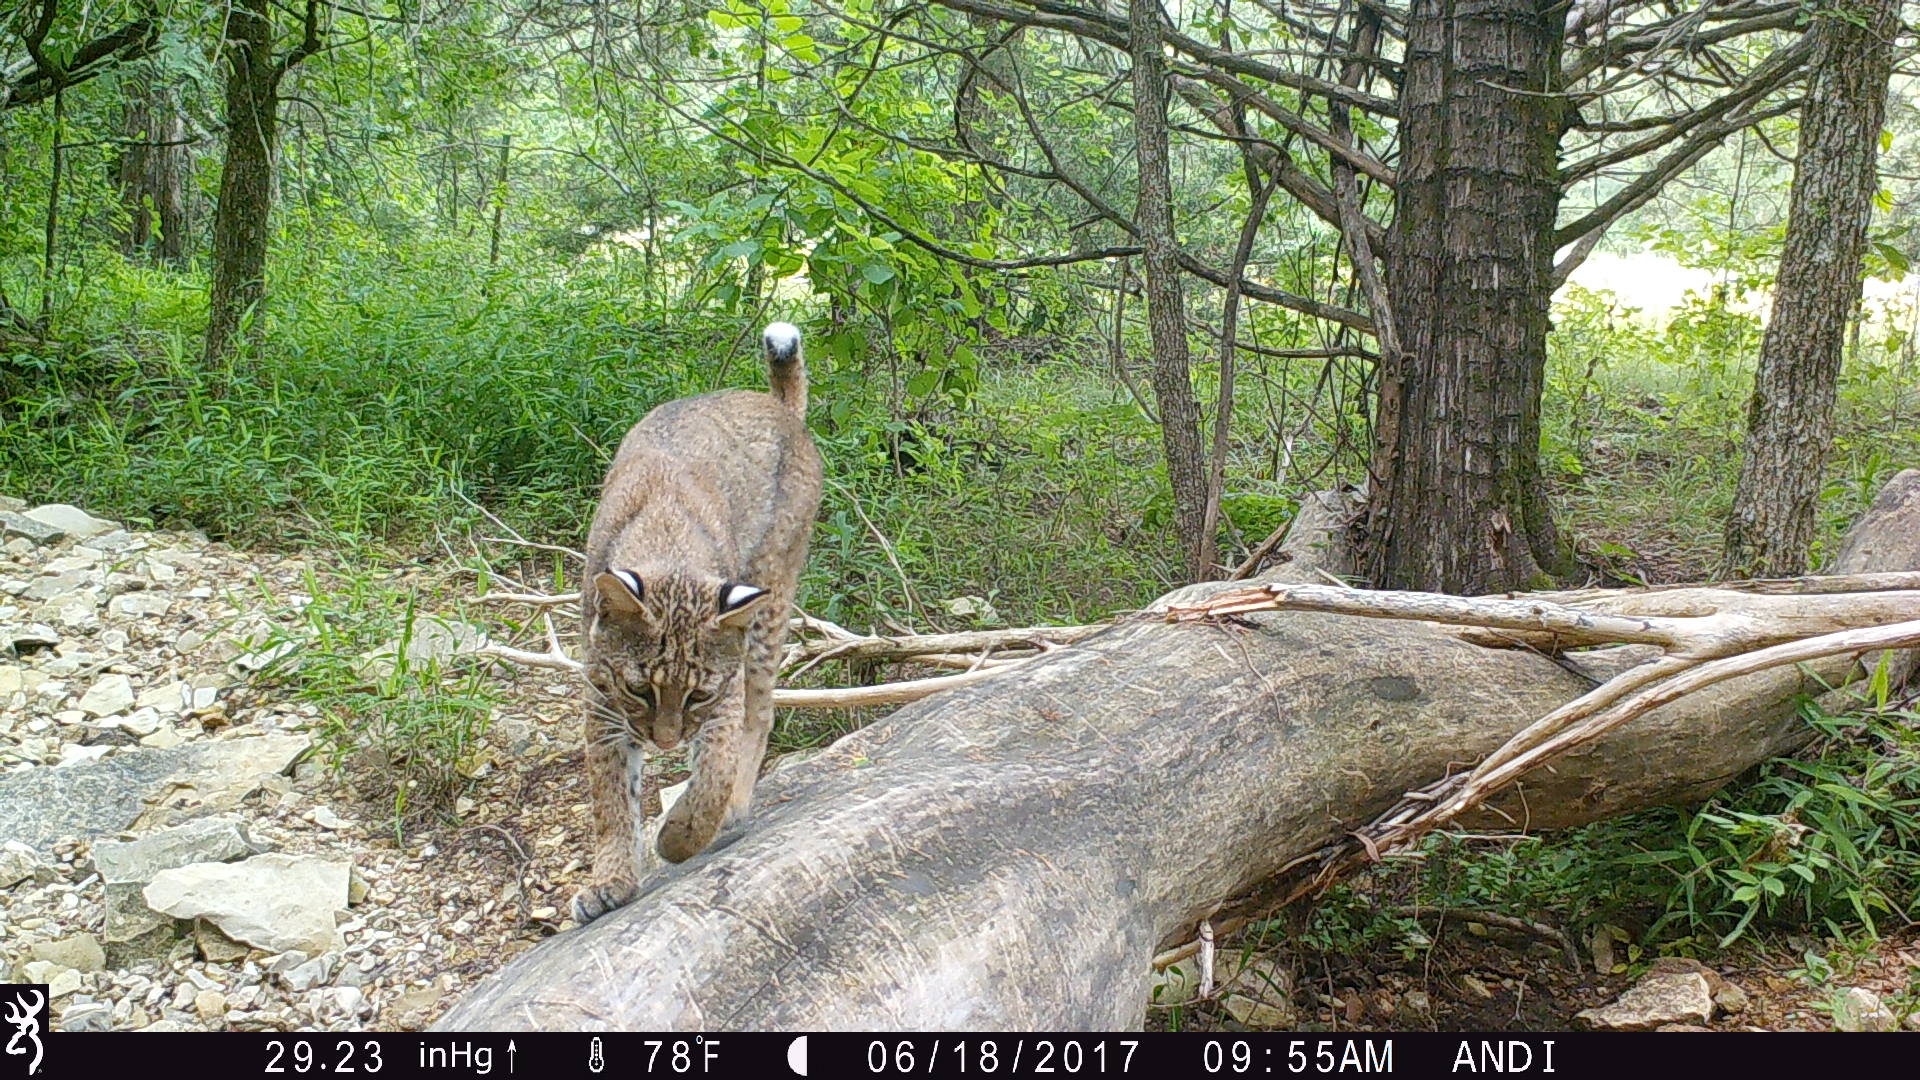
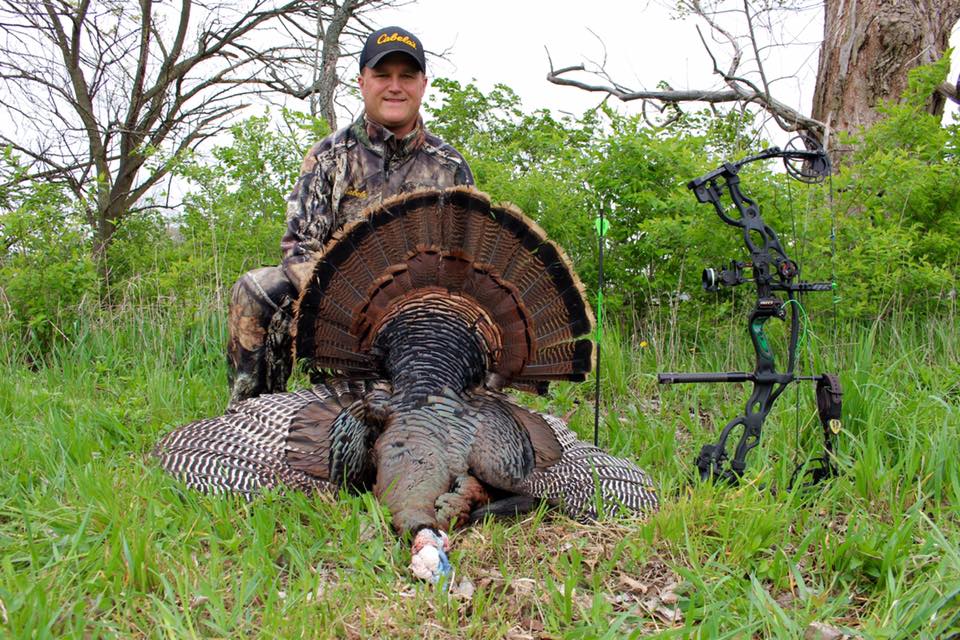
In certain situations, the 8-Shot Rapidfire mode is one of my favorites to use on my Browning Trail Cameras. It takes 8 shots in 2 seconds! I prefer to use this when I have a specific animal that I am targeting that I know will not be in the frame for long. For example, I wanted a Bobcat on this log setup, but I knew it would likely not use this log repeatedly and not stay on it for long, so I put it on Rapid-Fire mode to get as many photos of it as possible and pick my favorites to share. Rapidfire Mode is also great in deer season when you are watching a smaller area, such as pinchpoints and travel corridors, so you don’t miss any deer activity.
Video Mode
This is a really fun trail camera feature. It’s almost like watching the wildlife in person when playing the trail camera videos back! With 1920 X 1080P Full HD, the audio and the clarity in the Browning Trail Camera videos is really amazing. Additional new features for the 2017 model includes Smart IR video, which continues to record video footage while game is moving in front of the camera and SD card management options which allow you to overwrite older images on the SD card if the memory is full.
I hope this article helped you know where to start in shopping for your first trail camera! If you have any other questions that were not listed in this article please feel free to leave a comment below.
By Andrea Haas
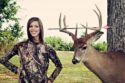
Andrea Haas is a Pro-Staffer from Missouri who enjoys hunting deer, turkeys, and upland birds. She is also the founder of the Huntress View, an organization formed to help strengthen the ever growing community of women hunters
Homemade Venison Jerky Recipe
July 2nd, 2017 by BTC Editor
Making homemade jerky is a simple way to preserve excess meat, and when done correctly, can be stored 1-2 months. Depending on the ingredients used, it can serve as a healthy, high-protein and low-carb snack—perfect for training for upcoming hunts or while in the mountains hiking or hunting.
Below is the recipe I use. Ingredients are approximations, and can be adjusted based on individual preferences.
Ingredients:
- 3 lbs. venison meat (can also use elk or other meat)
- 2 cups teriyaki
- ¼ cup soy sauce
- ¼ cup brown sugar (dark or light is ok)
- 1 heaping tablespoon minced garlic
- 1 tablespoon Cajun seasoning
- 1 tablespoon dried and crushed hot peppers (such as cayenne, jalapeno or habanero)
Instructions:
- Slice meat into 1/8”-1/4” slices using meat slicer
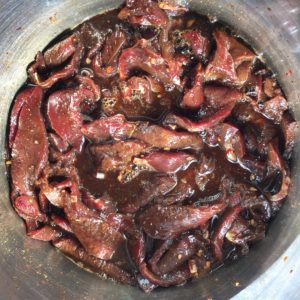
- Combine all ingredients (except meat) in small pot, mix well and heat over a low heat just enough to dissolve the sugar
- Add meat to liquid mix, one piece at a time, ensuring all pieces are thoroughly coated
- Place meat and all liquid in Ziploc bag and refrigerate at least 4 hours (I prefer overnight for a stronger flavor)
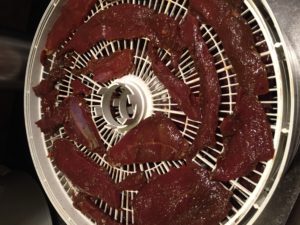
- Place slices of meat on dehydrator racks, making sure not to overlap any of the pieces
- Let dehydrate for 7-8 hours at 155°F
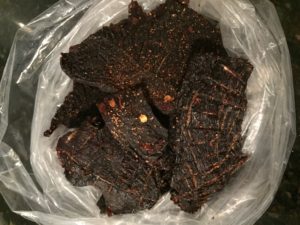
- Remove from dehydrator and store in plastic Ziploc bag
Additional information:
- 3 lbs. of raw meat yields approximately 1 lb. dried jerky
- Many people use a jerky gun, but I prefer making jerky with sliced meat instead of ground meat. I have a restaurant-quality meat slicer, but good slicers can be purchased at Bass Pro or Cabela’s.
- Sugar can be omitted for a lower-carb recipe; can also substitute a can of crushed pineapple
- Cajun seasoning and hot peppers can be omitted if you prefer non-spicy jerky
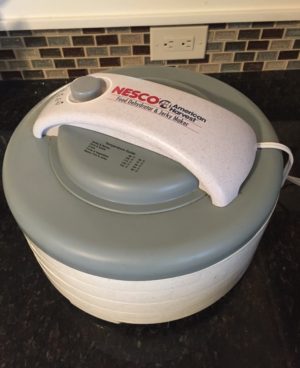
- I recommend the Nesco American Harvest Dehydrator, available for purchase on Amazon. I purchased this in 2009 and have used it for multiple batches of jerky every year, as well as for drying fruits and veggies in the summer. It comes with four dehydrator racks, and more can be purchased separately.
This is our go-to recipe, but would love to hear your jerky recipes. Please comment with your favorite recipe, or any tips you have for making jerky.
Sarah Honadel is an avid outdoorswoman from Kentucky, now living in Idaho, who enjoys hunting turkey, deer and elk. She is a Team Member at Huntress View and Brand Champion for ReelCamo Girl, two organizations that work to support, encourage and empower women in the outdoors. Follow her on Instagram @waddysarah and @arrowridgecreations.
Father’s Day
June 18th, 2017 by BTC Editor
In honor of Father’s Day, here is a poem celebrating and thanking Dad’s for everything they have done for us. We’d also like to say Happy Father’s Day to the Dad’s on the Browning Trail Camera team: Brad Miller, Carl Drake, Derek Dirnberger, Don Kisky, Hal Shaffer, Henry Woodard, Jon Brunson, and Levi Morgan. Thank you for setting such a great example for your children and doing a great job at raising the next generation of hunters!
Happy Father’s Day
A Dad is a person
who is loving and kind,
And often he knows
what you have on your mind.
He’s someone who listens,
suggests, and defends.
A dad can be one
of your very best friends!
He’s proud of your triumphs,
but when things go wrong,
A dad can be patient
and helpful and strong
In all that you do,
a dad’s love plays a part.
There’s always a place for him
deep in your heart.
And each year that passes,
you’re even more glad,
More grateful and proud
just to call him your dad!
Thank you, Dad…
for listening and caring,
for giving and sharing,
but, especially, for just being you!
Happy Father’s Day.
-Author Unknown
5 Summertime Trail Camera Tips
May 21st, 2017 by BTC Editor
1- Summertime is when most hunters get their trail cameras out of storage and hang them to start taking inventory of their whitetail herd. It’s also a great time to take inventory of your trail cameras. Make note of how many you have, how many more you may need for the upcoming season, and also keep a list of each camera model and serial number in the rare case of theft. It can, and does, happen so keeping a record of this could help get your cameras back eventually if they do get stolen. Browning Trail Cameras also has a Security Box that makes it more difficult for thieves to take your cameras, if even at all.
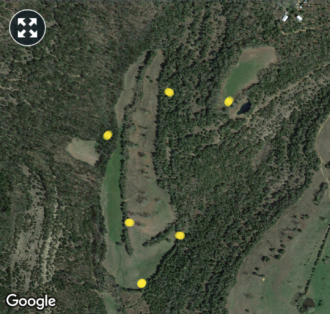
2- Look at an aerial map of your hunting property beforehand so you have a good idea of where you’d like to hang your cameras. This way, you’re not driving or walking all over your property, disturbing the game and working up a sweat. If you have a weather app on your phone you can easily locate your property via the radar portion of the app. If you don’t have that, Google Earth is what I recommend. It’s probably a good idea to take a screenshot of your property and from there mark where you are placing cameras using the paint/draw tool on your phone in case you forget where you hung the cameras later on.
3- Summertime is obviously hot, even first thing in the morning, so in order to be out in the heat as little as possible it’s best to have everything ready to go before you head out. Have your trail cameras already set up with the correct date/time/camera settings, full with batteries and the SD card in so all you have to do is hang them, turn them on, and go!
A Browning Trail Camera feature that really helps get your camera positioned quicker is the viewing screen on some of the camera models. (See photo below.)

4- Everyone has their own system for transferring and storing trail camera pictures to their computer. I like to stay organized from the start by putting my SD cards in 2 separate cases – one for blank SD cards, and one for full SD cards – and then loading the pictures to my computer once I’m home. A baggie works just as good, just make sure you label each one to avoid confusion. Some prefer to bring a laptop and transfer the pictures there in the field, but I like to get in and out as quickly as possible and this works best for me.

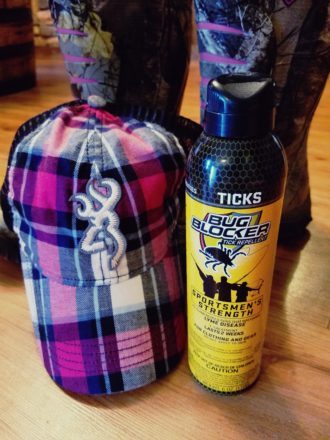
5- Last but not least, don’t forget the tick spray! So far this year has been one of the worst I’ve seen for ticks. Using a tick spray with Permethrin has worked well for me. Spray down your clothes and boots and make sure they’re dry before putting them on. You do not want this on your skin! For those worried about scent control, this kind is supposedly odorless once it dries. My nose is of course nowhere near as good as a whitetail’s, but I don’t smell it at all once it’s dry and would prefer to be tick free over scent free anyways, so to me it’s worth it. It also doesn’t hurt to spray it on some of your trail cameras to avoid ant infestations, which are very common in the summer months.
By Andrea Haas
Andrea Haas is a Pro-Staffer from Missouri who enjoys hunting deer, turkeys, and upland birds. She is also the founder of the Huntress View, an organization formed to help strengthen the ever growing community of women hunters
Easy Wild Turkey Tacos Recipe
May 7th, 2017 by BTC Editor
Of all the game meats, wild turkey is by far my favorite. I love making wild turkey nuggets—small chunks rolled in egg and covered in Italian breadcrumbs, then fried. Yum! But lately, I’ve been looking for new, healthier ways to cook my turkey harvest. I decided to try making crockpot turkey tacos. Good decision, because they were delicious…and super easy!
What you need:
- 1-1/2 lbs. wild turkey breast meat
- 1 tbsp. chili powder
- 1/2 tsp. paprika
- 1-1/2 tsp. ground cumin
- 1/4 tsp. onion powder
- 1 tsp. minced garlic (can replace with 1/4 tsp. garlic powder)
- 16 oz. of your favorite salsa
- Optional: 1/2 tsp. hot pepper flakes*
- Optional: 1/2 cup water
*I like spicy food, so I use a mix of dried cayenne and habanero peppers. You can substitute with red pepper flakes, or eliminate for less spice.
Instructions:
- Place whole chunk of wild turkey breast in crockpot
- Mix all dry ingredients together in small bowl, then sprinkle onto turkey breast
- Pour salsa over turkey; if the salsa is extra chunky, add water
- Cook on low 5-6 hours (or high for 3-4 hours)
- Before serving, use two forks to shred the meat and stir all ingredients together
Serve immediately with desired taco toppings such as shredded cheese, sour cream, avocado or guacamole, lettuce, tomato, hot sauce, rice, corn, etc. There are so many options, and you can personalize it to whatever you prefer.

Ingredients can be adjusted to your personal tastes, or you can also use store-bought taco seasoning in place of the listed dry ingredients (I prefer to make my own to eliminate the salt and preservatives).
Sarah Honadel is an avid outdoors-woman from Kentucky who enjoys hunting turkey, deer and elk. She is a Team Member at Huntress View and Brand Champion for ReelCamo Girl, two organizations that work to support, encourage and empower women in the outdoors. Follow her on Instagram @waddysarah and @arrowridgecreations.
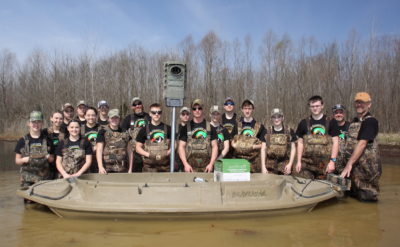
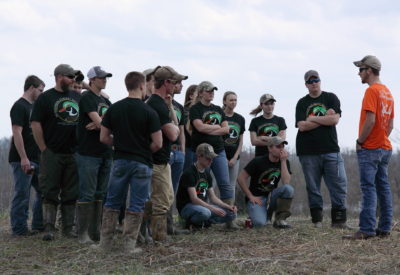
“Land and Wildlife Field Day”
April 23rd, 2017 by BTC Editor
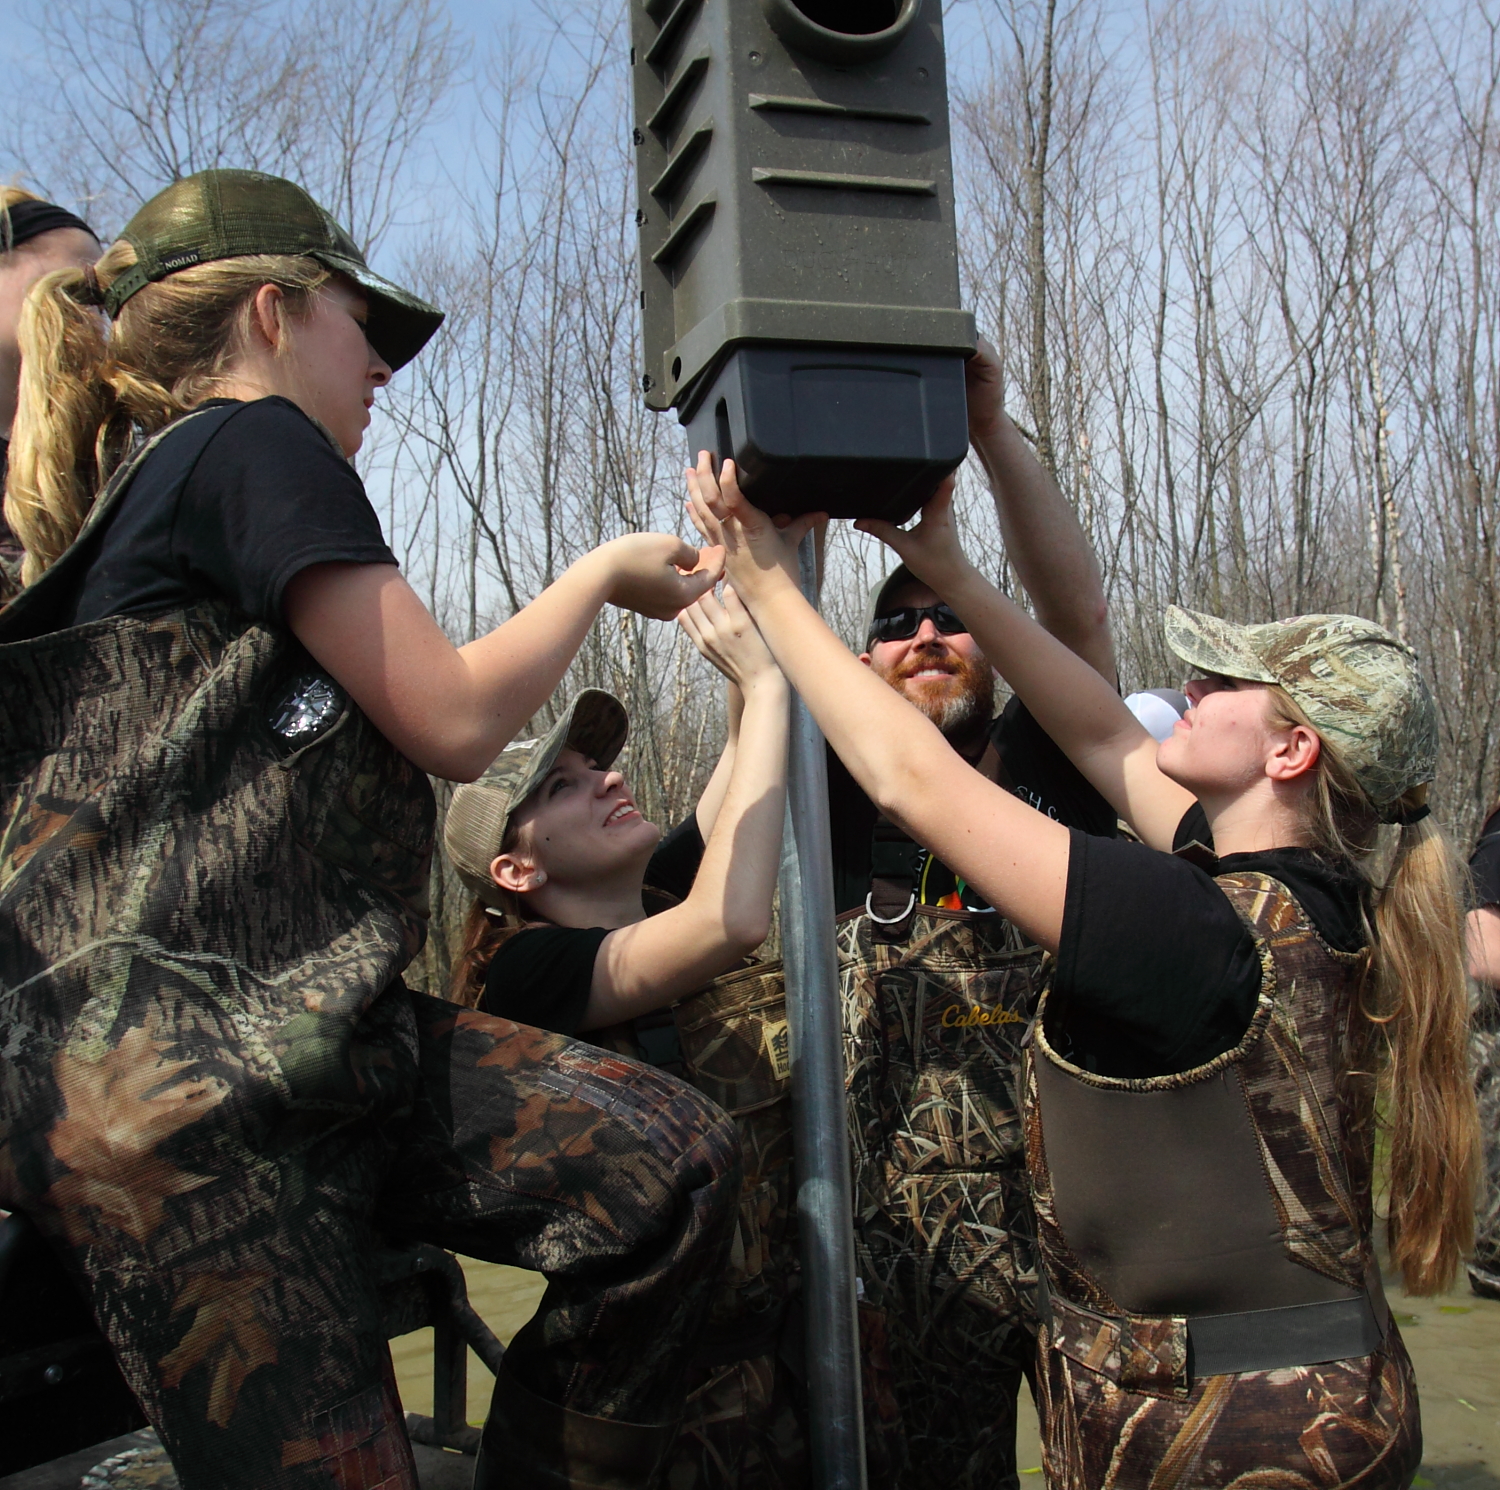
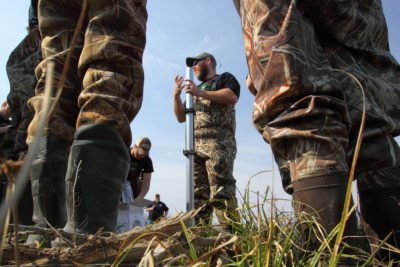
Making and setting up Wood Duck boxes is not only a great way to get the next generation involved in conservation and wildlife management, it’s an excellent way to gain insight into the nesting and reproduction habits of Wood Ducks, with an ultimate goal of increasing their population. Scott Cronin, a Pro-Staffer from Kentucky, holds an annual event with a local High School called the “Land & Wildlife Field Day”. Junior and Senior High School students in the Wildlife Forestry Programs participate in this field event in which Wood Duck boxes and trail cameras are installed and studied.
The goal of this project is to pinpoint which locations are best for the Wood Duck boxes, what box styles and designs are the most effective, and the rate of nesting in the boxes. Scott has found that using his Browning Trail Cameras to watch the boxes gives them actual data to use, rather than just going back in a few months to see if there’s any eggs. The project also allows them to spend time with the students, teaching them about using trail cameras as a game management tool to get data and to see how successful the projects are.
Scott has been using trail cameras on this conservation project for the past 15 years, but has been using Browning Trail Cameras exclusively for the past 4 years, for several reasons: the durability, versatility and the camera features. Naturally, the locations of the Wood Duck boxes and trail cameras are very wet (swamp areas, flood timber, etc.) but Scott shares that his Browning Trail Cameras have been very maintenance free and has had very little issues with fog and moisture, which is a common problem with any trail camera in these types of locations.
This year Scott started using the new Browning Strike Force HD Pro, which features an incredible .3 second trigger speed, a 1.5” color viewing screen and an adjustable mount, all of which have been a tremendous asset on this project. Scott shares: “I selected the Strike Force HD Pro based on the fact that we’ve had tremendous success over the past 4 years with the Browning Strike Force, and now that it has the viewfinder and the bracket it makes it so much easier to set up the cameras and pinpoint the exact area that you’re wanting to center your frame on from the start.”

Side view of the 2017 Strike Force HD Pro
Trail Cameras are our eyes in the woods, or in this case the wetlands, when we can’t physically be there. They have been especially helpful on this project since they often go a few months before going back to check on these locations. The “Land & Wildlife Field Day” project is an excellent way to teach the next generation about using trail cameras and Wood Duck boxes as tools to help grow the Wood Duck population. While trail cameras are used most often to aid in hunting, don’t overlook how valuable they can be in collecting data for conservation efforts as well.
Kentucky Afield Magazine was there to cover the event this year. Here are a few more photos from their field day!

By Andrea Haas
Andrea Haas is a Pro-Staffer from Missouri who enjoys hunting deer, turkeys, and upland birds. She is also the founder of the Huntress View, an organization formed to help strengthen the ever growing community of women hunters.
The First Hunt
April 9th, 2017 by BTC Editor
With having accumulated many special memories over the course of my 35 years of hunting, I can vividly remember so many details. Memories begin with my first successful whitetail deer hunt, my first turkey, and my first harvest with a bow. All of these events pale in comparison to being able to watch my eight-year-old son squeeze the trigger on his very first deer…a spike buck.
Like many fathers who love to hunt, my hopes had always been to raise my two children to share my passion for hunting and the beauty of the outdoors. I know many hunters; however, whose children had grown up with little or no interest in following in their father’s footsteps when it came to pursuing wild game. I often wondered what it is that separates those kids who develop the passion and those that do not. There is no sure way of getting or keeping our children involved in hunting, yet there are certain things that we can do to increase the odds of them developing that lifelong passion.
From my experience and from what I have learned from others, it is key to get them involved at an early age. Children generally do take an early interest in their parent’s passion for the outdoors. My children were always there when I would bring home a harvested animal. They would come rushing outside to take a look. Whether it was gutting a deer or processing one, I allowed them to be a part of it. I made sure to answer any of the questions that they may have had. I would always say to them, “One day you both will get to go hunting with dad.”
Once a child reaches the age where you feel it is the right time to take them hunting, you must make necessary changes to how you hunt. You are going to have to keep it somewhat “fun” in their eyes. It could be a tag-along trip where they sit with you or simply head out to do some scouting. Explain what you are doing and what you are looking for. Allow them to utilize some of the gear, such as binoculars or rangefinders. If you are like me, you may need to shorten the time frame of your hunt. For instance, you may be accustomed to a 4 or 5-hour sit, but now you may need to make it only a few hours to prevent the child from becoming bored. Once you detect boredom, either change things up a bit or head to the house.
You may ask yourself, “When is the right time to take your child hunting?” The answer depends on the individual child. I believe it is important to not push them to go until they have shown the desire. We, as hunters, all want our children to share our love for hunting and the outdoors; however, if you force it on them, you risk driving them farther away. If they do not show as much interest as you would like, then simply give them their space. Always keep the invitation open and never force them to be an unwilling participant.
Make sure the child, when the day comes that they are ready, has the correct equipment. Make sure they are comfortable with the proper clothing. Even for seasoned hunters, we know the misery of freezing our butts off while trying to stay out for as long as possible. If it is miserable for us, imagine how much more it will be for the child who is not accustomed to cold temperatures for extended periods of time. You do not want to over-clothe them either. They need to be comfortable with proper fitting clothing. Remember, they so want to be like dad. Make their attire fit the part of a hunter.
And just as important as the clothes they wear, is the weapon that they carry or utilize. Proper fit, whether a bow or a gun, is crucial. For a rifle, that means making sure your child can properly shoulder and aim the firearm and that the recoil is not more than they can handle. Assure they are comfortable with it, via practice, and preach the importance of firearms safety. I made sure to allow my son to carry his unloaded weapon to the stand. He held that rifle so tight and walked with so much pride. If your child is using a bow, it is important to assure proper fit with correct draw length and draw weight. If your child is not comfortable with the weapon they are utilizing, they probably will not be able to shoot it accurately or consistently. This can quickly lead to disappointment and frustration with hunting. If you are truly serious about getting your child involved, it is your duty to equip them properly. Just as you would do for yourself.
Finally, to keep them interested in hunting, sooner or later, they are going to have to experience the taste of success. While you and I may be able to sit in a tree stand or blind for hours on end, day after day and never draw back an arrow or push that safety forward, a young child is going to likely deem this boring and lose interest. This may mean that you need to start them out on smaller game or, in my case, place them in a situation where you know they will have a high chance at success in harvesting their first game. Sure, I dreamed of my son taking a nice big buck on his first hunt, but I was just as thrilled when a couple of spikes came in and presented him a shot. After my son dropped the deer in his tracks, I think it is safe to say, he was hooked. He experienced the “rush” that all of us, as hunters, have felt. Now, he does not mind spending a little more time waiting for the next opportunity.
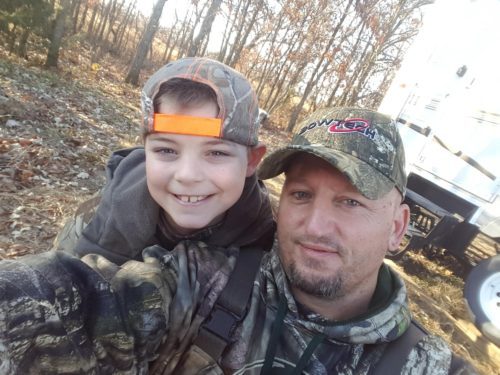
When that special day came for just the two of us to make that trip to the field, I felt confident that we had put in the time preparing for a successful hunt. I am testifying that there is nothing more rewarding than watching your child harvest his or her first game animal. The excitement in their eyes, and to feel the pride of knowing that you played a major part in their success, is a feeling like no other. Most importantly, there is a bond that develops between you and your child that makes it that much more special. A special closeness that could only come from time shared afield. A bond that, if properly nurtured, will last a lifetime.
Blog post originally shared on “The Break TV”.
By Bobby Raybourn
Bobby is a team hunter on “The Break TV” on the Pursuit Channel. He grew up near Odessa, MO and began hunting at a very young age alongside of his father and older brother. Bobby has also taken up Taxidermy in his spare time and his business is thriving.
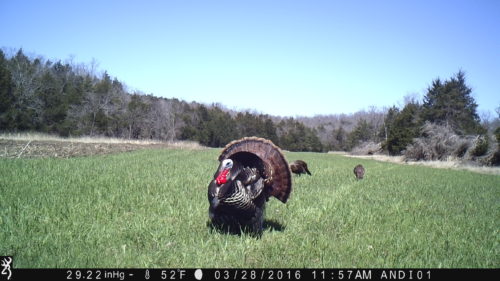
Using Trail Cameras to Scout for Turkeys
March 26th, 2017 by BTC Editor
Knowing where to hang your trail cameras and what kind of settings to use when scouting for turkeys is important, as it can vary a little from using cameras for deer hunting. When hanging my trail cameras, whether I’m using them for deer or turkey hunting, I pretty much keep 3 things in mind when determining where to put them: bedding, food and travel routes. So, for deer I often like to hang my cameras where I know they will be coming from their bedding area to their feeding area, and vice versa. For turkeys, I like to do essentially the same thing: find where they are roosting and figure out where they are going when coming off the roost. These locations for deer are often different than they are for turkeys, so scouting is a must.
A few things to look for when you are scouting for good turkey trail camera locations are roosting sites, travel routes, strut zones, and feeding areas.
Roosting Sites
You will know a roosting site when you see one. I have found several on our property, and they have always been in tall, dead trees and have lots of turkey droppings underneath them. You may find some primary wing feathers as well. When hunting last year, I actually spotted a couple of toms still up on the roost, which further confirmed their roost site. I found another spot this spring while shed hunting – it was a dead tree in on the edge of our food plot – and found quite a bit of droppings and a wing feather underneath it.
Camera Setup:
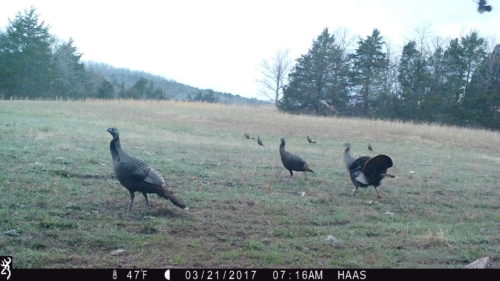
If I know where a roosting site is, I personally like to set my trail camera where I expect they will be landing when they fly down from the roost. From observing turkeys while out hunting I have a good idea of where they usually land when they fly down. On my property, this is usually in one of our fields planted in wheat and clover.
Time-Lapse mode is a great option for fields this size so you don’t miss anything further out where turkeys may not trigger the camera. I have this Browning Strike Force trail camera set up quite a bit higher to have a better view of the field. As you can see in this photo, the turkeys are flying in off the roost.
Travel Routes
I’ve noticed a couple of similarities in how both deer and turkey travel from my experiences hunting, and it seems they often prefer to take the easiest route possible. Some examples of routes I have seen both deer and turkeys using often is logging roads in the woods, creek crossings, openings in the timber, and holes in fences.
Camera Setup:
These are usually in small, tight spots so I prefer to hang my camera pretty low here and will often put my camera on burst mode so I don’t miss any action. I have this Browning Strike Force set to take 4 multi-shot images every 5 seconds.
Strut Zones
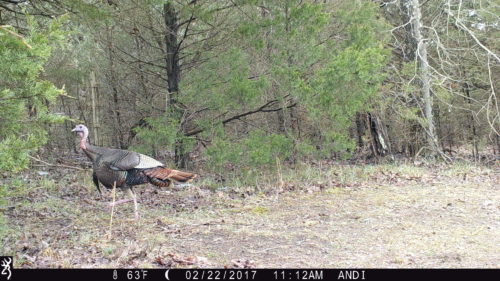
The best way to find these is to actually see a turkey using it in person. I know where a couple are on our property from observing the turkeys while out hunting. If you haven’t seen your turkeys using one, try looking for wing drag marks in the dirt while you’re scouting. On my property, our turkeys love to strut on the edge of one of our food plots where the sun hits them, so keep that in mind when looking for strut zone locations.
Camera Setup:
If you are looking to get some neat footage from your trail cameras, a Strut Zone is the perfect opportunity to switch your trail camera to Video Mode! Make sure you have a larger SD card in this instance as they can fill up pretty quickly on video mode.
This Browning Strike Force camera is actually in the same location as the “Roosting Site” listed above and Time-Lapse mode is what I prefer in this location due to the field size.

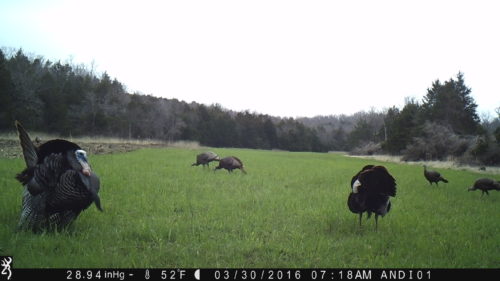
Feeding Areas
Food plots planted in chicory, wheat and/or clover are excellent options for hanging your trail cameras to scout for turkeys. We have one field planted in clover and chicory, and another planted in wheat and clover, both of which really seem to hold the turkeys on our property.
We also experimented one year by plowing up some of the ground on the edge of one of our food plots and the turkeys loved the easy access to insects there! You can see the plowed part in the photo below from the Browning Spec Ops:
Camera Setup:
Once again, a good option in a field this size is Time Lapse mode so you can still catch turkey movement outside of the camera’s detection zone, and setting the camera a little higher up.
If you already have a pretty good idea of where the turkeys are feeding at, regular Trail Camera mode works just fine here as well, and I would probably up the picture delay to 20 or 30 seconds here so you aren’t filling up the SD card as quickly with tons of feeding pictures.
When making your game plan for opening day of Spring Turkey Season, keep in mind what you have learned from studying your trail camera pictures prior to season opener. Using trail cameras to scout for turkeys will give you a good idea on your flock size, how many different groups of turkeys you may have, and where you need to be setting up on opening day. You will be one step ahead of the turkeys and by using the right settings, will likely get some amazing trail camera pictures and/or videos along the way!
By Andrea Haas
Andrea Haas is a Pro-Staffer from Missouri who enjoys hunting deer, turkeys, and upland birds. She is also the founder of the Huntress View, an organization formed to help strengthen the ever growing community of women hunters.
5 Tips For Bowhunting Turkeys
March 12th, 2017 by BTC Editor
Planning on using your bow to harvest a turkey this spring? If you’ve ever hunted turkeys before then you know it will be no easy task. Hunting turkeys with a shotgun is often enough to drive a hunter crazy, let alone adding the challenge of a stick and string. Successfully harvesting a turkey with your bow is perhaps one of the hardest, yet most rewarding hunts you will ever be a part of.
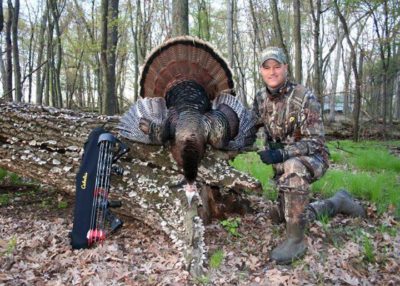
Browning Trail Cameras Pro Staff members Don and Dan Pickell have been bowhunting for years and make bagging a gobbler with a bow look like a piece of cake.
Here are a few of their tips for bowhunting turkeys this spring:
1) Scouting
Spend some time in the woods before season starts so you can be as prepared as possible before opening day. Look for roosting sites, turkey feathers & droppings, feeding areas and travel routes. Once you’ve found some turkey sign or what looks like some good locations, it’s time to hang your trail cameras.
2) Trail Cameras
Get your Browning Trail Cameras out now and keep them out throughout turkey season. Trail cameras will help pinpoint the time of day the turkeys are in certain locations so you know when you should target these specific areas while hunting.
When setting up your cameras, keep the location in mind and set them accordingly. For example, you may want to set your camera on Time Lapse mode while watching large fields or new locations where you aren’t sure where the turkeys are entering or leaving. The camera will take images of the entire field, so you will end up capturing game at 200 + yards away, where a conventional game camera would not normally trigger a picture.
3) Setup
Pattern the birds with your trail cameras and set up your ground blinds accordingly. If they aren’t coming into your call it’s usually best to just sit and wait them out; Remember, you’re hunting with a bow, not a shotgun, so run and gun is a lot more difficult. More often than not, your trail cameras will tell you where you need to be. Remember what you learned about their behavior while studying your trail camera photos and stick with that.
4) Decoys
A decoy will often help bring the birds within bow range while keeping their eyes off of you, but we have also had toms skirt our decoys at times. When this happens we usually pull the decoys and set up in a proven spot where we have them patterned with our Browning Trail Cameras and ambush them. It just depends on the bird’s moods.
5) Shot Placement & Recovery
With a shotgun we aim at the bottom of the neck to allow for the pattern to cover both his head and neck. With a bow, we prefer a broadside shot through the wings if possible so an injured bird can’t fly off, making it harder to recover. Whether we use a bow or a shotgun, as soon as a shot is made we go after the bird and get a foot on its head, just in case.
Going into turkey season, it’s best to have a positive outlook and lots of patience! Turkeys are fickle creatures and even having the “perfect setup” is often not enough to harvest a tom. Make sure you’re as prepared as possible ahead of time by scouting with your trail cameras and keeping the above tips in mind. Harvesting a big longbeard with your bow is worth all of the hassle. Stay safe and have fun this turkey season!
By Andrea Haas
Andrea Haas is a Pro-Staffer from Missouri who enjoys hunting deer, turkeys, and upland birds. She is also the founder of the Huntress View, an organization formed to help strengthen the ever growing community of women hunters.
Venison Meatball Recipe
February 26th, 2017 by BTC Editor
INGREDIENTS:
1 lb ground venison
¼ cup half and half
Extra Virgin Olive Oil
1 medium white onion – finely chopped
3 tablespoons chopped garlic
2 large eggs
1/4 cup dried parsley flakes
1 tsp dried oregano
1/4 cup freshly grated Parmesan cheese
salt and pepper to taste
DIRECTIONS
This recipe is by far the best wild game recipe I’ve ever tasted! I must preface this by saying that up until a few of years ago, I was actually a vegetarian. Not because I was trying to save the animals. I did it because I just didn’t care for meat. However, what I realized when I met my husband, who is a hunter and ultimately the one whom got me into hunting as well, is that what actually bothered me about meat is that I didn’t always know where the meat from the grocery store had come from. I was growing a few veggies in my backyard, and purchasing the rest through a farmers market or local CSA. So I have always been aware of where my food came from; but the meat remained a mystery. Then along comes hunting. The first time my husband brought a whitetail deer home for us to process I started asking questions. I began cooking it for my family and realized my kids could never tell the difference between ground venison and ground beef. Thus began my journey in creating wild game friendly recipes.
Now I am extremely picky with how my food tastes. I do not like having a gamey taste to it at all. This meatball recipe is so perfect. Every time I make it, it gets better and better as I modify ingredients.
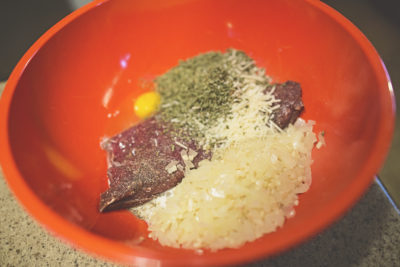
Begin by preheating your oven to 425 degrees and coating the bottom of your 9×12 baking dish with olive oil. Next, place 1 pound of ground venison in a large mixing bowl. Add ¼ cup half and half (regular milk works as well, however I have not tried this recipe with dairy substitutes) and then set this bowl aside.
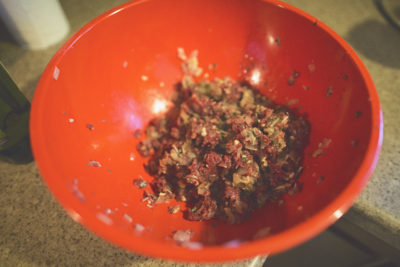
In a medium skillet, heat 2 tablespoons of olive oil over medium heat. Add 1 diced onion and 3 tablespoons of chopped garlic to the skillet. Be sure to dice your onion into very small pieces. Saute until the onion is clear. I tend to like a lot of onion, so this may look like more than 1 medium onion. Never enough onion or garlic in my house!
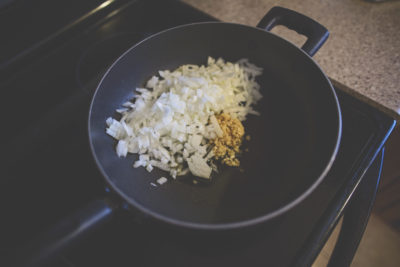

Then, add the onion mixture to the ground venison bowl. Add 2 eggs, ¼ cup dried parsley flakes, ¼ cup freshly grated Parmesan cheese, and 1 teaspoon oregano to this same mixture. Salt and pepper to taste. You are now ready to mix with a wood spoon or your hands. I typically use my hands, but am careful for the hot onion/garlic mixture. Don’t burn your fingers!
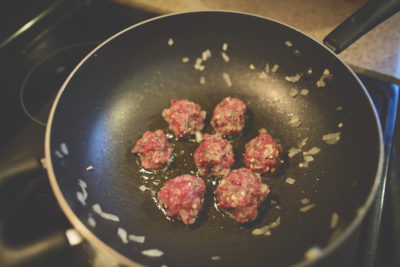
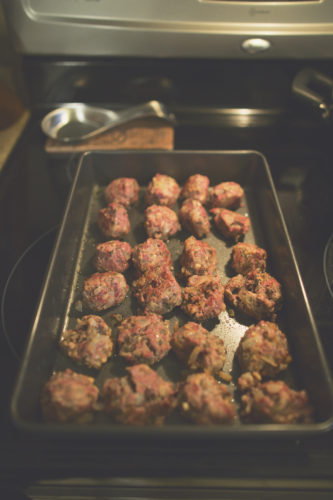
Using the same medium skillet as you cooked the onions (as you can see in the photo I do not clean out the skillet), add 2 tablespoons olive oil and turn on heat to medium. Roll meat mixture into 1” diameter meatballs. Don’t look to close at mine. They are never perfectly round because my kids are always starving. Place meatballs into heated skillet; browning on at least 2 sides. You are not cooking them all the way through, just browning the edges. This makes the outside of the meatballs yummy and slightly crispy. Once you have browned the meatballs on 2 sides, place meatballs into your greased baking dish. Bake 20 minutes, turning once after 10 minutes.
My husband and I tend to eat them plain (that’s how good they are) or dipped in barbecue sauce. My kids like to put them on Hawaiian rolls with cheese and barbecue sauce. Either way, I think you will love them! Enjoy!
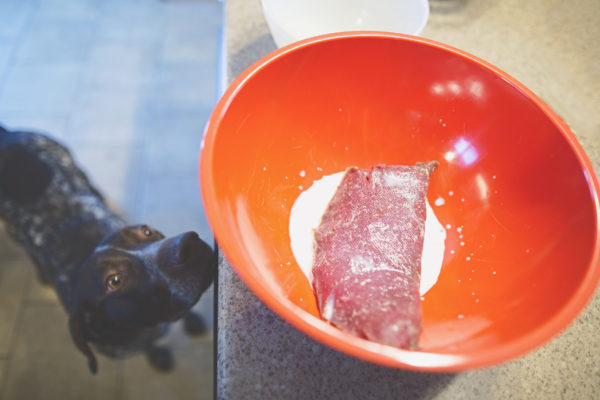
By Tammy Bashore

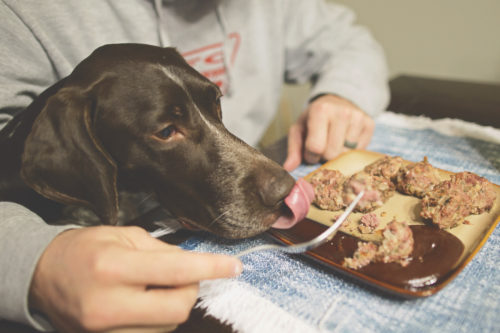
Tammy Bashore is an outdoor enthusiast from South Dakota. She is a professional photographer, the wife of a professional walleye angler and the mother of 2 kids, plus one fur baby, a GSP named Bentley (pictured above). Tammy is also a member of the Huntress View team, an organization formed to help strengthen the ever growing community of women hunters.
