The “30/30” Trail Camera Setting
October 22nd, 2017 by BTC Editor
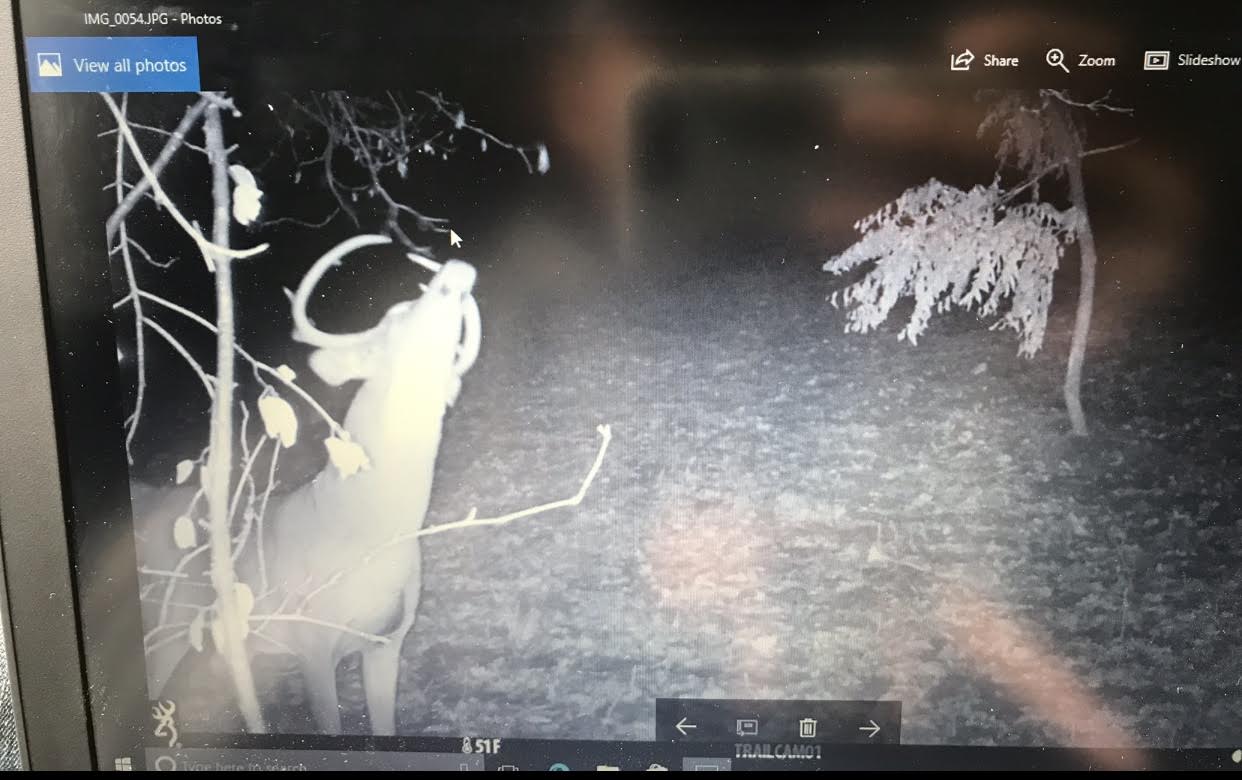
Just a couple weeks ago I made my first series of mock scrapes for the year and placed my Browning Trail Cameras on all of them using what I call the “30/30 setting”: Video mode set on 30 second clips with 30 sec delay. It didn’t take long before the first mature buck found one in less than 24 hours of being made, and within a couple days they all started to heat up. I noticed one series of the three was showing more activity from a specific deer than the others. I knew right away this was a deer I wanted to target, but how was I going to be able to do so? The October lull was here and everything was happening at night. I knew if I wanted to harvest this deer I would have to do so fast, before love pulled him away.
I chose to focus on checking that series of three cameras the most frequently, using wind and time of day to my advantage. By having them on the “30/30 setting”, I was able to see direction of travel and study the specific behavior of the deer I was targeting. Once I was able to get a general direction of travel, I used what I refer to as the “leapfrog method”: moving 2-3 cameras in the direction of travel, leapfrogging them as I checked them. This helps me stay on where I had him last while exploring my thoughts with the newly moved camera. I gained a very solid direction of what I thought was his daily routine – deer of a mature age class are very much creatures of habit – but even having a solid route of travel, I feared I was getting too close to his bedroom. I elected to not move in any further and let my Browning cameras continue to do my homework for me.
Over the course of a couple weeks I checked the cameras in a three-day rotation, as long as the wind stayed true to checking them. The pattern was there but since he was still moving after dark I was going to have to get aggressive, yet smart, if I was to win this chess match. I checked the weather on a site I live by called Weather Underground. This site lays it all out in a graph for me. I noticed an upcoming front with precipitation was a few days out. It was calling for rain for almost an entire day, ending the next day mid-morning with a temperature drop, wind drop, and rising barometric pressure. I knew this had to be the time to make my move!
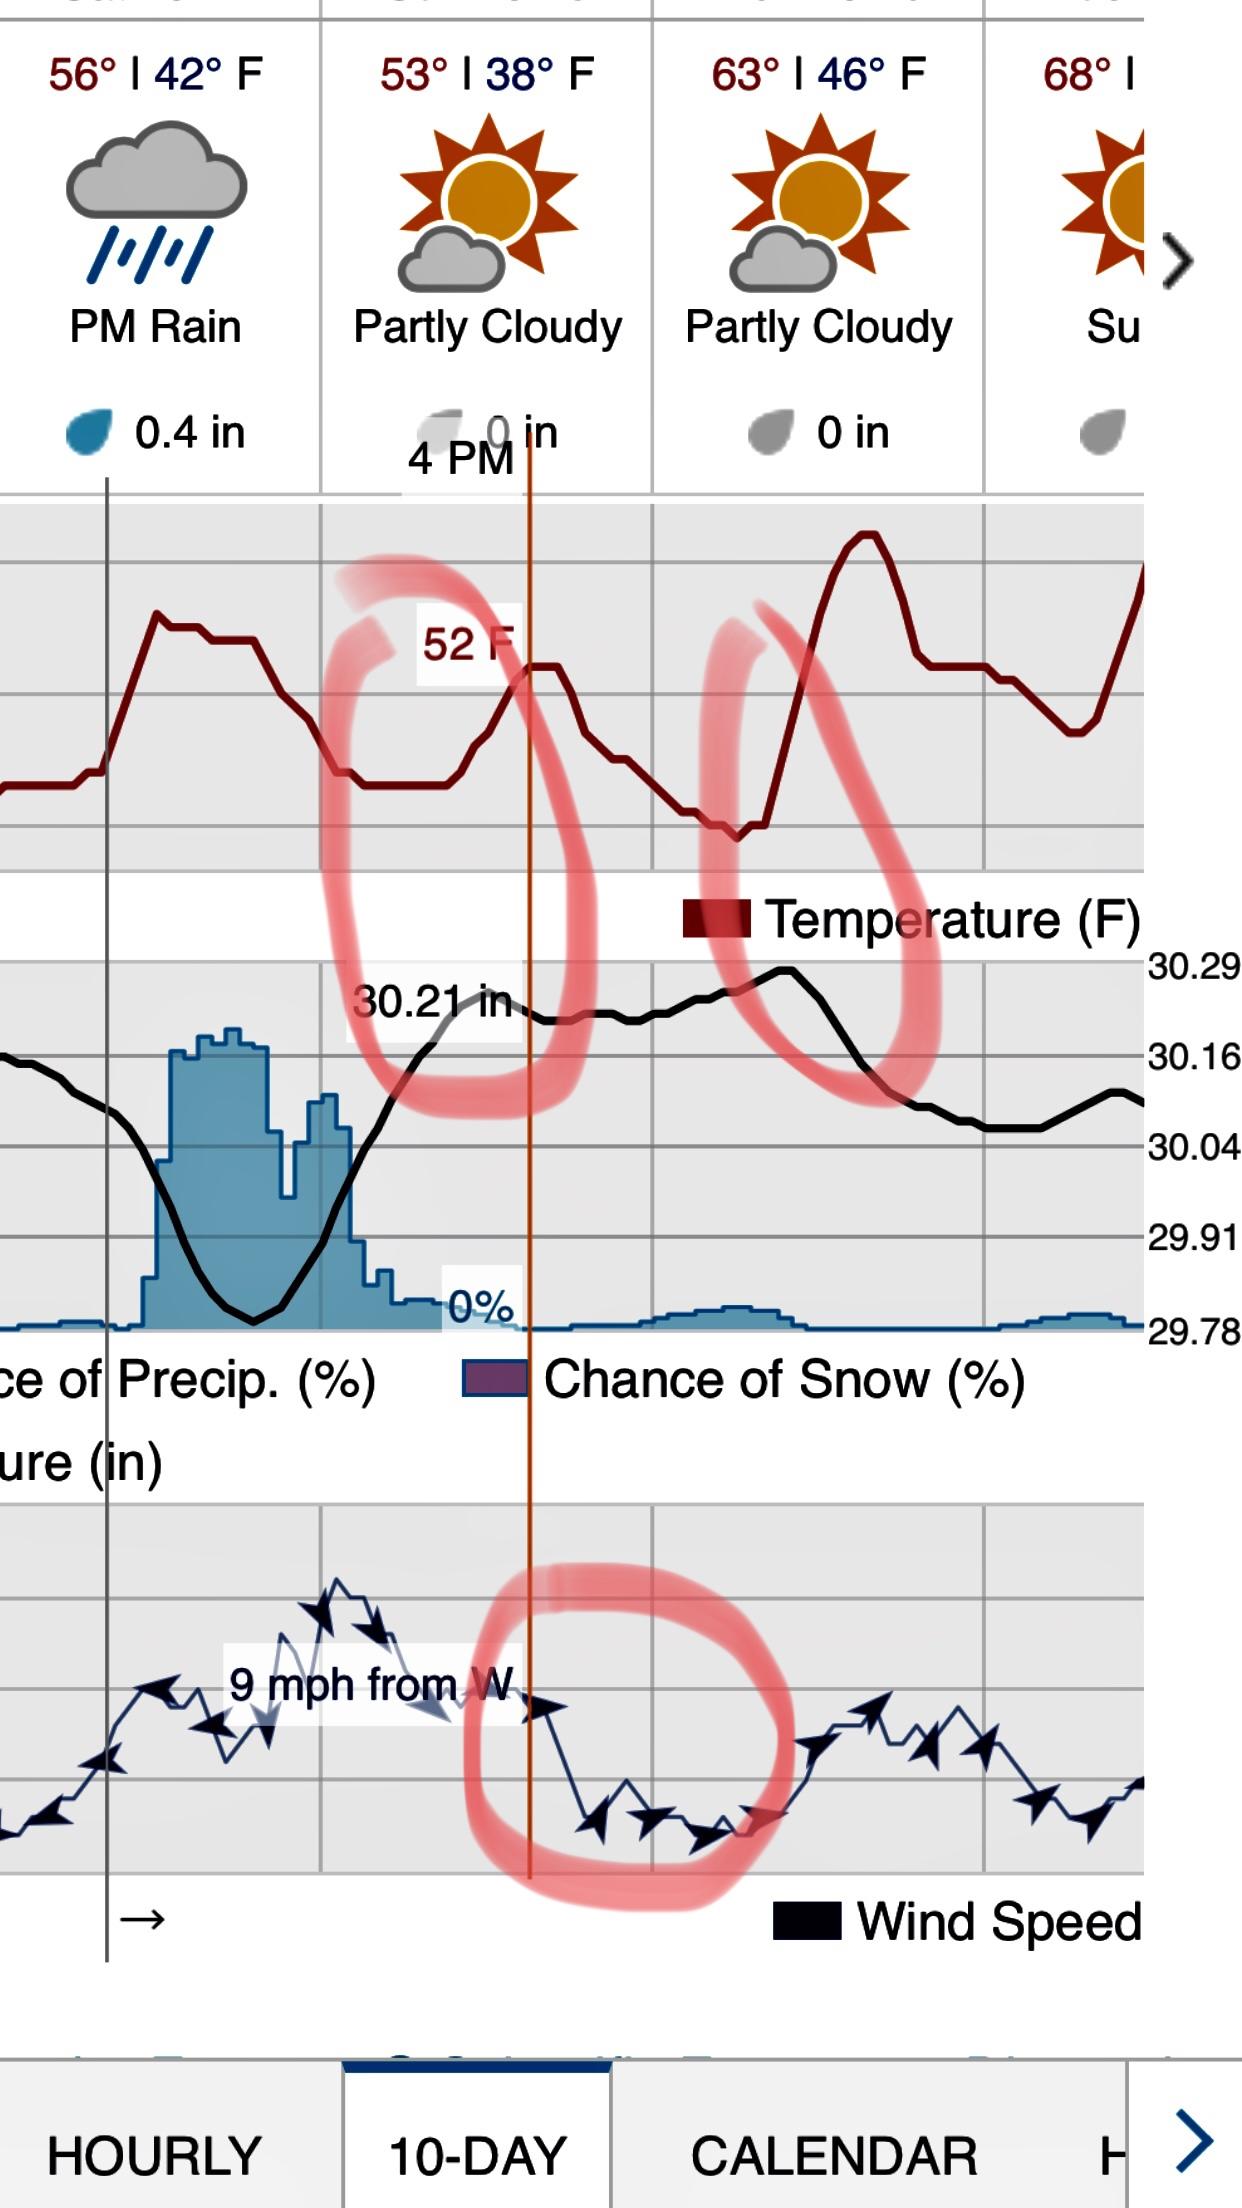
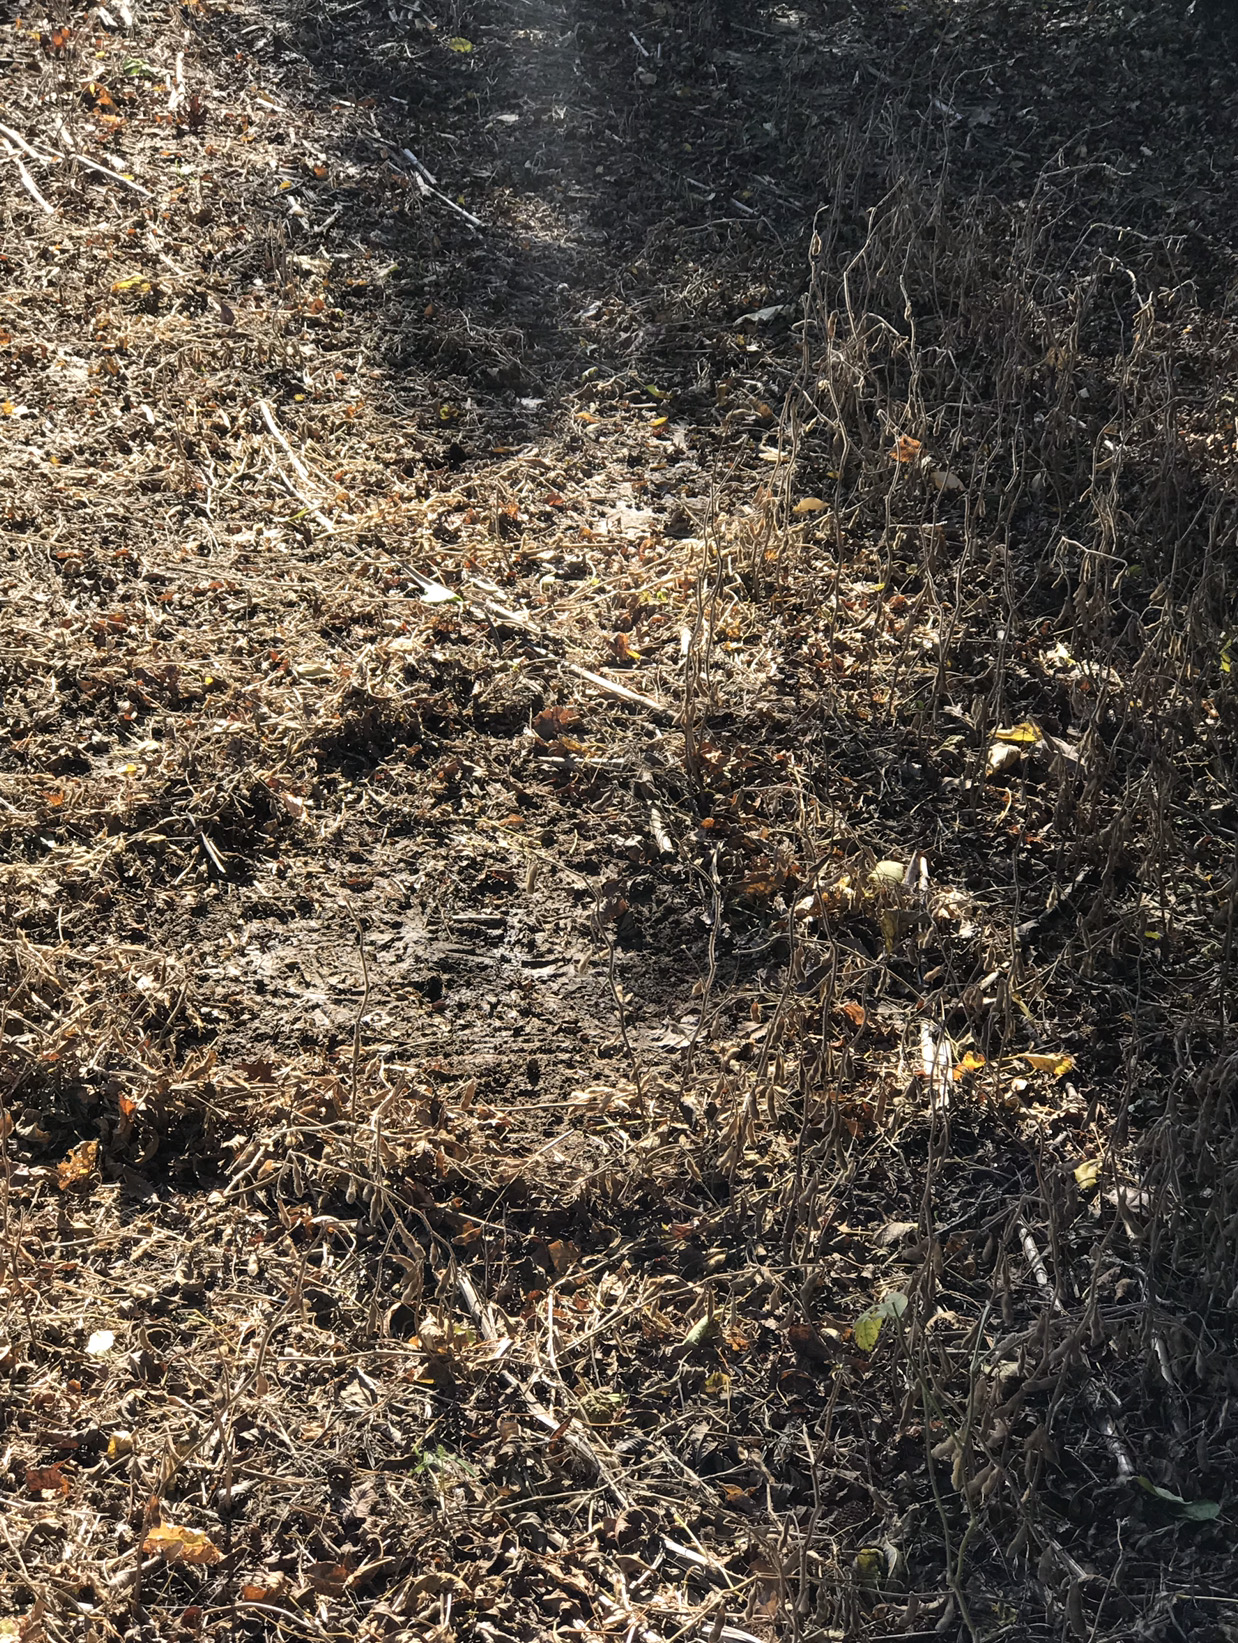
A couple of days went by and the rain set in. I was going to move in and hang a stand under the cover of good wind. The noise from the rain would cover me, and the wet forest floor would make for sneaking in an easy task. I was able to get my stand hung while staying undetected and pulled all the SD cards on my way out. My thoughts were staying true. My trail cameras showed he moved daily until the front hit and didn’t move that night or morning at all. I knew that after the rain he would likely move, as barometric pressure would be rising with a sudden drop in wind. I was going to hunt the following afternoon.
The following day rolled around and the weather stayed true, my information from my cameras were spot on, and I was able to harvest a beautiful mature 8 point.
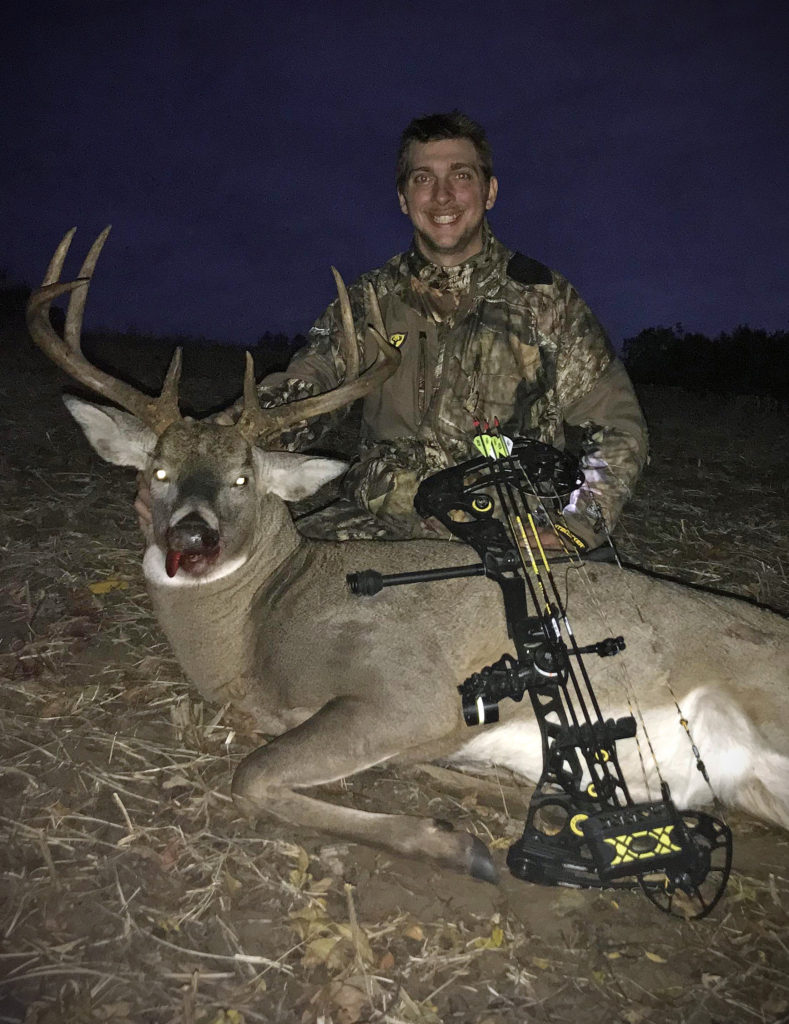
When targeting scrapes, deer will likely want to freshen them up after precipitation. If you accompany that with a drop in temperature, high barometric pressure and a wind drop, it can often be the ticket to bucks getting on their feet a little sooner. I relied heavily on my Browning Trail Cameras to help me pattern this particular buck. Without being able to further pin down direction of travel I don’t think I would have been able to catch him during legal shooting hours, let alone a full hour before dark.
By John Steinhauer
Defender 850: Changing How You Hunt
October 8th, 2017 by BTC Editor
For 2017, Browning Trail Cameras came up with a new concept in trail cameras: the Defender 850. When they first unveiled this camera at ATA, I knew it was going to be a game changer. The Defender has some unique features and technology that set it apart from the rest and that can take your deer hunting to the next level. Here are 3 features on the Defender 850 trail camera that will allow you to change the way you hunt this season.
1 – Bluetooth and WiFi Connectivity Via the Browning Trail Cameras Mobile App
You can connect to the Defender on your mobile device from about 60 yards away via the new Browning Trail Cameras app. Through the app you can control the camera settings and download images and video straight to your phone or tablet, allowing you to keep your favorite hunting areas undisturbed and free of scent.
I have my Defender’s set up close to a few of my favorite tree stands so I can check the camera while I’m in my stand without actually having to touch the camera and leave my scent in the area where I am expecting the deer to walk out.

2 – Adjustable IR Flash
This feature is also new for 2017 and allows you to control the range of your LED’s on your nighttime images. There are 3 different flash settings – Power Save, Long Range, and Fast Motion – that allow you to maximize the performance of your Browning Trail Cameras, no matter where they are set up.
–Power Save: This is the most economical of the 3 flash modes. The flash goes out to about 70 feet, which is perfect for wooded areas.
–Long Range: The flash goes out to about 120 feet. This is perfect for open areas, such as larger fields or food plots where the game may be a good distance away from the camera.
–Fast Motion: The exposure time is much faster in this mode, allowing you to capture game that are moving faster, while eliminating motion blur. Think fence crossings, trails, pinch-points and travel corridors, etc. This mode will really come in handy when new bucks start showing up on your hunting property during the whitetail rut!
Here’s a link for a YouTube video for more info on this setting: https://www.youtube.com/watch?v=eWva5ReMbKo

3 – Capable of Holding Up To 128 GB Micro SD Card
I wanted to point out this feature for 2 reasons:
1) The camera also features 1080P HD video technology, so having the ability to use an SD card with larger storage capacity means that you can leave the camera out in the field on video mode without having to worry about the memory card filling up in between camera checks.
2) If you wanted to set up your Defender 850 in a location that you may not hunt or visit often, once again you can rest assured that most likely your memory card will not be full by the time you make it there to hunt or check the camera. This is perfect for those whose hunting property is a long distance away, or if your favorite hunting location isn’t easily accessible.
Whether I end up getting a deer this season or not, I already feel like I am one step further with my hunting game plan than I was this time last year, and that is due to the unique features on the Browning Defender 850 that allow me to hunt smarter, not harder.
By Andrea Haas
Andrea Haas is a Pro-Staffer from Missouri who enjoys hunting deer, turkeys, and upland birds. She is also the founder of the Huntress View, an organization formed to help strengthen the ever growing community of women hunters
5 Summertime Trail Camera Tips
May 21st, 2017 by BTC Editor
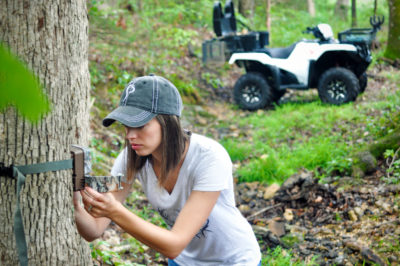
1- Summertime is when most hunters get their trail cameras out of storage and hang them to start taking inventory of their whitetail herd. It’s also a great time to take inventory of your trail cameras. Make note of how many you have, how many more you may need for the upcoming season, and also keep a list of each camera model and serial number in the rare case of theft. It can, and does, happen so keeping a record of this could help get your cameras back eventually if they do get stolen. Browning Trail Cameras also has a Security Box that makes it more difficult for thieves to take your cameras, if even at all.
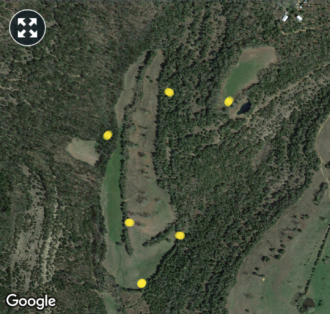
2- Look at an aerial map of your hunting property beforehand so you have a good idea of where you’d like to hang your cameras. This way, you’re not driving or walking all over your property, disturbing the game and working up a sweat. If you have a weather app on your phone you can easily locate your property via the radar portion of the app. If you don’t have that, Google Earth is what I recommend. It’s probably a good idea to take a screenshot of your property and from there mark where you are placing cameras using the paint/draw tool on your phone in case you forget where you hung the cameras later on.
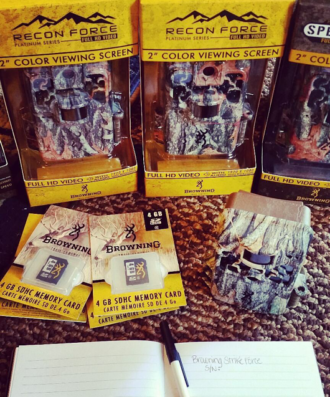
3- Summertime is obviously hot, even first thing in the morning, so in order to be out in the heat as little as possible it’s best to have everything ready to go before you head out. Have your trail cameras already set up with the correct date/time/camera settings, full with batteries and the SD card in so all you have to do is hang them, turn them on, and go!
A Browning Trail Camera feature that really helps get your camera positioned quicker is the viewing screen on some of the camera models. (See photo below.)

4- Everyone has their own system for transferring and storing trail camera pictures to their computer. I like to stay organized from the start by putting my SD cards in 2 separate cases – one for blank SD cards, and one for full SD cards – and then loading the pictures to my computer once I’m home. A baggie works just as good, just make sure you label each one to avoid confusion. Some prefer to bring a laptop and transfer the pictures there in the field, but I like to get in and out as quickly as possible and this works best for me.

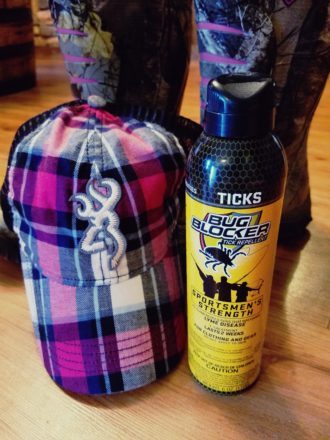
5- Last but not least, don’t forget the tick spray! So far this year has been one of the worst I’ve seen for ticks. Using a tick spray with Permethrin has worked well for me. Spray down your clothes and boots and make sure they’re dry before putting them on. You do not want this on your skin! For those worried about scent control, this kind is supposedly odorless once it dries. My nose is of course nowhere near as good as a whitetail’s, but I don’t smell it at all once it’s dry and would prefer to be tick free over scent free anyways, so to me it’s worth it. It also doesn’t hurt to spray it on some of your trail cameras to avoid ant infestations, which are very common in the summer months.
By Andrea Haas
Andrea Haas is a Pro-Staffer from Missouri who enjoys hunting deer, turkeys, and upland birds. She is also the founder of the Huntress View, an organization formed to help strengthen the ever growing community of women hunters
Using Trail Cameras to Scout for Turkeys
March 26th, 2017 by BTC Editor
Knowing where to hang your trail cameras and what kind of settings to use when scouting for turkeys is important, as it can vary a little from using cameras for deer hunting. When hanging my trail cameras, whether I’m using them for deer or turkey hunting, I pretty much keep 3 things in mind when determining where to put them: bedding, food and travel routes. So, for deer I often like to hang my cameras where I know they will be coming from their bedding area to their feeding area, and vice versa. For turkeys, I like to do essentially the same thing: find where they are roosting and figure out where they are going when coming off the roost. These locations for deer are often different than they are for turkeys, so scouting is a must.
A few things to look for when you are scouting for good turkey trail camera locations are roosting sites, travel routes, strut zones, and feeding areas.
Roosting Sites
You will know a roosting site when you see one. I have found several on our property, and they have always been in tall, dead trees and have lots of turkey droppings underneath them. You may find some primary wing feathers as well. When hunting last year, I actually spotted a couple of toms still up on the roost, which further confirmed their roost site. I found another spot this spring while shed hunting – it was a dead tree in on the edge of our food plot – and found quite a bit of droppings and a wing feather underneath it.
Camera Setup:
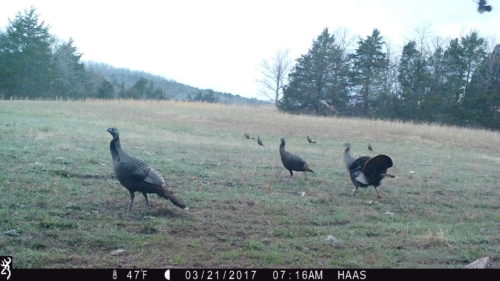
If I know where a roosting site is, I personally like to set my trail camera where I expect they will be landing when they fly down from the roost. From observing turkeys while out hunting I have a good idea of where they usually land when they fly down. On my property, this is usually in one of our fields planted in wheat and clover.
Time-Lapse mode is a great option for fields this size so you don’t miss anything further out where turkeys may not trigger the camera. I have this Browning Strike Force trail camera set up quite a bit higher to have a better view of the field. As you can see in this photo, the turkeys are flying in off the roost.
Travel Routes
I’ve noticed a couple of similarities in how both deer and turkey travel from my experiences hunting, and it seems they often prefer to take the easiest route possible. Some examples of routes I have seen both deer and turkeys using often is logging roads in the woods, creek crossings, openings in the timber, and holes in fences.
Camera Setup:
These are usually in small, tight spots so I prefer to hang my camera pretty low here and will often put my camera on burst mode so I don’t miss any action. I have this Browning Strike Force set to take 4 multi-shot images every 5 seconds.
Strut Zones
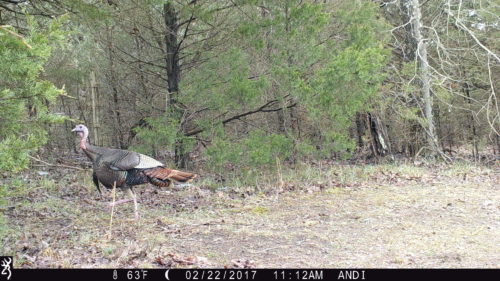
The best way to find these is to actually see a turkey using it in person. I know where a couple are on our property from observing the turkeys while out hunting. If you haven’t seen your turkeys using one, try looking for wing drag marks in the dirt while you’re scouting. On my property, our turkeys love to strut on the edge of one of our food plots where the sun hits them, so keep that in mind when looking for strut zone locations.
Camera Setup:
If you are looking to get some neat footage from your trail cameras, a Strut Zone is the perfect opportunity to switch your trail camera to Video Mode! Make sure you have a larger SD card in this instance as they can fill up pretty quickly on video mode.
This Browning Strike Force camera is actually in the same location as the “Roosting Site” listed above and Time-Lapse mode is what I prefer in this location due to the field size.

Feeding Areas
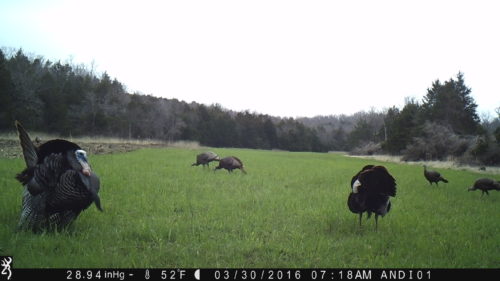
Food plots planted in chicory, wheat and/or clover are excellent options for hanging your trail cameras to scout for turkeys. We have one field planted in clover and chicory, and another planted in wheat and clover, both of which really seem to hold the turkeys on our property.
We also experimented one year by plowing up some of the ground on the edge of one of our food plots and the turkeys loved the easy access to insects there! You can see the plowed part in the photo below from the Browning Spec Ops:
Camera Setup:
Once again, a good option in a field this size is Time Lapse mode so you can still catch turkey movement outside of the camera’s detection zone, and setting the camera a little higher up.
If you already have a pretty good idea of where the turkeys are feeding at, regular Trail Camera mode works just fine here as well, and I would probably up the picture delay to 20 or 30 seconds here so you aren’t filling up the SD card as quickly with tons of feeding pictures.
When making your game plan for opening day of Spring Turkey Season, keep in mind what you have learned from studying your trail camera pictures prior to season opener. Using trail cameras to scout for turkeys will give you a good idea on your flock size, how many different groups of turkeys you may have, and where you need to be setting up on opening day. You will be one step ahead of the turkeys and by using the right settings, will likely get some amazing trail camera pictures and/or videos along the way!
By Andrea Haas
Andrea Haas is a Pro-Staffer from Missouri who enjoys hunting deer, turkeys, and upland birds. She is also the founder of the Huntress View, an organization formed to help strengthen the ever growing community of women hunters.
Mountain Lions in Missouri
February 7th, 2017 by BTC Editor
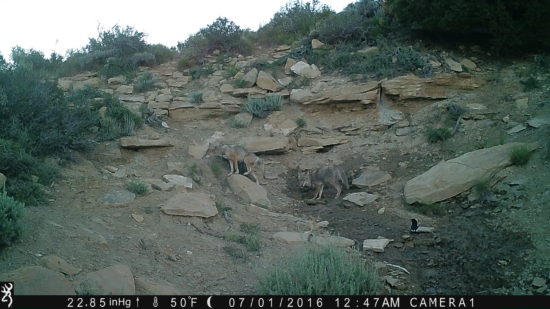
What is one of the neatest things you’ve captured on your game cameras? For Darryl Esthay from Louisiana it was photos of a mountain lion on a piece of property he hunts in Missouri, a very rare sight for the Show-Me-State! Being from Missouri myself, I know how big of a deal it is to the residents here to learn that there are mountain lions in our state. I contacted Darryl to get the story behind the photos and to find out what is involved in reporting a mountain lion sighting in Missouri.
The Story
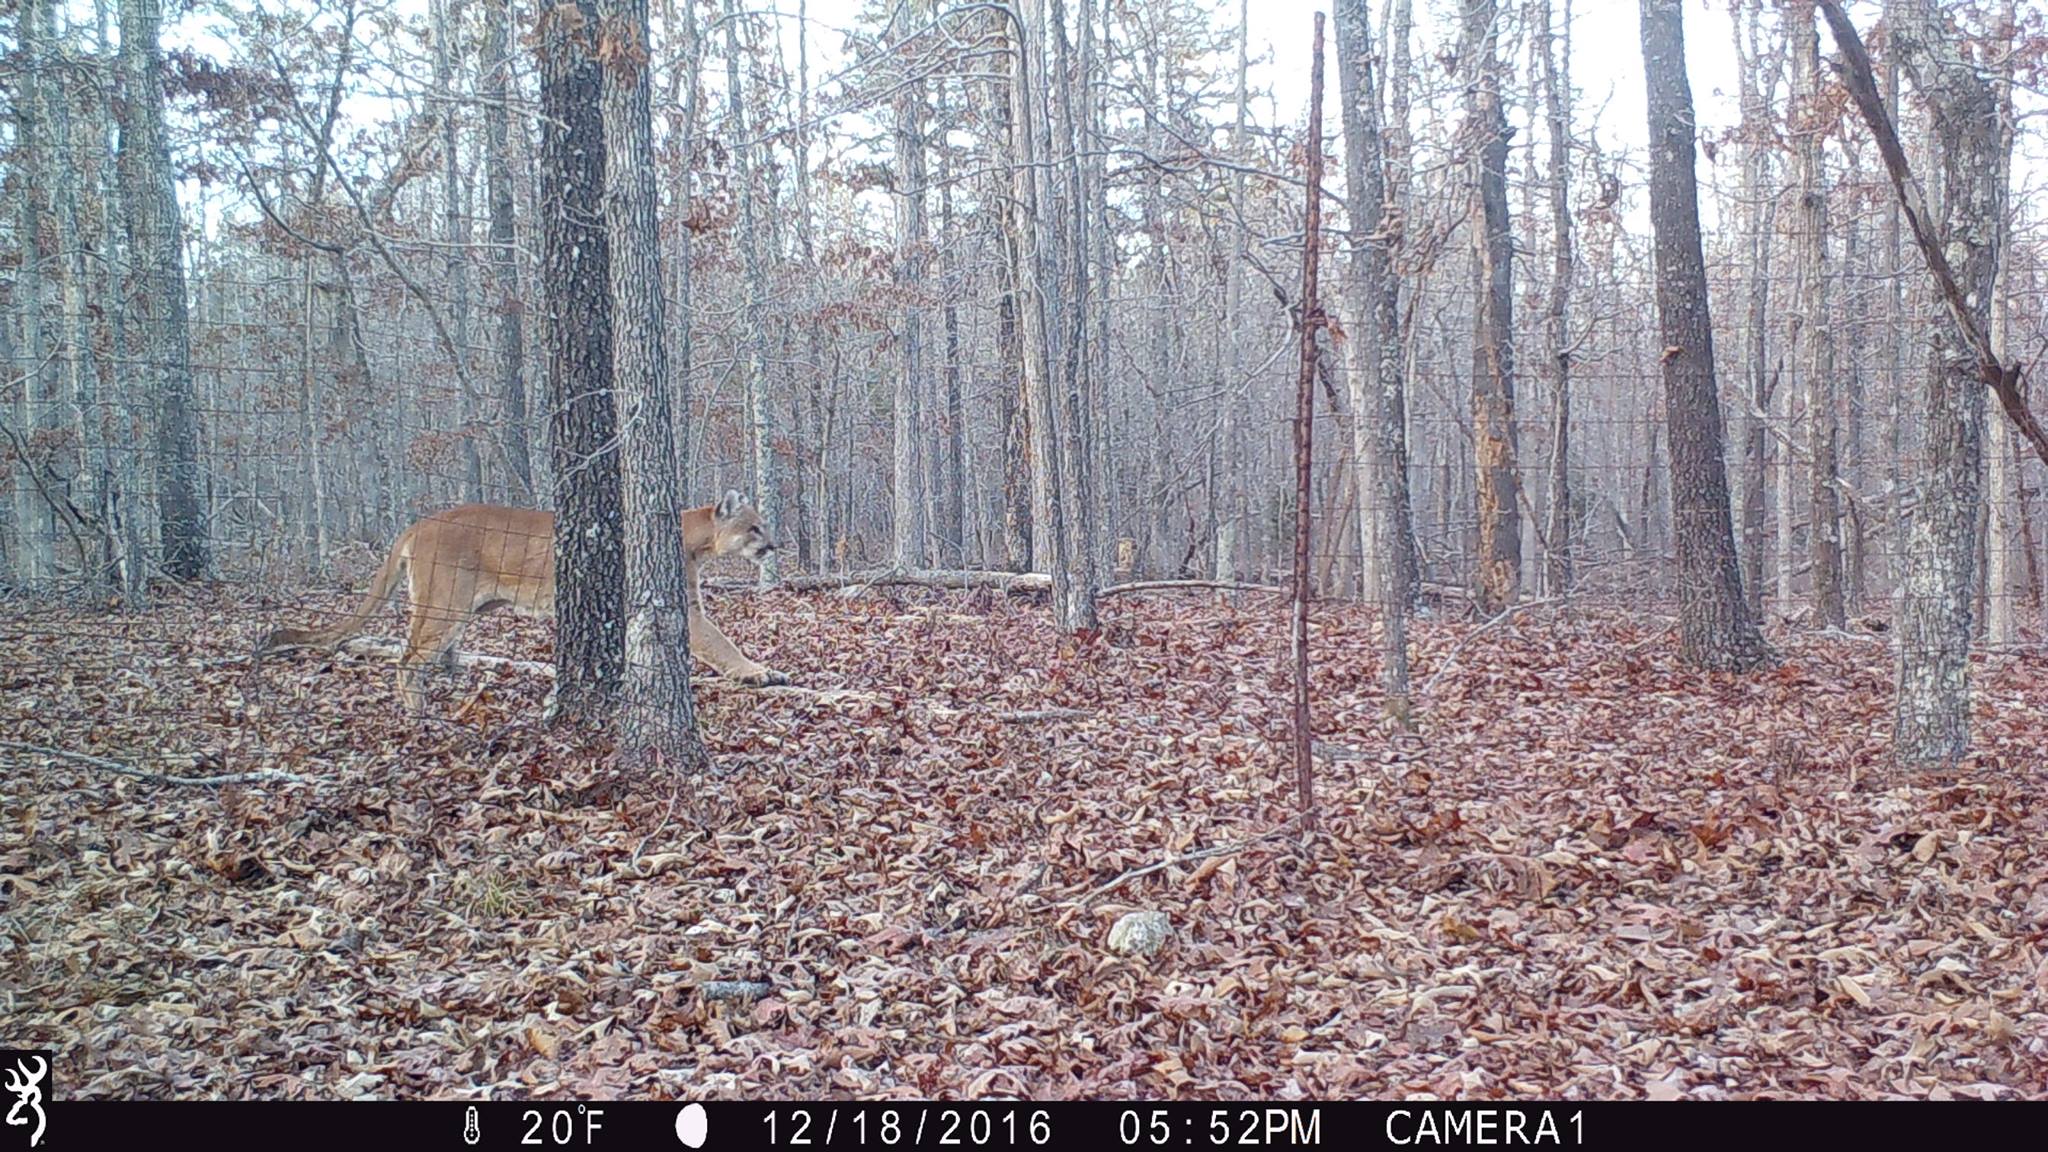
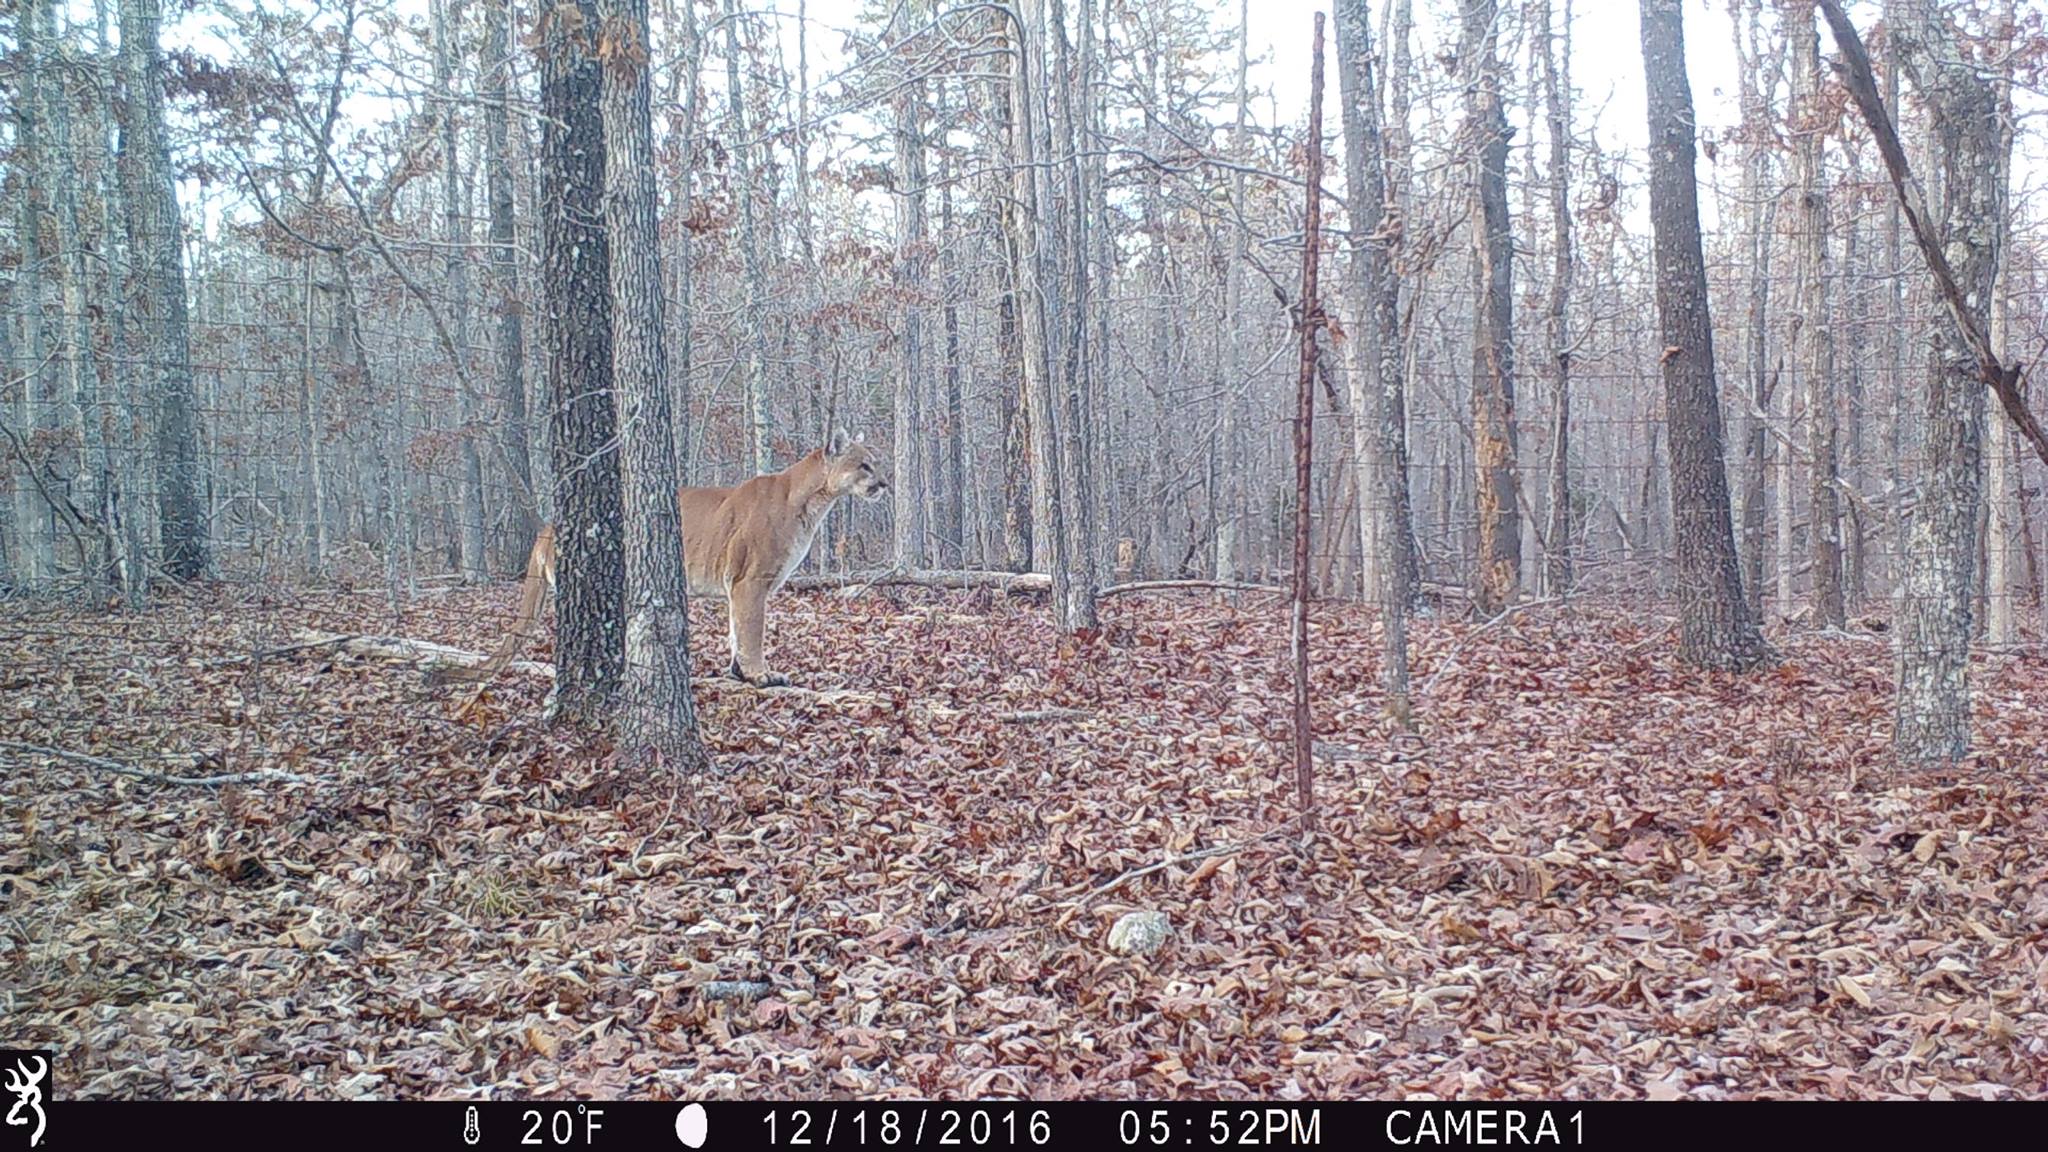
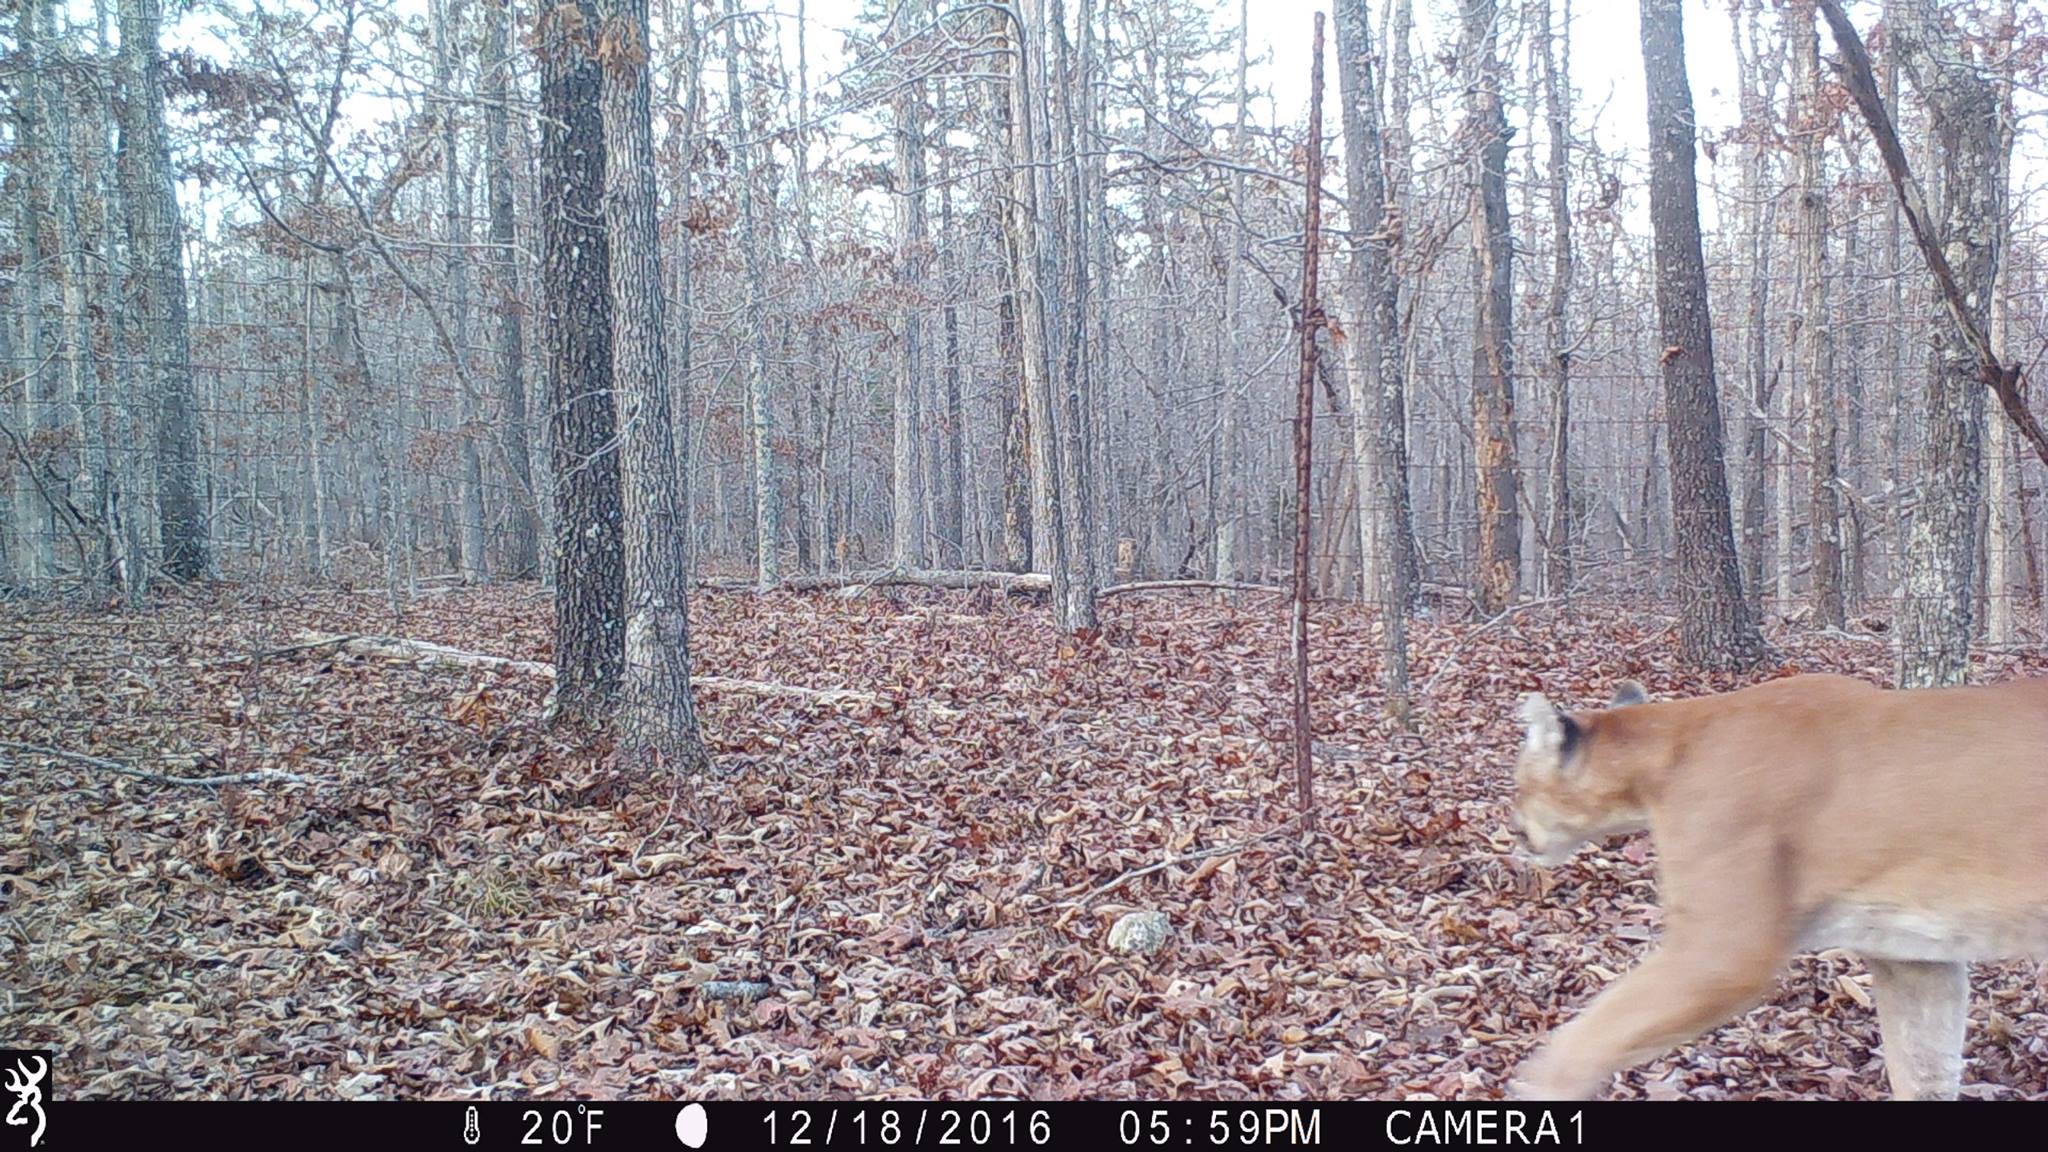
According to Darryl, he went to his hunting property in Oregon County, Missouri for his final deer hunt of the year on 1/02/2017. That afternoon, he pulled his SD cards on his Browning Strike Force Trail Cameras and found this series of mountain lion pictures on one of them. He then contacted the Missouri Department of Conservation (MDC) who sent their Mountain Lion Response Team to investigate the “possible” sighting, later officially confirming that this indeed is a mountain lion.
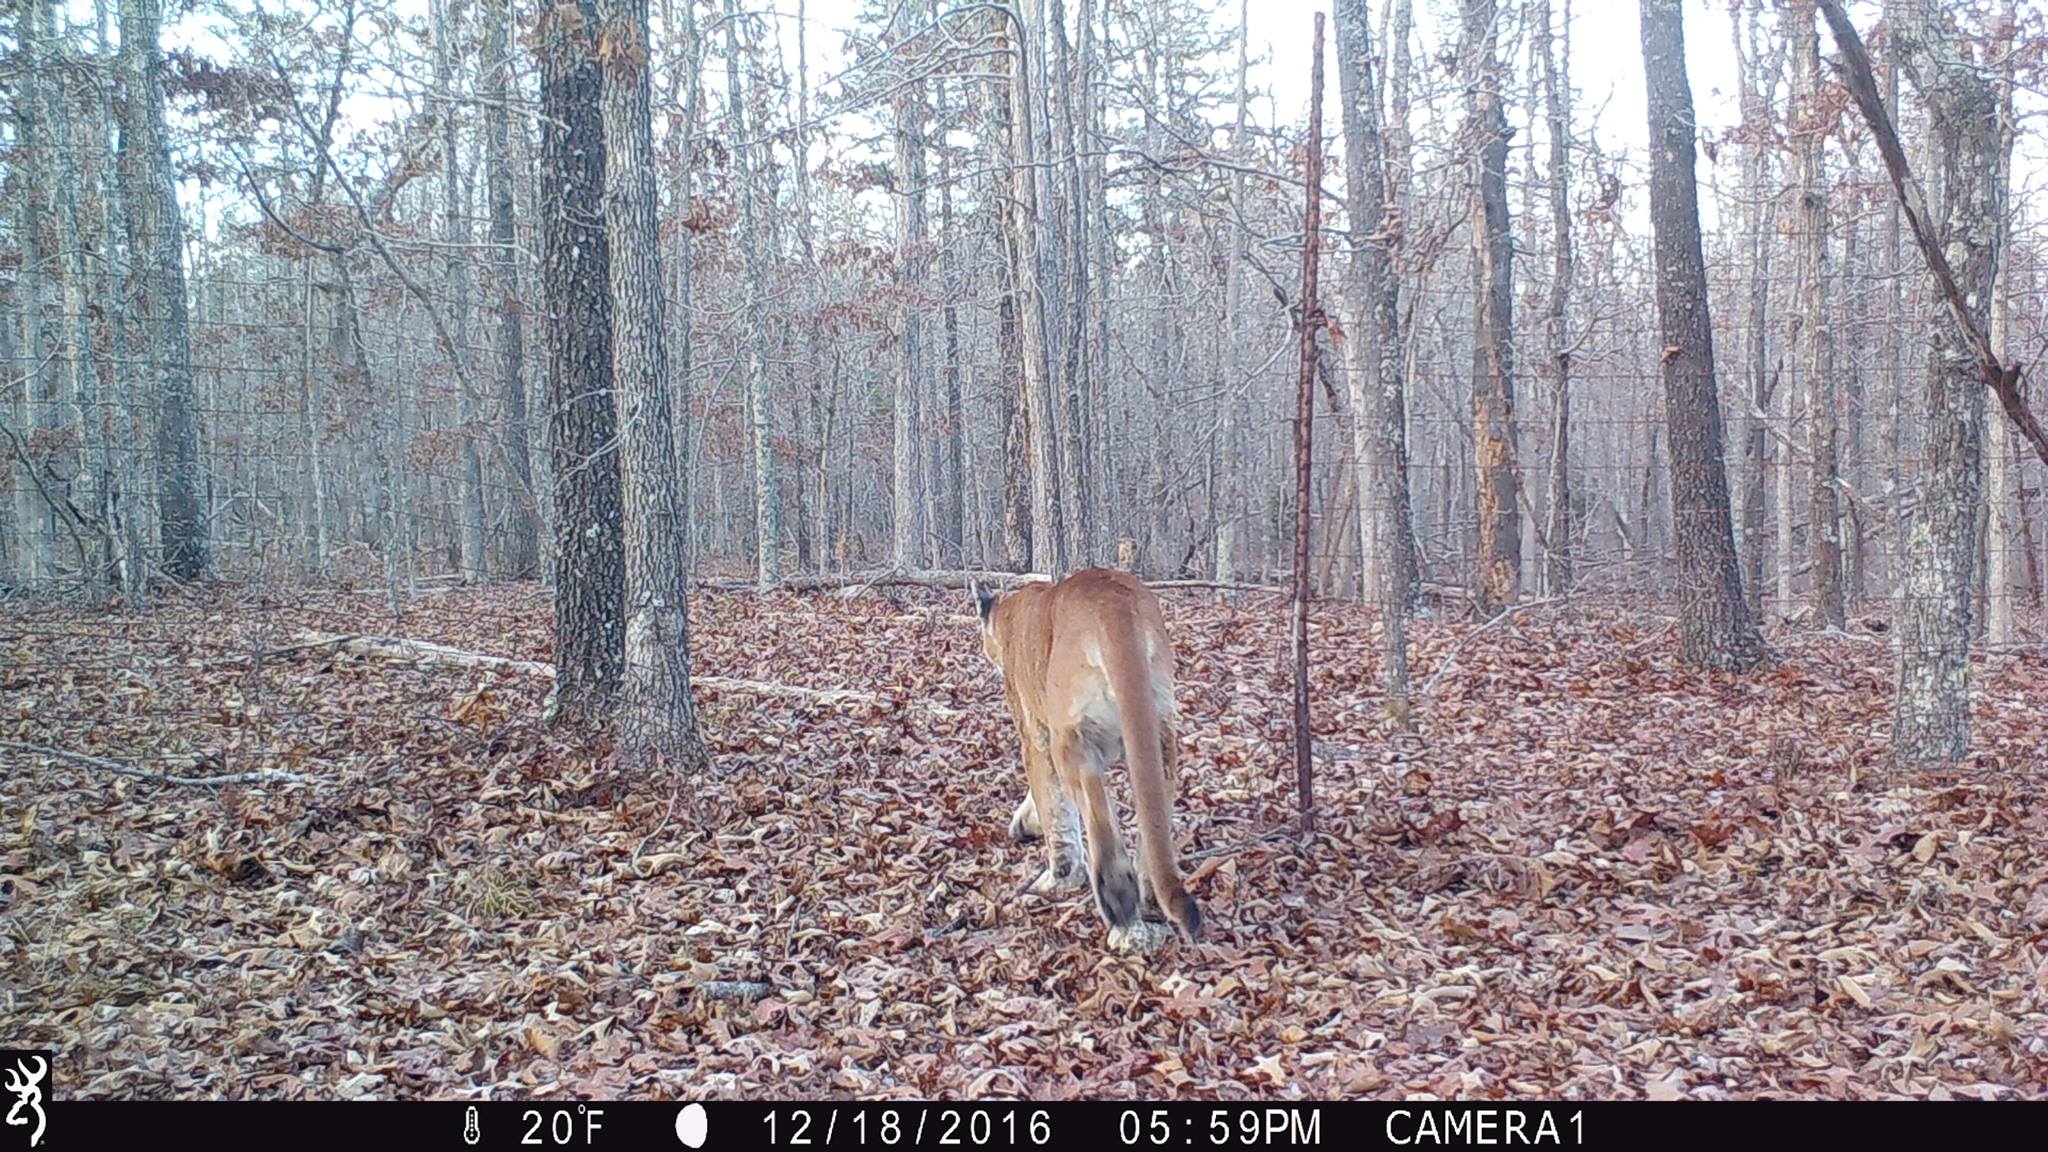

Darryl states that they were very thorough in gathering their evidence. They asked to see the original SD card that the mountain lion pictures were on, which Darryl presented to them. They saved the mountain lion photos, as well as the two photos before and the two photos after, to help support their evidence.
Next, the Mountain Lion Response Team asked to see the location that Darryl’s Browning Trail Camera was hung. They spotted the different landmarks that were in the photo: the fence, the rock & the log, and verified that it was the same location that the mountain lion pictures were taken. Darryl states that the “high fence” that is in the photos is actually an old fox pen from years ago that was there when he bought the property. He has cut 5-6 foot holes all along the fence to allow wildlife to pass through, as you can see in the photos.
After verifying the location was the same as in the photos, they then looked for mountain lion hair, scat and tracks in the area, but so far none were found. All of the gathered evidence was then presented to the entire Mountain Lion Response Team and was later officially confirmed as a mountain lion sighting in Missouri.
About a week later, Darryl also got a video of a gray fox, and what could possibly be another mountain lion in the bottom right-hand corner. The Mountain Lion Response Team looked at this video as well but they were not able to confirm that it was a mountain lion. They advised Darryl that once all the evidence is gathered after investigating a possible sighting, it is then voted on by the Mountain Lion Response Team. Each member of the team must vote “yes” in order for it to be a confirmed sighting. Even if the majority of the team believes it is, it’s not officially confirmed unless 100% of the team is positive that what they are looking at is a mountain lion.
(Click here to see a list of all of the confirmed sightings in Missouri.)
Other Evidence
Trail camera photos aren’t the only recent evidence of mountain lions in Missouri. According to an article in the Springfield News-Leader dated 1/27/17, the first confirmed female mountain lion in Missouri since 1994 killed an elk in Shannon County. Here are a couple of excerpts from the article:
“DNA from the cat’s saliva showed it likely originated from the Black Hills of Wyoming and South Dakota and northwest Nebraska. Conlee (A furbearer biologist for the MDC) said it’s a significant find because female mountain lions typically don’t travel long distances, preferring to live and hunt near where they were born.”
“There’s no indication the female mountain lion is staying in Shannon County, Conlee said, and it’s possible the cat will continue moving…Conlee emphasized there is still no evidence that Missouri has a breeding population of mountain lions.”
According to the Missouri Department of Conservation, there have been 68 confirmed mountain lion sightings in Missouri since 1994, becoming more common in recent years. This could be due to the growing number of mountain lions out west, making their way into Missouri, or could possibly be due to an increasing number of trail cameras out in the woods.
I have lived in Missouri all my life and I have never personally seen a mountain lion or gotten pictures of one on my game cameras, though I have heard stories of our neighbors seeing some behind our home for years now. My husband said his great-grandfather told his family he was riding his horse on our property one day and the horse he was on was attacked by a mountain lion. How true that is we may never know!
Part of the excitement of running trail cameras is never knowing what you’ll get pictures of. If you’ve already taken down your game cameras for the year, I suggest hanging a few back up to see what types of wildlife you get pictures of! Although it is still extremely rare, mountain lion sightings are becoming more common in Missouri. If you think you’ve seen one and have a good amount of evidence, follow this link for instructions on how to report it to the Missouri Department of Conservation.
By Andrea Haas
Andrea Haas is a Pro-Staffer from Missouri who enjoys hunting deer, turkeys, and upland birds. She is also the founder of the Huntress View, an organization formed to help strengthen the ever growing community of women hunters.
Using Trail Cameras in Trapping
December 18th, 2016 by BTC Editor
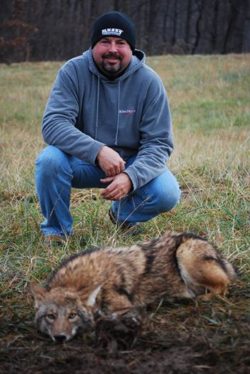
“Sometimes people wonder if animals are suffering or what exactly happens after they’re trapped. After an initial period of attempting to get away — which is why trappers run multiple swivel points and laminate the trap jaws so no paw damage occurs — the animal lies peacefully until the trapper arrives to check his traps. At that point, the trapper can decide to turn it loose or harvest it, depending on the conservation goals for the property he or she is trapping.
“Trappers are the best outdoorsmen there are,” the game warden replied when I told him I trapped. It was a routine license check while deer hunting, and once that formality was out of the way we began chatting. I don’t know if I fit into THAT category, but I certainly strive to learn all I can from those who’ve gone before me. Trappers settled this country, and their skillset often determined living or dying in those days. It’s a time-honored tradition where not much has changed: the methods, the techniques and even the equipment could easily be interchanged with those who came before us more than 200 years ago.
But there’s been one concession to modern, cutting-edge technology that has advanced the trapper’s knowledge more than any other single item: the trail camera. For years, we trappers have studied the tracks left behind of an animal at our sets, trying to figure out why he stepped here and not there. Snow is like a God-send to the trapper, and we’ll get out and follow a set of tracks for miles just to study the species we love to go after. What caused him to stray from the path he was walking there, and what attracted his attention enough to cause him to deviate from his destination?
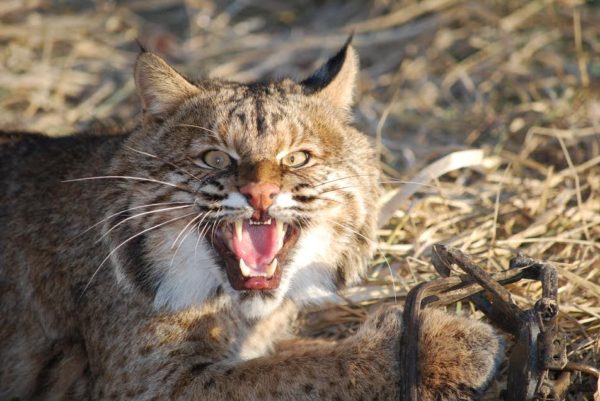
Staggs first recorded this nice bobcat visiting his set four days before the second time it made an appearance; another added benefit of using trail cameras while ‘cat trapping is helping to pattern them, as big males will often make a 5-day loop around their territory.
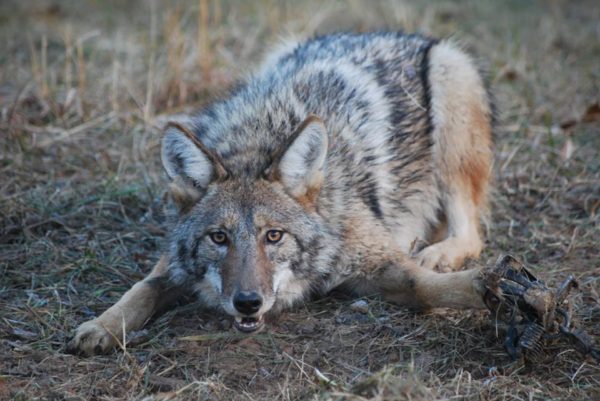
With the technical advances in trail cameras over the past decade or so, a treasure-trove of information is now readily available to the average person, and chief among those questions that get asked more than any other: How does animal XYZ work a set? Tracks give clues, but there’s nothing like actually WATCHING a bobcat tip-toe gingerly through your walk-through set… or a coyote approach your dirt-hole set from the side, because he didn’t know that the “front” of your set was the front.
Pictures are great, but video mode and the information it captures is priceless. Invisible night-vision infrared LED illumination is a must when capturing predators on video like this; if they see a red glow light up the area, they’re gone … and unlikely to return. Give it a try sometime if you’re a trapper, and see how much your knowledge base is increased. Or, even if you’re not a trapper, you may enjoy expanding your horizons beyond merely trying to capture deer on camera. The next time you’re in a Bass Pro or Cabela’s, or even an old hardware store that may have a trapping section, pick up a bottle of gland lure. Dip a bit out with a Q-tip and place it under a fallen limb on the forest floor. You may be amazed to see the number of predators you get video of which you had no idea were around.
Greg Staggs is the former back-page columnist for Inside Archery, and his writing regularly appears in such magazines as Outdoor Life and Petersen’s Bowhunting. Staggs loves introducing his two boys to all things outdoors, including fishing, trapping, canoeing and camping, and has been chasing turkeys and big game exclusively with archery equipment for over 20 years.
Late Season Trail Camera Placement
December 11th, 2016 by BTC Editor
As deer season is winding down and will soon be coming to an end, now is the perfect time to re-position your trail cameras and change your game plan for hunting late season whitetail bucks. As the seasons change, so does a whitetail’s pattern as they shift their focus from the rut to food once again. Here are a couple of tips on trail camera setup and placement to help you get the most out of your cameras before deer season closes.
Camera Location: Pinch Points and Travel Corridors
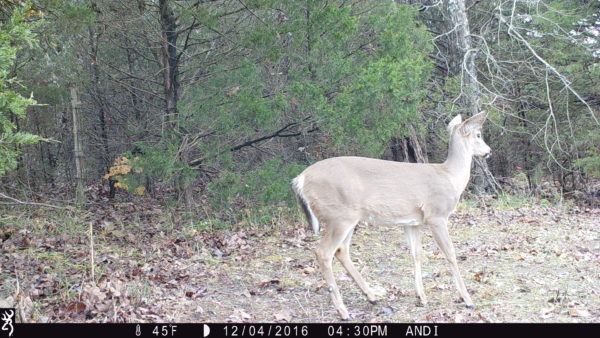
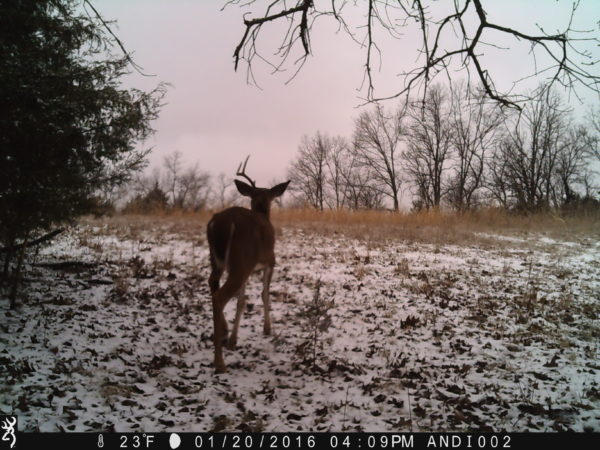
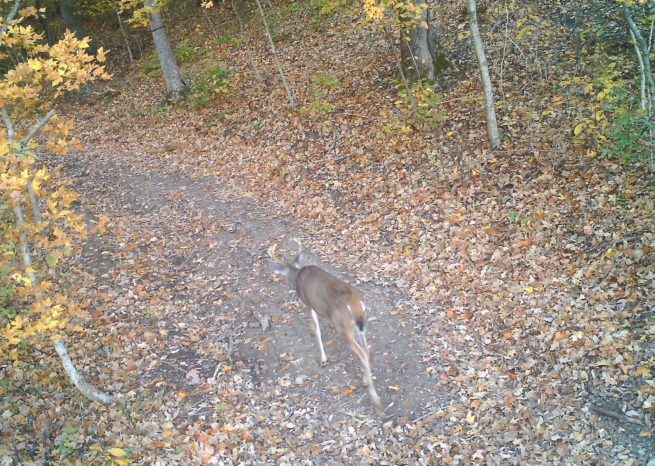
While I move most of my cameras to new locations post-rut, I still like to leave one or two at prior locations like pinch points, known deer trails and travel corridors to catch any bucks that may still be out cruising for does. As the fawns come into estrous late in the season, often referred to as the “Second Rut”, these locations are great for catching buck movement in the daylight. It appears to me that is exactly what is going on in the next series of pictures.
![1632:120416:45F:0000:ANDI :2E[097:0494]G[024:0x0016]](http://btc-omrc.com/wp-content/uploads/2016/12/IMG_0047-e1481494823717.jpg)
![1700:120416:45F:0000:ANDI :2E[099:0453]G[024:0x0016]](http://btc-omrc.com/wp-content/uploads/2016/12/IMG_0069-e1481496091319.jpg)
![1704:120416:45F:0000:ANDI :2E[097:0494]G[024:0x0016]](http://btc-omrc.com/wp-content/uploads/2016/12/IMG_0089-e1481496451232.jpg)
My Setup
- Camera: Browning Strike Force
- Mode: Burst Mode, 4 shots
When placing my cameras at the above locations, I like to set them up on burst mode to make sure I don’t miss any deer activity. For example, say I had my camera set up to take a picture every 5 seconds, but in normal mode. If this buck would have been trailing this fawn right on its tail, I may not have gotten a picture of him. In burst mode the camera takes several images, one after another, before stopping to reset.
Camera Location: Food Sources
Moving trail cameras to the remaining food sources is a good strategy for late season scouting. By now most of the acorns have either rotted or been eaten, so I like to move more of my cameras from the woods to our food plots in the fields. We have a couple of fields planted in winter wheat, clover and chicory, and another one planted in turnips. These have proven year after year to be the hot spots on our property for hunting late season bucks, and this year is no different! After checking my cameras this weekend, this buck has shown up in the daylight hours almost every day in one of our wheat and chicory plots.
![1440:120616:52F:0000:HAAS :2E[142:0070]G[008:0x0006]](http://btc-omrc.com/wp-content/uploads/2016/12/IMG_0578-e1481470633184.jpg)
![1615:120816:29F:0000:HAAS :2E[140:0076]G[008:0x0006]](http://btc-omrc.com/wp-content/uploads/2016/12/IMG_3681-e1481497272261.jpg)
My Setup
- Camera: Browning Strike Force
- Mode: Timelapse Mode
The Timelapse mode on my Browning Trail Cameras is perfect for watching bigger open areas, like our food plots. For the most part, we know where our deer are entering this field, which is why I put this camera where I did. But, deer will often be in that same location and you’d never know it because they are too far away to trigger the camera. Timelapse Mode solves that problem since it can capture game at 200+ yards away. Plus, you can easily view a full day’s worth of pictures in just minutes, thanks to the Buck Watch Timelapse Viewer Plus software that is included with every Browning Trail Camera.
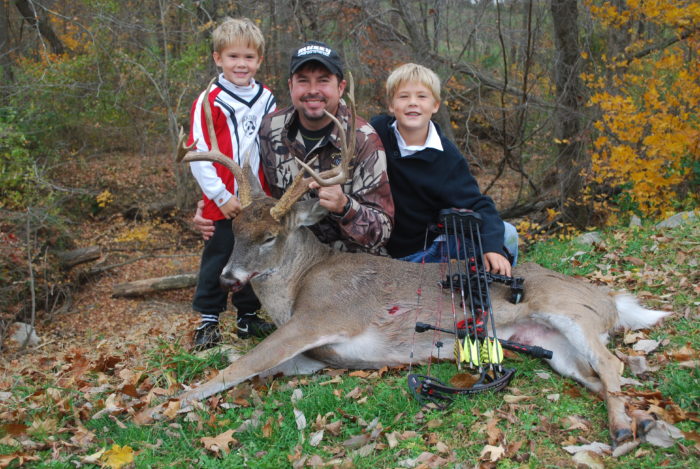
If you still have a deer tag you’re trying to fill, utilize your trail cameras as best you can. They are a deer hunter’s most valuable scouting tool! I shot my biggest buck to date on the last day of Missouri’s 2014 archery season as he was making his way into our turnip plot. Had I not been watching and patterning him with my trail cameras, I may have picked a different stand in that food plot and missed my chance at him.
Aside from avoiding tag soup, there are other benefits to keeping your trail cameras out during late season. Use them to help take inventory of what deer survived the season, determine your buck to doe ratio, and age of your deer. Looking over this season’s pictures, as well as pictures from prior season, will help you determine your game plan for next season. Another benefit to keeping your cameras set up so late in the year is to aid with shed hunting. Once you start getting pictures of bucks dropping their antlers, you’ll have a better idea of when and where to start looking for sheds.
Deer season isn’t over until it’s over, so if you’ve already taken down your game cameras for the year, I recommend getting them back out! The above late season trail camera locations and setups have helped me fill my deer tags in the past. Even if I don’t fill my archery tags this year, I have already gained some valuable information to carry over into next season, thanks to my Browning Trail Cameras!
By Andrea Haas
Andrea Haas is a Pro-Staffer from Missouri who enjoys hunting deer, turkeys, and upland birds. She is also the founder of the Huntress View, an organization formed to help strengthen the ever growing community of women hunters.
D.E.E.R. Project
October 9th, 2016 by BTC Editor
D.E.E.R. Project
By Matthew Hayes
Mule deer have a complex history throughout the western United States. In the days of the early settlers and pioneers, mule deer were relatively scarce; many trappers and explorers reported only occasional sightings of mule deer whereas other big game species were regularly observed. At the beginning of the 20th century, mule deer populations had been drastically reduced in number due largely to overharvest, market hunting, and overgrazing. Protections were put in place in the early to mid-1900s, eventually leading to ideas such as the North American Model of Wildlife Conservation, which was followed by a dramatic increase in mule deer populations. Mule deer populations peaked between the 1940s to the early 1960s throughout the western US.
Fast forward a few decades to the present day. With a lens to examine population fluctuations over the past 40+ years, a clear pattern has emerged. Populations, at least in Wyoming, appear to go through cyclical periods of increase followed by sharp declines. In reviewing literature and historical documents, concerns about mule deer populations tend to follow huge decreases in populations and when they subsequently rise, research and management become less important. Another point that seems clear in Wyoming is that although we have this see-saw in population numbers, there is a general declining trend since at least the 1970s. On average, Wyoming has seen a roughly 20% reduction in mule deer populations.
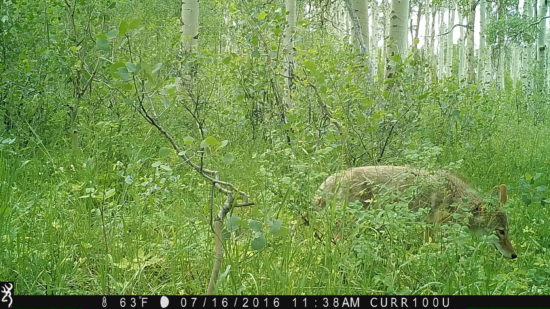
The population swings, and general decline, of mule deer since the 1970s has been difficult to understand. A variety of factors have been proposed to explain these declines, including: overharvest, harsh winters, habitat, drought, predation, disease and burgeoning elk populations. Managers have long noted that many areas that mule deer inhabit face different pressures and that populations are likely being driven by a variety of factors. All factors are not influencing populations in each portion of their range. This complication has meant that gaining a more complete understanding of reasons for fluctuations or stagnant growth in population numbers has been elusive. Without a solid understanding of the why and how associated with population fluctuations, it is incredibly difficult for targeted management to be beneficial.

Researchers and managers have made great strides to better understand mule deer ecology and factors relating to their survival and reproduction. In the early 2000’s Global Positioning Systems (GPS) became small enough to fit onto a collar sized for ungulates. Since then, studies have been conducted examining migration and use of the landscape in summer and winter. The effects of drought and shifting precipitation regimes have been investigated as well as determining when, where and how animals are dying. Wyoming has been at the forefront of this research and has helped to better understand the ecology and management of mule deer. A key ecological process that has remained poorly understood are the interactions between mule deer and elk (though some work has been done at the Starkey Experimental Forest).
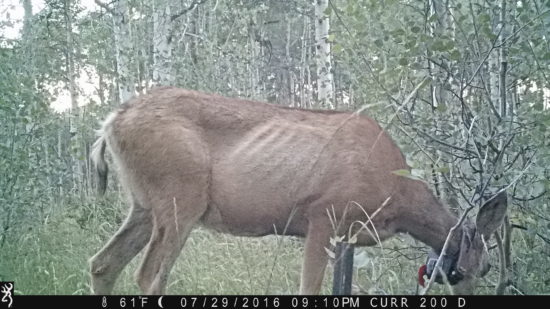
Mule Deer with GPS tracking collar.
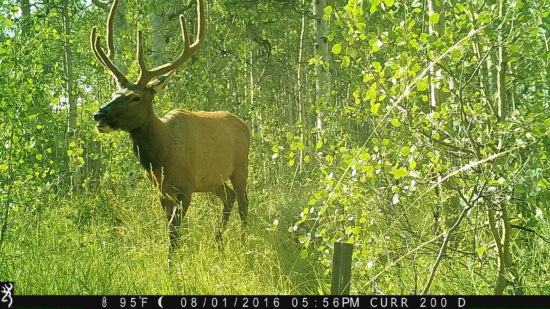
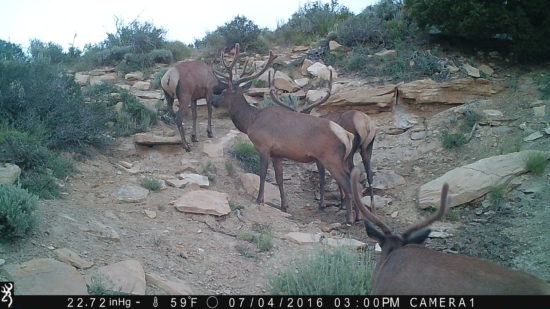
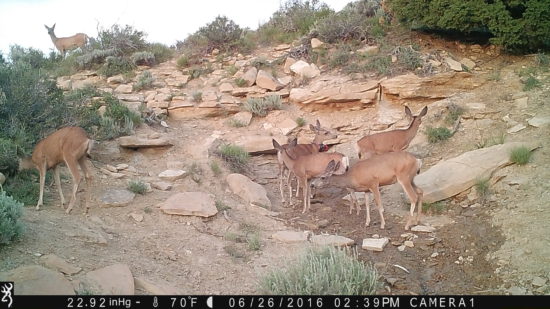
Both mule deer and elk are highly cherished big game species. Wyoming and her residents rely on these animals for hunting, tourism and as a part of our cultural heritage. Nevertheless, at the same time those mule deer populations have generally declined, elk populations have increased dramatically across the same geographical range. Managers and researchers have long wondered if mule deer and elk could be competing for space and resources but, until recently, the ability to study these interactions was almost impossible. Potential for interactions between these 2, highly valued species to affect one another’s abundance has been a bit of a conundrum for decades, probably given the challenges associated with addressing such a complex question. The Deer-Elk Ecology Research Project (DEER) was ultimately incepted out the need to unravel the head-scratching complexities of poor performing mule deer populations, while a similar big game animal continues to grow in the same country.
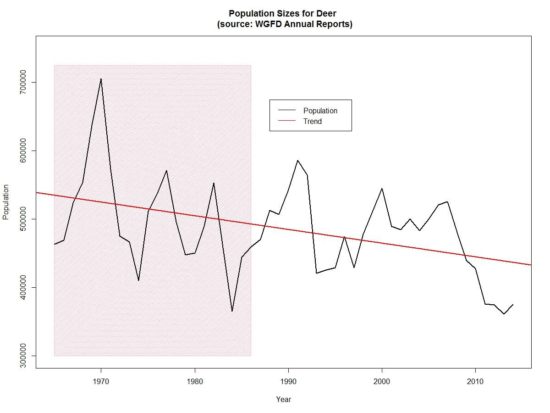
Population sizes for Deer

Population sizes for Elk
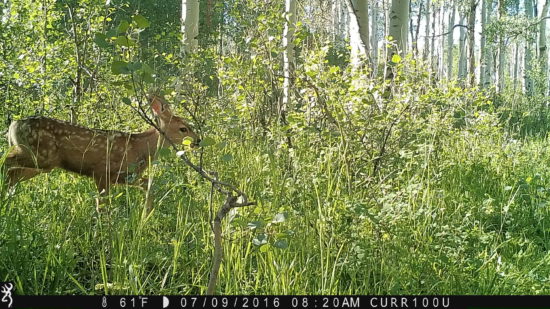
The DEER Project, located in the Greater Little Mountain Area of southwestern Wyoming, aims to increase our understanding of both mule deer and elk. This project is examining parturition timing and location of mule deer, mortality and recruitment of fawns, nutritional condition of adult female mule deer, summer diet overlap between elk and mule deer, space use, recruitment of male mule deer, survival, migration, and dispersal. We also are implicitly examining winter severity, habitat use, precipitation patterns, predation and disease. One of the greatest strengths of this work is the rigorous monitoring of both mule deer and elk in the same system. Many studies prior have examined one species or the other with inference to supposed interactions, but the DEER project will be able to analyze these interactions at a much finer scale. Another added benefit of this project is that it occurs in a high-desert system—an ecosystem ubiquitous throughout Wyoming but less studied compared to high-elevation systems. Far from being a one-off or unique system, the results from this work will be applicable to mule deer and elk throughout their shared range.
Future articles will focus on updates from the DEER project. You can follow along with the project, donate and subscribe for updates at www.deerproject.org.
The Western Association of Fish and Wildlife Agencies (WAFWA) has explored the issue of mule deer decline in depth and has published a very approachable book on the topic; you can check out the website at www.wafwa.org and navigate to the Mule Deer Working Group for more information.


FOR MORE INFORMATION: 
UNIVERSITY OF WYOMING
Kevin Monteith 307-766-2322 kevin.monteith@uwyo.edu
Matthew Hayes 307-766-5417 mhayes1@uwyo.edu

WYOMING GAME & FISH DEPARTMENT
Patrick Burke 307-875-3223 patrick.burke@wyo.gov
Mark Zornes 307-875-3223 mark.zornes@wyo.gov
Kevin Spence 307-875-3223 kevin.spence@wyo.gov
Early Season Bowhunting Tactics
October 2nd, 2016 by BTC Editor
By Greg Staggs
I turned and idled gently up the drive, palms getting clammy even as my breathing became shallower. Easing my truck to a stop, I quietly reached down and turned off the ignition and allowed the silence to envelope me. Going over my planned routine seemed to settle me a bit, and I took one last deep breath and opened the door. I had been thinking about this moment for weeks and it was finally here. Sliding off my seat, I walked as confidently as I could up to the door, knocked and asked if my date was ready.
First dates in high school probably provided as much nervous anticipation as anything I would experience for the first part of my life… until I started bowhunting. Today, I still idle gently into my parking spot. My palms may not be as clammy, but my senses are definitely heightened as adrenaline courses through my veins, thinking about the possibilities, the “what-ifs”… And my planned routine? It’s down to a science.
Chasing whitetails across the Midwest in September and October is truly a love of my life these days. Here are three things that have become a part of my routine that’s led to years of punched tags and filled freezers early in the season.
- Scout with a light footprint. Amazingly enough, I don’t spend a lot of time in the woods in the summer. Most of my whitetail hunting is done on public land with miles of corn and soybeans backing up to the woods. I’ve spent many a night tucked into a fence row on the opposite side of a field glassing to identify which corners the deer are using to enter the fields.
- Stay away as much as possible. If I can place a trail camera there on one visit and retrieve a card from it a month later, it’s harder for the deer to pattern me but I’m gaining valuable reconnaissance the whole time I wasn’t there. Taking it a step further, even my trail-camera placement leaves little presence. Ever walked into the woods and noticed a camera staring at you at eye-level? It can be obtrusive and stick out like a sore thumb. I’ve had deer think the same thing; I can tell by their reactions I’ve captured. A lot of times these days – especially on public land – I’ll take a lightweight climber with me and angle my camera down from twelve feet or so. It also keeps honest people honest, as my Dad used to say.
- Hunt with a light footprint. The first couple months of archery seasons in the Midwest can be downright hot. Deer don’t like to travel any farther than they have to, which means they’ll often bed less than 100 yards inside the woodline. If you plan to dive deeper in the woods this time of year, plan on bumping some deer. I’d rather sneak in and out of the edge a few times than blunder up once and alert every deer in the woods to your presence – especially a full month ahead of that magical November time-frame.
Greg Staggs is the former back-page columnist for Inside Archery, and his writing regularly appears in such magazines as Outdoor Life and Petersen’s Bowhunting. Staggs loves introducing his two boys to all things outdoors, including fishing, trapping, canoeing and camping, and has been chasing turkeys and big game exclusively with archery equipment for over 20 years.
DIY Trail Camera Stand
September 1st, 2016 by BTC Editor
No tree around to hang your Browning Trail Camera? No problem! Pro-Staffer Kinsey Edmunds gives step-by-step instructions on how to make a homemade game camera stand that can be placed anywhere!
Kinsey Edmunds is a pro-staffer from Missouri. Being raised on a farm and surrounded by wildlife, her love for the outdoors began at a young age. Kinsey enjoys bowhunting whitetails, turkeys, hogs and gators, just to name a few. She is also a team member of Huntress View, a team dedicated to strengthening the ever-growing community of women hunters.
