4 Seasonal Trail Camera Techniques
November 5th, 2017 by BTC Editor
Trail Cameras have become a big part of the modern hunters scouting strategies. But many fall short by not putting in the time to scout and find new places to put their trail cameras. These 4 simple trail camera techniques will help you get more pictures of your monster bucks.
EARLY SEASON
As the bucks begin to grow and racks begin to form, it is time to put trail cameras up on popular mineral sites. The nutrients deer need can be found in these minerals for the growth of antlers and milk production of fawns. This is a great place to determine deer density and take an early season inventory of your deer herd.
PRE-RUT
This time of year, bucks shed their velvet and their testosterone levels begin to rise. When scrapes and rubs become more visible, it is time to move your trail cameras. Scrapes are a great place to find mature bucks looking for receptive does. Most bucks visit scrapes in the cover of darkness, but are easy to get great pictures of.
RUT
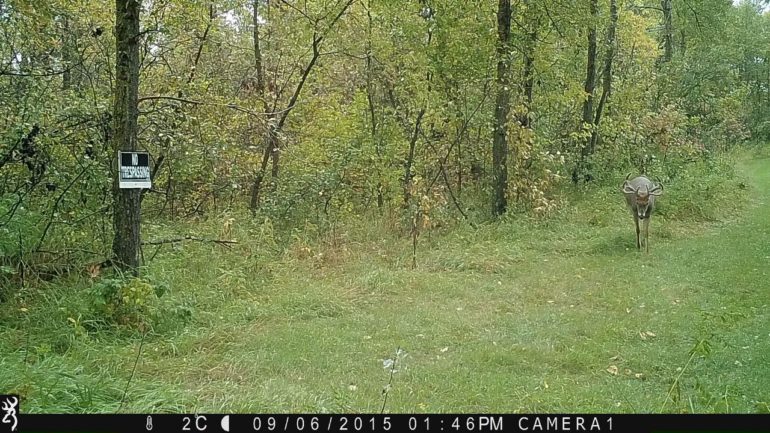
When the does start to come into heat, bucks really start to move. As bucks begin to seek does, food sources become a hot spot for deer activity. By putting a trail camera on the edge of a field, you are likely to get pictures of bucks checking for receptive does. Also helping to show where and what time they enter the field.
POST-RUT
As the rut winds down, bucks begin showing the toll of heavy rut activity. Low body weights and broken, beat up bodies, bucks become slaves to their stomachs. This is the time of year that corn stations or late season food plots become key trail camera spot. These pictures can help you find out what bucks made it through the season and ones to write off the hit list.
Blog originally posted on The Break TV blog by team member Stephen Jones.
5 Summertime Trail Camera Tips
May 21st, 2017 by BTC Editor
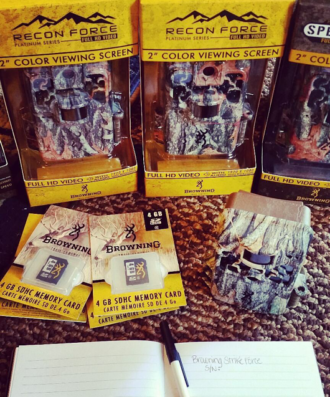
1- Summertime is when most hunters get their trail cameras out of storage and hang them to start taking inventory of their whitetail herd. It’s also a great time to take inventory of your trail cameras. Make note of how many you have, how many more you may need for the upcoming season, and also keep a list of each camera model and serial number in the rare case of theft. It can, and does, happen so keeping a record of this could help get your cameras back eventually if they do get stolen. Browning Trail Cameras also has a Security Box that makes it more difficult for thieves to take your cameras, if even at all.
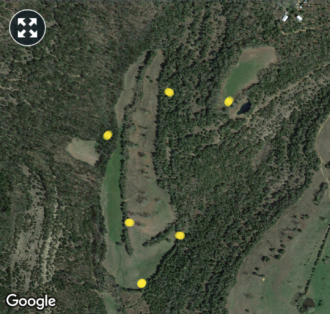
2- Look at an aerial map of your hunting property beforehand so you have a good idea of where you’d like to hang your cameras. This way, you’re not driving or walking all over your property, disturbing the game and working up a sweat. If you have a weather app on your phone you can easily locate your property via the radar portion of the app. If you don’t have that, Google Earth is what I recommend. It’s probably a good idea to take a screenshot of your property and from there mark where you are placing cameras using the paint/draw tool on your phone in case you forget where you hung the cameras later on.
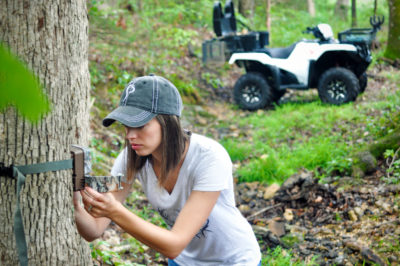
3- Summertime is obviously hot, even first thing in the morning, so in order to be out in the heat as little as possible it’s best to have everything ready to go before you head out. Have your trail cameras already set up with the correct date/time/camera settings, full with batteries and the SD card in so all you have to do is hang them, turn them on, and go!
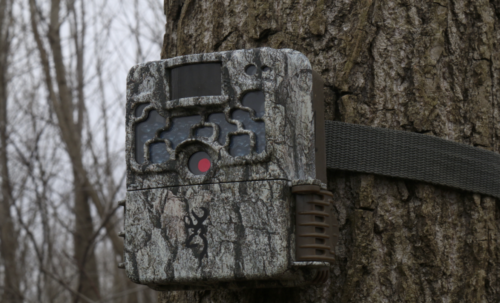
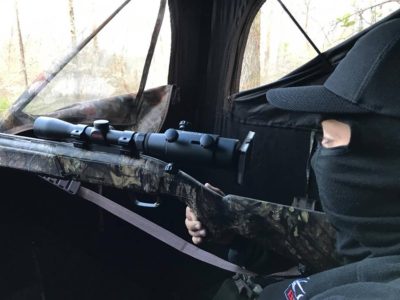
A Browning Trail Camera feature that really helps get your camera positioned quicker is the viewing screen on some of the camera models. (See photo below.)

4- Everyone has their own system for transferring and storing trail camera pictures to their computer. I like to stay organized from the start by putting my SD cards in 2 separate cases – one for blank SD cards, and one for full SD cards – and then loading the pictures to my computer once I’m home. A baggie works just as good, just make sure you label each one to avoid confusion. Some prefer to bring a laptop and transfer the pictures there in the field, but I like to get in and out as quickly as possible and this works best for me.

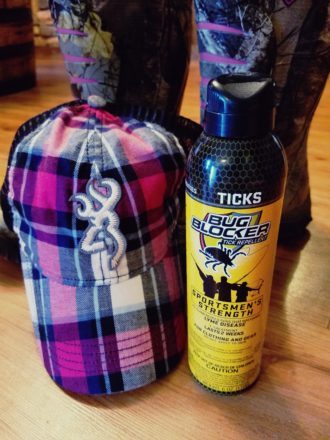
5- Last but not least, don’t forget the tick spray! So far this year has been one of the worst I’ve seen for ticks. Using a tick spray with Permethrin has worked well for me. Spray down your clothes and boots and make sure they’re dry before putting them on. You do not want this on your skin! For those worried about scent control, this kind is supposedly odorless once it dries. My nose is of course nowhere near as good as a whitetail’s, but I don’t smell it at all once it’s dry and would prefer to be tick free over scent free anyways, so to me it’s worth it. It also doesn’t hurt to spray it on some of your trail cameras to avoid ant infestations, which are very common in the summer months.
By Andrea Haas
Andrea Haas is a Pro-Staffer from Missouri who enjoys hunting deer, turkeys, and upland birds. She is also the founder of the Huntress View, an organization formed to help strengthen the ever growing community of women hunters
The First Hunt
April 9th, 2017 by BTC Editor
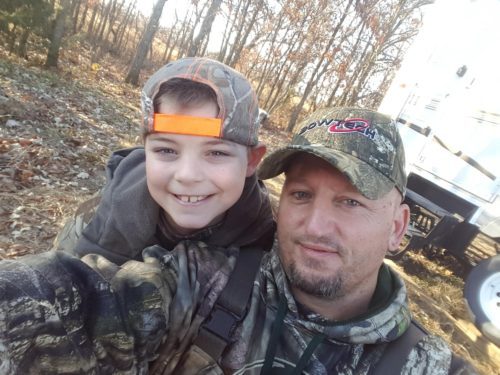
With having accumulated many special memories over the course of my 35 years of hunting, I can vividly remember so many details. Memories begin with my first successful whitetail deer hunt, my first turkey, and my first harvest with a bow. All of these events pale in comparison to being able to watch my eight-year-old son squeeze the trigger on his very first deer…a spike buck.
Like many fathers who love to hunt, my hopes had always been to raise my two children to share my passion for hunting and the beauty of the outdoors. I know many hunters; however, whose children had grown up with little or no interest in following in their father’s footsteps when it came to pursuing wild game. I often wondered what it is that separates those kids who develop the passion and those that do not. There is no sure way of getting or keeping our children involved in hunting, yet there are certain things that we can do to increase the odds of them developing that lifelong passion.
From my experience and from what I have learned from others, it is key to get them involved at an early age. Children generally do take an early interest in their parent’s passion for the outdoors. My children were always there when I would bring home a harvested animal. They would come rushing outside to take a look. Whether it was gutting a deer or processing one, I allowed them to be a part of it. I made sure to answer any of the questions that they may have had. I would always say to them, “One day you both will get to go hunting with dad.”
Once a child reaches the age where you feel it is the right time to take them hunting, you must make necessary changes to how you hunt. You are going to have to keep it somewhat “fun” in their eyes. It could be a tag-along trip where they sit with you or simply head out to do some scouting. Explain what you are doing and what you are looking for. Allow them to utilize some of the gear, such as binoculars or rangefinders. If you are like me, you may need to shorten the time frame of your hunt. For instance, you may be accustomed to a 4 or 5-hour sit, but now you may need to make it only a few hours to prevent the child from becoming bored. Once you detect boredom, either change things up a bit or head to the house.
You may ask yourself, “When is the right time to take your child hunting?” The answer depends on the individual child. I believe it is important to not push them to go until they have shown the desire. We, as hunters, all want our children to share our love for hunting and the outdoors; however, if you force it on them, you risk driving them farther away. If they do not show as much interest as you would like, then simply give them their space. Always keep the invitation open and never force them to be an unwilling participant.
Make sure the child, when the day comes that they are ready, has the correct equipment. Make sure they are comfortable with the proper clothing. Even for seasoned hunters, we know the misery of freezing our butts off while trying to stay out for as long as possible. If it is miserable for us, imagine how much more it will be for the child who is not accustomed to cold temperatures for extended periods of time. You do not want to over-clothe them either. They need to be comfortable with proper fitting clothing. Remember, they so want to be like dad. Make their attire fit the part of a hunter.
And just as important as the clothes they wear, is the weapon that they carry or utilize. Proper fit, whether a bow or a gun, is crucial. For a rifle, that means making sure your child can properly shoulder and aim the firearm and that the recoil is not more than they can handle. Assure they are comfortable with it, via practice, and preach the importance of firearms safety. I made sure to allow my son to carry his unloaded weapon to the stand. He held that rifle so tight and walked with so much pride. If your child is using a bow, it is important to assure proper fit with correct draw length and draw weight. If your child is not comfortable with the weapon they are utilizing, they probably will not be able to shoot it accurately or consistently. This can quickly lead to disappointment and frustration with hunting. If you are truly serious about getting your child involved, it is your duty to equip them properly. Just as you would do for yourself.
Finally, to keep them interested in hunting, sooner or later, they are going to have to experience the taste of success. While you and I may be able to sit in a tree stand or blind for hours on end, day after day and never draw back an arrow or push that safety forward, a young child is going to likely deem this boring and lose interest. This may mean that you need to start them out on smaller game or, in my case, place them in a situation where you know they will have a high chance at success in harvesting their first game. Sure, I dreamed of my son taking a nice big buck on his first hunt, but I was just as thrilled when a couple of spikes came in and presented him a shot. After my son dropped the deer in his tracks, I think it is safe to say, he was hooked. He experienced the “rush” that all of us, as hunters, have felt. Now, he does not mind spending a little more time waiting for the next opportunity.
When that special day came for just the two of us to make that trip to the field, I felt confident that we had put in the time preparing for a successful hunt. I am testifying that there is nothing more rewarding than watching your child harvest his or her first game animal. The excitement in their eyes, and to feel the pride of knowing that you played a major part in their success, is a feeling like no other. Most importantly, there is a bond that develops between you and your child that makes it that much more special. A special closeness that could only come from time shared afield. A bond that, if properly nurtured, will last a lifetime.
Blog post originally shared on “The Break TV”.
By Bobby Raybourn
Bobby is a team hunter on “The Break TV” on the Pursuit Channel. He grew up near Odessa, MO and began hunting at a very young age alongside of his father and older brother. Bobby has also taken up Taxidermy in his spare time and his business is thriving.
4 Reasons to Start Hunting in 2017
January 29th, 2017 by BTC Editor
When making your list of New Years resolutions for 2017, I hope plenty of you have added “hunting” to the list of things you’d like to check off this year. Whether it turns into a life-long passion or something you decide may not be for you, I’m sure either way you will walk away a better person from the experience. Here are 4 positive things you can expect to happen from giving hunting a try.
Healthier Lifestyle
Almost everybody makes it a New Years Resolution to become healthier in the coming year, and being a hunter can help you reach that goal! Aside from the fact that the meat from the animals you harvest will be organic, leaner, and free from man-made intervention, most hunts require a good amount of physical activity as well. So you’re getting your exercise in while you are obtaining a healthier form of food. It’s a win-win!
Strengthen the Economy
You may not necessarily feel that you alone can help contribute to this, but check out this statistic: According to the National Shooting Sports Foundation (NSSF), hunting has generated 600,000 jobs in the United States. That’s a HUGE number. And just think, the more you and others hunt, the more purchases you will make within the hunting industry that will help that number continue to grow!
Conservation
If there is one thing that hunters and non-hunters can agree on, I feel it’s the fact that we all want to ensure that nature and wild animals will be around for future generations to enjoy. You can help contribute to that through hunting. Check out these excerpts from the NSSF Hunter’s Pocket Fact Card about how hunters contribute to conservation:
“License Revenues fund nearly half the budget, on average, for state fish and wildlife agencies. The money supports wildlife management and restoration programs, habitat improvement and general conservation efforts.”
“Excise Taxes on sporting equipment (such as firearms, ammunition and fishing tackle) provide more than one-fifth the revenue for state fish and wildlife agencies. The funds are used to acquire, maintain and improve wildlife habitat and to make the nation’s lands and waters more accessible and enjoyable to all its citizens, sportsmen and non-sportsmen alike.”
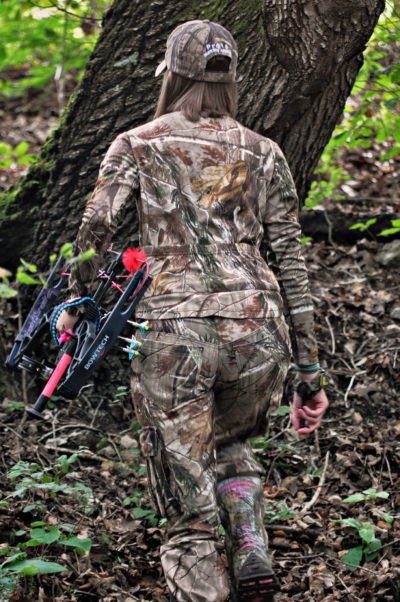
Allison Stegmann, Huntress View team member
“Hunters and anglers provide more than 75% of the annual funds of the 50 state conservation agencies. Sportsmen are clearly the largest contributors to conservation, paying for programs that benefit all Americans and all wildlife.”
Character Building
I have been hunting for years now, but I still remember how I felt after my very first whitetail hunt and what I learned from it. I remember climbing up in the tree and seeing 3 does walk underneath my treestand. At the time I didn’t want to shoot anything, I just wanted to observe them, and I’m glad I did. Just watching them in their natural environment, not having a clue that anyone else was there, was quite the experience for me.
That day I learned to appreciate several things: Having land to hunt on, having the ability to get out and go hunting in the first place (which I feel a lot of people take for granted), and for life itself. While hunting can be very difficult, I realized how easily I could have taken one of those does with my rifle that day, had I wanted to, and it just made me have a new found respect for wildlife.
If you’ve been thinking about hunting for a while but haven’t taken the leap yet, please give it a try this year! There is always something positive that one can take away from hunting. I encourage you to see how it can help change you for the better!
By Andrea Haas
Andrea Haas is a Pro-Staffer from Missouri who enjoys hunting deer, turkeys, and upland birds. She is also the founder of the Huntress View, an organization formed to help strengthen the ever growing community of women hunters.
Shed Hunting: Tips & Benefits
January 1st, 2017 by BTC Editor
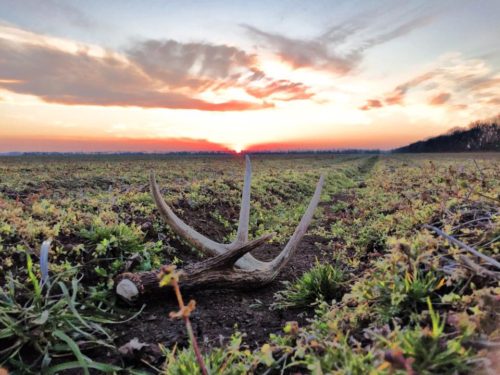
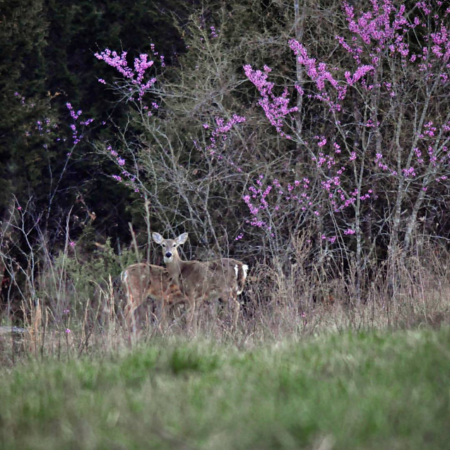
Anyone that knows me knows I’m a whitetail freak. I’m in love with hunting whitetail deer and everything that goes with it. However, as much as I love to hunt the actual deer, I am just as crazed about hunting their sheds after season is over. Picking up a shed antler gives me just as big of a rush as sitting in my stand and hearing a deer walking around on the fallen leaves in the timber.
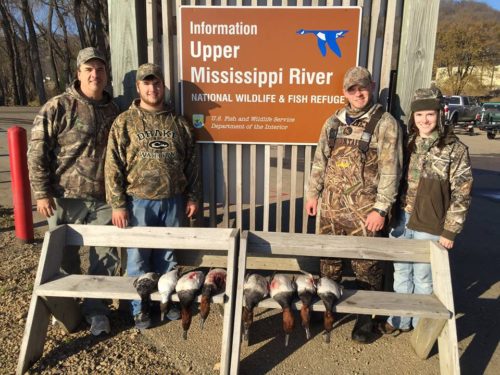
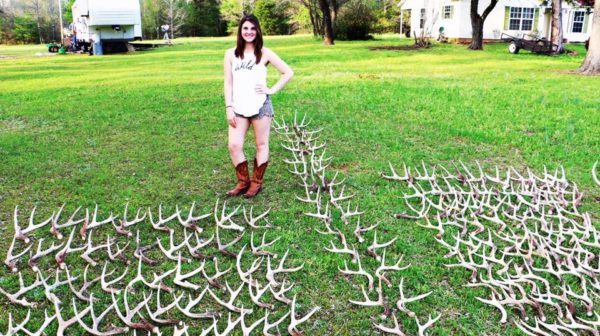
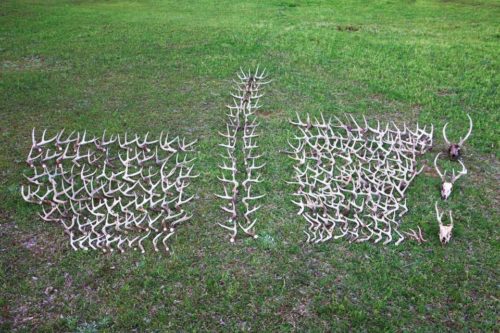
This past shed season, my husband and I found over 200 shed antlers and 3 dead heads. I can’t begin to tell you how rewarding it has been. We were able to spend so much quality time together doing what we love, got in some serious leg workouts, and we even introduced our little girl to the sport. She came along on every shed outing and will have an eye for them before we know it.
In this article, I will be discussing benefits, tips, and ideas for what to do with your sheds.
Benefits:
There are so many benefits involving shed hunting. First and foremost, it’s a wonderful way to get in some quality time with family and friends. Finding shed antlers to an outdoor enthusiast is the equivalent to a child’s Easter egg hunt: extremely exciting, full of fun and the amount of pride that fills your soul when you pick one up. I’ll add, also, that it’s an excellent way to get in some serious exercise. Successful shed hunting requires a lot of walking, though some are lucky enough to have terrain accessible enough for four wheelers and/or horseback riding– both of which are effective ways to be successful. However, for those that don’t have land that is ATV accessible, get walking. Walk your food plots. Walk your trails. Walk your fence lines. Walk, walk, walk, walk, walk. Getting outside and walking your property for sheds gives you other advantages, like getting to know your deer herd’s travel patterns, and also what deer made it through the season. Plus, it’s just flat out fun.
Tips:
Like I stated previously, walking and/or driving/riding your property is key. You have to put in the time to be successful. Think like a deer, just as you would when considering what location to hang a tree stand or trail camera. Go places the deer go. Find their bedding areas and their feeding areas and you will be golden. Places where you know bucks will have to make hard landings, like jumping over fences or ditches are excellent places to look. Just because the rut has come and gone, doesn’t mean bucks don’t spar. With that being said, walk your food plots. Walk the open areas where deer congregate.
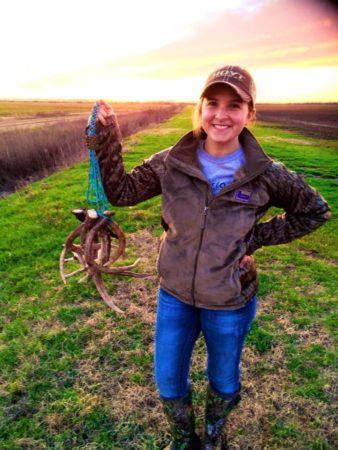
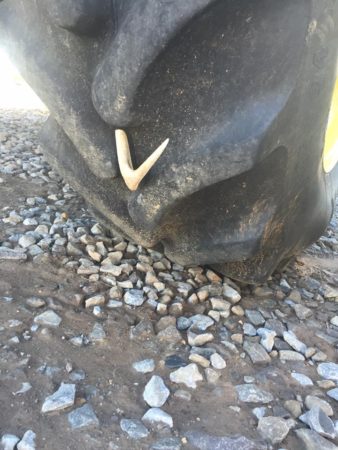
Something I also understand is that not everyone has their own land to go look on, which brings me to my next tip. Just ask. You would be surprised at how many people just don’t care for sheds, or better yet, want them off of their property: farmers especially. This past season, about 90 percent of the property I shed hunted on was from people that I had never met a day in my life, most of them being farmers. Sheds pose a threat to tractor tires and most farmers hate them. Almost every response we got when we asked for permission from farmers was, “find them all and take them all,” and most of them even gave us names and numbers of other farmers.
What to do with your sheds:
The fun doesn’t stop after you’ve picked up a load of bone. There are countless ideas to explore with your antlers. Decorating is my favorite thing to do, as I have sheds laying everywhere around the house. Nowadays, with websites like Pinterest, the creative opportunities are endless. I’ve seen everything from jewelry holders and fall decorations, to chandeliers and doorway entries. Believe it or not, there is actually a lot of money potential in your shed antlers if you’re willing to sell them. This year, while out, there were a couple of guys from Colorado in the area where we were hunting that were searching for sheds as well, and were willing to pay $16 dollars per pound. Crazy, right? I, for one, like to keep the ones I find.
With all that being said– get out there this upcoming shed season. It’s very rewarding and an experience that will develop into an obsession.
By Cajun Bradley
Cajun Bradley is a lifelong lover of hunting and the outdoors, especially waterfowl hunting. She is a member of the Huntress View team, an organization formed to help strengthen the ever growing community of women hunters.
Estimating Whitetail Deer Score
August 28th, 2016 by BTC Editor
With the right camera and settings, photos captured can help immensely to accurately gauge a buck’s net score well before it hits the ground.
Hunting stores like Cabela’s have a wide range of trail cameras and filtering through pictures is quickly becoming a favorite past time of hunters. Like Christmas morning, each memory card filled with thousands of pictures is waiting to be opened and scanned. Every hunter will have a different level of “acceptable” target deer to hunt. For rookie hunters, anything that moves will usually suffice. Bow hunters might be interested in the Pope and Young minimum qualifying score as a target buck for the season. For others, it may be that elusive net score of 150 inches(“). And for the seasoned trophy hunters it’s likely to be upwards of 170” (the Boone and Crockett all time net typical minimum). Either way, it depends on what hunting stage the individual is in, where their hunting territory is and perhaps how much time they can afford to dedicate towards hunting season. No matter who you are, where you hunt or what your goals are, Boone and Crockett and Pope and Young conversation clubs established a consistent method of measuring deer antlers many years ago.
Previous to the 1990’s, trail cameras were non-existent. Now a days, it is hard to find a hunter without one. Trail cameras scout 24 hours a day, 7 days a week providing great information regarding:
- herd population
- herd age classes
- frequency of movement
- buck to doe ratio
- target bucks
- largest antlers
- worst genetics
Scoring a deer is the act of adding up all the qualifying inches the buck has. Scoring a live buck is difficult at best as they usually do not stand motionless for long or in the right position to properly gauge their score. This is where trail cameras can really help out, especially models with burst mode that take many pictures in rapid succession. A whitetail deer’s net typical score is composed of 5 components from the antler rack they possess:
- Length
- Height
- Thickness (mass)
- Spread
- Length of abnormal points
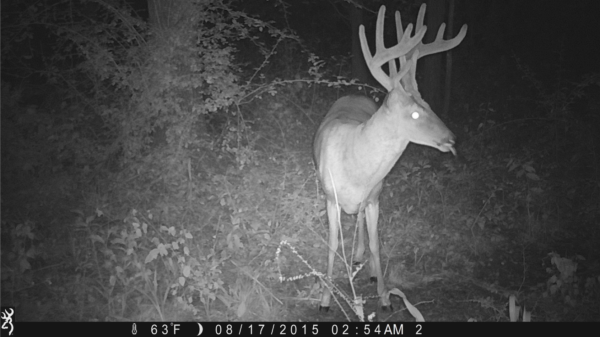
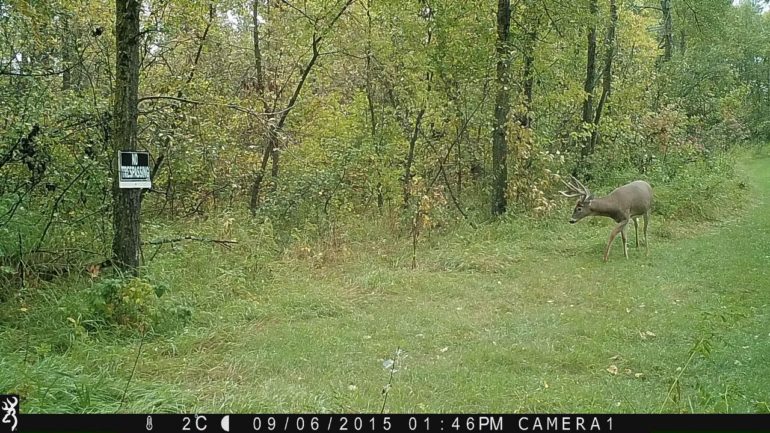
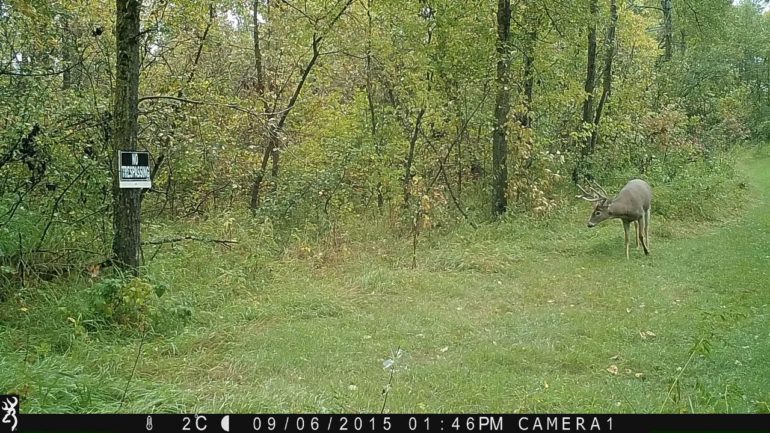
Length is measured as the total distance from where the antler start on the head to the tip, referred to as the main beam. If the length of the right main beam is shorter than the left, or vice versa, estimate the shortest. Antler symmetry is a factor, so an official score sheet will add the actual length of both sides and subtract the difference. Therefore, starting with the shorter main beam eliminates the step of adding and subtracting the inches that are not present on both main beams. To get a good estimate of length you need a picture of the buck from the front (looking at the camera) or top (facing the camera head on, but sniffing the ground). This orientation clearly outlines the main beam, how far it goes out towards/past the ears and will also help identify the shorter one (if any). A helpful second picture is a side profile of the deer’s head on alert (head up). This gives great indication of how far past the nose the main beam goes. The distance from the eyes to the tip of the nose on a mature buck in Alberta is 7”. Visit some mounted deer from your local hunting area and take measurements of this same distance and use it as a reference point. At the end you should have one number – the length of the shortest main beam.
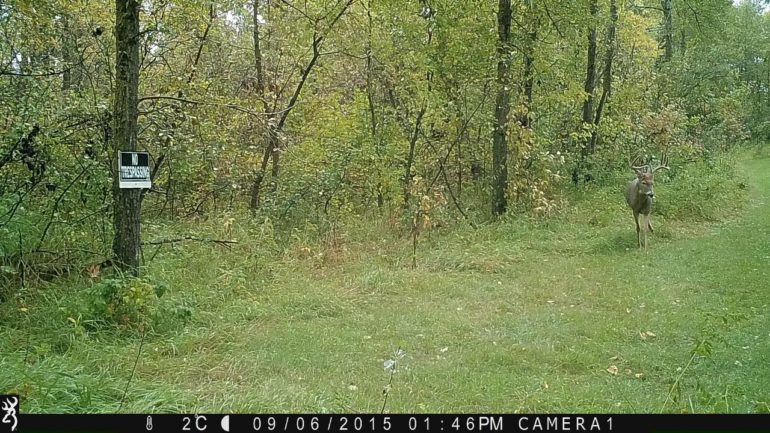
Using the outer distance between the eyes atop the skull as a gauge (6”), I estimated each main beam to extend outwardly 7.5” and then turn back inward 6.5”. Photo also give a clear view of the spread estimated at 19” (6.5 + 6 + 6.5) using the same gauge. Excellent photo to show the difference in the first tine set (G1’s) and to confirm this buck is a 4×4. I estimated the shortest G1 tine at 4”, again with the same gauge.
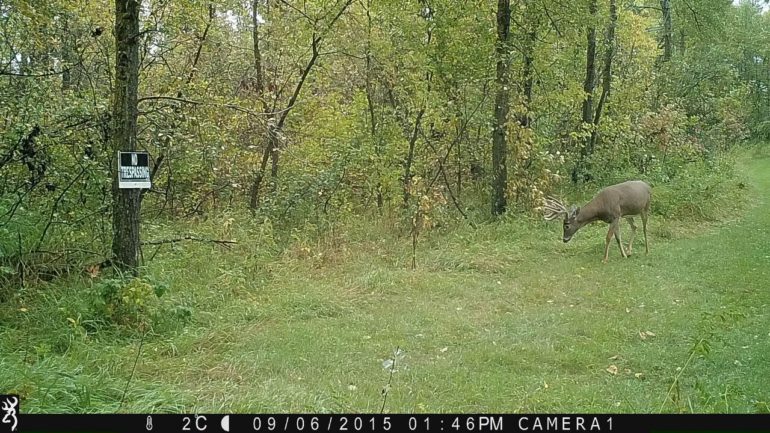
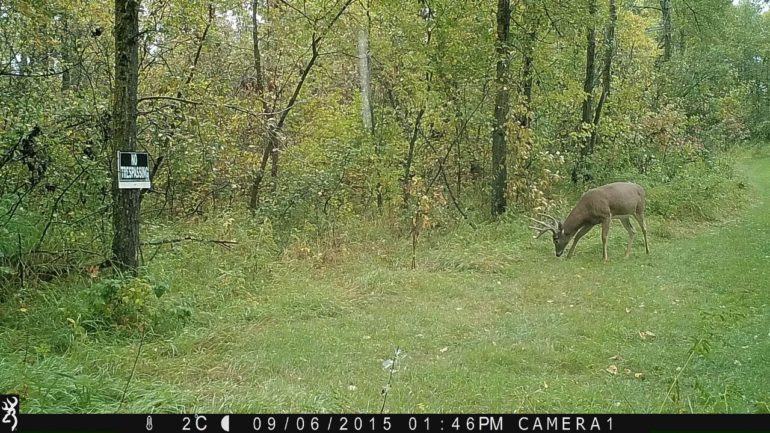
Using the distance from the eye to the snout tip as a gauge (7”), I estimated the middle part of the main beam to be 8”. I also used this picture (and same gauge) to estimate the second tine (G2) at 9”and the third tine (G3) at 7”. Estimated total tine height is 20.5” (9” + 7.5” + 4”). The main beams look very symmetrical but I estimated the right one at 22” (7.5” + 6.5” + 8”).
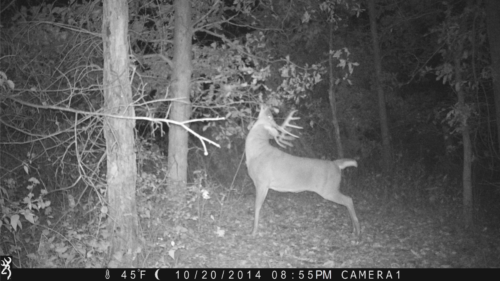
Net typical height is the total length of all tines (points) that come off the main beam, minus any differences between the sets. To begin, choose the first tine (starting from the head) sprouting from each main beam and estimate the length of the shortest one. Then use the same process on the next set of tines, until you are done. If one main beam has more tines than the other, ignore the extra tines. Only measure the typical tines, meaning where you’d expect the buck to have a tine coming off the main beam. You will need as many pictures as possible with the buck looking in all directions with his head held high. Use a reference like the distance from the eye to the tip of the nose to gauge the length of each tine. In the end you should have one number created by adding the estimated length of the shortest tine in each set. For example, if it was a 5×4 typical buck, you would have: (Shortest G1(brow) tine) + (Shortest G2 tine) + (Shortest G3 tine) + 0. Note: The tip of each main beam is not a tine and was already accounted for when estimating the main beam length. Official scoresheets have an excellent visual representation of the tines and their common names (G#).

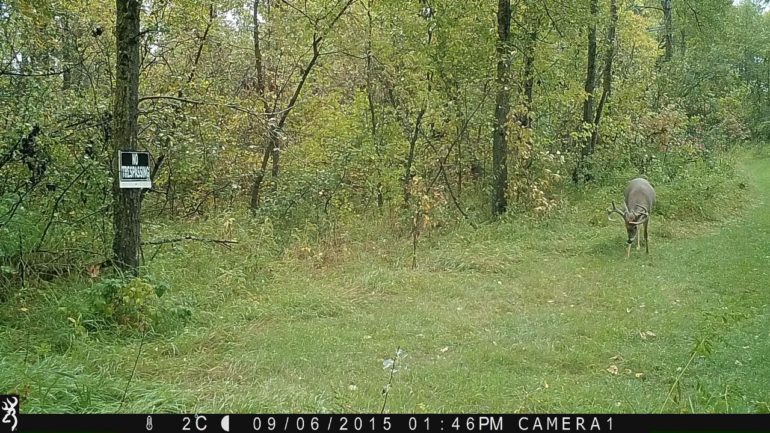
Photo gives a good indication of how many tines are on the antlers. In this case, an even three per side.
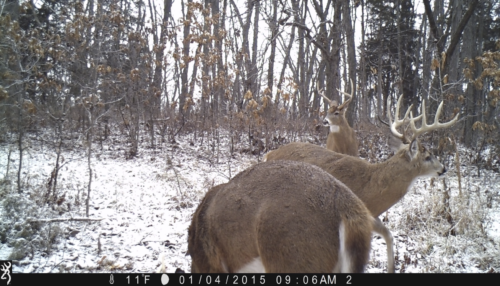
Mass (or thickness) of each antler is measured before each tine sprouts until you reach four measurements. Add those four number together for total mass. Again, use the antler that looks to be the smallest. More often than not I don’t bother with estimating this measurement and just use 18” on mature deer as a baseline. If the deer antlers look really thick, I will add up to 3” and vice versa for skinny antlers. Be cautious of bucks that move during photo capture causing them to appear ‘heavier’ (more mass) than they actually are. Browning trail cameras shoot the fastest shutter speed (even at night), minimizing motion blur and provided crisp photos to estimate mass. I have used both the snout and eye socket as a reference to diameter of the main beam because they both measure around 1.5 – 2”, but like I said, I usually just go with 18” as a conservative estimate.

Unabstracted view of main beam thickness against grass, however this deer is in velvet (which counts). Compare it to the eyeball and snout.
Excellent photo to show symmetry because tine sets. This deer appears to have the same tine length on both the right and left antler.
Spread is the width between the left and right antler. Spread is measured by finding the longest distance between the inside of the right and left main beam. Unlike length, mass and height, spread is only counted once, not twice (for each antler side), therefore it contributes the least towards final score. A really wide 4×4 buck will be most impressive at first glance, but a narrower 5×5 buck should have a better score because it’s far easier to have 8 additional inches by having a forth 4” tine on each side as opposed to 8” between the right and left antler. A picture showing the ears and the buck looking at the camera is great to estimate spread. I have also used the skull as a good gauge to estimate spread.
Once you have estimated length, height, mass and spread, the final number required is the total length of all abnormal points. Any picture you have will help find these hidden deductions. Estimate the length of each one and tally them up to one number for both the right and left antler. If you have more than 15” of abnormal points, it qualifies for non-typical scoring instead of typical scoring.
For your final estimated net score do the following:
- Length + Height + Mass
- Double it
- Add Spread
- Subtract length of abnormal points (if less than 15 otherwise add)
The burst mode on this Browning trail camera took 8 pictures of this buck in rapid succession, providing various camera angles to accurately estimate the buck net typical score at 140”. ([22(length) + 20.5(height) + 18(mass)] x 2 + 19(spread) – 0(non-typical deductions)). I never did shoot this buck, so I’ll never know fore sure though.
An official score sheet is much more precise when it comes to deductions but since estimating the shorter and smaller side of the antlers eliminates those differences (from non-symmetry) immediately.
Remember, score is just a number, it does not consider effort, method of hunting, determination or atmosphere which all contribute to making a deer hunt memorable. Trail cameras are an excellent tool for estimating buck scores before a hunter decides to target that particular deer. I know I still enjoy “if it’s brown it’s down” hunts but I have enjoyed holding out for specific bucks captured on trail cameras that I know will qualify for Pope and Young records book based on the estimating process described above.
By Gord Nuttall
Gord Nuttall is an enthusiastic outdoorsmen and award-winning freelance writer that spends countless hours sorting through Browning trail camera pictures of western big game animals to pursue. Follow all his adventures at www.facebook.com/prostaffgordn