Personal Goals for Deer Season
August 13th, 2017 by BTC Editor
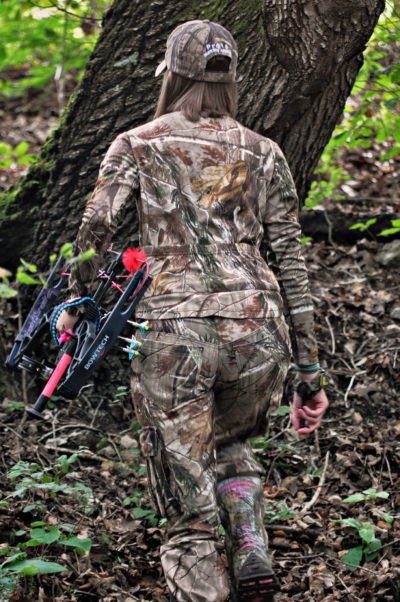
Bowhunters everywhere are anxiously counting down the days until deer season opens. Although it’s exciting, if you’re a serious hunter there’s a lot that goes on before climbing into the stand. Preparation is the key to success in the hunting world. You do so by taking inventory of your deer, making sure you have the right setup and proper stand placements, and providing adequate food sources. This will help to increase your success rate, not just for that specific year, but for years to come. Through the preparation process, you really gain knowledge and respect for the land that, in return, helps shape you to be the best stewardess of the land you can be. Setting personal goals to increase your success helps to make yourself accountable and focused on land management.
For me, preparing for the season at a young age was different than it is for me now. Throughout my years growing up, I would help my dad hang tree stands and prepare for deer season under his wing. It was my chance to observe and learn. I recently moved a couple years ago into a house that had hunting ground that I could hunt and manage as I could. I finally got the chance to try my hand at land management on my own. It was an important goal for me to learn about food plots. I started by taking soil samples and executing how and what I needed to have a successful food plot. This is now an ongoing goal that I am excited to complete every year. As late August approaches, I will be planting a mixture of Triticale, Forage Oats, Winter Peas, Crimson Clover, Chicory, Turnip, and Daikon Radish. This food plot is located in a corner off of a large soybean field, not quite a 1/4 of an acre. It will provide deer with a highly palatable forage source.
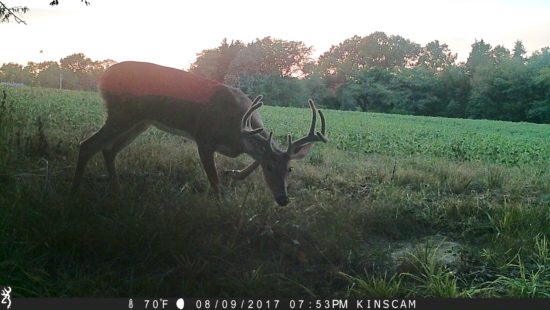
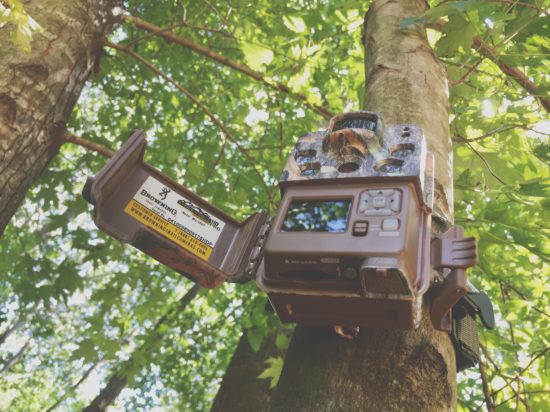
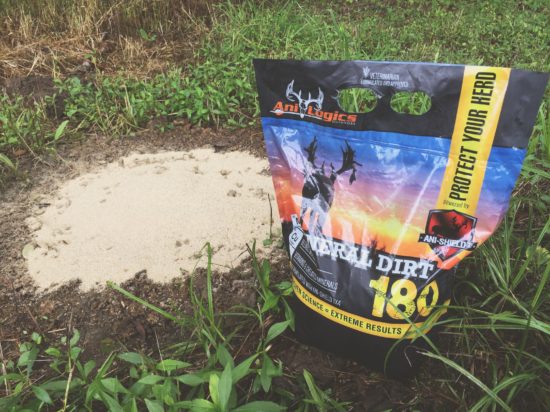
Within these food plots I use my Browning Trail Cameras to take inventory of the deer. During early summer, bucks are in full velvet and still in their bachelor groups. By putting out your cameras early, you can watch the bucks progress and see how their antlers develop. Try to learn their patterns for early season hunting and pay attention to how they are using the land. This is a high priority, and yet something I truly enjoy doing. Study these bucks and get to know them. An attractant can help keep your deer coming back for more, while providing them with adequate supplements and minerals. I use Anilogics Mineral Dirt 180 which has minerals like Copper, Zinc, Selenium, and Manganese to help a deer’s immune system. As the velvet starts to shed completely off, each buck will soon start to go his own way and their patterns will quickly change.
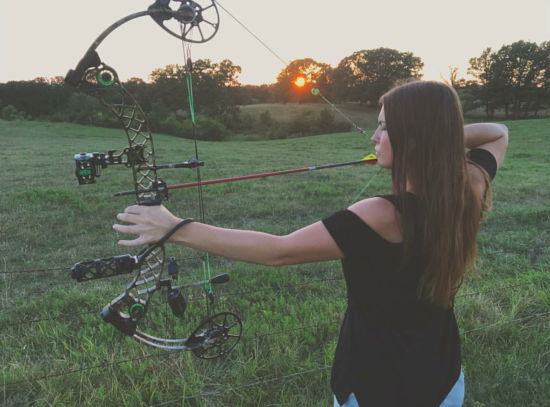
You know, there are so many different ways to manage your land and provide for your deer. I think by actively being involved in all year prepping, you can tremendously grow and learn to become an even more successful hunter each year. After all the hard work has been put in, it’s time to enjoy time in the stand. It truly makes all your hard work and effort pay off when you harvest a mature buck or healthy doe. Myself, as well as thousands of other hunters, are making it our final goal to stock our freezer with lean, organic venison. Shooting your bow as much as you can prior to deer season will help give you the confidence you will need in the stand. It’s a year-round cycle of preparing, planning and executing, and it never gets old!
Kinsey Edmunds is a pro-staffer from Missouri. Being raised on a farm and surrounded by wildlife, her love for the outdoors began at a young age. Kinsey enjoys bowhunting whitetails, turkeys, hogs and gators, just to name a few. She is also a team member of Huntress View, a team dedicated to strengthening the ever-growing community of women hunters.
Homemade Venison Jerky Recipe
July 2nd, 2017 by BTC Editor
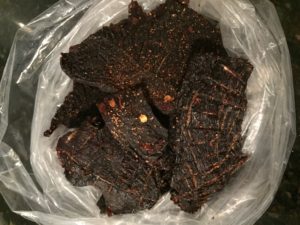
Making homemade jerky is a simple way to preserve excess meat, and when done correctly, can be stored 1-2 months. Depending on the ingredients used, it can serve as a healthy, high-protein and low-carb snack—perfect for training for upcoming hunts or while in the mountains hiking or hunting.
Below is the recipe I use. Ingredients are approximations, and can be adjusted based on individual preferences.
Ingredients:
- 3 lbs. venison meat (can also use elk or other meat)
- 2 cups teriyaki
- ¼ cup soy sauce
- ¼ cup brown sugar (dark or light is ok)
- 1 heaping tablespoon minced garlic
- 1 tablespoon Cajun seasoning
- 1 tablespoon dried and crushed hot peppers (such as cayenne, jalapeno or habanero)
Instructions:
- Slice meat into 1/8”-1/4” slices using meat slicer
- Combine all ingredients (except meat) in small pot, mix well and heat over a low heat just enough to dissolve the sugar
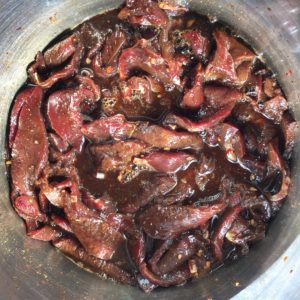
- Add meat to liquid mix, one piece at a time, ensuring all pieces are thoroughly coated
- Place meat and all liquid in Ziploc bag and refrigerate at least 4 hours (I prefer overnight for a stronger flavor)
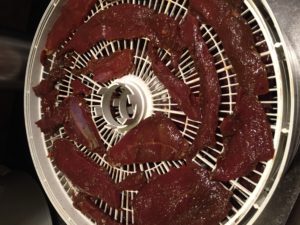
- Place slices of meat on dehydrator racks, making sure not to overlap any of the pieces
- Let dehydrate for 7-8 hours at 155°F
- Remove from dehydrator and store in plastic Ziploc bag
Additional information:
- 3 lbs. of raw meat yields approximately 1 lb. dried jerky
- Many people use a jerky gun, but I prefer making jerky with sliced meat instead of ground meat. I have a restaurant-quality meat slicer, but good slicers can be purchased at Bass Pro or Cabela’s.
- Sugar can be omitted for a lower-carb recipe; can also substitute a can of crushed pineapple
- Cajun seasoning and hot peppers can be omitted if you prefer non-spicy jerky
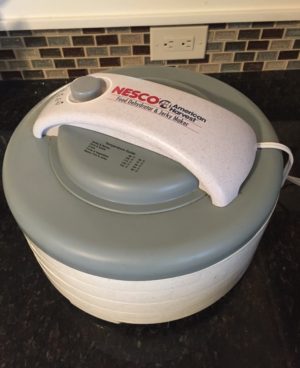
- I recommend the Nesco American Harvest Dehydrator, available for purchase on Amazon. I purchased this in 2009 and have used it for multiple batches of jerky every year, as well as for drying fruits and veggies in the summer. It comes with four dehydrator racks, and more can be purchased separately.
This is our go-to recipe, but would love to hear your jerky recipes. Please comment with your favorite recipe, or any tips you have for making jerky.
Sarah Honadel is an avid outdoorswoman from Kentucky, now living in Idaho, who enjoys hunting turkey, deer and elk. She is a Team Member at Huntress View and Brand Champion for ReelCamo Girl, two organizations that work to support, encourage and empower women in the outdoors. Follow her on Instagram @waddysarah and @arrowridgecreations.
5 Summertime Trail Camera Tips
May 21st, 2017 by BTC Editor
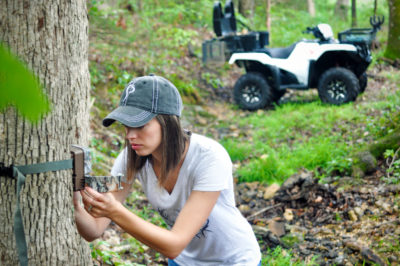
1- Summertime is when most hunters get their trail cameras out of storage and hang them to start taking inventory of their whitetail herd. It’s also a great time to take inventory of your trail cameras. Make note of how many you have, how many more you may need for the upcoming season, and also keep a list of each camera model and serial number in the rare case of theft. It can, and does, happen so keeping a record of this could help get your cameras back eventually if they do get stolen. Browning Trail Cameras also has a Security Box that makes it more difficult for thieves to take your cameras, if even at all.
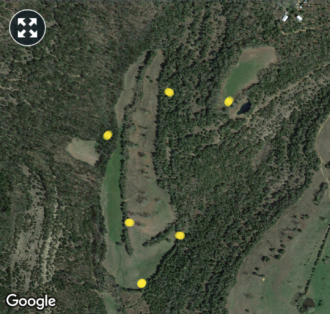
2- Look at an aerial map of your hunting property beforehand so you have a good idea of where you’d like to hang your cameras. This way, you’re not driving or walking all over your property, disturbing the game and working up a sweat. If you have a weather app on your phone you can easily locate your property via the radar portion of the app. If you don’t have that, Google Earth is what I recommend. It’s probably a good idea to take a screenshot of your property and from there mark where you are placing cameras using the paint/draw tool on your phone in case you forget where you hung the cameras later on.
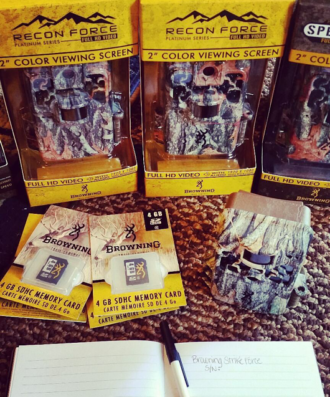
3- Summertime is obviously hot, even first thing in the morning, so in order to be out in the heat as little as possible it’s best to have everything ready to go before you head out. Have your trail cameras already set up with the correct date/time/camera settings, full with batteries and the SD card in so all you have to do is hang them, turn them on, and go!
A Browning Trail Camera feature that really helps get your camera positioned quicker is the viewing screen on some of the camera models. (See photo below.)

4- Everyone has their own system for transferring and storing trail camera pictures to their computer. I like to stay organized from the start by putting my SD cards in 2 separate cases – one for blank SD cards, and one for full SD cards – and then loading the pictures to my computer once I’m home. A baggie works just as good, just make sure you label each one to avoid confusion. Some prefer to bring a laptop and transfer the pictures there in the field, but I like to get in and out as quickly as possible and this works best for me.

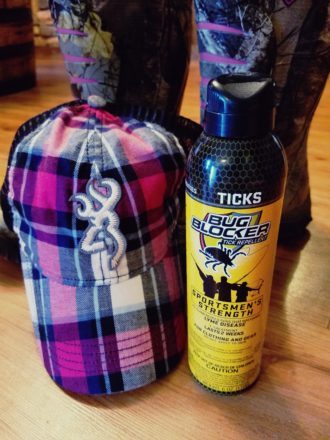
5- Last but not least, don’t forget the tick spray! So far this year has been one of the worst I’ve seen for ticks. Using a tick spray with Permethrin has worked well for me. Spray down your clothes and boots and make sure they’re dry before putting them on. You do not want this on your skin! For those worried about scent control, this kind is supposedly odorless once it dries. My nose is of course nowhere near as good as a whitetail’s, but I don’t smell it at all once it’s dry and would prefer to be tick free over scent free anyways, so to me it’s worth it. It also doesn’t hurt to spray it on some of your trail cameras to avoid ant infestations, which are very common in the summer months.
By Andrea Haas
Andrea Haas is a Pro-Staffer from Missouri who enjoys hunting deer, turkeys, and upland birds. She is also the founder of the Huntress View, an organization formed to help strengthen the ever growing community of women hunters
4 Reasons to Start Hunting in 2017
January 29th, 2017 by BTC Editor
When making your list of New Years resolutions for 2017, I hope plenty of you have added “hunting” to the list of things you’d like to check off this year. Whether it turns into a life-long passion or something you decide may not be for you, I’m sure either way you will walk away a better person from the experience. Here are 4 positive things you can expect to happen from giving hunting a try.
Healthier Lifestyle
Almost everybody makes it a New Years Resolution to become healthier in the coming year, and being a hunter can help you reach that goal! Aside from the fact that the meat from the animals you harvest will be organic, leaner, and free from man-made intervention, most hunts require a good amount of physical activity as well. So you’re getting your exercise in while you are obtaining a healthier form of food. It’s a win-win!
Strengthen the Economy
You may not necessarily feel that you alone can help contribute to this, but check out this statistic: According to the National Shooting Sports Foundation (NSSF), hunting has generated 600,000 jobs in the United States. That’s a HUGE number. And just think, the more you and others hunt, the more purchases you will make within the hunting industry that will help that number continue to grow!
Conservation
If there is one thing that hunters and non-hunters can agree on, I feel it’s the fact that we all want to ensure that nature and wild animals will be around for future generations to enjoy. You can help contribute to that through hunting. Check out these excerpts from the NSSF Hunter’s Pocket Fact Card about how hunters contribute to conservation:
“License Revenues fund nearly half the budget, on average, for state fish and wildlife agencies. The money supports wildlife management and restoration programs, habitat improvement and general conservation efforts.”
“Excise Taxes on sporting equipment (such as firearms, ammunition and fishing tackle) provide more than one-fifth the revenue for state fish and wildlife agencies. The funds are used to acquire, maintain and improve wildlife habitat and to make the nation’s lands and waters more accessible and enjoyable to all its citizens, sportsmen and non-sportsmen alike.”
Allison Stegmann, Huntress View team member
“Hunters and anglers provide more than 75% of the annual funds of the 50 state conservation agencies. Sportsmen are clearly the largest contributors to conservation, paying for programs that benefit all Americans and all wildlife.”
Character Building
I have been hunting for years now, but I still remember how I felt after my very first whitetail hunt and what I learned from it. I remember climbing up in the tree and seeing 3 does walk underneath my treestand. At the time I didn’t want to shoot anything, I just wanted to observe them, and I’m glad I did. Just watching them in their natural environment, not having a clue that anyone else was there, was quite the experience for me.
That day I learned to appreciate several things: Having land to hunt on, having the ability to get out and go hunting in the first place (which I feel a lot of people take for granted), and for life itself. While hunting can be very difficult, I realized how easily I could have taken one of those does with my rifle that day, had I wanted to, and it just made me have a new found respect for wildlife.
If you’ve been thinking about hunting for a while but haven’t taken the leap yet, please give it a try this year! There is always something positive that one can take away from hunting. I encourage you to see how it can help change you for the better!
By Andrea Haas
Andrea Haas is a Pro-Staffer from Missouri who enjoys hunting deer, turkeys, and upland birds. She is also the founder of the Huntress View, an organization formed to help strengthen the ever growing community of women hunters.
Late Season Trail Camera Placement
December 11th, 2016 by BTC Editor
As deer season is winding down and will soon be coming to an end, now is the perfect time to re-position your trail cameras and change your game plan for hunting late season whitetail bucks. As the seasons change, so does a whitetail’s pattern as they shift their focus from the rut to food once again. Here are a couple of tips on trail camera setup and placement to help you get the most out of your cameras before deer season closes.
Camera Location: Pinch Points and Travel Corridors
While I move most of my cameras to new locations post-rut, I still like to leave one or two at prior locations like pinch points, known deer trails and travel corridors to catch any bucks that may still be out cruising for does. As the fawns come into estrous late in the season, often referred to as the “Second Rut”, these locations are great for catching buck movement in the daylight. It appears to me that is exactly what is going on in the next series of pictures.
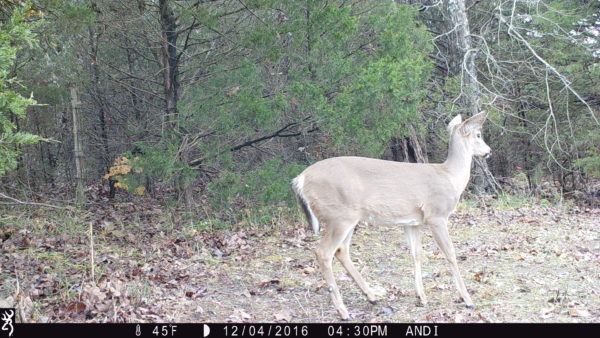
![1632:120416:45F:0000:ANDI :2E[097:0494]G[024:0x0016]](http://btc-omrc.com/wp-content/uploads/2016/12/IMG_0047-e1481494823717.jpg)
![1700:120416:45F:0000:ANDI :2E[099:0453]G[024:0x0016]](http://btc-omrc.com/wp-content/uploads/2016/12/IMG_0069-e1481496091319.jpg)
![1704:120416:45F:0000:ANDI :2E[097:0494]G[024:0x0016]](http://btc-omrc.com/wp-content/uploads/2016/12/IMG_0089-e1481496451232.jpg)
My Setup
- Camera: Browning Strike Force
- Mode: Burst Mode, 4 shots
When placing my cameras at the above locations, I like to set them up on burst mode to make sure I don’t miss any deer activity. For example, say I had my camera set up to take a picture every 5 seconds, but in normal mode. If this buck would have been trailing this fawn right on its tail, I may not have gotten a picture of him. In burst mode the camera takes several images, one after another, before stopping to reset.
Camera Location: Food Sources
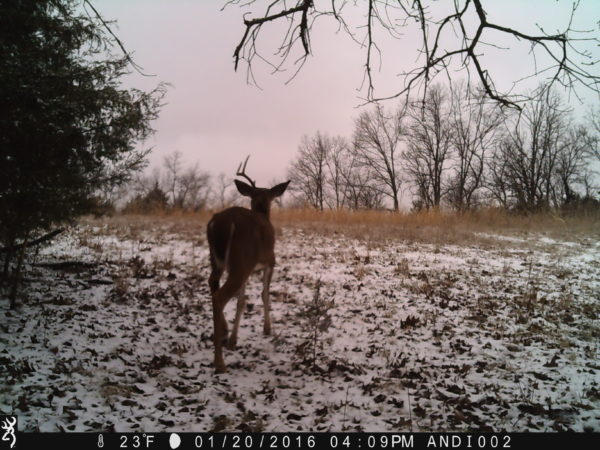
Moving trail cameras to the remaining food sources is a good strategy for late season scouting. By now most of the acorns have either rotted or been eaten, so I like to move more of my cameras from the woods to our food plots in the fields. We have a couple of fields planted in winter wheat, clover and chicory, and another one planted in turnips. These have proven year after year to be the hot spots on our property for hunting late season bucks, and this year is no different! After checking my cameras this weekend, this buck has shown up in the daylight hours almost every day in one of our wheat and chicory plots.
![1440:120616:52F:0000:HAAS :2E[142:0070]G[008:0x0006]](http://btc-omrc.com/wp-content/uploads/2016/12/IMG_0578-e1481470633184.jpg)
![1615:120816:29F:0000:HAAS :2E[140:0076]G[008:0x0006]](http://btc-omrc.com/wp-content/uploads/2016/12/IMG_3681-e1481497272261.jpg)
My Setup
- Camera: Browning Strike Force
- Mode: Timelapse Mode
The Timelapse mode on my Browning Trail Cameras is perfect for watching bigger open areas, like our food plots. For the most part, we know where our deer are entering this field, which is why I put this camera where I did. But, deer will often be in that same location and you’d never know it because they are too far away to trigger the camera. Timelapse Mode solves that problem since it can capture game at 200+ yards away. Plus, you can easily view a full day’s worth of pictures in just minutes, thanks to the Buck Watch Timelapse Viewer Plus software that is included with every Browning Trail Camera.
If you still have a deer tag you’re trying to fill, utilize your trail cameras as best you can. They are a deer hunter’s most valuable scouting tool! I shot my biggest buck to date on the last day of Missouri’s 2014 archery season as he was making his way into our turnip plot. Had I not been watching and patterning him with my trail cameras, I may have picked a different stand in that food plot and missed my chance at him.
Aside from avoiding tag soup, there are other benefits to keeping your trail cameras out during late season. Use them to help take inventory of what deer survived the season, determine your buck to doe ratio, and age of your deer. Looking over this season’s pictures, as well as pictures from prior season, will help you determine your game plan for next season. Another benefit to keeping your cameras set up so late in the year is to aid with shed hunting. Once you start getting pictures of bucks dropping their antlers, you’ll have a better idea of when and where to start looking for sheds.
Deer season isn’t over until it’s over, so if you’ve already taken down your game cameras for the year, I recommend getting them back out! The above late season trail camera locations and setups have helped me fill my deer tags in the past. Even if I don’t fill my archery tags this year, I have already gained some valuable information to carry over into next season, thanks to my Browning Trail Cameras!
By Andrea Haas
Andrea Haas is a Pro-Staffer from Missouri who enjoys hunting deer, turkeys, and upland birds. She is also the founder of the Huntress View, an organization formed to help strengthen the ever growing community of women hunters.
Taxidermy: Caring For Your Animal Pre-Mount
November 6th, 2016 by BTC Editor
As hunters and huntresses, we sometimes harvest that special animal that may be a first, a big buck, big fish, or beautifully plumed bird to get preserved and hang on the wall as a trophy. When you have that trophy in hand, what are the next steps to take to make sure it is properly cared for until it is safely in the hands of the taxidermist, and how do we care for the mounts when we get them back?
Growing up in a taxidermy family, I have seen everything from freezer burns and premature decay to faded and bug infested mounts. The care of an animal before and after it is mounted is key in keeping it beautiful for many, many years.
One of the first and very best things you can do before going afield is research taxidermists in your area and find one you are comfortable with. Most taxidermists will welcome you into their shops and showrooms that showcase their work. Talk to other hunters and find out what taxidermists they recommend. Do not go with the cheapest option because the mount will more than likely be poor quality. Bottom line, you’re going to get what you pay for.
Before the animal is mounted and before you are able to get it to the taxidermist, proper storage in the freezer is crucial to producing a good mount. Freezer burns are a common result of improper packing. On the other end, not getting the animal in the freezer soon enough can result in premature decay.
Mammal, bird and fish taxidermy are very different, so the way they are taken to the taxidermist will be different. When you collect any mammal, the first thing to know for field care is to avoid dragging the animal if at all possible. There are many tools/equipment out there to help you transport your animal. The second thing to know is to keep the animal cool until you can get it skinned or to the taxidermy shop no matter what kind of animal it is. Always consult with the taxidermist before skinning it. The quickest way to ruin a trophy is to skin it wrong. You may also want to wash off any excess blood or body fluids prior to freezing. The third thing is get it to the taxidermist as soon as possible. Carting a deer around is a bad idea, but a coyote or fox is an even worse idea. As nature rapidly takes it course, bacteria starts to grow as soon as the animal dies and the skin will start ‘turning green’ or rotting.

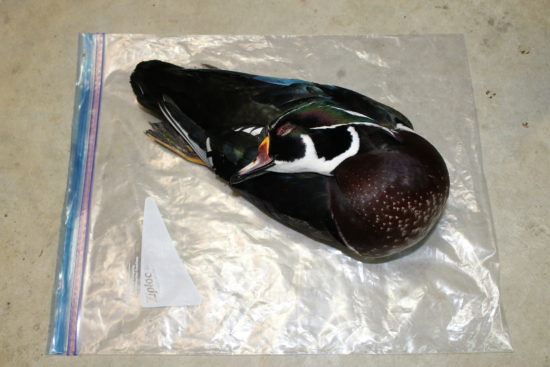
Birds will be put in the freezer exactly like they were shot. It’s not necessary to do any kind of skinning, so don’t take any of the meat or entrails out. The proper freezing position is to put the head on the chest of the bird and wrap it in a couple garbage bags and tightly seal it. Freezer Ziplock bags are also something good to use. Be careful to not bend or twist tail and wing feathers. One common misnomer is to put a bird in nylon hose and wrap it in newspaper. Many taxidermists cringe when a bird is brought to them inside a hose and even worse wrapped in newspaper. Newspaper will begin the process of dehydration and promote freezer burn, making the taxidermists job more difficult. Once you get a properly wrapped bird in the freezer, call your taxidermist and make arrangements to take it to them.
Fish have a completely different scenario than mammals and birds. The very first thing you should do when you pull the fish out of the water is take good quality, clear pictures of it. Take an overall profile picture and make sure to get any special markings or colors you want the finished mount to have. If you’re going to release the fish, measure it from the tip of the nose to the tip of the tail and the girth all around the body of the fish. If you are keeping the fish, do not skin or gut it and don’t put it on a stringer if you don’t absolutely have to. The best place to keep it is in a cooler or live well until it can be put in a freezer. When you’re ready to freeze it, get a wet t-shirt or towel and roll the fish in it. Wet towels or shirts are key in protecting the fish from freezer burn. Never use newspapers or paper towels. Put the wrapped fish into a trash bag and seal it tight. If you need to, double bag it. If it’s possible, freeze it on a flat board.
Try to have an idea of the position you want your animal mounted in. It will be that way forever. The taxidermist may be able to provide some ideas of positioning, but to avoid delays it is best to know what you want ahead of time.
When you see your mount for the first time, the memories come flooding back. You want it to look like that forever right? When placing your mount in your home, the best thing you can do is to keep it out of sunlight to prevent colors from fading and keep it dusted. Just like anything else sitting on the shelf, it will collect dust. Consult with your taxidermist about what is best to use for cleaning your particular mount. For fish and birds, a feather duster is most likely to be recommended along with never using any chemicals, as they will build up over time and cannot be removed. Dusting also applies to deer, however, some hair care type products are available.
Hopefully these tips will aid you in the process of preserving that special animal you were able to harvest, and to keep the memories of a hunt alive for years to come.
By Allison Stegmann
Allison is an avid waterfowl hunter from Iowa. She is currently a student at the University of Northern Iowa studying Leisure, Youth, and Human Services with an emphasis in Outdoor Recreation. Allison is also a member of of Huntress View, a team dedicated to strengthening the ever-growing community of women hunters.
What’s In Your Hunting Pack?
October 30th, 2016 by BTC Editor
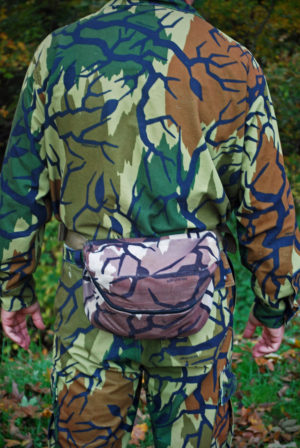
In two days, a couple buddies and I are heading to Pike County for a four-day bowhunting trip… No, not THAT Pike County, but it’s close. In fact, it’s right across the river from it. Both my pals are fairly novice bowhunters, and this is the first full season for one of them. Seeing as how I’ve been on several 10-day, DIY excursions to Colorado chasing my beloved wapiti, they’re leaning on me heavily to provide guidance as to what to bring. It’s actually not that uncommon a question from even veteran bowyers, as I see the “What’s In Your Bag?” query on the bowhunting forums quite often.
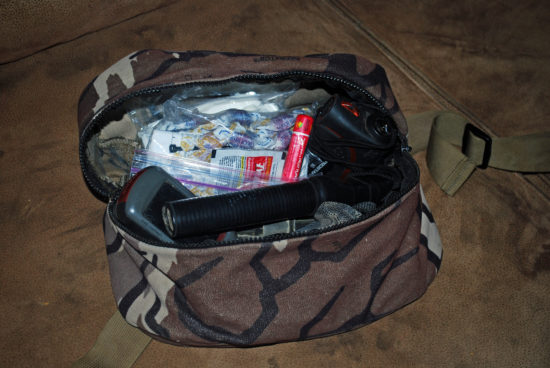
After well over a couple decades’ worth of bowhunting, with most of that time consisting of over 100 stand sits annually, I’ve definitely settled on a list of “must-haves” as well as items that have found their way into and out of my fanny pack. I’ll break down below exactly what I carry with me, and the use for each item.
- A small Ziploc bag (for weather protection) holding a good amount of toilet paper, plus hunting licenses. Also included in this bag are small zip ties for affixing the licenses to the deer’s back legs, a tube of chapstick (seems my lips are prone to drying out on windy days while on stand), and a handful of cherry cough drops (nothing worse than getting that tickle in your throat when you’re set up within 100 yards of that big buck’s bedding area!). I also put a nice lensatic compass in the bag, to keep the glass lens from getting scratched all up by the other items in my pack.
I’ll give you a tip about the toilet paper before moving on… I carry quite a bit of it with me, and obviously you probably realize one of its primary purposes. But I also lean on it just as heavily when tracking a deer at night by propane lantern. I tear off little half-squares and place every couple feet along the blood trail I’m unwinding… it’s remarkable how you can hold up your lantern and see those white squares trailing off into the blackness, and they’ll really help you get a “line” on the direction the deer’s traveling and where to look for next blood if you’re having difficulties. An added bonus is that when you’re done, you don’t have to go back and retrieve all of them — just let the next rain dissolve all of them for you.
- A mini-mag flashlight… the triple-battery version. I often end up in hairy places after dark I’ve never been through before, and I like to see what I’m trying to wade through – be it thorn bushes or a small creek. The version I like to carry just fits into my fanny pack from end to end, and utilizes three “AA” batteries.
- A headlamp. Sometimes, I’ll opt to turn my cap around backwards and slap on the headlamp. It’s especially helpful when I’m assembling my stand at the bottom of my tree after I get down in the pitch black, or when I’m gutting a deer after dark.
- A Leatherman multipurpose tool, the small kind. It contains a three-inch knife blade that I’ve used to gut over 50 deer, antelope and elk with. And on the off chance I need a pair of pliers, they’re included too.
- Limb saw… to trim shooting lanes with, and more importantly to cut off small branches on the tree I’m going up with my climber.
- My pull-up rope. I bought a commercial one with the plastic swiveling ends and hooks on it, cut those off and attached those to 30’ of parachute cord. Packs much tighter than the commercial one I bought.
- Rattle bag. I’ve got a very nice set of real rattling antlers that sound awesome, but they’re a pain to carry all the time. My rattle bag fits nicely inside my pack and is always there from the third week of October until December.
- Bleat can. I can’t attribute any single deer to coming in to the can call, but I’ll mix it into my rattling sequences any way; the hope is it’ll sound like the estrus doe that the two bucks are fighting over.
- True Talker grunt tube. This has accounted for more deer riding home with me than any other single piece of equipment.
- Ninety percent of the time, my shot opportunities are limited by heavy undergrowth and are 30 yards or less. Every once in a while though, I’ll sit a field edge where the rangefinder comes in handy.
- Diaphragm turkey call in a clear case. Archery deer tags come with two turkey tags included, and I won’t pass up an opportunity to call to a passing flock. I’ve got a wall-full of turkey fans above my desk that were all taken with my bow in deer season.
- Extra release. In case I leave my main one at the truck or it falls out of the tree for some reason.
- Four bow hooks. My bow goes on one above my left shoulder, and my fanny pack hangs from one around seat height on the same side of the tree. The other two are spares.
- A Kwikee Quiver caddy with my Octane quiver holder attached. I screw this into the left side of the tree, and affix my quiver upside-down so if I shoot and need to reload quickly, I simply reach behind me without looking and pull another arrow out.
- A hand-held Magellan GPS. This is a recently new addition to my pack, and one that I’ve come to value. I shoot a lot of deer just before dark as evening hunts comprise 98% of my trips afield (I’m just not a morning person). Usually, by the time I recover the deer and head back to my vehicle to get my game cart, it’s pitch black once I return to the scene of the crime. Having marked where my deer is laying via the GPS sure does make it a whole lot easier once everything looks completely different in the dark – and a whole lot easier to get out of the woods.
You could ask me any day of the year, and that’s what I’ll have in my fanny pack. It’s the main component of a system that I’ve fine-tuned for over 20 years of bowhunting, and it’s what enables me to grab my gear extremely quickly when I get home and be on my way to the woods in just a few minutes. I’m never scrambling around looking for this item or that; I simply know exactly where everything I need is.
Now, if it was only that easy to know where that big buck was…
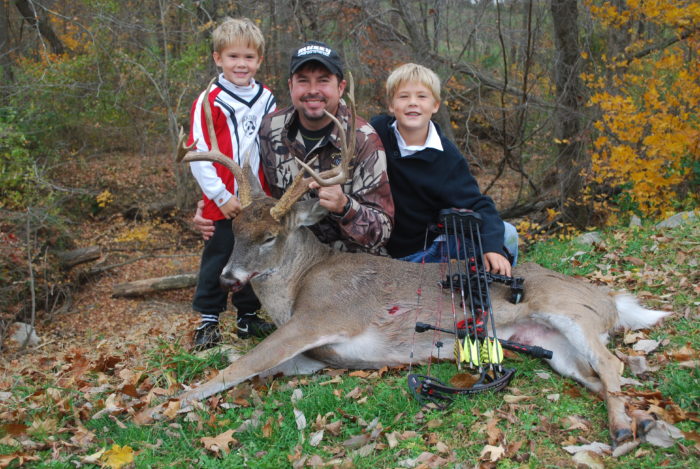
Greg Staggs is the former back-page columnist for Inside Archery, and his writing regularly appears in such magazines as Outdoor Life and Petersen’s Bowhunting. Staggs loves introducing his two boys to all things outdoors, including fishing, trapping, canoeing and camping, and has been chasing turkeys and big game exclusively with archery equipment for over 20 years.
Early Season Bowhunting Tactics
October 2nd, 2016 by BTC Editor
By Greg Staggs
I turned and idled gently up the drive, palms getting clammy even as my breathing became shallower. Easing my truck to a stop, I quietly reached down and turned off the ignition and allowed the silence to envelope me. Going over my planned routine seemed to settle me a bit, and I took one last deep breath and opened the door. I had been thinking about this moment for weeks and it was finally here. Sliding off my seat, I walked as confidently as I could up to the door, knocked and asked if my date was ready.
First dates in high school probably provided as much nervous anticipation as anything I would experience for the first part of my life… until I started bowhunting. Today, I still idle gently into my parking spot. My palms may not be as clammy, but my senses are definitely heightened as adrenaline courses through my veins, thinking about the possibilities, the “what-ifs”… And my planned routine? It’s down to a science.
Chasing whitetails across the Midwest in September and October is truly a love of my life these days. Here are three things that have become a part of my routine that’s led to years of punched tags and filled freezers early in the season.
- Scout with a light footprint. Amazingly enough, I don’t spend a lot of time in the woods in the summer. Most of my whitetail hunting is done on public land with miles of corn and soybeans backing up to the woods. I’ve spent many a night tucked into a fence row on the opposite side of a field glassing to identify which corners the deer are using to enter the fields.
- Stay away as much as possible. If I can place a trail camera there on one visit and retrieve a card from it a month later, it’s harder for the deer to pattern me but I’m gaining valuable reconnaissance the whole time I wasn’t there. Taking it a step further, even my trail-camera placement leaves little presence. Ever walked into the woods and noticed a camera staring at you at eye-level? It can be obtrusive and stick out like a sore thumb. I’ve had deer think the same thing; I can tell by their reactions I’ve captured. A lot of times these days – especially on public land – I’ll take a lightweight climber with me and angle my camera down from twelve feet or so. It also keeps honest people honest, as my Dad used to say.
- Hunt with a light footprint. The first couple months of archery seasons in the Midwest can be downright hot. Deer don’t like to travel any farther than they have to, which means they’ll often bed less than 100 yards inside the woodline. If you plan to dive deeper in the woods this time of year, plan on bumping some deer. I’d rather sneak in and out of the edge a few times than blunder up once and alert every deer in the woods to your presence – especially a full month ahead of that magical November time-frame.
Greg Staggs is the former back-page columnist for Inside Archery, and his writing regularly appears in such magazines as Outdoor Life and Petersen’s Bowhunting. Staggs loves introducing his two boys to all things outdoors, including fishing, trapping, canoeing and camping, and has been chasing turkeys and big game exclusively with archery equipment for over 20 years.
Ken Haas of Whitetail Freaks – 9/11 Interview
September 11th, 2016 by BTC Editor
BTC: Do you recall where were you and what you were doing on 9/11 when you heard about the terrorist attack? What type of impact did those events have on you as you watched them unfold?
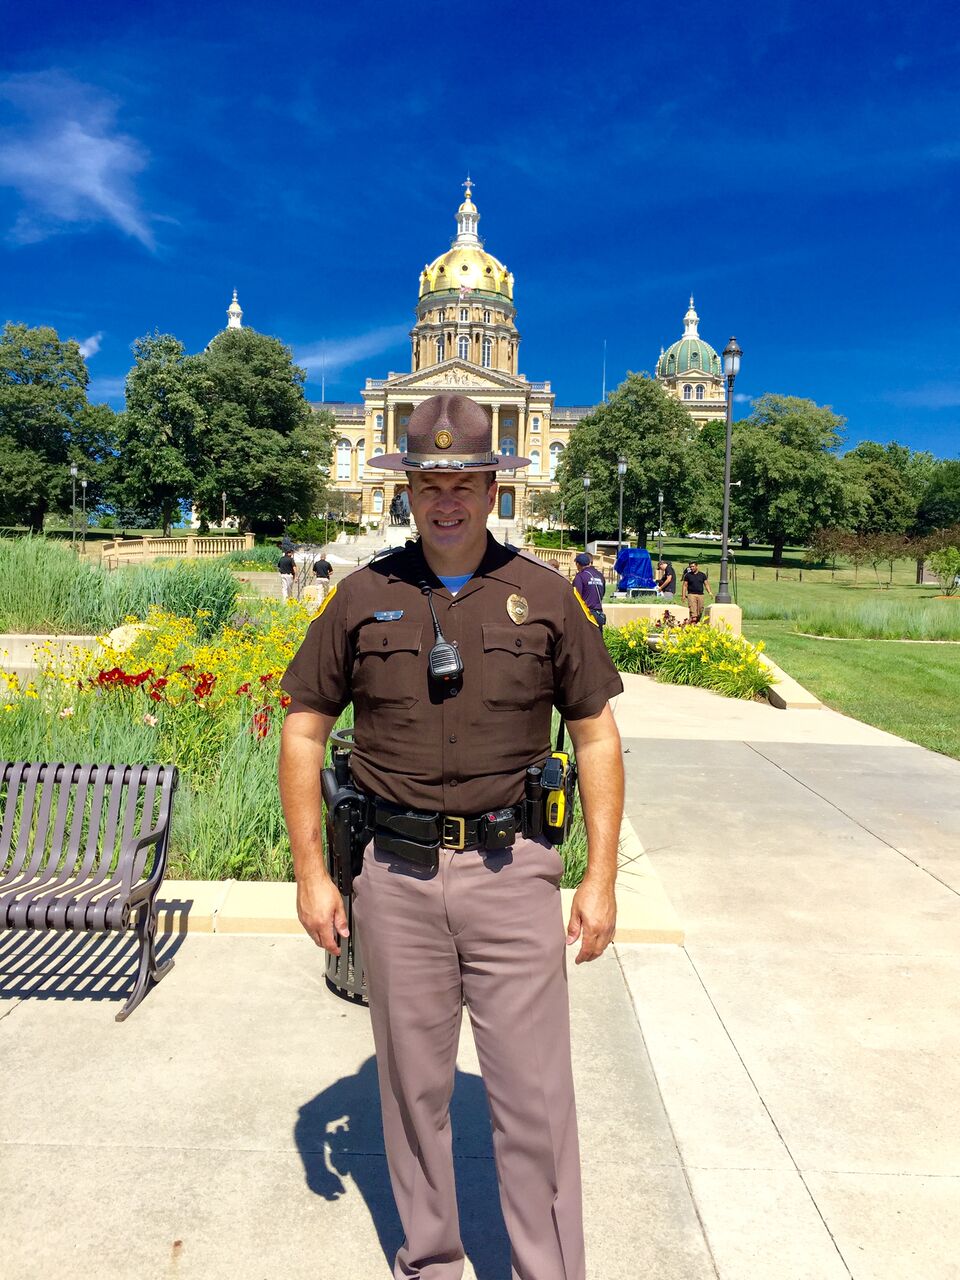
KEN: I was sitting in a grocery store in Council Bluffs, Iowa eating breakfast with two other Troopers while the news was on. We all watched in utter disbelief as the second plane hit the tower. All of us there were prior military and we all had the same gut wrenching feeling that we were under attack and felt very helpless watching the entire event unfold. I remember that day being very quiet and the airways going quiet as all air traffic had been grounded. Living equal distance from Offut Air Force Base and Omaha Eply Airfield it was eerily quiet. It was a huge surprise to see a plane I knew well fly by, that being Airforce one descending into Offut Airforce Base, which was no doubt bringing the President to the center of the country for safety.
As our soldiers continue to fight overseas, it is our job as Peace Officers to protect our country’s border to border against foreign and domestic terrorists. Extremist groups are a constant threat and the uniformed officer, sometimes referred to as “The Thin Blue Line”, are without a doubt this country’s greatest assets when preventing, disrupting and deterring future acts of violence and terrorism.
Few people know that terrorism is funded in part by the sale of drugs. The exploitation of the United States and its unfortunate appetite for elicit and illegal drugs is problematic when we spend billions of dollars on heroin that has been imported from overseas. I mention heroin first because of the horrible impact it has on our people, but I do not disregard the impact of the other drugs that are imported as well. As you start to see the larger picture of what is happening, you will understand that the facts of our purchasing these illicit drugs is devastating. That same money used from the sale of drugs will then go back into the pockets of terrorist organizations, allowing them to continue to fund their attacks on the United States and the rest of the world.
As with anybody that watched the unfortunate events unfold on September 11th, that day will never be forgotten. The loss of life, the bravery of the firefighters, the police and other EMS personnel, their memories will not be forgotten. It has been my experience that no matter how bad the tragedy, there is always something to be gained from it. In this case, understanding what funds terrorism and that the profit has cost the world thousands of lives lost unnecessarily, has fueled my motivation and the motivation of many others. The world’s worst criminals are the most vulnerable while they are in transit. By intercepting them we are able to make the biggest impact where we can.
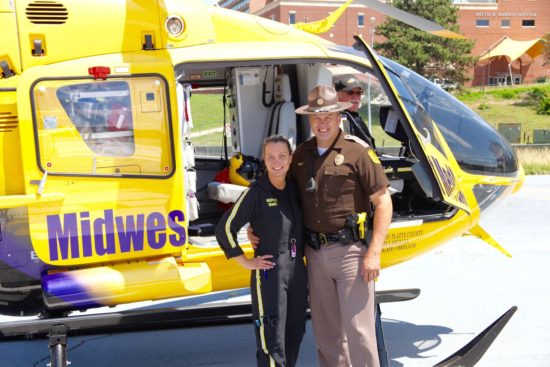
Ken and his significant other, Malissa Driver. She’s a flight nurse and they are a family committed to public service.
There are many other stories like mine and my arrest of the terrorist suspect (see newspaper article below) that never see the light of day for security reasons, but rest assured uniformed and plain clothed officers are out every day doing their best to ensure that these major criminals do not travel freely to commit acts of violence throughout the country. I also take great pride in educating police officers from every type of policing agency across the country in criminal and terrorist apprehension training. I have instructed for more than 10 years in the state of Iowa, educating our officers and working for a private program called Desert Snow. I have traveled to almost all 50 states and shared what I have learned with thousands. I also take great pride in hearing about the success stories from the officers following the training.
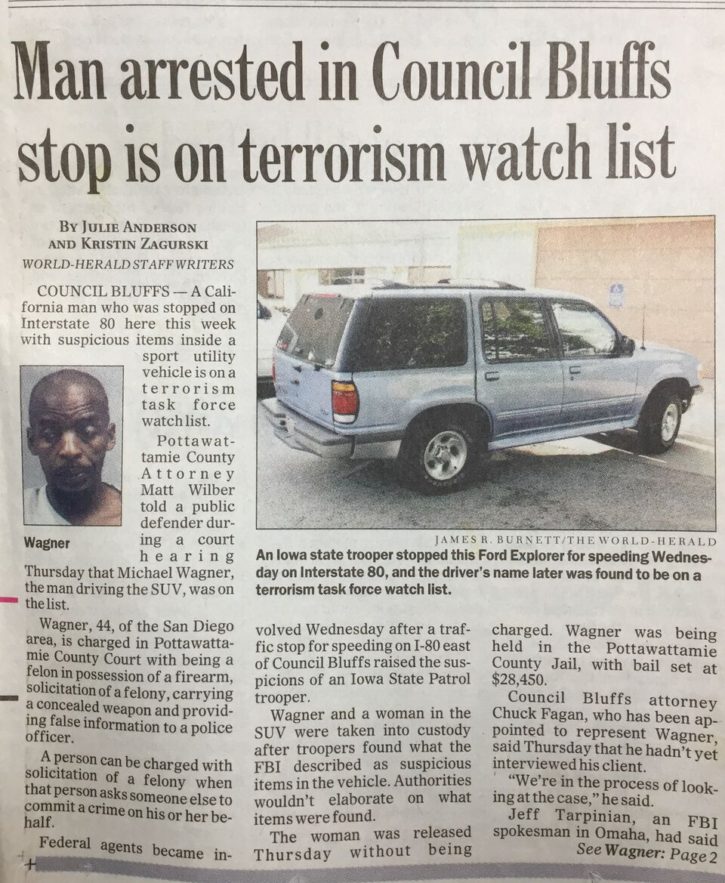
A newspaper article about a terrorist suspect Ken arrested
In 2011 in Glendale, Arizona I was given the distinct honor as being chosen as the United States 2010 and 2011 Bob Thompson Criminal Interdiction Officer of the Year by the United States Department of Transportation, the United States Department of Justice, the Drug Enforcement Administration, the Drug Interdiction Assistance Program, the El Paso Intelligence Center, and the former recipients of this prestigious award. I have very humbly received many awards in my career, but all of them ill in comparison to sharing and continuing to share what I have learned to educate new officers in the same principles for understanding and recognizing when criminal activity is afoot. That impact, no matter how significant, will change the course of someone’s life in a positive way.
Most importantly, I hope people understand that the Peace Officers of this country cannot do the job without the support of its citizens. As I travel and teach officers across the country, the sentiment from those officers and their communities that they serve is the same. The officers are being overwhelmed with gratitude from the good citizens of this country who didn’t understand that this is not just a Peace Officers fight, but this is a fight that includes everyone in our nation. We who serve without a doubt need the support of our communities and the willingness of those people to share information with us when they see things that are not right. I believe it is this cooperation that will continue to keep our country and its people safe. And those that continue to help law enforcement have my unwavering gratitude and appreciation for their continued help and their dedication to the protection of our communities. For those that have gone out of their way, and for everyone that has taken the time and thanked a Peace Officer, fire fighter, or EMS personnel, I thank you!!!! You, are the people that I am talking about.
BTC: What do you feel is the most rewarding about your job as a state trooper?
KEN: The most rewarding part of my job is tough. It has many facets that stretch out in many directions. Being a first responder and saving lives is huge. So is protecting the innocent from crime and the relentless pursuit of major criminals on our nation’s roads. Few people consider the fact that all crime is, at some point, in transit: the people perpetrating the crime, the proceeds of the crime, the tools to facilitate the crime, or evidence of a crime committed.
BTC: What skill sets learned from your job and training have helped you the most as a hunter?
KEN: So you might ask yourself, “What does this have to do with me hunting, and how do I apply what I’ve learned from such a tumultuous career?” It’s simple. It’s the desire to pursue something, in this case a whitetail deer, and becoming a student of the sport. Many people will refer to me as an expert in my field, both as a Peace Officer and as a hunter. Although it is very humbling, I see myself as a student who is always looking for new ways, a better understanding, and never taking for granted the information that is shared.
One instance I’ll share with you happened last year while hunting. As I was sitting in the blind and watching a buck chasing a doe in and out of cover, I watched intently as I always do and enjoyed watching the doe try to elude the buck. Soon as the buck lost sight of the doe and he could no longer see her he employed a tactic that was not only smart, but something that I had never seen happen before, or at least understood its purpose. The whitetail buck started to stomp his foot and blow in the same alarming mode as if he was to have spotted or smelled some type of danger. I immediately suspected that he had caught our wind and could possibly smell us. So I checked the wind direction only to be reassured that it was correct and the chances of that buck smelling us was nonexistent. That buck taught me that he would employ the same tactic that he would use to alarm deer of danger to get the doe to run from heavy cover where she was hiding so he could continue to pursue her. This was the first time I had ever seen this activity and understood what was happening.
At the end of the evening I immediately called Don Kisky to talk to him about what I had seen and ask him what his opinion was and what he thought about the encounter. After a short discussion, Don had told me that he had just seen the same behavior this year. He had never seen it before but had the same concern I did, that the deer actually had smelled or seen something that made the deer alarmed. We both enjoyed a good laugh as I stated to Don, “I might have taught Don Kisky something”. And knowing Don Kisky, that’s next to impossible when it comes to hunting whitetail deer. Really we just shared an observation that we both learned from.
So how does my career pertain to whitetail deer hunting you might ask? Simple. It’s the same perseverance, it’s the same willingness to learn and continue to learn, and a never quit attitude that keeps me going. It’s also tradition, a strong sense of brotherhood, and it’s something I love to share with my children. My children understand the “circle of life” and the life lessons that we have had the privilege to enjoy together. They understand that hunting isn’t a right, it’s a privilege, one that we enjoy along with many other privileges. All of those privileges came at a very high cost and I feel very humbled and privileged to be able to share with many two of my greatest passions. To quote Lee Greenwood, “And I won’t forget the men who died that gave that right to me”.
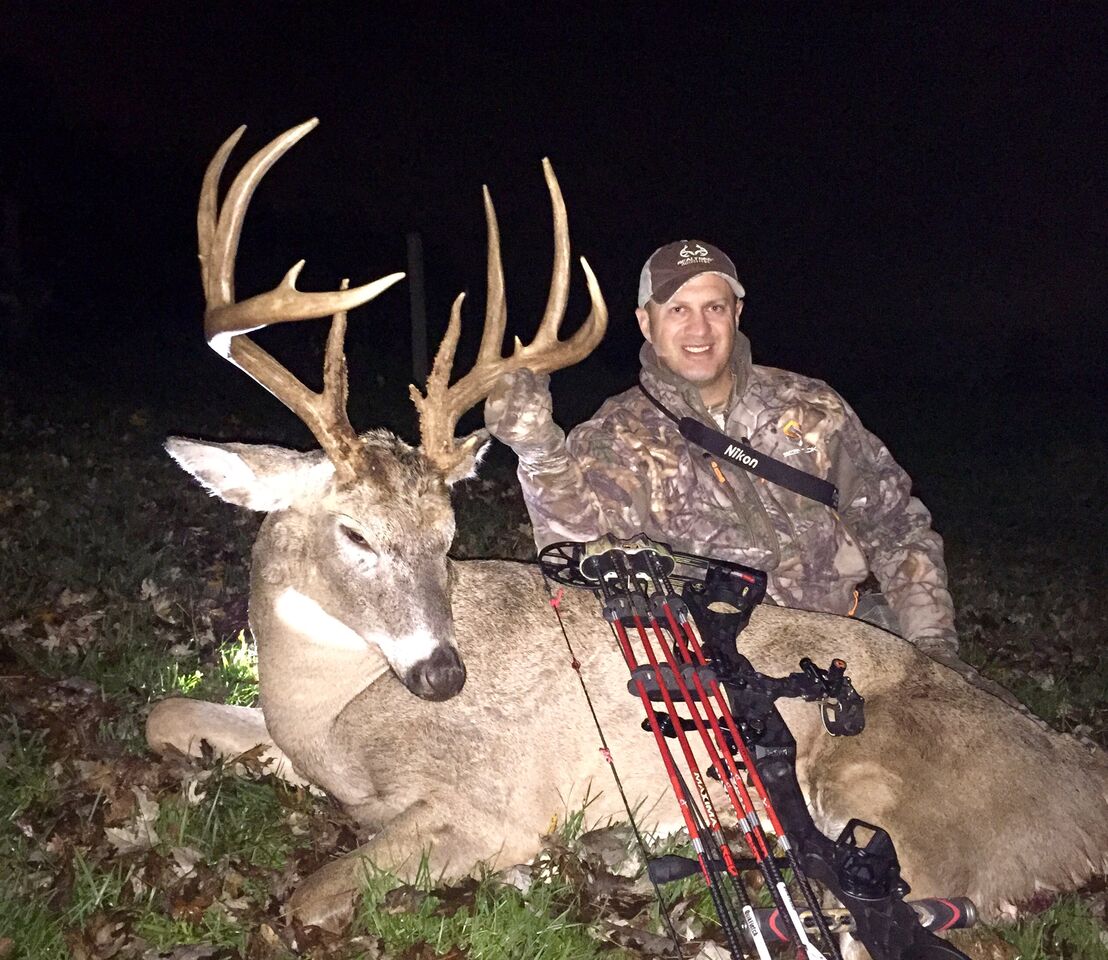
One of Ken’s 2015 bucks
Trooper Kenneth W. Haas #345 Iowa State Patrol
Ken Haas is a native of Omaha Nebraska and lifelong resident of the region. Upon graduating from Millard South High School in 1990 Ken joined the Army National Guard, honorably serving for six years.
Ken received a Bachelor of Science in Criminal Justice from the University of Nebraska-Lincoln in 1996. While working on his B.S. degree, Ken worked as an Intern for both the Nebraska State Patrol and Lincoln Police Department, affirming his desire for a career in law enforcement.
Ken joined the Iowa State Patrol in 1996 and is a 19 year veteran as a State Trooper. Ken served as the Iowa State Patrol Intelligence Officer in 2012, receiving a secret security clearance and was instrumental in implementing the department’s Suspicious Activity Reporting (SAR) initiative. Ken is the lead Criminal Interdiction Instructor at the Iowa DPS Academy, a Drug Interdiction Assistance Program/El Paso Intelligence Center (DIAP/EPIC) certified Instructor, an Associate Instructor for Desert Snow and instructs the Iowa Department of Public Safety (DPS) Law Enforcement Intelligence Network (LIEN) School.
Ken has served in many capacities during his career with the State Patrol including Canine Handler, SWAT team member, Sniper, Hazardous Materials Technician, and Field Training Officer. His dedication to professional development includes more than 600 hours of continued education in interdiction and hundreds of hours in a variety of topics including but not limited to defense tactics, firearms and emergency medical services.
During his career as a Trooper, Ken has been responsible for more than 350 major drug and currency seizures, and involved in more than 600. These seizures include, but are not limited to, more than 23,500 pounds of Marijuana, 10 pounds of heroin, 1,200 pounds of cocaine, 200 pounds of psilocybin mushrooms, 150 pounds of Crystal Methamphetamine and $13M United States currency.
As a direct result of criminal interdiction enforcement Ken has been involved in murder investigations, bank robberies, fraud, theft, weapons, terrorism and a lethal force situation,. Fifteen of the seizures resulted in a controlled delivery of the contraband to further the investigation. These controlled deliveries have resulted in the forfeitures of more than 78 vehicles (53+ were outfitted with after-market compartments designed for concealing and transporting contraband).
Ken is a certified Level III inspector of commercial motor vehicles. His experience with contraband seizures in commercial motor vehicles includes commercial rental trucks, refrigerated trailers with manufactured compartments, dry van trailers with manufactured compartments, car carriers, fifth wheel motor home transporters, Motor coaches, and seizures of contraband co-mingled within legitimate loads. Ken also has many personal use arrests in commercial motor vehicles and one “cloned” AT&T service vehicle.
Ken has traveled to 43 states to train FBI, DEA, Homeland Security, TSA, state and local officers, task force officers and attorneys in criminal and terrorist interdiction. He also travels internationally to provide training for the US Department of Justice International Criminal Investigative Training Assistance Program (ICITAP) and trains stateside for the US Department of Transportation Drug Interdiction Assistance program.
With extensive courtroom testimony experience in both State and Federal courts throughout Iowa and the United States, Ken is considered an expert witness in highway criminal interdiction.
Ken is a proud father of three wonderful children and has served as a State Trooper for 20 years. He is a Taijutsu Blue Belt and when he is not patrolling or instructing Ken is an avid whitetail hunter. He is currently in his 8th year with the television series “Realtree Whitetail Freaks” on the Outdoor Channel.
Ken’s opinions expressed in this blog entry are his own and do not reflect the opinions of the Iowa Department of Public Safety.
A C H I E V E M E N T S A N D A W A R D S
2014 Certificate of appreciation from the Department of Defense and the ICITAP program for providing Criminal Interdiction and Terrorist Training to the Kosovo Police in Pristina Kosovo.
2011 Award from The El Paso Intelligence Center in conjunction with the Drug
Enforcement Administration for “The Largest U.S. Criminal Highway Interdiction Of Currency Seized in 2011.” The seizure of 2,569,955.00 in U.S. Currency.
2011 The Bob Thomason Criminal Interdiction Officer of the Year
United States Department of Transportation/ Federal Motor Carrier Administration/ Drug Interdiction Assistance Program (DIAP)
Criminal Interdiction Officer of the Year, nominated by the former recipients’ of this distinguished award.
2011 Recipient of the 2011 Officer of the year award “Respect For Law 2011”
Optimist Club of Council Bluffs Iowa.
2010 Nominated for the United States Department of Transportation/ Federal Motor Carrier Administration/ Drug Interdiction Assistance Program (DIAP)
Criminal Interdiction Officer of the Year by the former recipients’ of this distinguished award
2010 Recognized by United States Department of Transportation/ Federal Motor Carrier Administration/ DIAP for continued and sustained contributions to highway criminal interdiction.
2009 Recipient of the United States Department of Transportation/ Federal Motor Carrier
Administration/ DIAP “Outstanding Achievement Award”
2008 Golden Dome Award, Iowa State Patrol Interdiction Unit
2007 Colonel’s Commendation for Interdiction
2006 Nominated for Governors Golden Dome Award
2005 Golden Dome Award
2004 United States Attorney’s Office Enrique Camarena Certificate of appreciation
2004 Colonel’s Commendation for apprehension of terrorist subjects.
2003 Nominated Department of Public Safety Employee of the Year Award.
2003 Nominated Governors Golden Dome Award
2003 United States Attorneys Award for excellence in Criminal Interdiction
2003 Drug Enforcement Agency Commendation for Drug Interdiction
2002 Colonels Commendation for criminal interdiction efforts, seizing more than $28.5M in narcotics and $3.2M in US currency
2000 Jimmy Wilson Jr. Foundation Award, for Officer involved shooting.
2000 Iowa Department of Public Safety Commissioner’s Commendation Award
2000 Award for Excellence in Criminal Interdiction, Governor of Iowa
1998 F.B.I. Accommodation for excellence, for the Apprehension of a bank robber
Nighttime Trail Camera Images – Putting Light On The Subject
August 15th, 2016 by BTC Editor
The evolution of the trail camera has been simply remarkable over the last several years, from taking 35mm film to the photo shop to the almost instant gratification of looking at them on your phone, things are simply in a place that was once only a dream.
With that said, there are still some factors in play when it comes to nighttime images that make them seem behind the times. With all of the advances in technology, why have nighttime images not been perfected yet? Well, in this format, we’ll do our best to explain the basic science of nighttime images on trail cameras.
Seeing the Waves
Nope. We’re not at the beach. But to develop a basic understanding of what’s going on with nighttime images you will want to make sense of the following to help differentiate between the various types of flashes:
- Our eyes can only see light that exists within a small range of the electromagnetic spectrum.
- That electromagnetic spectrum is measured in wavelengths.
- Those wavelengths are measured in nanometers.
Ultimately, these nanometers are your take away from this section because this is the measurement that you can use to understand how each type of flash impacts the quality of your game camera pictures.
If you need a visual aide to help you more effectively wrap your head around the concept of nanometers, NASA has created a handy below:

SOURCE: http://science-edu.larc.nasa.gov/EDDOCS/Wavelengths_for_Colors.html
Measuring the Flash?
Well, we’ve given you the basics on nanometers, but now you’re asking: why do I care? Well, we’ll do our best to explain that here as simply as possible across all three types of flashes found on trail cameras:
White Flash Cameras
If you look at the chart from NASA, you will see that they define “visible light” as being in the range of 400nm to 700nm. That’s pretty much what you get with a “white flash” camera and that’s how you get to see the full color images.
SOURCE: http://www.trailcampro.com/collections/shop-trail-cameras/products/reconyx-hyperfire-hc550
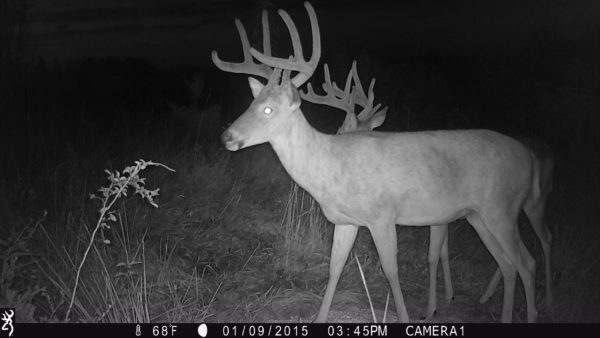
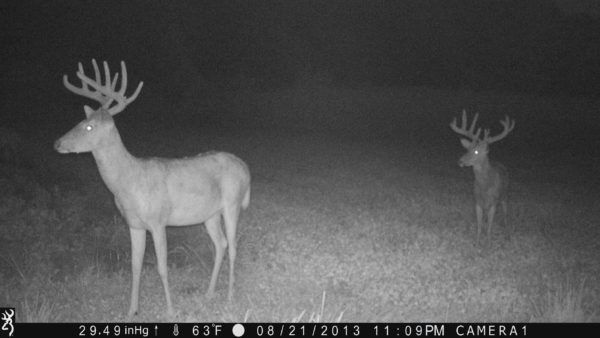
Low-Glow/Standard Infrared (IR) Flash
Now it starts to get a little more complex, because we’re going to step outside the range of “visible light” and move into the infrared range. For cameras that fall into the “low-glow” or “standard” infrared (IR) category, it’s reasonable to suggest that most of these cameras measure around 850 nanometers.
Now, even though these camera flashes technically fall in the “Infrared” category, they are still close enough to the red in the “visible light” range that (A) if someone is looking in the general direction of the LED bulbs when it takes a nighttime image they will see a “low red glow” and (B) the flash still generates enough illumination to take a reasonably good nighttime images.
Obviously, you sacrifice the color of the images here since you are using a flash outside of the spectrum found in the “visible light” range, but you are still getting a reasonably crisp image without the “flash of lightning” effect you get with a white flash camera.
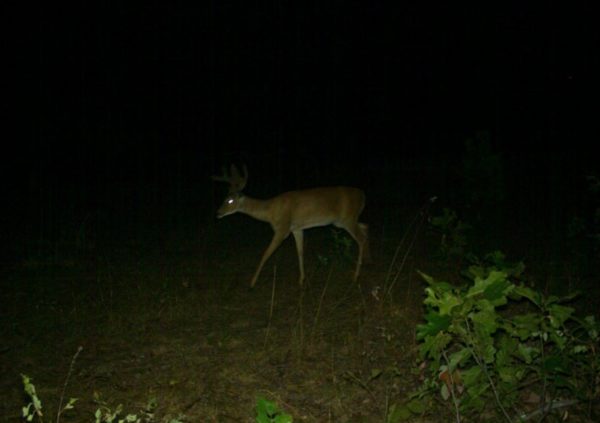
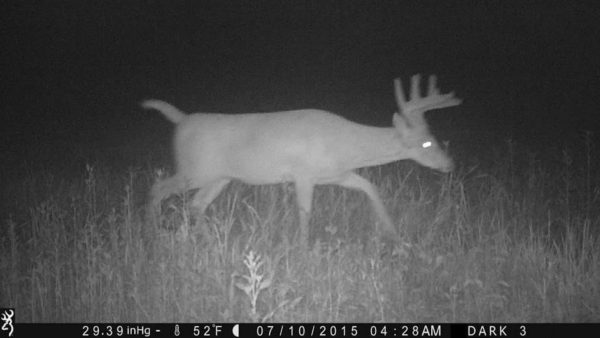
Invisble/No Glow/Black Flash
As we discuss this type of flash, it is worth noting that it still falls within the infrared light range. It is simply further away from the “visible light” range than the low-glow infrared flash cameras. With flashes in this category, it is reasonable to assume that most of them can be measured around 950 nanometers.
The net result of this is that the LED bulbs are not visible when taking a nighttime image, BUT in exchange for that “invisibility” you are sacrificing image quality when compared to the other types of flashes. This is because invisible flash cameras simply do not illuminate the subject matter as much as the other two.
In this image below, if you look back up to the one we used for the “low-glow” images you’ll notice that the image captured by the “invisible flash” camera is a little grainier and has a little more “white noise.” They are both still good images, but you can see that one is a little clearer than the other.
Speed Matters
Now, we could get into a long dissertation about the impact that SHUTTER SPEED has on trail camera images, but for today we’ll just provide you with a few quick notes and save the essay on “shutter speeds” for another day.
In this context we only want to relate shutter speed to the amount of light that is available for capturing images. So here goes: the more light you have available, the faster the shutter speed can be. The less light/illumination you have available, the slower the shutter speed must be.
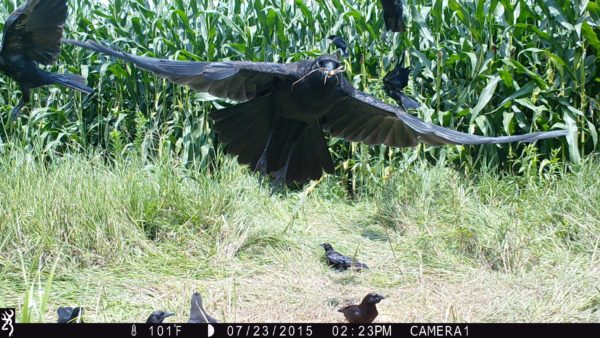
Basically that means this: during the day you have enough light for the shutter speeds to be super-fast and capture cool images of deer jumping and birds flying. This is why most of the cool action shots we see in trail cam pics are daytime pics.
It also means that as you move further away for the visible light range with your flash (i.e From 700 nanometers to 850 nanometers to 950 nanometers…), the shutter speed must slow down to allow enough light inside the camera to capture nighttime photos. In layman’s terms, as you move from a white flash to a low glow IR flash to an invisible flash, you are increasing the likelihood of blurred images because the shutter speeds needs to slow down. While this example isn’t horribly blurred, it still demonstrates that the illumination from an invisible flash camera accompanied by the slower shutter speed, doesn’t always give you the cleanest image in the world.
What Do I Really Need to Remember?
Well, here is the gist of it, starting with the very basic premise that there are two types of trail camera pictures: daytime pictures and nighttime pictures.
Beyond that, based simply on game cameras, there are 3 types of nighttime images: those taken with a white flash, those taken with a standard/low-glow IR flash, and those taken with an invisible/black flash.
So if we take those four types of images and rank them based on potential quality of the images based on the lighting, they would be ranked as follows:
- Daytime Images
- White Flash Images
- Low Glow/Standard IR Images
- Invisible/Black Flash Images
Obviously, there can be a lot more depth to the discussion on flashes and nanometers and shutter speeds and everything else that leads to the trail camera pictures you find on your SD cards, but hopefully this gives you a little bit more of a foundation for understanding why some of the pictures you find on your SD cards look the way they do and helps you with you game planning when it comes to where you put your different types of trail cameras!
Tom Rainey
Tom Rainey has been with Browning Trail Cameras ever since they were introduced at retail and enjoys hunting everything from squirrels to whitetail deer…but his obsession is turkey hunting. His grandfather purchased him a Belgium Browning 20-Gauge A-5 prior to his birth and he has been a fan of the Browning brand ever since…
