Personal Goals for Deer Season
August 13th, 2017 by BTC Editor
Bowhunters everywhere are anxiously counting down the days until deer season opens. Although it’s exciting, if you’re a serious hunter there’s a lot that goes on before climbing into the stand. Preparation is the key to success in the hunting world. You do so by taking inventory of your deer, making sure you have the right setup and proper stand placements, and providing adequate food sources. This will help to increase your success rate, not just for that specific year, but for years to come. Through the preparation process, you really gain knowledge and respect for the land that, in return, helps shape you to be the best stewardess of the land you can be. Setting personal goals to increase your success helps to make yourself accountable and focused on land management.
For me, preparing for the season at a young age was different than it is for me now. Throughout my years growing up, I would help my dad hang tree stands and prepare for deer season under his wing. It was my chance to observe and learn. I recently moved a couple years ago into a house that had hunting ground that I could hunt and manage as I could. I finally got the chance to try my hand at land management on my own. It was an important goal for me to learn about food plots. I started by taking soil samples and executing how and what I needed to have a successful food plot. This is now an ongoing goal that I am excited to complete every year. As late August approaches, I will be planting a mixture of Triticale, Forage Oats, Winter Peas, Crimson Clover, Chicory, Turnip, and Daikon Radish. This food plot is located in a corner off of a large soybean field, not quite a 1/4 of an acre. It will provide deer with a highly palatable forage source.
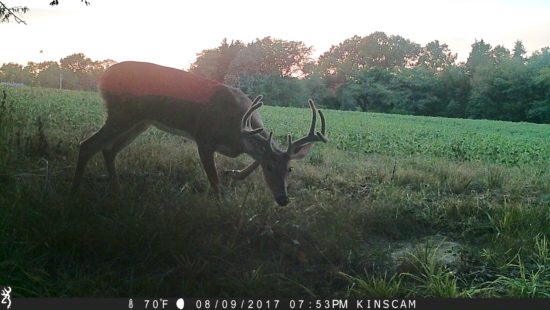
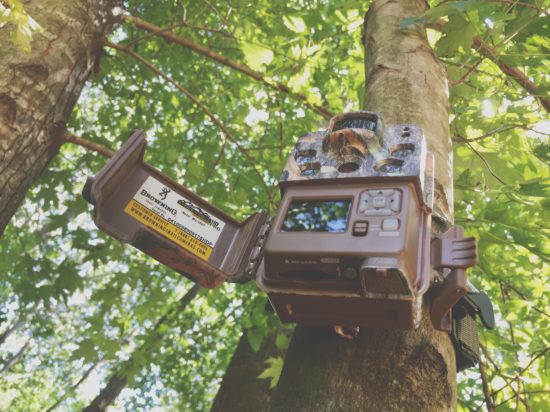
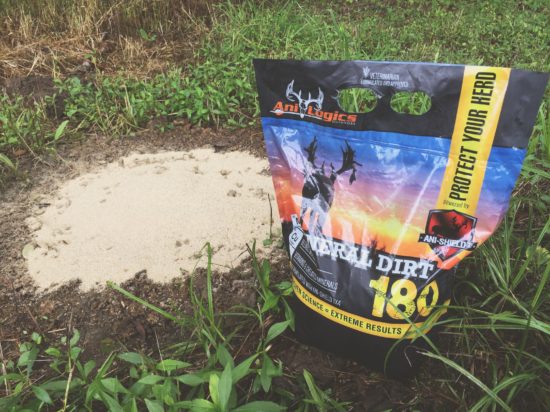
Within these food plots I use my Browning Trail Cameras to take inventory of the deer. During early summer, bucks are in full velvet and still in their bachelor groups. By putting out your cameras early, you can watch the bucks progress and see how their antlers develop. Try to learn their patterns for early season hunting and pay attention to how they are using the land. This is a high priority, and yet something I truly enjoy doing. Study these bucks and get to know them. An attractant can help keep your deer coming back for more, while providing them with adequate supplements and minerals. I use Anilogics Mineral Dirt 180 which has minerals like Copper, Zinc, Selenium, and Manganese to help a deer’s immune system. As the velvet starts to shed completely off, each buck will soon start to go his own way and their patterns will quickly change.
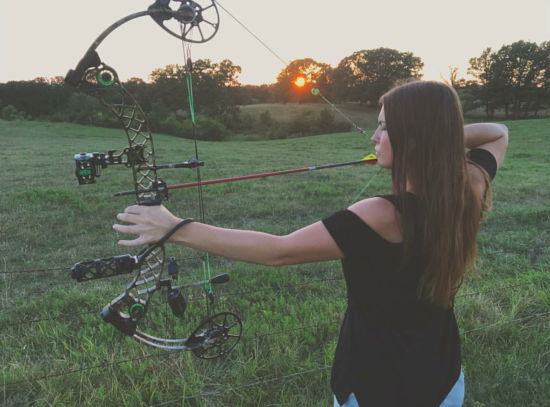
You know, there are so many different ways to manage your land and provide for your deer. I think by actively being involved in all year prepping, you can tremendously grow and learn to become an even more successful hunter each year. After all the hard work has been put in, it’s time to enjoy time in the stand. It truly makes all your hard work and effort pay off when you harvest a mature buck or healthy doe. Myself, as well as thousands of other hunters, are making it our final goal to stock our freezer with lean, organic venison. Shooting your bow as much as you can prior to deer season will help give you the confidence you will need in the stand. It’s a year-round cycle of preparing, planning and executing, and it never gets old!
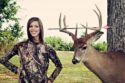
Kinsey Edmunds is a pro-staffer from Missouri. Being raised on a farm and surrounded by wildlife, her love for the outdoors began at a young age. Kinsey enjoys bowhunting whitetails, turkeys, hogs and gators, just to name a few. She is also a team member of Huntress View, a team dedicated to strengthening the ever-growing community of women hunters.
Using Trail Cameras to Scout for Turkeys
March 26th, 2017 by BTC Editor
Knowing where to hang your trail cameras and what kind of settings to use when scouting for turkeys is important, as it can vary a little from using cameras for deer hunting. When hanging my trail cameras, whether I’m using them for deer or turkey hunting, I pretty much keep 3 things in mind when determining where to put them: bedding, food and travel routes. So, for deer I often like to hang my cameras where I know they will be coming from their bedding area to their feeding area, and vice versa. For turkeys, I like to do essentially the same thing: find where they are roosting and figure out where they are going when coming off the roost. These locations for deer are often different than they are for turkeys, so scouting is a must.
A few things to look for when you are scouting for good turkey trail camera locations are roosting sites, travel routes, strut zones, and feeding areas.
Roosting Sites
You will know a roosting site when you see one. I have found several on our property, and they have always been in tall, dead trees and have lots of turkey droppings underneath them. You may find some primary wing feathers as well. When hunting last year, I actually spotted a couple of toms still up on the roost, which further confirmed their roost site. I found another spot this spring while shed hunting – it was a dead tree in on the edge of our food plot – and found quite a bit of droppings and a wing feather underneath it.
Camera Setup:
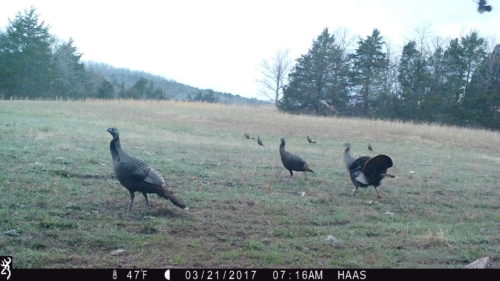
If I know where a roosting site is, I personally like to set my trail camera where I expect they will be landing when they fly down from the roost. From observing turkeys while out hunting I have a good idea of where they usually land when they fly down. On my property, this is usually in one of our fields planted in wheat and clover.
Time-Lapse mode is a great option for fields this size so you don’t miss anything further out where turkeys may not trigger the camera. I have this Browning Strike Force trail camera set up quite a bit higher to have a better view of the field. As you can see in this photo, the turkeys are flying in off the roost.
Travel Routes
I’ve noticed a couple of similarities in how both deer and turkey travel from my experiences hunting, and it seems they often prefer to take the easiest route possible. Some examples of routes I have seen both deer and turkeys using often is logging roads in the woods, creek crossings, openings in the timber, and holes in fences.
Camera Setup:
These are usually in small, tight spots so I prefer to hang my camera pretty low here and will often put my camera on burst mode so I don’t miss any action. I have this Browning Strike Force set to take 4 multi-shot images every 5 seconds.
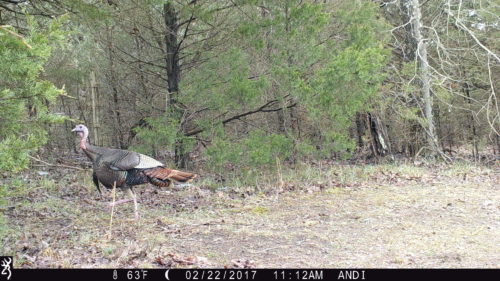
Strut Zones
The best way to find these is to actually see a turkey using it in person. I know where a couple are on our property from observing the turkeys while out hunting. If you haven’t seen your turkeys using one, try looking for wing drag marks in the dirt while you’re scouting. On my property, our turkeys love to strut on the edge of one of our food plots where the sun hits them, so keep that in mind when looking for strut zone locations.
Camera Setup:
If you are looking to get some neat footage from your trail cameras, a Strut Zone is the perfect opportunity to switch your trail camera to Video Mode! Make sure you have a larger SD card in this instance as they can fill up pretty quickly on video mode.
This Browning Strike Force camera is actually in the same location as the “Roosting Site” listed above and Time-Lapse mode is what I prefer in this location due to the field size.

Feeding Areas
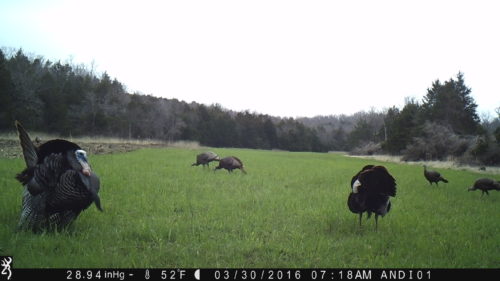
Food plots planted in chicory, wheat and/or clover are excellent options for hanging your trail cameras to scout for turkeys. We have one field planted in clover and chicory, and another planted in wheat and clover, both of which really seem to hold the turkeys on our property.
We also experimented one year by plowing up some of the ground on the edge of one of our food plots and the turkeys loved the easy access to insects there! You can see the plowed part in the photo below from the Browning Spec Ops:
Camera Setup:
Once again, a good option in a field this size is Time Lapse mode so you can still catch turkey movement outside of the camera’s detection zone, and setting the camera a little higher up.
If you already have a pretty good idea of where the turkeys are feeding at, regular Trail Camera mode works just fine here as well, and I would probably up the picture delay to 20 or 30 seconds here so you aren’t filling up the SD card as quickly with tons of feeding pictures.
When making your game plan for opening day of Spring Turkey Season, keep in mind what you have learned from studying your trail camera pictures prior to season opener. Using trail cameras to scout for turkeys will give you a good idea on your flock size, how many different groups of turkeys you may have, and where you need to be setting up on opening day. You will be one step ahead of the turkeys and by using the right settings, will likely get some amazing trail camera pictures and/or videos along the way!
By Andrea Haas
Andrea Haas is a Pro-Staffer from Missouri who enjoys hunting deer, turkeys, and upland birds. She is also the founder of the Huntress View, an organization formed to help strengthen the ever growing community of women hunters.
