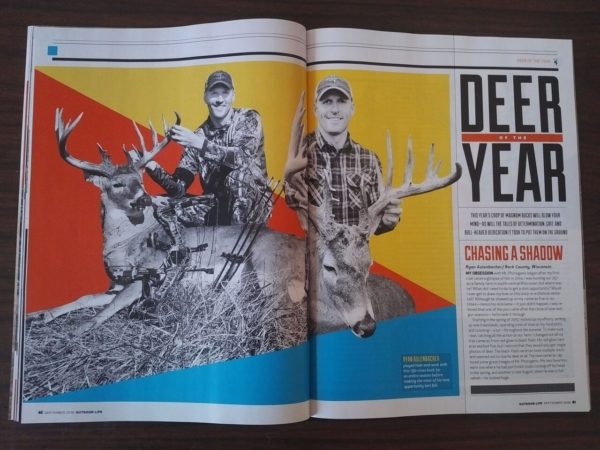
How Many Trail Cameras Do I Need?
December 10th, 2017 by BTC Editor
How many trail cameras you need and why you need to leave them out year round.
By 2016 Outdoor Life Deer of the Year Award Winner Ryan Aulenbacher
Putting cameras up during the season is great and then when you get one picture in mid-September you get excited. Only problem is you can’t tell if it was a one shot wonder or a resident buck. There lies your problem. Let’s say it was at 2AM. Was he going to bedding area or going to a feeding area or? In my younger years I would just pound that area with activity not really knowing if that was where he was most of the time. This not only didn’t result in getting said buck but I never even saw him with my own eyes.
The goal for me with game cameras is to try and start building that pattern early and get your stands in the woods before the season begins, or at least during early season. I don’t care how careful you are when it comes to scent control, it’s very hard to keep an area scent free during the season when you are banging around with a tree stand, breaking a sweat, and cutting branches for shooting lanes. From my years of chasing these one shot wonders I can tell you it’s not a successful strategy.
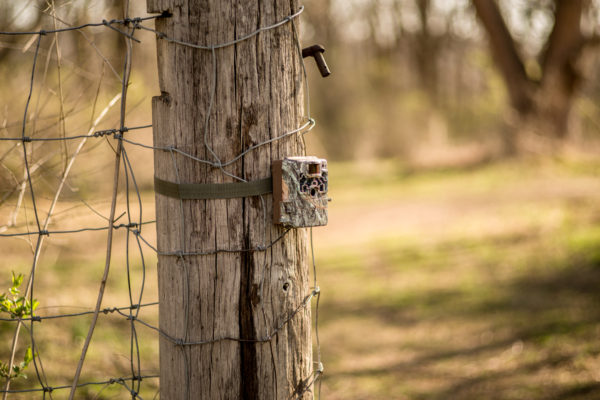
That’s why the cameras need to be up year round. I literally leave them up 365 days a year. With today’s cameras that may be 2 sets of batteries a year and with a Browning Trail Camera that’s only 6 AA batteries at a shot. That’s less than $5 a year in batteries. That’s pretty cheap scouting if you ask me. As a side benefit you also can get a better view on the predation, the number of fawns you have each spring, and an occasional Morel hunter who can’t read No Trespassing signs.
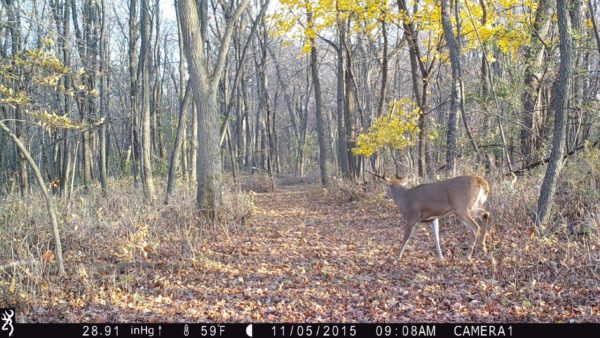
So what is a pattern? It’s when you are seeing deer come through at some similar time periods within close proximity of days. Knowing what direction he is going helps as well. When you start seeing him 2-3 times a week he likely is just out of camera view the other days. Try and use your best guess on where his bedding and feeding areas are with this information. If you are getting weekly pictures of him you surely are in “his home.” Hopefully you have an intercept point ready to go.
Once you start keeping your cameras up year-round, you may notice deer moving from their spring pattern to summer pattern and then to their fall pattern when they lose their velvet. This is also when you should be trying to hone in on a pattern. For example; are the bucks following the river or are they headed into the corn at a certain spot? Do I have any coyotes on this side of the property? (Disclaimer: being on the non-coyote side of the farm is like being in the non-chlorinated side of the pool; there is no such thing but I find that like deer, coyotes are more active in certain areas.) I notice that if I start seeing coyotes in one area with my cameras I don’t see many does and fawns in that same area. On the flip side, I have noticed that bachelor groups in early summer won’t show much of a change due to predator activity.
You need to move your cameras throughout the season as well to help pattern your bucks. Don’t go throwing them up in the middle of a bedding area, but you do need to change where you place them throughout the year to see if the deer are entering and exiting an area in the same or a different spot from the month or year prior. You need to have fresh data to go off of.
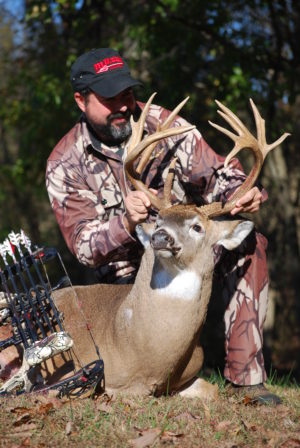
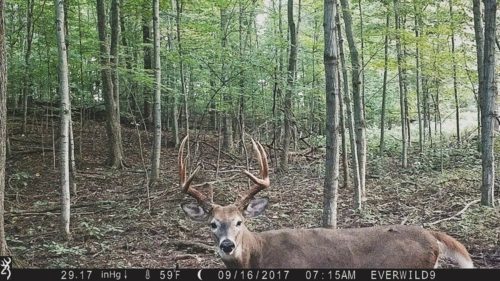
For instance, my buck that was on the cover of Outdoor Life I had on camera in the same area on 2 different cameras every 3-4 days from August until November. The cameras were about 100 yards apart in an area just outside of what I believe was his bedding area. I set up my stand at an intersecting point trying to get him on the way back in during AM hunts and on the way out during PM hunts.
A few years prior to my deer that was on the cover of Outdoor Life I had shot another good buck. The following year I left my cameras and stands in the same areas and basically hunted the pattern of a deer I already killed the year prior. It hit me as I sat there late in the season not seeing any mature bucks. “Why am I in this stand? What deer am I hoping to see? I didn’t have any patterns developed…” That’s why you need to try different spots every year with your cameras. Yes, you have good “areas” year after year on your land but with bow hunting you need to know the right tree not the right area.
So how many cameras do you need? Well that’s tough to answer in a vacuum. I think the better question is, where do I need them? I would definitely try and get a camera up where they have the most activity coming in and out of your land near some edges or bottlenecks so you don’t disturb bedded deer. Until you have a pattern developed I would be vigilant with scent control and check them at least once per week or maybe more during hunting season. I could easily see you having 2-4 cameras out on 40 acres.
Let’s say you have 250 acres. This is where you can really start to pattern a deer because it may spend the majority of its time on your land. Going off my experience in rural farming areas of WI where we don’t have massive 400-acre wood lots, more of 80 acres of field and 20 acres of woods and then 20 acres of Marsh etc., I would try to get a camera in each area. So each separate woodlot or cover area would get a camera. On 400 acres of farm country that might be 10-20 cameras. I hunt property that is about 200 acres and I have 8 cameras out now (6 black flash/ 2 RED IR). So that will be around 1 per 25 acres. In doing some research, that is a number you’ll see come up by other hunters and writers as well.
Once you figure out a spot to sit, remember you are in “his” area now and he will notice anything out of place, so don’t put a stand up without taking extreme scent control measures. I typically wait until right before a rain event to move a stand during hunting season. I like having the rain wash away any scent I may leave. You would hate to take all the time to develop a pattern only to change it!
Get your trail cameras out there and keep them up the whole year. We have so much more technology available today to help us become better hunters if we figure out how to use it correctly. Good luck!
Trail Camera Motivation
November 26th, 2017 by BTC Editor
I’m not a morning person. At all.
I know people say that a lot, but it matters when it hurts what you love to do the most. That trait surely hurts my deer-hunting efforts. You see, I’ve been chasing my beloved whitetails for over 25 years now. I average over 100 stand sits each season — if you break up the morning and afternoon hunts, because often they’re in different locations. But the bulk of that number is generated with afternoon hunts… a large bulk of that number.
I’ve got a trophy room chock-full of heavy antlered Midwest whitetail giants, and I enjoy admiring well over 1,000 inches of bone adorning the mounts which stare at me every night as I unwind watching t.v. All but one of those trophies were killed in the afternoon. So what’s the problem with that, you may ask? I wonder if there could be more. I wonder what that room would look like if I’d been motivated enough over the years to set my alarm earlier? What if I were more motivated? Frankly, it’s hard to imagine what could motivate me more than I already am.
Then it happened… I decided to leave some cameras up this year during the season. I’ll be very candid here: I don’t run a lot of trail cameras once opening day rolls around. Never have. Why? Because I hunt public land, pretty much exclusively. Highly pressured public land – the kind that when you pull up to park, you hope there’s a spot left to squeeze your vehicle into. That probably gives you a good idea of why I don’t like leaving $150-200 prizes out in the woods for the first winner to take home with him when he finds it.
But I took a chance this year. After a couple weeks of leaving them out, I slid one of my SD cards into my laptop and I couldn’t believe my eyes: Wide 8, a deer I’d captured on camera only after dark for three straight years, walked up to a scrape guarded by my Browning Spec Ops HD and began working it at 7:30 a.m.! Talk about motivation!!
Wide 8, a buck that Staggs has watched for three years straight, strolls directly into a scrape at 7:30 on the morning of October 29th:
And that is my point… Yes, I know hunters have long used trail cameras to “inventory” their bucks, even creating special folders for them and sometimes being able to watch them progress over the years as I had done with Wide 8. But I’d truly never thought about using a trail camera for motivation – until now. Now before I slide between the covers and wonder if I should get up tomorrow morning and get in a stand, all I’ve got to do is watch that video. I don’t have to wonder if he ever slips up in the morning, I KNOW he does. And that motivates me.
Greg Staggs is the former back-page columnist for Inside Archery, and his writing regularly appears in such magazines as Outdoor Life and Petersen’s Bowhunting. Staggs loves introducing his two boys to all things outdoors, including fishing, trapping, canoeing and camping, and has been chasing turkeys and big game exclusively with archery equipment for over 20 years.
The “30/30” Trail Camera Setting
October 22nd, 2017 by BTC Editor
Just a couple weeks ago I made my first series of mock scrapes for the year and placed my Browning Trail Cameras on all of them using what I call the “30/30 setting”: Video mode set on 30 second clips with 30 sec delay. It didn’t take long before the first mature buck found one in less than 24 hours of being made, and within a couple days they all started to heat up. I noticed one series of the three was showing more activity from a specific deer than the others. I knew right away this was a deer I wanted to target, but how was I going to be able to do so? The October lull was here and everything was happening at night. I knew if I wanted to harvest this deer I would have to do so fast, before love pulled him away.
I chose to focus on checking that series of three cameras the most frequently, using wind and time of day to my advantage. By having them on the “30/30 setting”, I was able to see direction of travel and study the specific behavior of the deer I was targeting. Once I was able to get a general direction of travel, I used what I refer to as the “leapfrog method”: moving 2-3 cameras in the direction of travel, leapfrogging them as I checked them. This helps me stay on where I had him last while exploring my thoughts with the newly moved camera. I gained a very solid direction of what I thought was his daily routine – deer of a mature age class are very much creatures of habit – but even having a solid route of travel, I feared I was getting too close to his bedroom. I elected to not move in any further and let my Browning cameras continue to do my homework for me.
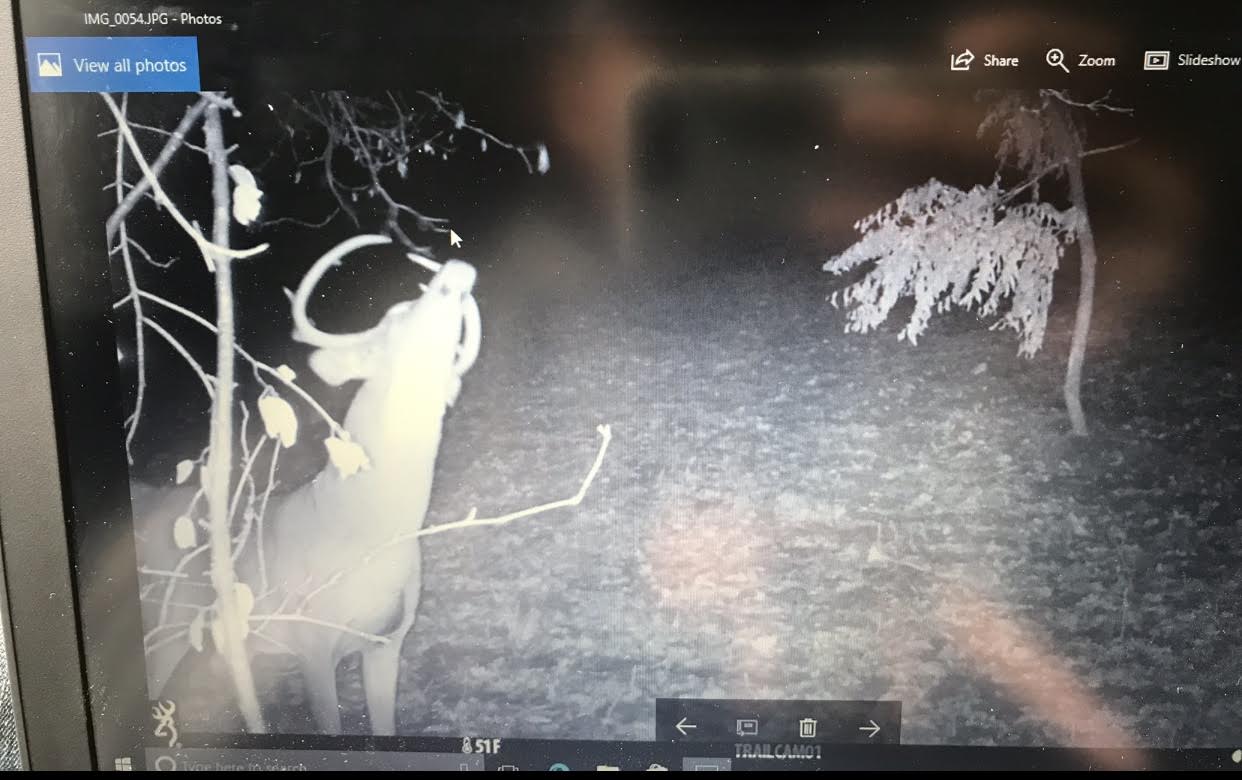
Over the course of a couple weeks I checked the cameras in a three-day rotation, as long as the wind stayed true to checking them. The pattern was there but since he was still moving after dark I was going to have to get aggressive, yet smart, if I was to win this chess match. I checked the weather on a site I live by called Weather Underground. This site lays it all out in a graph for me. I noticed an upcoming front with precipitation was a few days out. It was calling for rain for almost an entire day, ending the next day mid-morning with a temperature drop, wind drop, and rising barometric pressure. I knew this had to be the time to make my move!
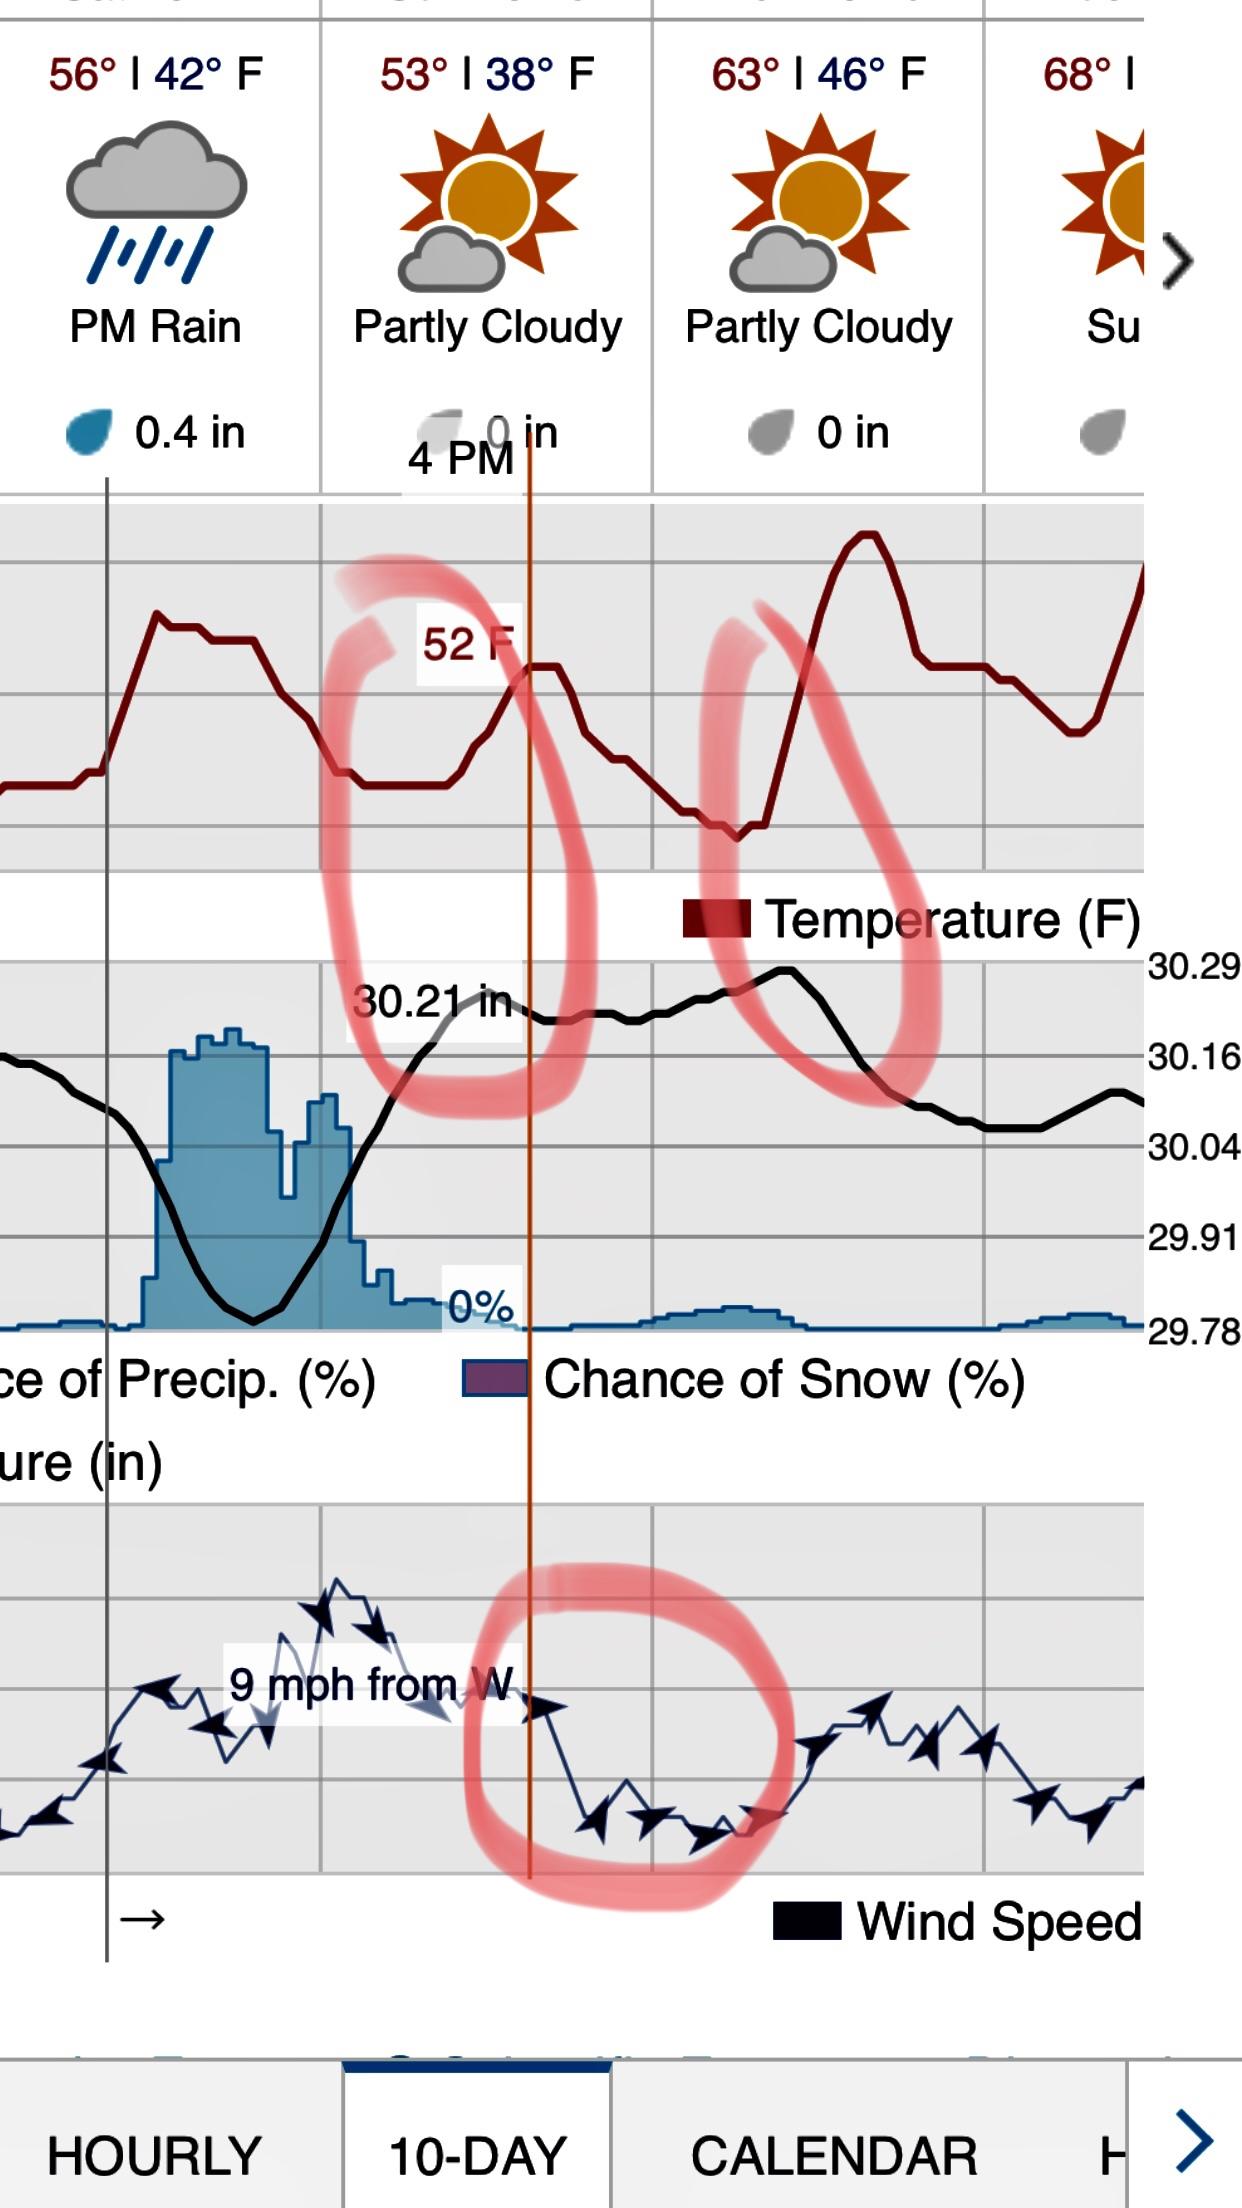
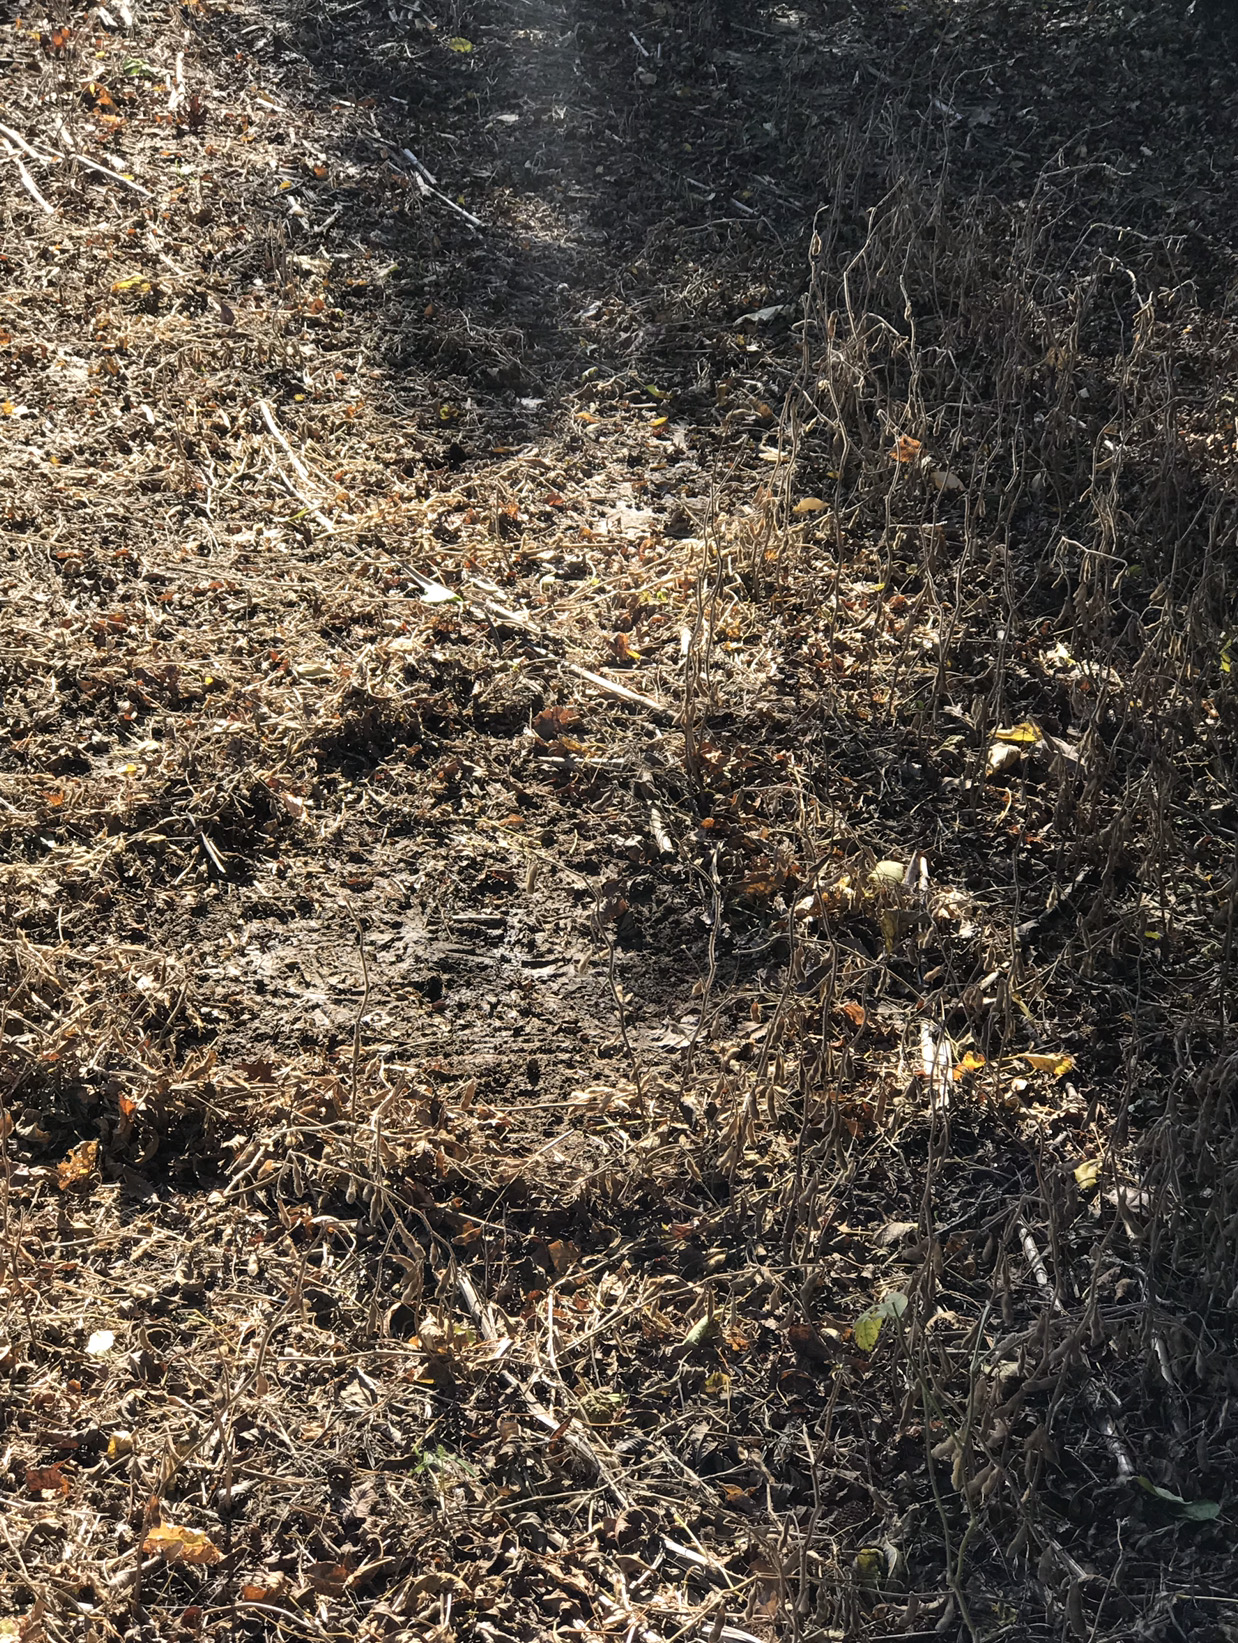
A couple of days went by and the rain set in. I was going to move in and hang a stand under the cover of good wind. The noise from the rain would cover me, and the wet forest floor would make for sneaking in an easy task. I was able to get my stand hung while staying undetected and pulled all the SD cards on my way out. My thoughts were staying true. My trail cameras showed he moved daily until the front hit and didn’t move that night or morning at all. I knew that after the rain he would likely move, as barometric pressure would be rising with a sudden drop in wind. I was going to hunt the following afternoon.
The following day rolled around and the weather stayed true, my information from my cameras were spot on, and I was able to harvest a beautiful mature 8 point.
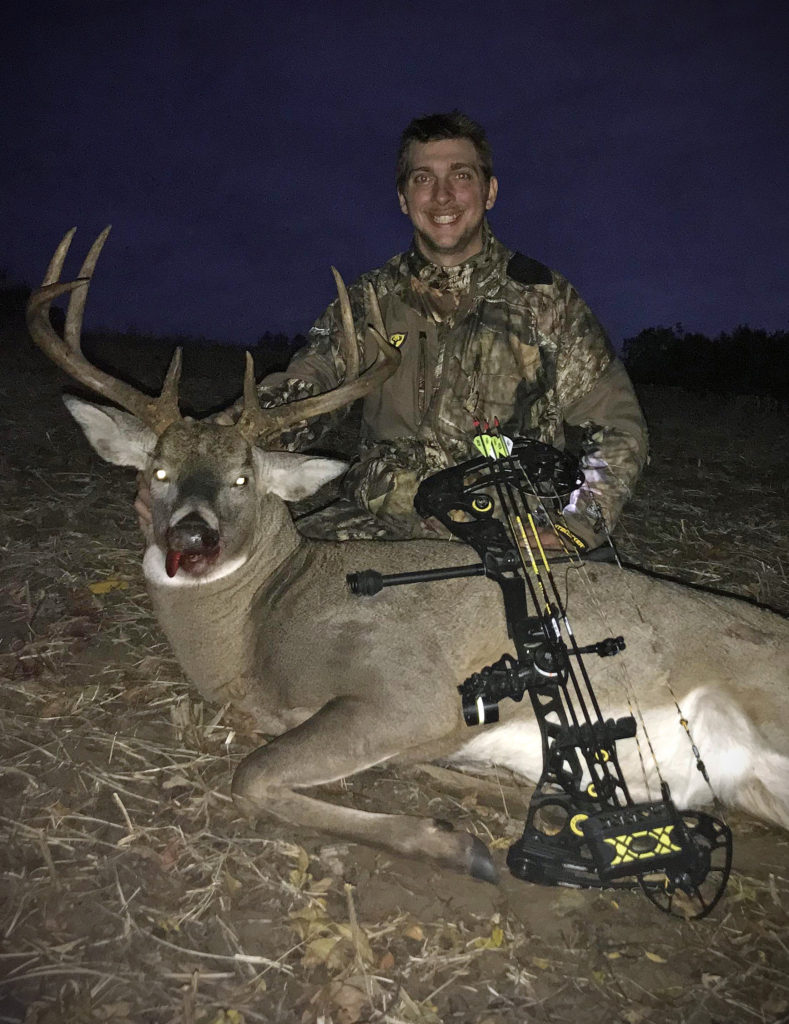
When targeting scrapes, deer will likely want to freshen them up after precipitation. If you accompany that with a drop in temperature, high barometric pressure and a wind drop, it can often be the ticket to bucks getting on their feet a little sooner. I relied heavily on my Browning Trail Cameras to help me pattern this particular buck. Without being able to further pin down direction of travel I don’t think I would have been able to catch him during legal shooting hours, let alone a full hour before dark.
By John Steinhauer
Defender 850: Changing How You Hunt
October 8th, 2017 by BTC Editor
For 2017, Browning Trail Cameras came up with a new concept in trail cameras: the Defender 850. When they first unveiled this camera at ATA, I knew it was going to be a game changer. The Defender has some unique features and technology that set it apart from the rest and that can take your deer hunting to the next level. Here are 3 features on the Defender 850 trail camera that will allow you to change the way you hunt this season.
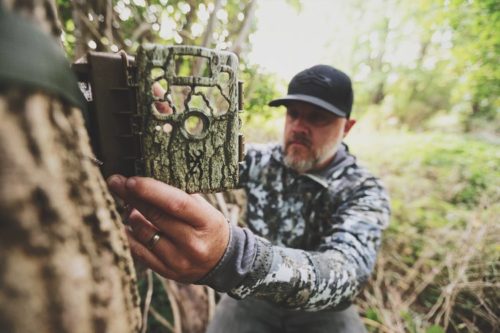
1 – Bluetooth and WiFi Connectivity Via the Browning Trail Cameras Mobile App
You can connect to the Defender on your mobile device from about 60 yards away via the new Browning Trail Cameras app. Through the app you can control the camera settings and download images and video straight to your phone or tablet, allowing you to keep your favorite hunting areas undisturbed and free of scent.
I have my Defender’s set up close to a few of my favorite tree stands so I can check the camera while I’m in my stand without actually having to touch the camera and leave my scent in the area where I am expecting the deer to walk out.

2 – Adjustable IR Flash
This feature is also new for 2017 and allows you to control the range of your LED’s on your nighttime images. There are 3 different flash settings – Power Save, Long Range, and Fast Motion – that allow you to maximize the performance of your Browning Trail Cameras, no matter where they are set up.
–Power Save: This is the most economical of the 3 flash modes. The flash goes out to about 70 feet, which is perfect for wooded areas.
–Long Range: The flash goes out to about 120 feet. This is perfect for open areas, such as larger fields or food plots where the game may be a good distance away from the camera.
–Fast Motion: The exposure time is much faster in this mode, allowing you to capture game that are moving faster, while eliminating motion blur. Think fence crossings, trails, pinch-points and travel corridors, etc. This mode will really come in handy when new bucks start showing up on your hunting property during the whitetail rut!
Here’s a link for a YouTube video for more info on this setting: https://www.youtube.com/watch?v=eWva5ReMbKo

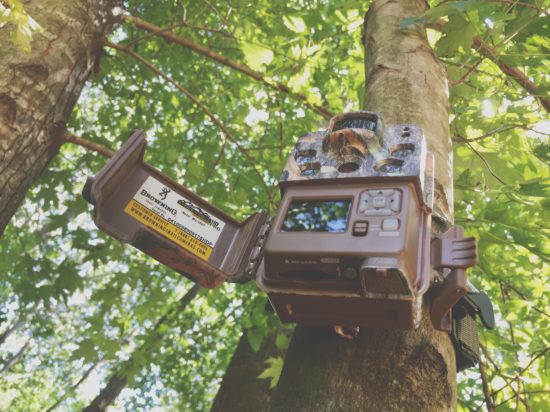
3 – Capable of Holding Up To 128 GB Micro SD Card
I wanted to point out this feature for 2 reasons:
1) The camera also features 1080P HD video technology, so having the ability to use an SD card with larger storage capacity means that you can leave the camera out in the field on video mode without having to worry about the memory card filling up in between camera checks.
2) If you wanted to set up your Defender 850 in a location that you may not hunt or visit often, once again you can rest assured that most likely your memory card will not be full by the time you make it there to hunt or check the camera. This is perfect for those whose hunting property is a long distance away, or if your favorite hunting location isn’t easily accessible.
Whether I end up getting a deer this season or not, I already feel like I am one step further with my hunting game plan than I was this time last year, and that is due to the unique features on the Browning Defender 850 that allow me to hunt smarter, not harder.
By Andrea Haas
Andrea Haas is a Pro-Staffer from Missouri who enjoys hunting deer, turkeys, and upland birds. She is also the founder of the Huntress View, an organization formed to help strengthen the ever growing community of women hunters
Shifting Deer, Shifting Cameras
September 24th, 2017 by BTC Editor
We’re beginning to get some early fall temps and the taste of clean, cool air. The skies are beginning to look a little different and we are both beginning to feel a bit different. We are anticipating…
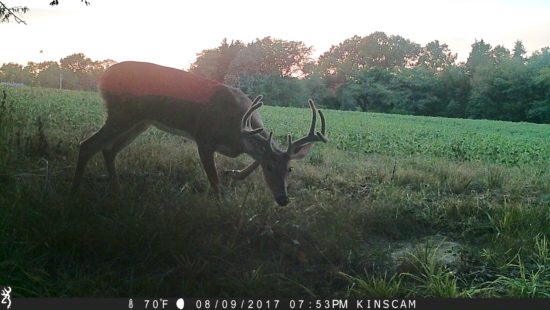
Having found a new core bedding area via trail camera recon (photos below) we are now closing in on exactly how this section of property functions and we are stoked for the postseason and the chance to move cameras into this area and establish precise buck bedding locations. However, we still have the ENTIRE NY deer season in front of us and we now know that we have a prime buck bedding location nailed down adjacent to an area the local does bed in. As we continue to work on peeling the layers off that scenario we will ramp up our mock scrape game using our cameras to tell the story of these locations. This year we are adding into our equation several rubbing posts with overhead licking branches where we will begin to test the waters of the local big boys and hopefully provide ourselves another late October/early November tool for our arsenal. As all these fellas begin to take on their fall ranges and each personality begins to show we become probably a little too eager as we wait for the right time to make our next card pull, but hey, this stuff is what it’s all about.

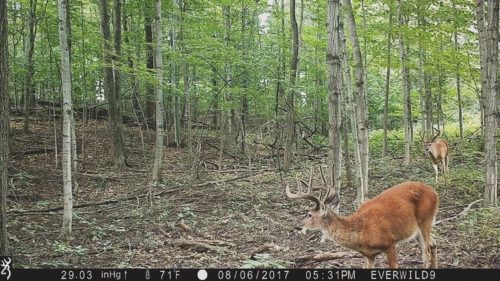
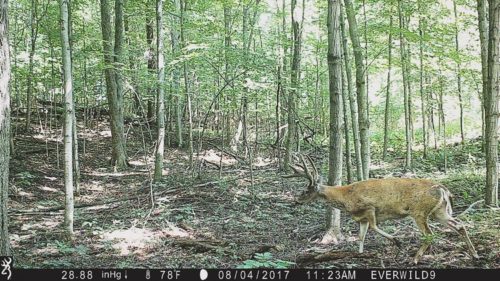
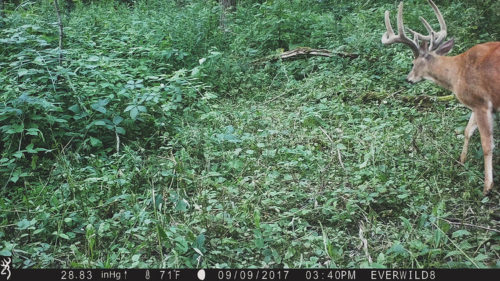
Blog originally posted on EverWild.
EverWild is an online journal of the outdoor adventure’s of two friends from New York – Justin Michau and DJ Tosh – who are passionate about the outdoors.
Personal Goals for Deer Season
August 13th, 2017 by BTC Editor
Bowhunters everywhere are anxiously counting down the days until deer season opens. Although it’s exciting, if you’re a serious hunter there’s a lot that goes on before climbing into the stand. Preparation is the key to success in the hunting world. You do so by taking inventory of your deer, making sure you have the right setup and proper stand placements, and providing adequate food sources. This will help to increase your success rate, not just for that specific year, but for years to come. Through the preparation process, you really gain knowledge and respect for the land that, in return, helps shape you to be the best stewardess of the land you can be. Setting personal goals to increase your success helps to make yourself accountable and focused on land management.
For me, preparing for the season at a young age was different than it is for me now. Throughout my years growing up, I would help my dad hang tree stands and prepare for deer season under his wing. It was my chance to observe and learn. I recently moved a couple years ago into a house that had hunting ground that I could hunt and manage as I could. I finally got the chance to try my hand at land management on my own. It was an important goal for me to learn about food plots. I started by taking soil samples and executing how and what I needed to have a successful food plot. This is now an ongoing goal that I am excited to complete every year. As late August approaches, I will be planting a mixture of Triticale, Forage Oats, Winter Peas, Crimson Clover, Chicory, Turnip, and Daikon Radish. This food plot is located in a corner off of a large soybean field, not quite a 1/4 of an acre. It will provide deer with a highly palatable forage source.
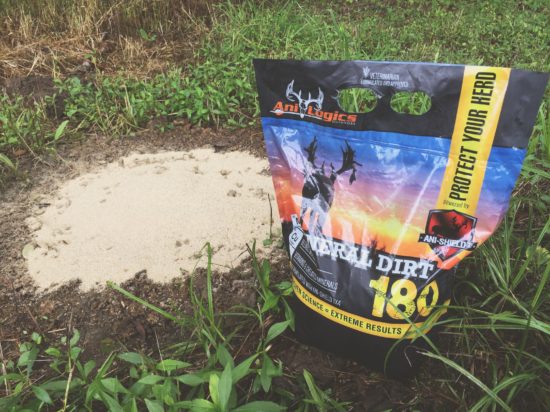
Within these food plots I use my Browning Trail Cameras to take inventory of the deer. During early summer, bucks are in full velvet and still in their bachelor groups. By putting out your cameras early, you can watch the bucks progress and see how their antlers develop. Try to learn their patterns for early season hunting and pay attention to how they are using the land. This is a high priority, and yet something I truly enjoy doing. Study these bucks and get to know them. An attractant can help keep your deer coming back for more, while providing them with adequate supplements and minerals. I use Anilogics Mineral Dirt 180 which has minerals like Copper, Zinc, Selenium, and Manganese to help a deer’s immune system. As the velvet starts to shed completely off, each buck will soon start to go his own way and their patterns will quickly change.
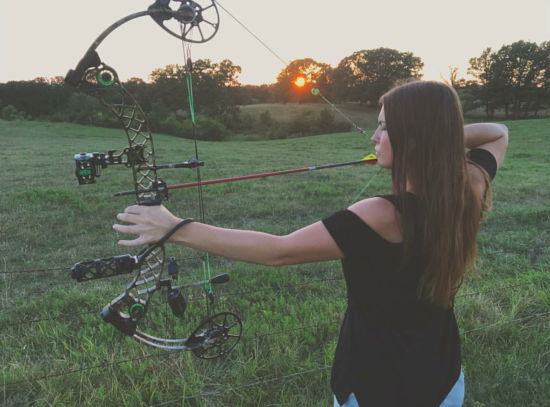
You know, there are so many different ways to manage your land and provide for your deer. I think by actively being involved in all year prepping, you can tremendously grow and learn to become an even more successful hunter each year. After all the hard work has been put in, it’s time to enjoy time in the stand. It truly makes all your hard work and effort pay off when you harvest a mature buck or healthy doe. Myself, as well as thousands of other hunters, are making it our final goal to stock our freezer with lean, organic venison. Shooting your bow as much as you can prior to deer season will help give you the confidence you will need in the stand. It’s a year-round cycle of preparing, planning and executing, and it never gets old!
Kinsey Edmunds is a pro-staffer from Missouri. Being raised on a farm and surrounded by wildlife, her love for the outdoors began at a young age. Kinsey enjoys bowhunting whitetails, turkeys, hogs and gators, just to name a few. She is also a team member of Huntress View, a team dedicated to strengthening the ever-growing community of women hunters.
Homemade Venison Jerky Recipe
July 2nd, 2017 by BTC Editor
Making homemade jerky is a simple way to preserve excess meat, and when done correctly, can be stored 1-2 months. Depending on the ingredients used, it can serve as a healthy, high-protein and low-carb snack—perfect for training for upcoming hunts or while in the mountains hiking or hunting.
Below is the recipe I use. Ingredients are approximations, and can be adjusted based on individual preferences.
Ingredients:
- 3 lbs. venison meat (can also use elk or other meat)
- 2 cups teriyaki
- ¼ cup soy sauce
- ¼ cup brown sugar (dark or light is ok)
- 1 heaping tablespoon minced garlic
- 1 tablespoon Cajun seasoning
- 1 tablespoon dried and crushed hot peppers (such as cayenne, jalapeno or habanero)
Instructions:
- Slice meat into 1/8”-1/4” slices using meat slicer
- Combine all ingredients (except meat) in small pot, mix well and heat over a low heat just enough to dissolve the sugar
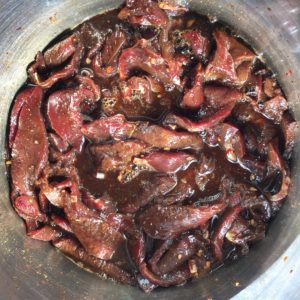
- Add meat to liquid mix, one piece at a time, ensuring all pieces are thoroughly coated
- Place meat and all liquid in Ziploc bag and refrigerate at least 4 hours (I prefer overnight for a stronger flavor)
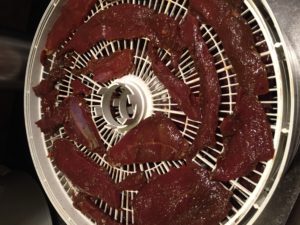
- Place slices of meat on dehydrator racks, making sure not to overlap any of the pieces
- Let dehydrate for 7-8 hours at 155°F
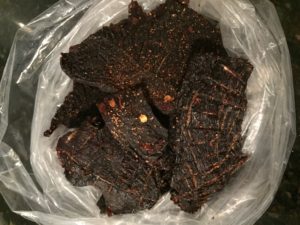
- Remove from dehydrator and store in plastic Ziploc bag
Additional information:
- 3 lbs. of raw meat yields approximately 1 lb. dried jerky
- Many people use a jerky gun, but I prefer making jerky with sliced meat instead of ground meat. I have a restaurant-quality meat slicer, but good slicers can be purchased at Bass Pro or Cabela’s.
- Sugar can be omitted for a lower-carb recipe; can also substitute a can of crushed pineapple
- Cajun seasoning and hot peppers can be omitted if you prefer non-spicy jerky
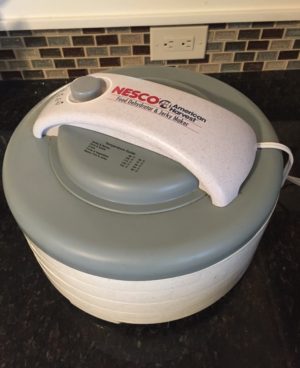
- I recommend the Nesco American Harvest Dehydrator, available for purchase on Amazon. I purchased this in 2009 and have used it for multiple batches of jerky every year, as well as for drying fruits and veggies in the summer. It comes with four dehydrator racks, and more can be purchased separately.
This is our go-to recipe, but would love to hear your jerky recipes. Please comment with your favorite recipe, or any tips you have for making jerky.
Sarah Honadel is an avid outdoorswoman from Kentucky, now living in Idaho, who enjoys hunting turkey, deer and elk. She is a Team Member at Huntress View and Brand Champion for ReelCamo Girl, two organizations that work to support, encourage and empower women in the outdoors. Follow her on Instagram @waddysarah and @arrowridgecreations.
A Hunter’s Widow, Married to a Hiking Widower
December 4th, 2016 by BTC Editor

Southwest Missouri resident Jessi Dreckman, who is married to an avid hunter, says deer season for non-hunting spouses shouldn’t be spent inside as “the hunter’s widow(er).” Instead, she urges those individuals to learn to love their spouse’s passion for hunting, and to get outdoors and find their own passion.
I’m the type of woman who has been known to spend 15 minutes, tupperware container in hand, trying to trap a red wasp that had wandered itself in my bathroom in order to take it outside and release it safely.
I’m the type of woman who has been known to spend the morning cooking warm oatmeal and delivering it to the hen house out back when there is two foot of snow on the ground, just to warm the bellies of my little egg producers.
I’m the type of woman who releases fish I catch. Even the really, really big ones.
I’m the type of woman who has been known to relocate the snakes I find in our yard down the road a ways instead of taking the shovel to them.
So, my love for hunting may not be immediately apparent to those who first meet me. But in addition to being that type of woman, I’m also the type of woman who fell head over heels in love with a hunter – and therefore, hunting itself.
My husband Drew and I have been together through thick and thin for 13 years, ever since our first date when I was just 16 years old. We’re opposites in many ways, but our mutual avid love for the outdoors that unites this opposites-attract couple in a way nothing else can.
So when the air turns cool and crisp and the leaves start to brown, I try not to hark on the fact that the season of being a hunter’s widow begins. Don’t get me wrong, the time my husband is home during September through February is minimal, but hunting season is also backpacking season. So it’s a time of adventure for both of us in different ways.
So, while Drew is waking up before dawn to find his way to a tree, I’m waking up shortly after to the trail head. When his heart jumps to the sound of the crinkle of leaves beneath him, my heart is pumping from hiking fifteen miles with a 30 pound pack on my back. When he is in his deer stand, close to the heart of nature, I am on my feet under the treetops, heart just as full. And when we do have precious moments together, we spend it with one another in the outdoors. My heart-pumping orienteering trip through the forest is an opportunity for Drew to scout for deer. His trip to put up a deer stand is an opportunity for me to tag along and test out my new hiking boots. And when he’s made a kill and we sit down to butcher and process deer, we share our separate stories of our adventures with one another. And we love every minute of it.
The truth is, although we spend our time in different ways, our hearts are very much the same. Through our time outdoors we’ve developed patience, determination and passion – and our love has only grown.
So to all of you fellow non-hunting spouses out there, please don’t spend hunting season alone focusing on your partner’s lack of presence. Instead, use those precious moments to go do what you love. Because when you find your own way to feel that same passion and fire, you realize it isn’t specific to any one hobby – those traits translate to life and love too. Get out there and find what makes your soul come alive!
Wild Game Thanksgiving Dinner
November 13th, 2016 by BTC Editor
It’s that time of year again, where we sit down with family and celebrate Thanksgiving. It’s a time to reflect on all that we are thankful for. For a hunter, this includes the memories in the field and the wild game that was harvested. In my opinion, there’s no better time than Thanksgiving to serve wild game. If you prefer a more non-traditional Thanksgiving dinner, here are a couple of simple recipes to try that you and your family are sure to appreciate.
The main course and side is a dinner kit from Hunter Gatherer Game Dinners.
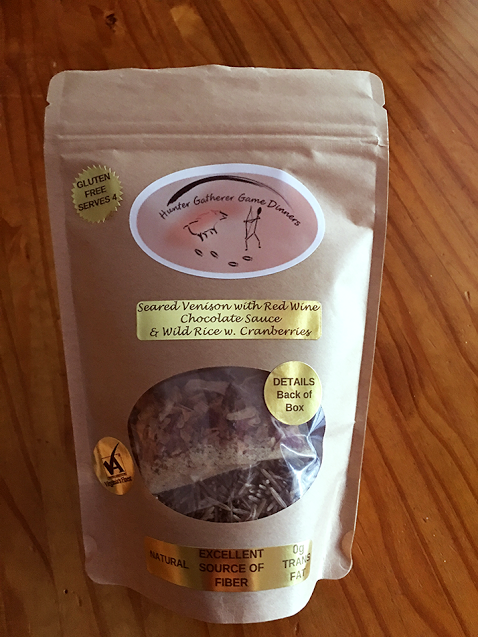
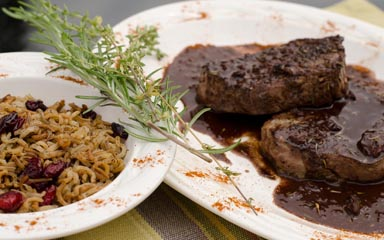
[Main course]
Seared Venison with Red Wine Chocolate Sauce
INGREDIENTS
- 12 oz. venison, elk, buffalo, filet mignon or rib eye steak (I prefer venison filet mignon)
- You’ll need to buy:
- 2 oz. pancetta or Italian bacon
- 1 – 8 oz. can low-sodium chicken broth
- 1 stick unsalted butter
- 1 cup Red Wine
- There are seasonings for the meat in individual packets labeled with numbers, as well as step-by-step instructions so it’s super easy to make!
[Side]
Wild Rice with Cranberries
- The wild rice and cranberries are also included in this kit, along with preparation instructions.
[Dessert]
Persimmon Bread
Most know that deer love to eat persimmons, but have you ever tried one? If you’ve ever tried one before they are ripe you probably think cooking anything with persimmons sounds like a bad idea, as they are awfully bitter. But once they turn ripe they are sweet and are great to use for pies, breads, cakes and cookies. Once they turn a purple/gray color and get soft they are ready for picking, usually after the first couple of frosts.
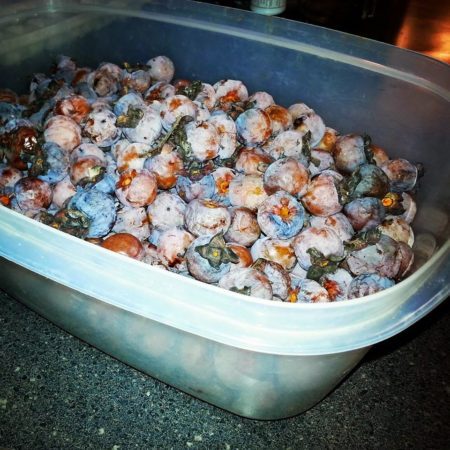
This recipe is my pumpkin bread recipe, but I swapped the 15 oz can pumpkin for 15 oz of persimmon pulp. To me, ripe persimmons taste very similar and have the same consistency as a pumpkin. To get the pulp you will want to smash the persimmons into a bowl through a cone shaped collander, this way you don’t get the skins or seeds in the pulp. We picked these and after smashing all of them through the collander we probably have about 4-5 cups of persimmon pulp. I put the pulp into zip-loc baggies, about 2 cups per baggie, and store them in the freezer until ready to use for cooking.
INGREDIENTS
- 3 cups sugar
- 1 cup cooking oil
- 4 eggs
- 3 1/2 cups all purpose flour
- 2 tsp baking soda
- 1 1/2 tsp salt
- 1 tsp ground cinnamon
- 1 tsp ground nutmeg
- 2/3 cup water
- 15 oz persimmon pulp
DIRECTIONS
- Preheat oven to 350 degrees. Grease 2 loaf pans.
- In an extra large mixing bowl, beat sugar and oil with electric mixer on medium speed. Add eggs & beat well; set sugar mixture aside
- In a large bowl, combine flour, baking soda, salt, cinnamon & nutmeg. Alternately add flour mixture & the water to sugar mixture, beating on low after each addition until just combined.
- Beat in the persimmon pulp.
- Spoon batter into pans
- Bake 55-65 minutes or until a toothpick comes out clean
- Cool in pan on wire rack for 10 minutes. Wrap & store overnight before slicing (The recipe calls for this, but I never do this. I absolutely love warm bread right out of the oven!)
By Andrea Haas
Andrea Haas is a Pro-Staffer from Missouri who enjoys hunting deer, turkeys, and upland birds. She is also the founder of the Huntress View, an organization formed to help strengthen the ever growing community of women hunters.
Taxidermy: Caring For Your Animal Pre-Mount
November 6th, 2016 by BTC Editor
As hunters and huntresses, we sometimes harvest that special animal that may be a first, a big buck, big fish, or beautifully plumed bird to get preserved and hang on the wall as a trophy. When you have that trophy in hand, what are the next steps to take to make sure it is properly cared for until it is safely in the hands of the taxidermist, and how do we care for the mounts when we get them back?
Growing up in a taxidermy family, I have seen everything from freezer burns and premature decay to faded and bug infested mounts. The care of an animal before and after it is mounted is key in keeping it beautiful for many, many years.
One of the first and very best things you can do before going afield is research taxidermists in your area and find one you are comfortable with. Most taxidermists will welcome you into their shops and showrooms that showcase their work. Talk to other hunters and find out what taxidermists they recommend. Do not go with the cheapest option because the mount will more than likely be poor quality. Bottom line, you’re going to get what you pay for.
Before the animal is mounted and before you are able to get it to the taxidermist, proper storage in the freezer is crucial to producing a good mount. Freezer burns are a common result of improper packing. On the other end, not getting the animal in the freezer soon enough can result in premature decay.
Mammal, bird and fish taxidermy are very different, so the way they are taken to the taxidermist will be different. When you collect any mammal, the first thing to know for field care is to avoid dragging the animal if at all possible. There are many tools/equipment out there to help you transport your animal. The second thing to know is to keep the animal cool until you can get it skinned or to the taxidermy shop no matter what kind of animal it is. Always consult with the taxidermist before skinning it. The quickest way to ruin a trophy is to skin it wrong. You may also want to wash off any excess blood or body fluids prior to freezing. The third thing is get it to the taxidermist as soon as possible. Carting a deer around is a bad idea, but a coyote or fox is an even worse idea. As nature rapidly takes it course, bacteria starts to grow as soon as the animal dies and the skin will start ‘turning green’ or rotting.

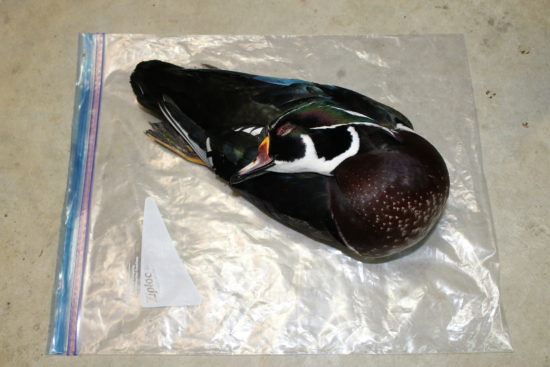
Birds will be put in the freezer exactly like they were shot. It’s not necessary to do any kind of skinning, so don’t take any of the meat or entrails out. The proper freezing position is to put the head on the chest of the bird and wrap it in a couple garbage bags and tightly seal it. Freezer Ziplock bags are also something good to use. Be careful to not bend or twist tail and wing feathers. One common misnomer is to put a bird in nylon hose and wrap it in newspaper. Many taxidermists cringe when a bird is brought to them inside a hose and even worse wrapped in newspaper. Newspaper will begin the process of dehydration and promote freezer burn, making the taxidermists job more difficult. Once you get a properly wrapped bird in the freezer, call your taxidermist and make arrangements to take it to them.
Fish have a completely different scenario than mammals and birds. The very first thing you should do when you pull the fish out of the water is take good quality, clear pictures of it. Take an overall profile picture and make sure to get any special markings or colors you want the finished mount to have. If you’re going to release the fish, measure it from the tip of the nose to the tip of the tail and the girth all around the body of the fish. If you are keeping the fish, do not skin or gut it and don’t put it on a stringer if you don’t absolutely have to. The best place to keep it is in a cooler or live well until it can be put in a freezer. When you’re ready to freeze it, get a wet t-shirt or towel and roll the fish in it. Wet towels or shirts are key in protecting the fish from freezer burn. Never use newspapers or paper towels. Put the wrapped fish into a trash bag and seal it tight. If you need to, double bag it. If it’s possible, freeze it on a flat board.
Try to have an idea of the position you want your animal mounted in. It will be that way forever. The taxidermist may be able to provide some ideas of positioning, but to avoid delays it is best to know what you want ahead of time.
When you see your mount for the first time, the memories come flooding back. You want it to look like that forever right? When placing your mount in your home, the best thing you can do is to keep it out of sunlight to prevent colors from fading and keep it dusted. Just like anything else sitting on the shelf, it will collect dust. Consult with your taxidermist about what is best to use for cleaning your particular mount. For fish and birds, a feather duster is most likely to be recommended along with never using any chemicals, as they will build up over time and cannot be removed. Dusting also applies to deer, however, some hair care type products are available.
Hopefully these tips will aid you in the process of preserving that special animal you were able to harvest, and to keep the memories of a hunt alive for years to come.
By Allison Stegmann
Allison is an avid waterfowl hunter from Iowa. She is currently a student at the University of Northern Iowa studying Leisure, Youth, and Human Services with an emphasis in Outdoor Recreation. Allison is also a member of of Huntress View, a team dedicated to strengthening the ever-growing community of women hunters.
