How Many Trail Cameras Do I Need?
December 10th, 2017 by BTC Editor
How many trail cameras you need and why you need to leave them out year round.
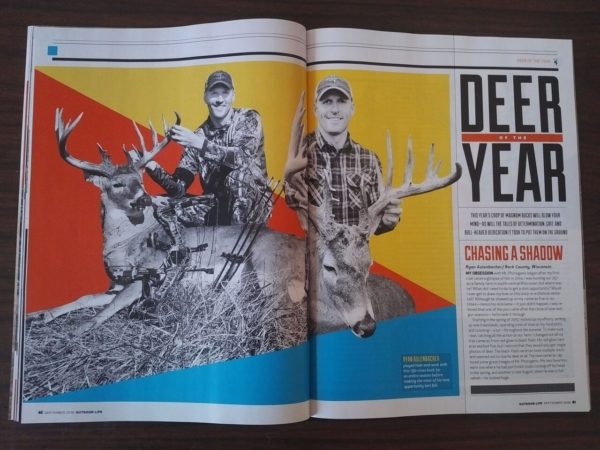
By 2016 Outdoor Life Deer of the Year Award Winner Ryan Aulenbacher
Putting cameras up during the season is great and then when you get one picture in mid-September you get excited. Only problem is you can’t tell if it was a one shot wonder or a resident buck. There lies your problem. Let’s say it was at 2AM. Was he going to bedding area or going to a feeding area or? In my younger years I would just pound that area with activity not really knowing if that was where he was most of the time. This not only didn’t result in getting said buck but I never even saw him with my own eyes.
The goal for me with game cameras is to try and start building that pattern early and get your stands in the woods before the season begins, or at least during early season. I don’t care how careful you are when it comes to scent control, it’s very hard to keep an area scent free during the season when you are banging around with a tree stand, breaking a sweat, and cutting branches for shooting lanes. From my years of chasing these one shot wonders I can tell you it’s not a successful strategy.
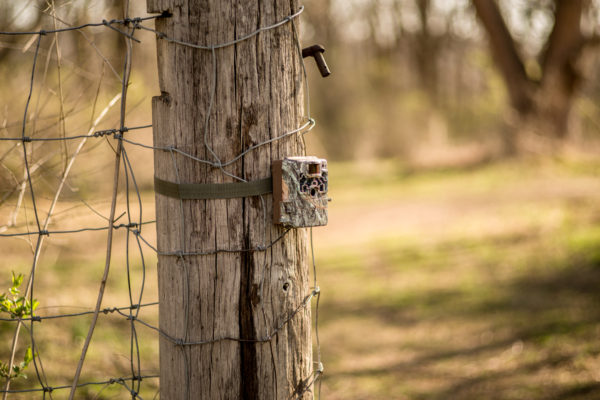
That’s why the cameras need to be up year round. I literally leave them up 365 days a year. With today’s cameras that may be 2 sets of batteries a year and with a Browning Trail Camera that’s only 6 AA batteries at a shot. That’s less than $5 a year in batteries. That’s pretty cheap scouting if you ask me. As a side benefit you also can get a better view on the predation, the number of fawns you have each spring, and an occasional Morel hunter who can’t read No Trespassing signs.
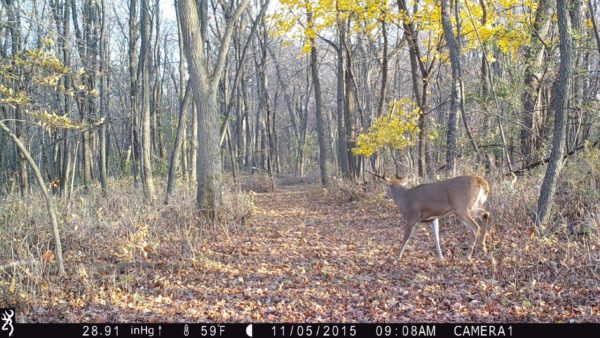
So what is a pattern? It’s when you are seeing deer come through at some similar time periods within close proximity of days. Knowing what direction he is going helps as well. When you start seeing him 2-3 times a week he likely is just out of camera view the other days. Try and use your best guess on where his bedding and feeding areas are with this information. If you are getting weekly pictures of him you surely are in “his home.” Hopefully you have an intercept point ready to go.
Once you start keeping your cameras up year-round, you may notice deer moving from their spring pattern to summer pattern and then to their fall pattern when they lose their velvet. This is also when you should be trying to hone in on a pattern. For example; are the bucks following the river or are they headed into the corn at a certain spot? Do I have any coyotes on this side of the property? (Disclaimer: being on the non-coyote side of the farm is like being in the non-chlorinated side of the pool; there is no such thing but I find that like deer, coyotes are more active in certain areas.) I notice that if I start seeing coyotes in one area with my cameras I don’t see many does and fawns in that same area. On the flip side, I have noticed that bachelor groups in early summer won’t show much of a change due to predator activity.
You need to move your cameras throughout the season as well to help pattern your bucks. Don’t go throwing them up in the middle of a bedding area, but you do need to change where you place them throughout the year to see if the deer are entering and exiting an area in the same or a different spot from the month or year prior. You need to have fresh data to go off of.
For instance, my buck that was on the cover of Outdoor Life I had on camera in the same area on 2 different cameras every 3-4 days from August until November. The cameras were about 100 yards apart in an area just outside of what I believe was his bedding area. I set up my stand at an intersecting point trying to get him on the way back in during AM hunts and on the way out during PM hunts.
A few years prior to my deer that was on the cover of Outdoor Life I had shot another good buck. The following year I left my cameras and stands in the same areas and basically hunted the pattern of a deer I already killed the year prior. It hit me as I sat there late in the season not seeing any mature bucks. “Why am I in this stand? What deer am I hoping to see? I didn’t have any patterns developed…” That’s why you need to try different spots every year with your cameras. Yes, you have good “areas” year after year on your land but with bow hunting you need to know the right tree not the right area.
So how many cameras do you need? Well that’s tough to answer in a vacuum. I think the better question is, where do I need them? I would definitely try and get a camera up where they have the most activity coming in and out of your land near some edges or bottlenecks so you don’t disturb bedded deer. Until you have a pattern developed I would be vigilant with scent control and check them at least once per week or maybe more during hunting season. I could easily see you having 2-4 cameras out on 40 acres.
Let’s say you have 250 acres. This is where you can really start to pattern a deer because it may spend the majority of its time on your land. Going off my experience in rural farming areas of WI where we don’t have massive 400-acre wood lots, more of 80 acres of field and 20 acres of woods and then 20 acres of Marsh etc., I would try to get a camera in each area. So each separate woodlot or cover area would get a camera. On 400 acres of farm country that might be 10-20 cameras. I hunt property that is about 200 acres and I have 8 cameras out now (6 black flash/ 2 RED IR). So that will be around 1 per 25 acres. In doing some research, that is a number you’ll see come up by other hunters and writers as well.
Once you figure out a spot to sit, remember you are in “his” area now and he will notice anything out of place, so don’t put a stand up without taking extreme scent control measures. I typically wait until right before a rain event to move a stand during hunting season. I like having the rain wash away any scent I may leave. You would hate to take all the time to develop a pattern only to change it!
Get your trail cameras out there and keep them up the whole year. We have so much more technology available today to help us become better hunters if we figure out how to use it correctly. Good luck!
5 Tips For Bowhunting Turkeys
March 12th, 2017 by BTC Editor
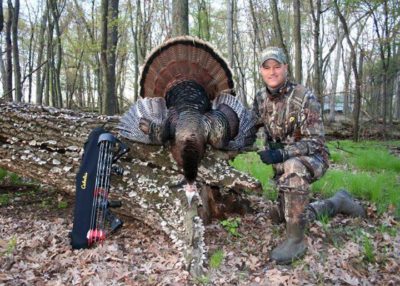
Planning on using your bow to harvest a turkey this spring? If you’ve ever hunted turkeys before then you know it will be no easy task. Hunting turkeys with a shotgun is often enough to drive a hunter crazy, let alone adding the challenge of a stick and string. Successfully harvesting a turkey with your bow is perhaps one of the hardest, yet most rewarding hunts you will ever be a part of.
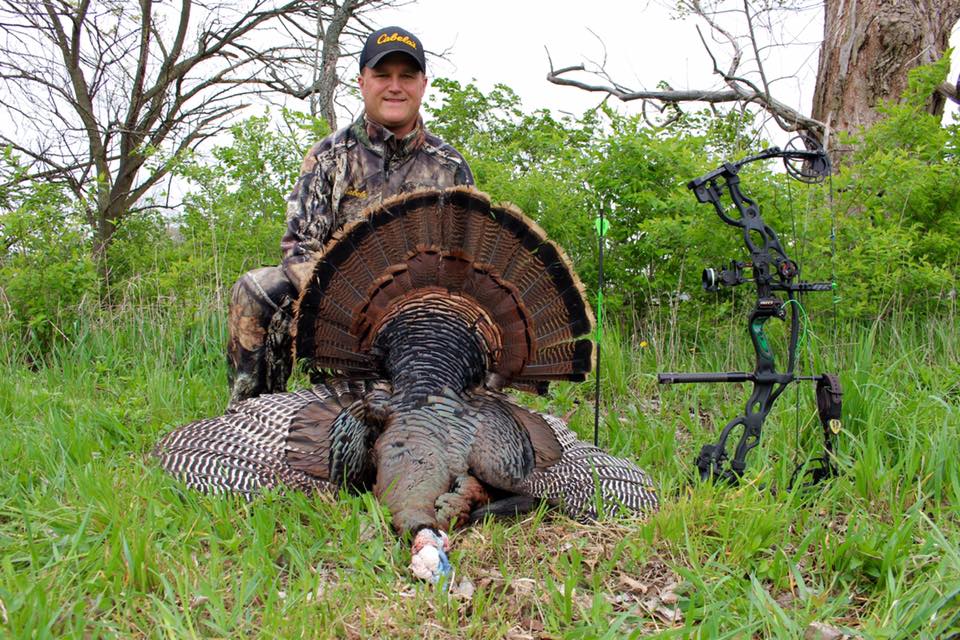
Browning Trail Cameras Pro Staff members Don and Dan Pickell have been bowhunting for years and make bagging a gobbler with a bow look like a piece of cake.
Here are a few of their tips for bowhunting turkeys this spring:
1) Scouting
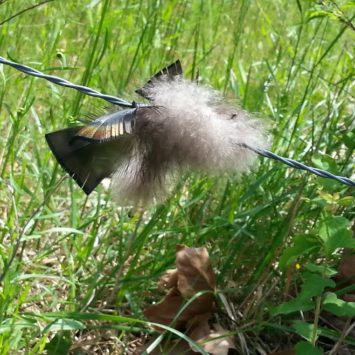
Spend some time in the woods before season starts so you can be as prepared as possible before opening day. Look for roosting sites, turkey feathers & droppings, feeding areas and travel routes. Once you’ve found some turkey sign or what looks like some good locations, it’s time to hang your trail cameras.
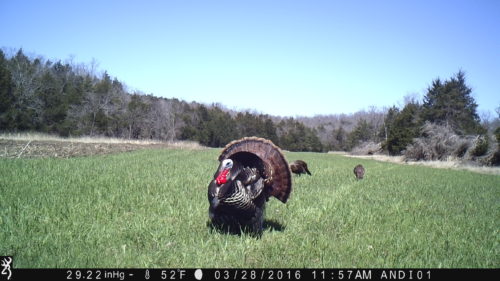
2) Trail Cameras
Get your Browning Trail Cameras out now and keep them out throughout turkey season. Trail cameras will help pinpoint the time of day the turkeys are in certain locations so you know when you should target these specific areas while hunting.
When setting up your cameras, keep the location in mind and set them accordingly. For example, you may want to set your camera on Time Lapse mode while watching large fields or new locations where you aren’t sure where the turkeys are entering or leaving. The camera will take images of the entire field, so you will end up capturing game at 200 + yards away, where a conventional game camera would not normally trigger a picture.
3) Setup
Pattern the birds with your trail cameras and set up your ground blinds accordingly. If they aren’t coming into your call it’s usually best to just sit and wait them out; Remember, you’re hunting with a bow, not a shotgun, so run and gun is a lot more difficult. More often than not, your trail cameras will tell you where you need to be. Remember what you learned about their behavior while studying your trail camera photos and stick with that.
4) Decoys
A decoy will often help bring the birds within bow range while keeping their eyes off of you, but we have also had toms skirt our decoys at times. When this happens we usually pull the decoys and set up in a proven spot where we have them patterned with our Browning Trail Cameras and ambush them. It just depends on the bird’s moods.
5) Shot Placement & Recovery
With a shotgun we aim at the bottom of the neck to allow for the pattern to cover both his head and neck. With a bow, we prefer a broadside shot through the wings if possible so an injured bird can’t fly off, making it harder to recover. Whether we use a bow or a shotgun, as soon as a shot is made we go after the bird and get a foot on its head, just in case.
Going into turkey season, it’s best to have a positive outlook and lots of patience! Turkeys are fickle creatures and even having the “perfect setup” is often not enough to harvest a tom. Make sure you’re as prepared as possible ahead of time by scouting with your trail cameras and keeping the above tips in mind. Harvesting a big longbeard with your bow is worth all of the hassle. Stay safe and have fun this turkey season!
By Andrea Haas
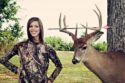
Andrea Haas is a Pro-Staffer from Missouri who enjoys hunting deer, turkeys, and upland birds. She is also the founder of the Huntress View, an organization formed to help strengthen the ever growing community of women hunters.
