How Many Trail Cameras Do I Need?
December 10th, 2017 by BTC Editor
How many trail cameras you need and why you need to leave them out year round.
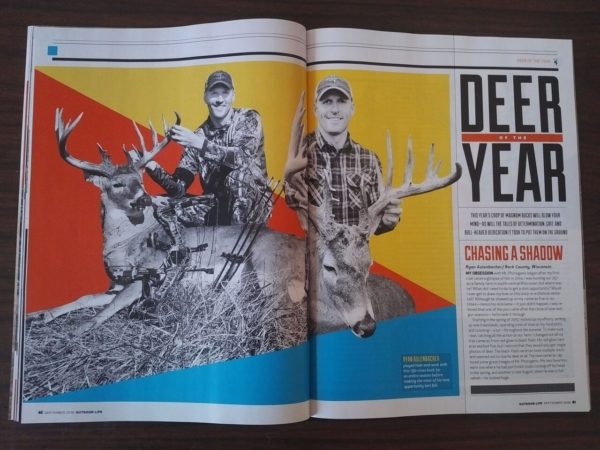
By 2016 Outdoor Life Deer of the Year Award Winner Ryan Aulenbacher
Putting cameras up during the season is great and then when you get one picture in mid-September you get excited. Only problem is you can’t tell if it was a one shot wonder or a resident buck. There lies your problem. Let’s say it was at 2AM. Was he going to bedding area or going to a feeding area or? In my younger years I would just pound that area with activity not really knowing if that was where he was most of the time. This not only didn’t result in getting said buck but I never even saw him with my own eyes.
The goal for me with game cameras is to try and start building that pattern early and get your stands in the woods before the season begins, or at least during early season. I don’t care how careful you are when it comes to scent control, it’s very hard to keep an area scent free during the season when you are banging around with a tree stand, breaking a sweat, and cutting branches for shooting lanes. From my years of chasing these one shot wonders I can tell you it’s not a successful strategy.
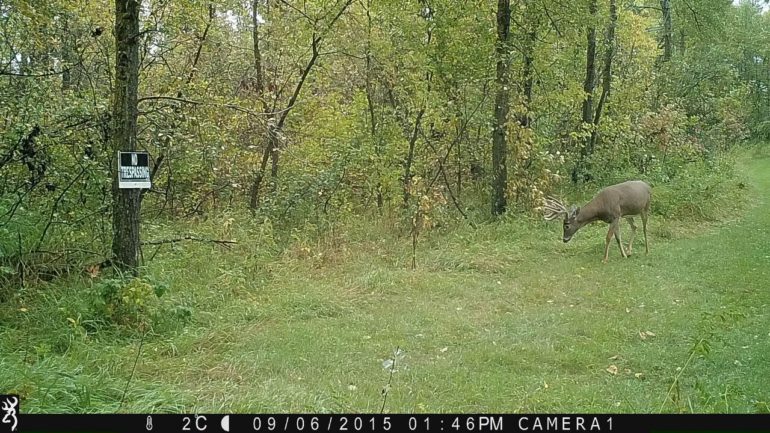
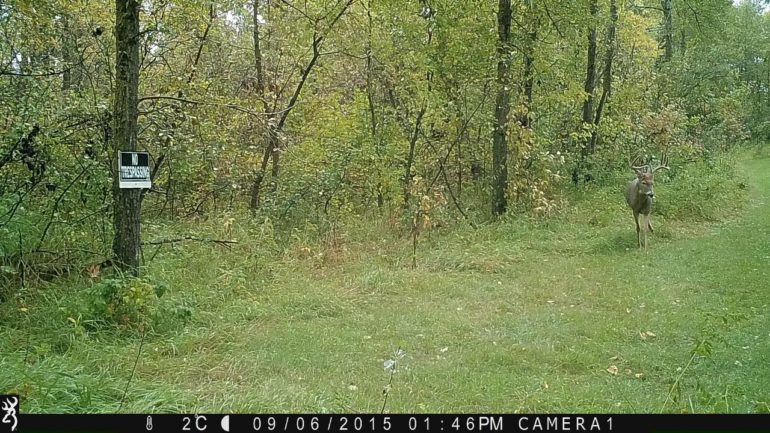
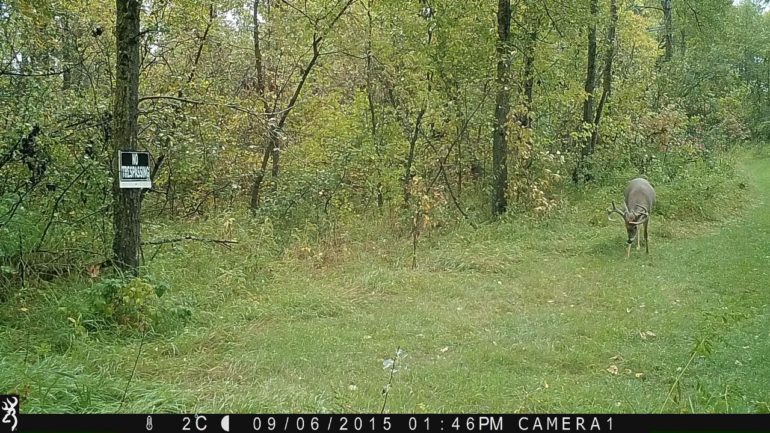
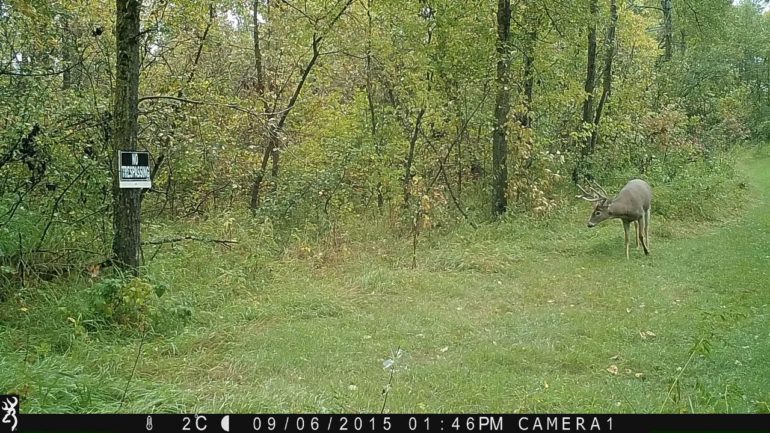
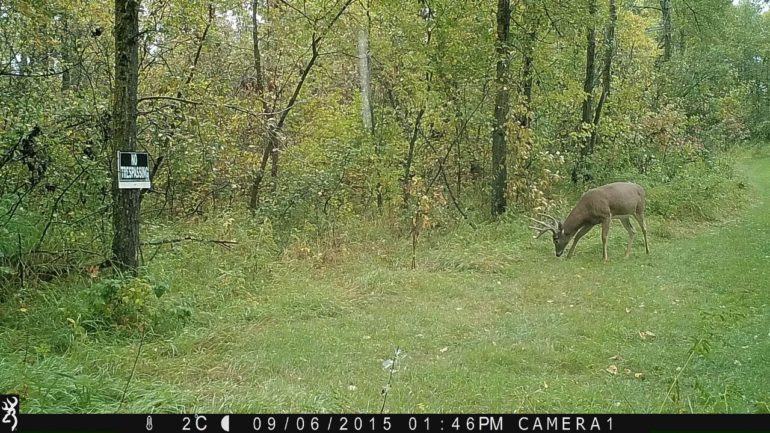
That’s why the cameras need to be up year round. I literally leave them up 365 days a year. With today’s cameras that may be 2 sets of batteries a year and with a Browning Trail Camera that’s only 6 AA batteries at a shot. That’s less than $5 a year in batteries. That’s pretty cheap scouting if you ask me. As a side benefit you also can get a better view on the predation, the number of fawns you have each spring, and an occasional Morel hunter who can’t read No Trespassing signs.
So what is a pattern? It’s when you are seeing deer come through at some similar time periods within close proximity of days. Knowing what direction he is going helps as well. When you start seeing him 2-3 times a week he likely is just out of camera view the other days. Try and use your best guess on where his bedding and feeding areas are with this information. If you are getting weekly pictures of him you surely are in “his home.” Hopefully you have an intercept point ready to go.
Once you start keeping your cameras up year-round, you may notice deer moving from their spring pattern to summer pattern and then to their fall pattern when they lose their velvet. This is also when you should be trying to hone in on a pattern. For example; are the bucks following the river or are they headed into the corn at a certain spot? Do I have any coyotes on this side of the property? (Disclaimer: being on the non-coyote side of the farm is like being in the non-chlorinated side of the pool; there is no such thing but I find that like deer, coyotes are more active in certain areas.) I notice that if I start seeing coyotes in one area with my cameras I don’t see many does and fawns in that same area. On the flip side, I have noticed that bachelor groups in early summer won’t show much of a change due to predator activity.
You need to move your cameras throughout the season as well to help pattern your bucks. Don’t go throwing them up in the middle of a bedding area, but you do need to change where you place them throughout the year to see if the deer are entering and exiting an area in the same or a different spot from the month or year prior. You need to have fresh data to go off of.
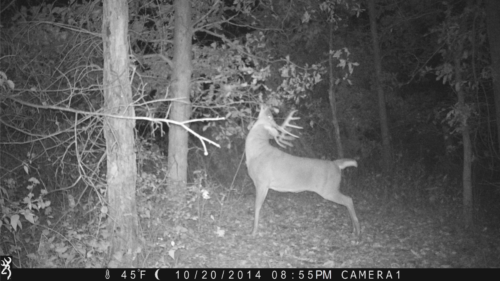
For instance, my buck that was on the cover of Outdoor Life I had on camera in the same area on 2 different cameras every 3-4 days from August until November. The cameras were about 100 yards apart in an area just outside of what I believe was his bedding area. I set up my stand at an intersecting point trying to get him on the way back in during AM hunts and on the way out during PM hunts.
A few years prior to my deer that was on the cover of Outdoor Life I had shot another good buck. The following year I left my cameras and stands in the same areas and basically hunted the pattern of a deer I already killed the year prior. It hit me as I sat there late in the season not seeing any mature bucks. “Why am I in this stand? What deer am I hoping to see? I didn’t have any patterns developed…” That’s why you need to try different spots every year with your cameras. Yes, you have good “areas” year after year on your land but with bow hunting you need to know the right tree not the right area.
So how many cameras do you need? Well that’s tough to answer in a vacuum. I think the better question is, where do I need them? I would definitely try and get a camera up where they have the most activity coming in and out of your land near some edges or bottlenecks so you don’t disturb bedded deer. Until you have a pattern developed I would be vigilant with scent control and check them at least once per week or maybe more during hunting season. I could easily see you having 2-4 cameras out on 40 acres.
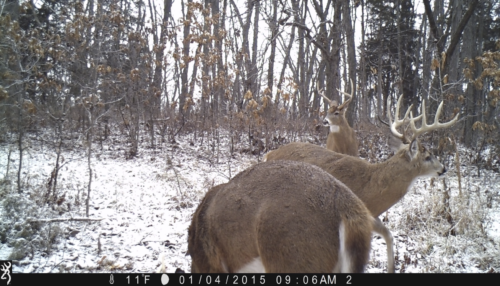
Let’s say you have 250 acres. This is where you can really start to pattern a deer because it may spend the majority of its time on your land. Going off my experience in rural farming areas of WI where we don’t have massive 400-acre wood lots, more of 80 acres of field and 20 acres of woods and then 20 acres of Marsh etc., I would try to get a camera in each area. So each separate woodlot or cover area would get a camera. On 400 acres of farm country that might be 10-20 cameras. I hunt property that is about 200 acres and I have 8 cameras out now (6 black flash/ 2 RED IR). So that will be around 1 per 25 acres. In doing some research, that is a number you’ll see come up by other hunters and writers as well.
Once you figure out a spot to sit, remember you are in “his” area now and he will notice anything out of place, so don’t put a stand up without taking extreme scent control measures. I typically wait until right before a rain event to move a stand during hunting season. I like having the rain wash away any scent I may leave. You would hate to take all the time to develop a pattern only to change it!
Get your trail cameras out there and keep them up the whole year. We have so much more technology available today to help us become better hunters if we figure out how to use it correctly. Good luck!
4 Seasonal Trail Camera Techniques
November 5th, 2017 by BTC Editor
Trail Cameras have become a big part of the modern hunters scouting strategies. But many fall short by not putting in the time to scout and find new places to put their trail cameras. These 4 simple trail camera techniques will help you get more pictures of your monster bucks.
EARLY SEASON
As the bucks begin to grow and racks begin to form, it is time to put trail cameras up on popular mineral sites. The nutrients deer need can be found in these minerals for the growth of antlers and milk production of fawns. This is a great place to determine deer density and take an early season inventory of your deer herd.
PRE-RUT
This time of year, bucks shed their velvet and their testosterone levels begin to rise. When scrapes and rubs become more visible, it is time to move your trail cameras. Scrapes are a great place to find mature bucks looking for receptive does. Most bucks visit scrapes in the cover of darkness, but are easy to get great pictures of.
RUT
When the does start to come into heat, bucks really start to move. As bucks begin to seek does, food sources become a hot spot for deer activity. By putting a trail camera on the edge of a field, you are likely to get pictures of bucks checking for receptive does. Also helping to show where and what time they enter the field.
POST-RUT
As the rut winds down, bucks begin showing the toll of heavy rut activity. Low body weights and broken, beat up bodies, bucks become slaves to their stomachs. This is the time of year that corn stations or late season food plots become key trail camera spot. These pictures can help you find out what bucks made it through the season and ones to write off the hit list.
Blog originally posted on The Break TV blog by team member Stephen Jones.
Choosing Your First Trail Camera
July 16th, 2017 by BTC Editor
Trail camera technology has really improved over the years and there are more features than ever, allowing you to customize your trail camera experience to your liking. For someone who is new to hunting or the trail camera world, picking out your first game camera can be somewhat overwhelming, especially if you don’t know what features you need or what the features even do. After someone recently asked me for advice on what they need to look for when purchasing their first camera, I decided to share a few things that I feel are “must-haves”, as well as some bonus features and accessories that may be an asset to you.
Features
I really feel a lot of features on trail cameras are user specific and depend on user preference. I’ll briefly explain the features that I feel are the most important when considering which camera to buy.
Flash Type
The flash types are: White flash, Black flash (Invisible, or No-Glow), and Standard IR (InfraRed / Low-Glow). Tom Rainey of Browning Trail Cameras wrote a really great article for this blog explaining each flash type and their effect on trail camera picture quality: http://btc-omrc.com/nighttime-trail-camera-images-putting-light-on-the-subject/
Basically, the highest quality nighttime photos will be from White Flash cameras, then IR cameras, and then Black Flash cameras, but that’s not to say that the quality of the nighttime images from Black Flash cameras are bad. You just may notice a little more motion blur on them.
So, a few things to consider when choosing the flash type:
Where will you be putting your cameras?
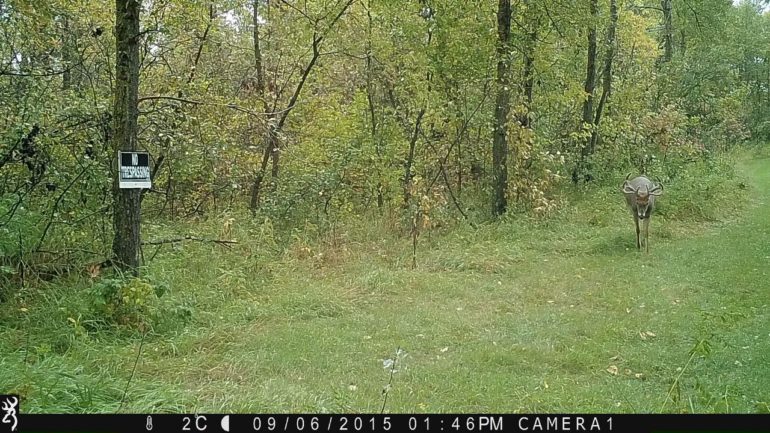
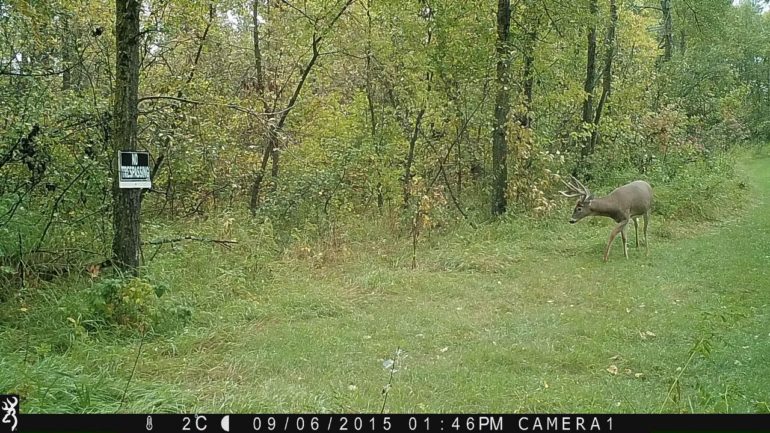
If you are going to be putting them on public land or in an area that is known to have a lot of trespassers, you will probably want to go with a Black Flash camera. Otherwise, one of the previous two flash options may be what you would prefer.
Do you feel a White Flash or Standard IR camera will spook the game you are hoping to get pictures of?
If so, a camera with Black Flash may be best for you. My personal experience with Standard IR and White Flash cameras is I feel the animals get used to them. I haven’t noticed them spooking deer in the years that I have been running trail cameras. Everyone has their own opinion on this and each location may be different, so again, go with your own personal preference here.
Detection Range
The location where you plan on putting your game cameras will help you decide which camera may be best for you in regards to detection range. If you are running trail cameras primarily in the woods or have it set up over pinch points and travel corridors, the detection range can be quite a bit lower. But, if you are watching over larger areas, such as fields, the detection range needs to be a little higher, especially if you aren’t quite sure where the wildlife are traveling.
For example, the Browning Command Ops has a detection range of 55 feet with a 60-foot flash range, which is great. But the Browning Recon Force Extreme has a detection range of 80 feet with a 120-foot flash range, which is quite a bit more. So, you can see how the higher detection range could be quite a bit more beneficial in certain situations.
Trail Camera Accessories
Obviously, SD Cards and batteries are must-have accessories for your trail cameras. But there are a couple other accessories that you may want to look into purchasing for your first trail camera, depending on the location the camera will be in and how often you plan on checking it.
Security Box
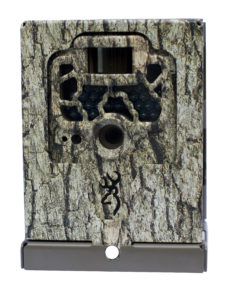 As I mentioned above, the location really is a key factor to consider when purchasing your trail camera. The same goes for deciding whether or not you need a trail camera Security Box. A couple things to keep in mind here: Do you expect there to be trespassers, or will the camera be on public land? Also, what types of animals are in your area? Do you have a high bear population? If you answered “Yes” to any of those questions, I recommend getting a Security Box. Browning makes one that fits all of their camera models (excluding the Defender 850). It can also be locked using a standard padlock or a Master Lock Python Cable so your camera stays safe and stays put.
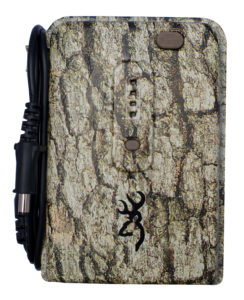
Trail Camera Power Pack
The Trail Camera Power Pack will extend the battery life of your Browning Trail Camera in the field. This is a great option if you don’t plan on checking your trail cameras very often. It holds holds 8 AA batteries in the same easy to use battery tray used in the trail cameras. Other features include a built-in battery tester and a twist lock plug to lock the power adapter to your Browning Trail Camera.
Bonus Trail Camera Features
Here are a few “bonus” features that you may also want to take into consideration when choosing your first trail camera. I personally don’t feel that these are features that you absolutely have to have, but I do feel they will enhance your trail camera experience. Personal preference comes into play here as well. Here are a few of my favorite features on the Browning Trail Cameras:
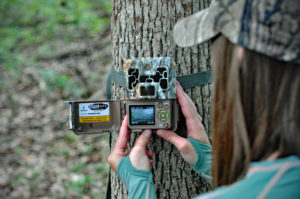
Viewing Screen
This is an internal viewing screen on some of the Browning Trail Camera models. It’s great for viewing trail camera photos in the field, and it really comes in handy when positioning the camera while you are setting it up.
Timelapse Mode
The Timelapse function allows you to set up your camera in the field, and program it to take pictures automatically at fixed intervals. This feature is helpful when you set a camera up in a new location such as a large field or food plot where you are not sure where the wildlife are entering the field. The camera will take images of the entire field, so you will end up capturing game at 200 + yards away, where a conventional game camera would not normally trigger a picture. All Browning Trail Camera models come with this feature, as well as the Timelapse Viewer Plus Software, so you can playback a whole day’s worth of activity in just a few minutes, much like watching a video.
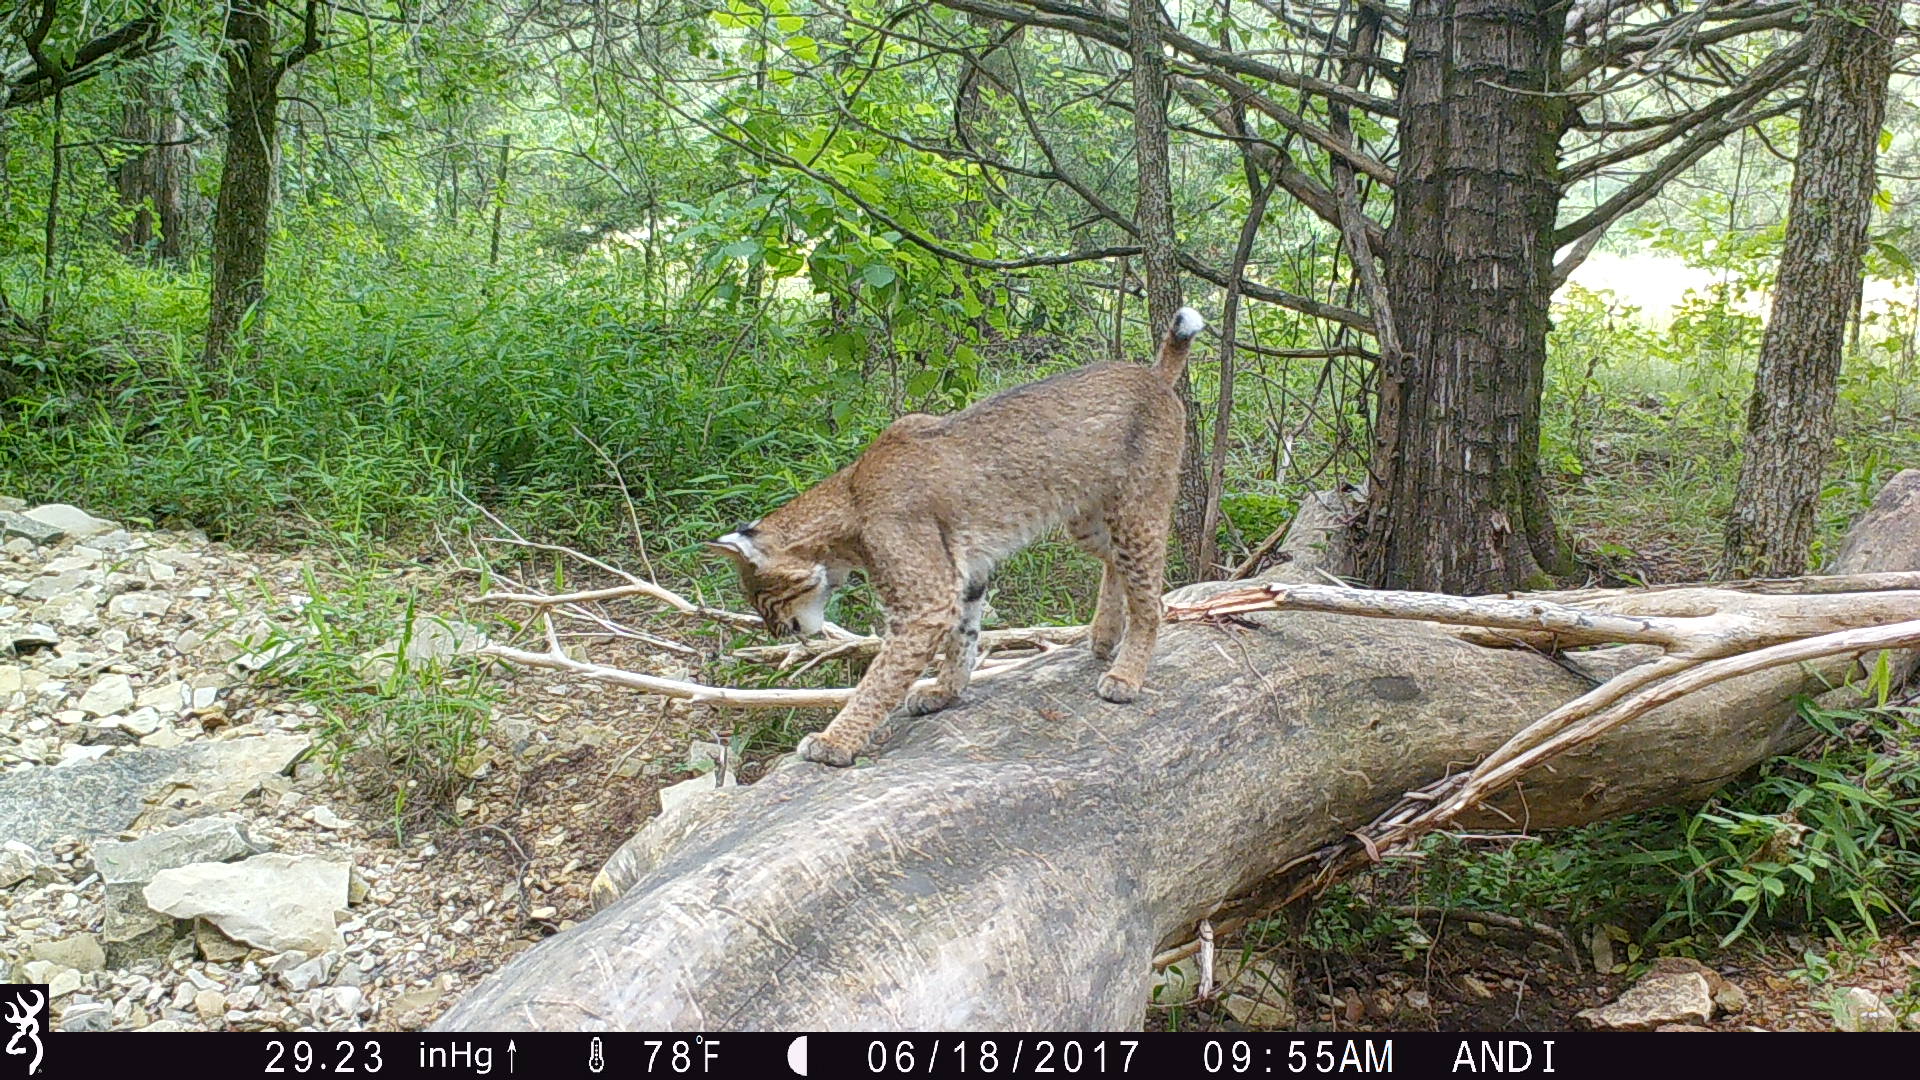
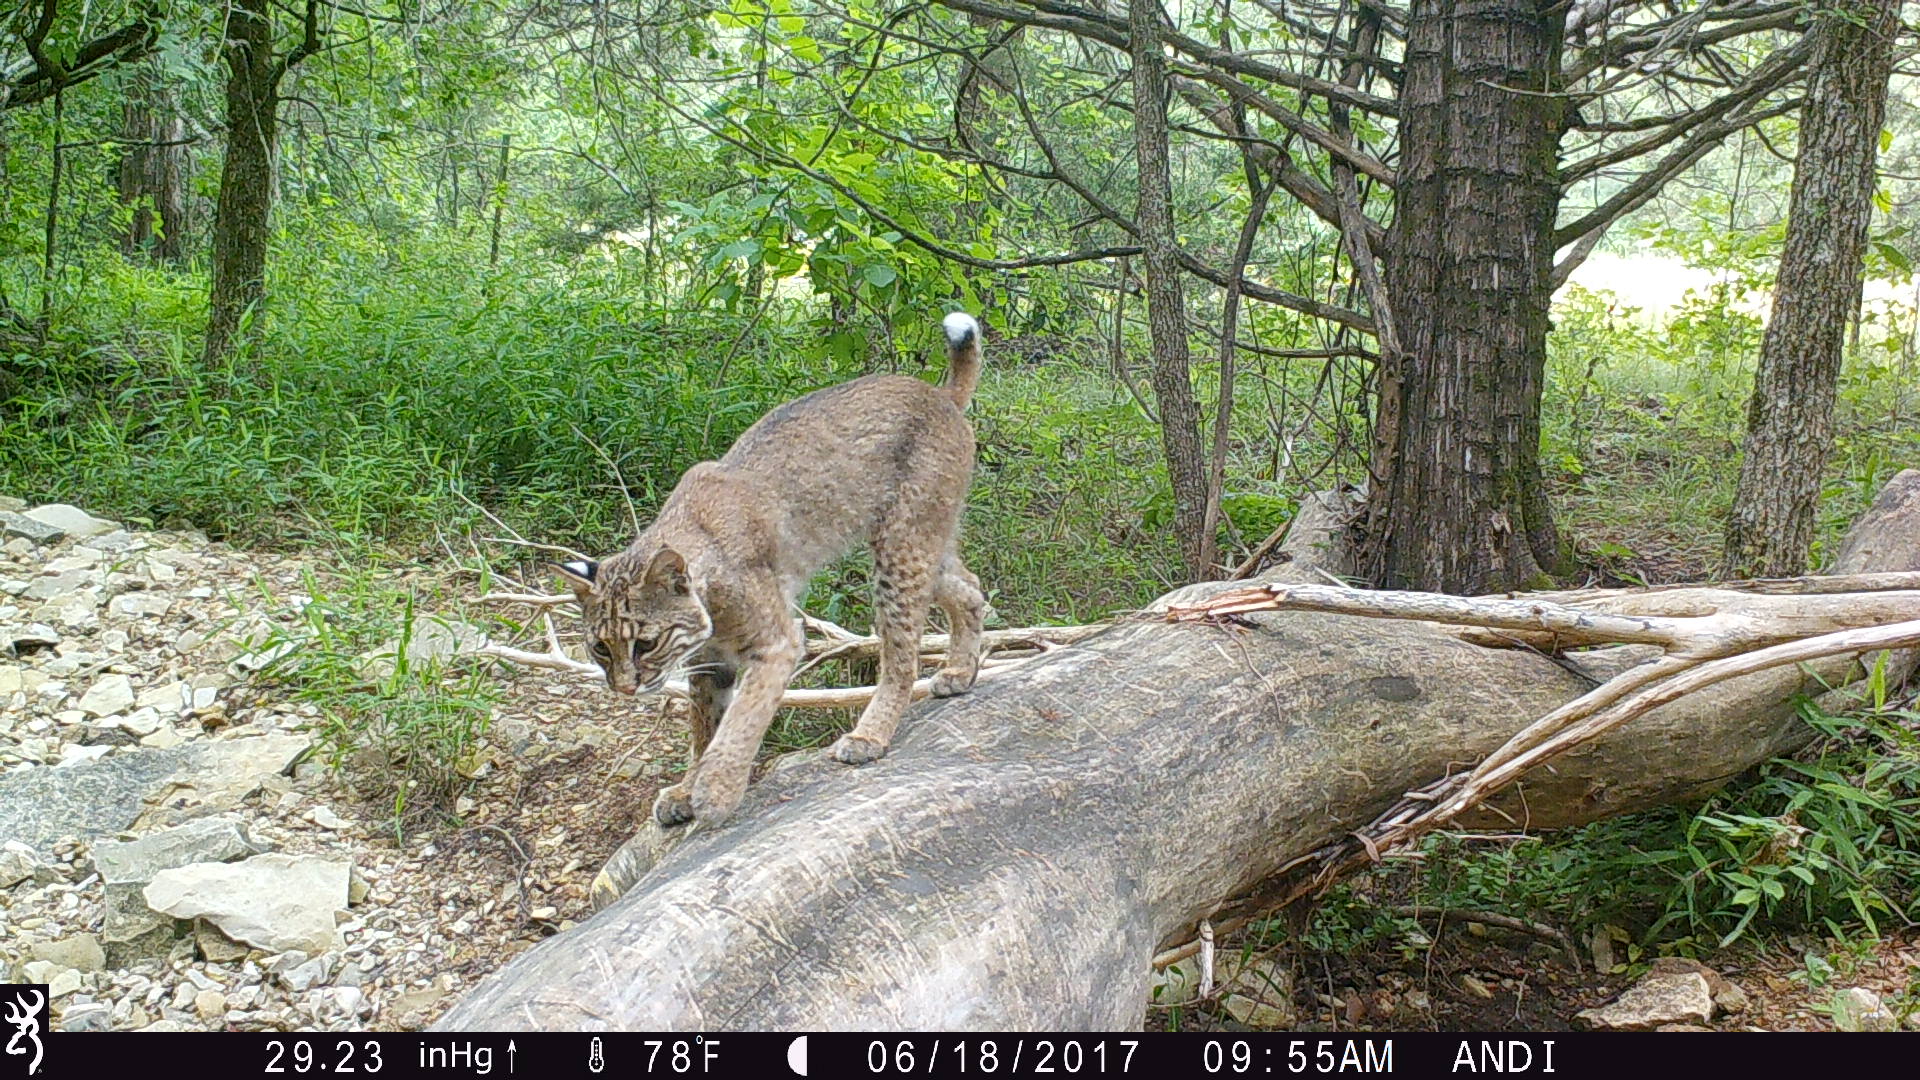
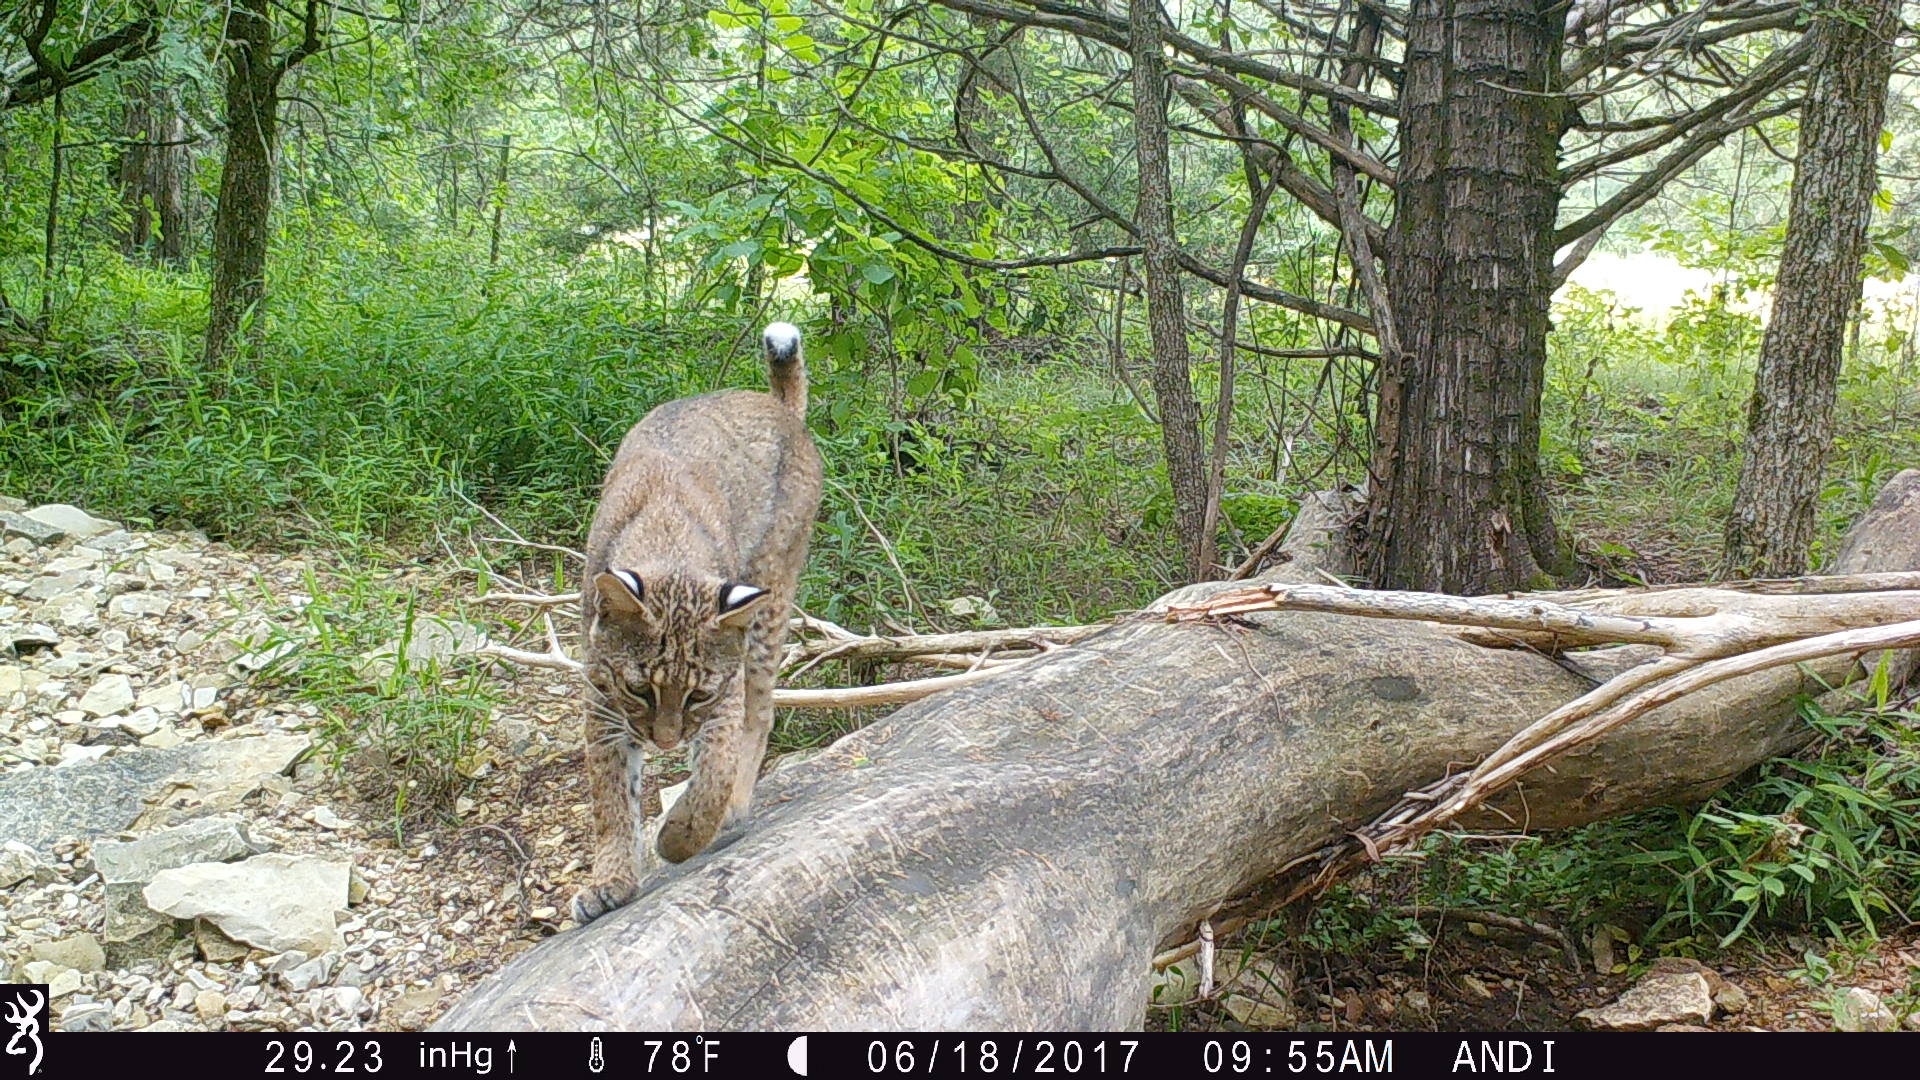
Multi Shot / Rapid Fire Mode
In certain situations, the 8-Shot Rapidfire mode is one of my favorites to use on my Browning Trail Cameras. It takes 8 shots in 2 seconds! I prefer to use this when I have a specific animal that I am targeting that I know will not be in the frame for long. For example, I wanted a Bobcat on this log setup, but I knew it would likely not use this log repeatedly and not stay on it for long, so I put it on Rapid-Fire mode to get as many photos of it as possible and pick my favorites to share. Rapidfire Mode is also great in deer season when you are watching a smaller area, such as pinchpoints and travel corridors, so you don’t miss any deer activity.
Video Mode
This is a really fun trail camera feature. It’s almost like watching the wildlife in person when playing the trail camera videos back! With 1920 X 1080P Full HD, the audio and the clarity in the Browning Trail Camera videos is really amazing. Additional new features for the 2017 model includes Smart IR video, which continues to record video footage while game is moving in front of the camera and SD card management options which allow you to overwrite older images on the SD card if the memory is full.
I hope this article helped you know where to start in shopping for your first trail camera! If you have any other questions that were not listed in this article please feel free to leave a comment below.
By Andrea Haas
Andrea Haas is a Pro-Staffer from Missouri who enjoys hunting deer, turkeys, and upland birds. She is also the founder of the Huntress View, an organization formed to help strengthen the ever growing community of women hunters
Mountain Lions in Missouri
February 7th, 2017 by BTC Editor
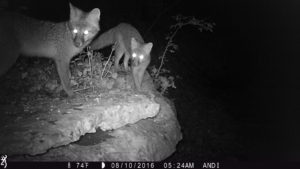
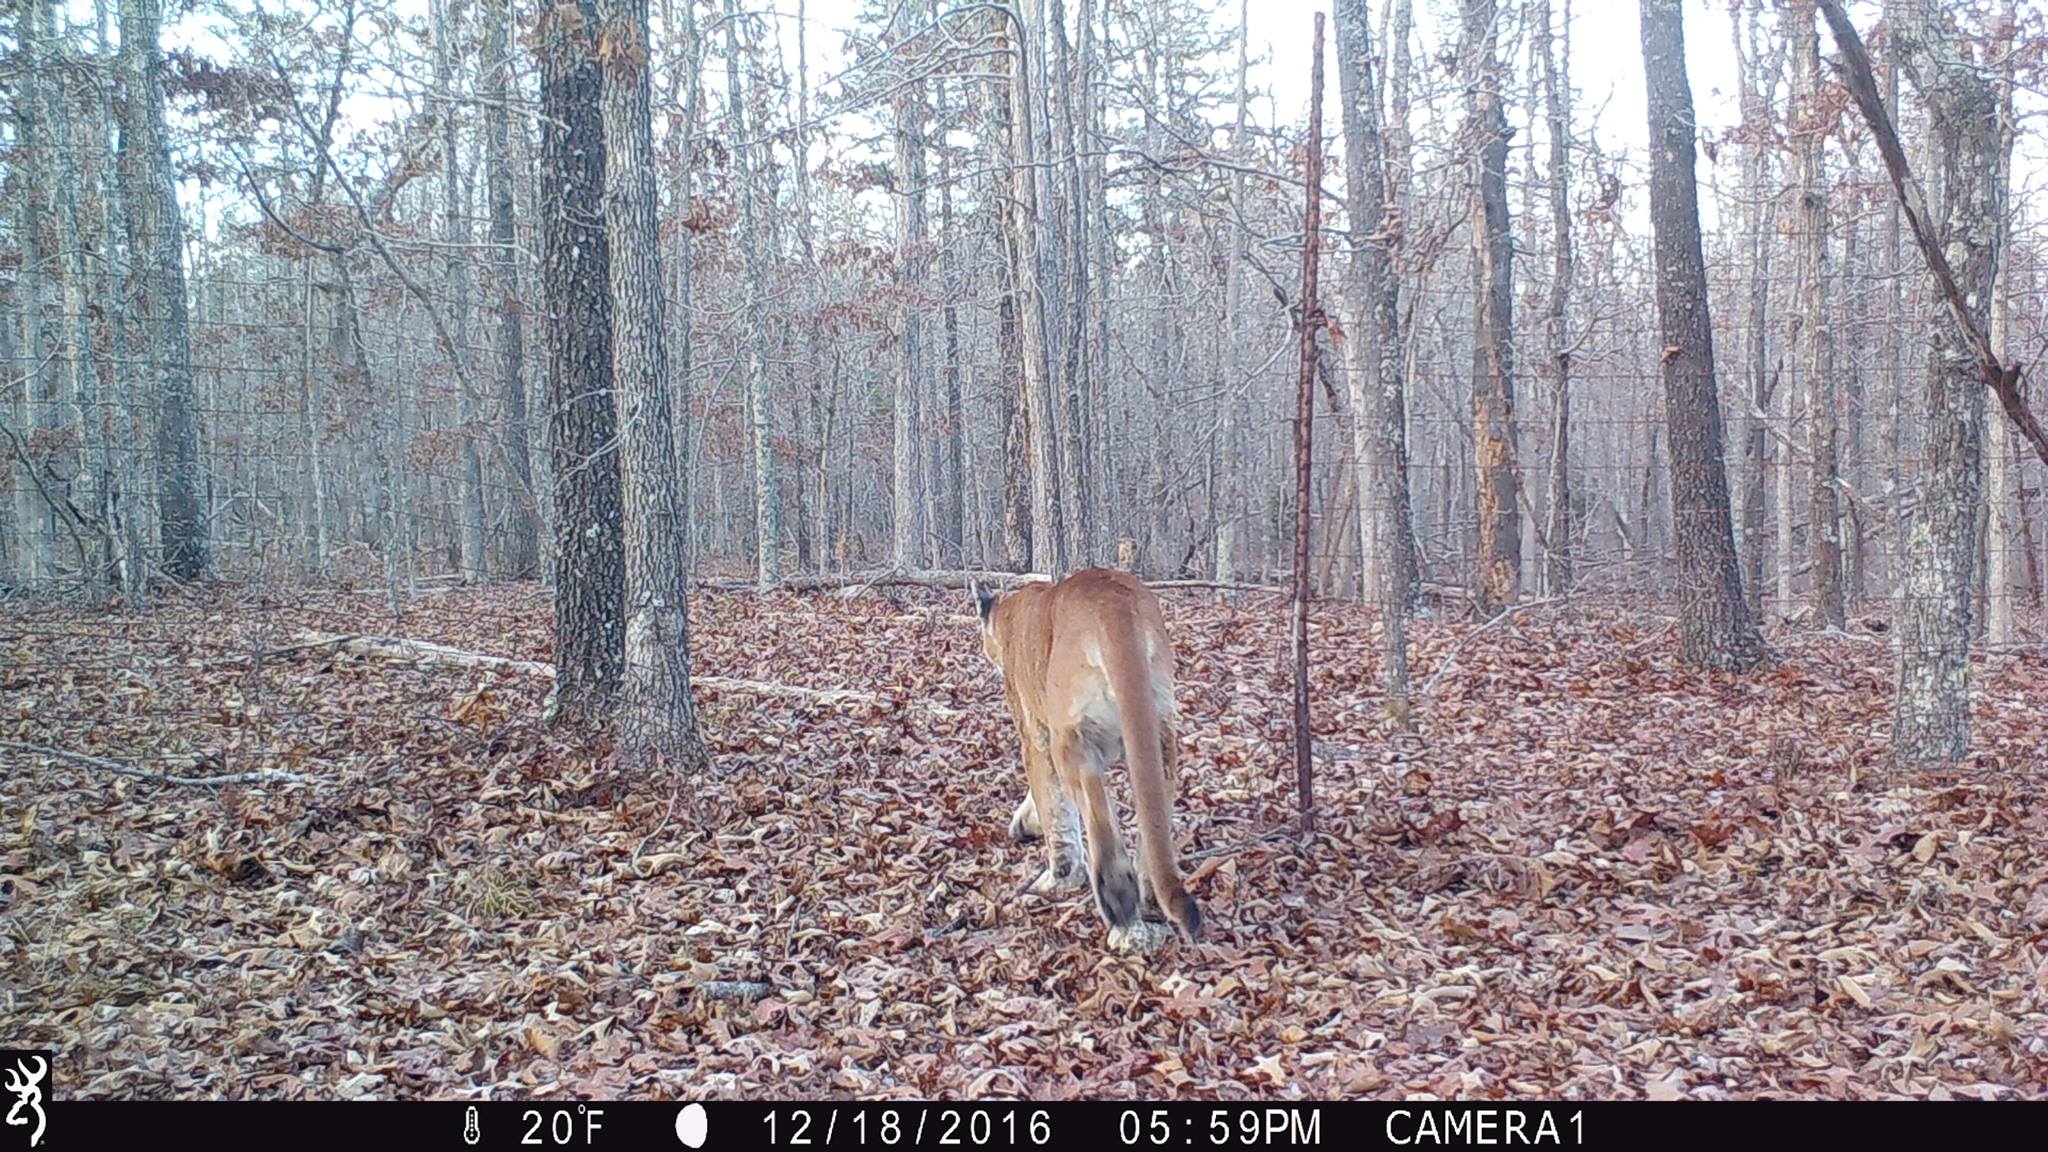
What is one of the neatest things you’ve captured on your game cameras? For Darryl Esthay from Louisiana it was photos of a mountain lion on a piece of property he hunts in Missouri, a very rare sight for the Show-Me-State! Being from Missouri myself, I know how big of a deal it is to the residents here to learn that there are mountain lions in our state. I contacted Darryl to get the story behind the photos and to find out what is involved in reporting a mountain lion sighting in Missouri.
The Story
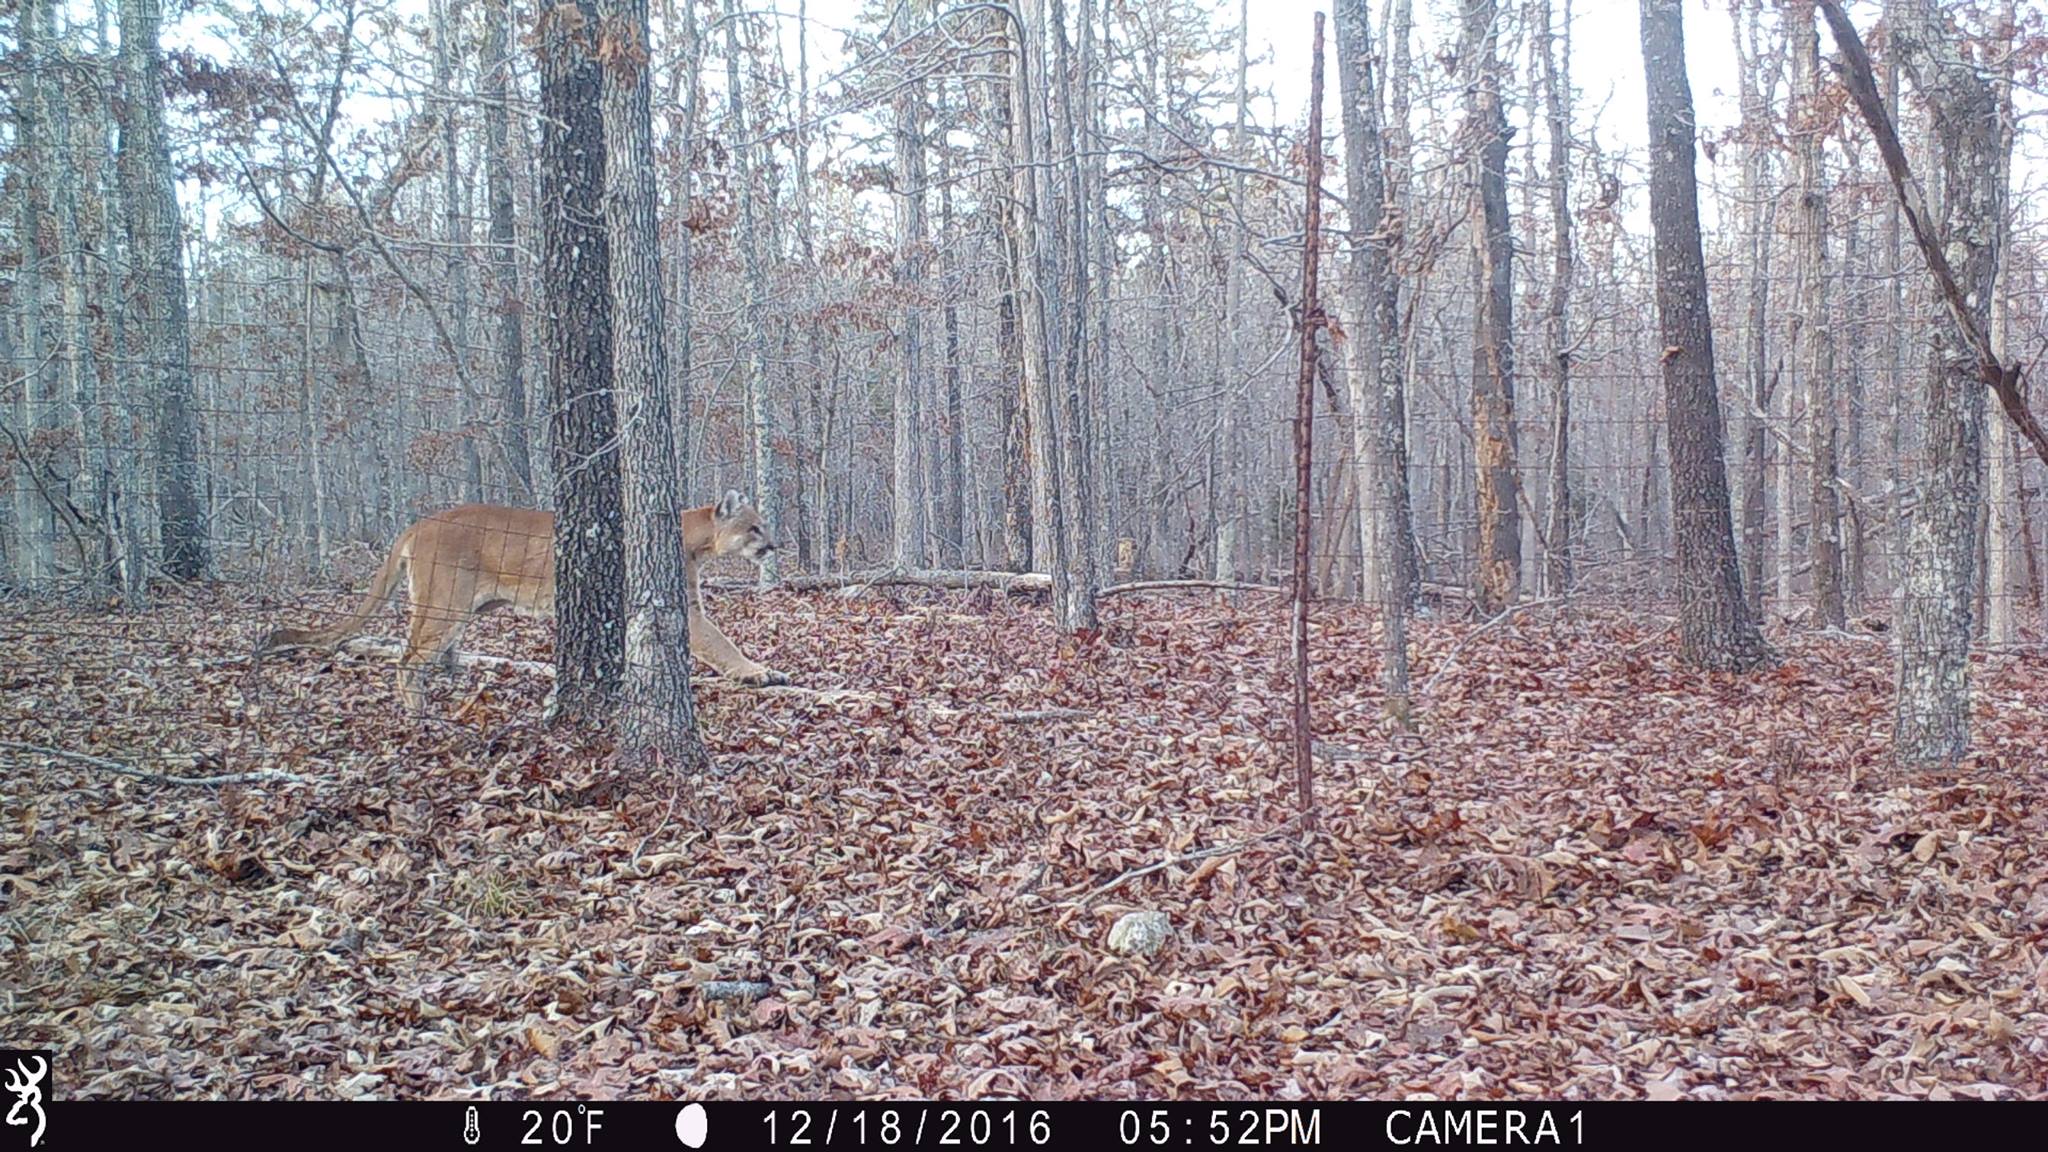
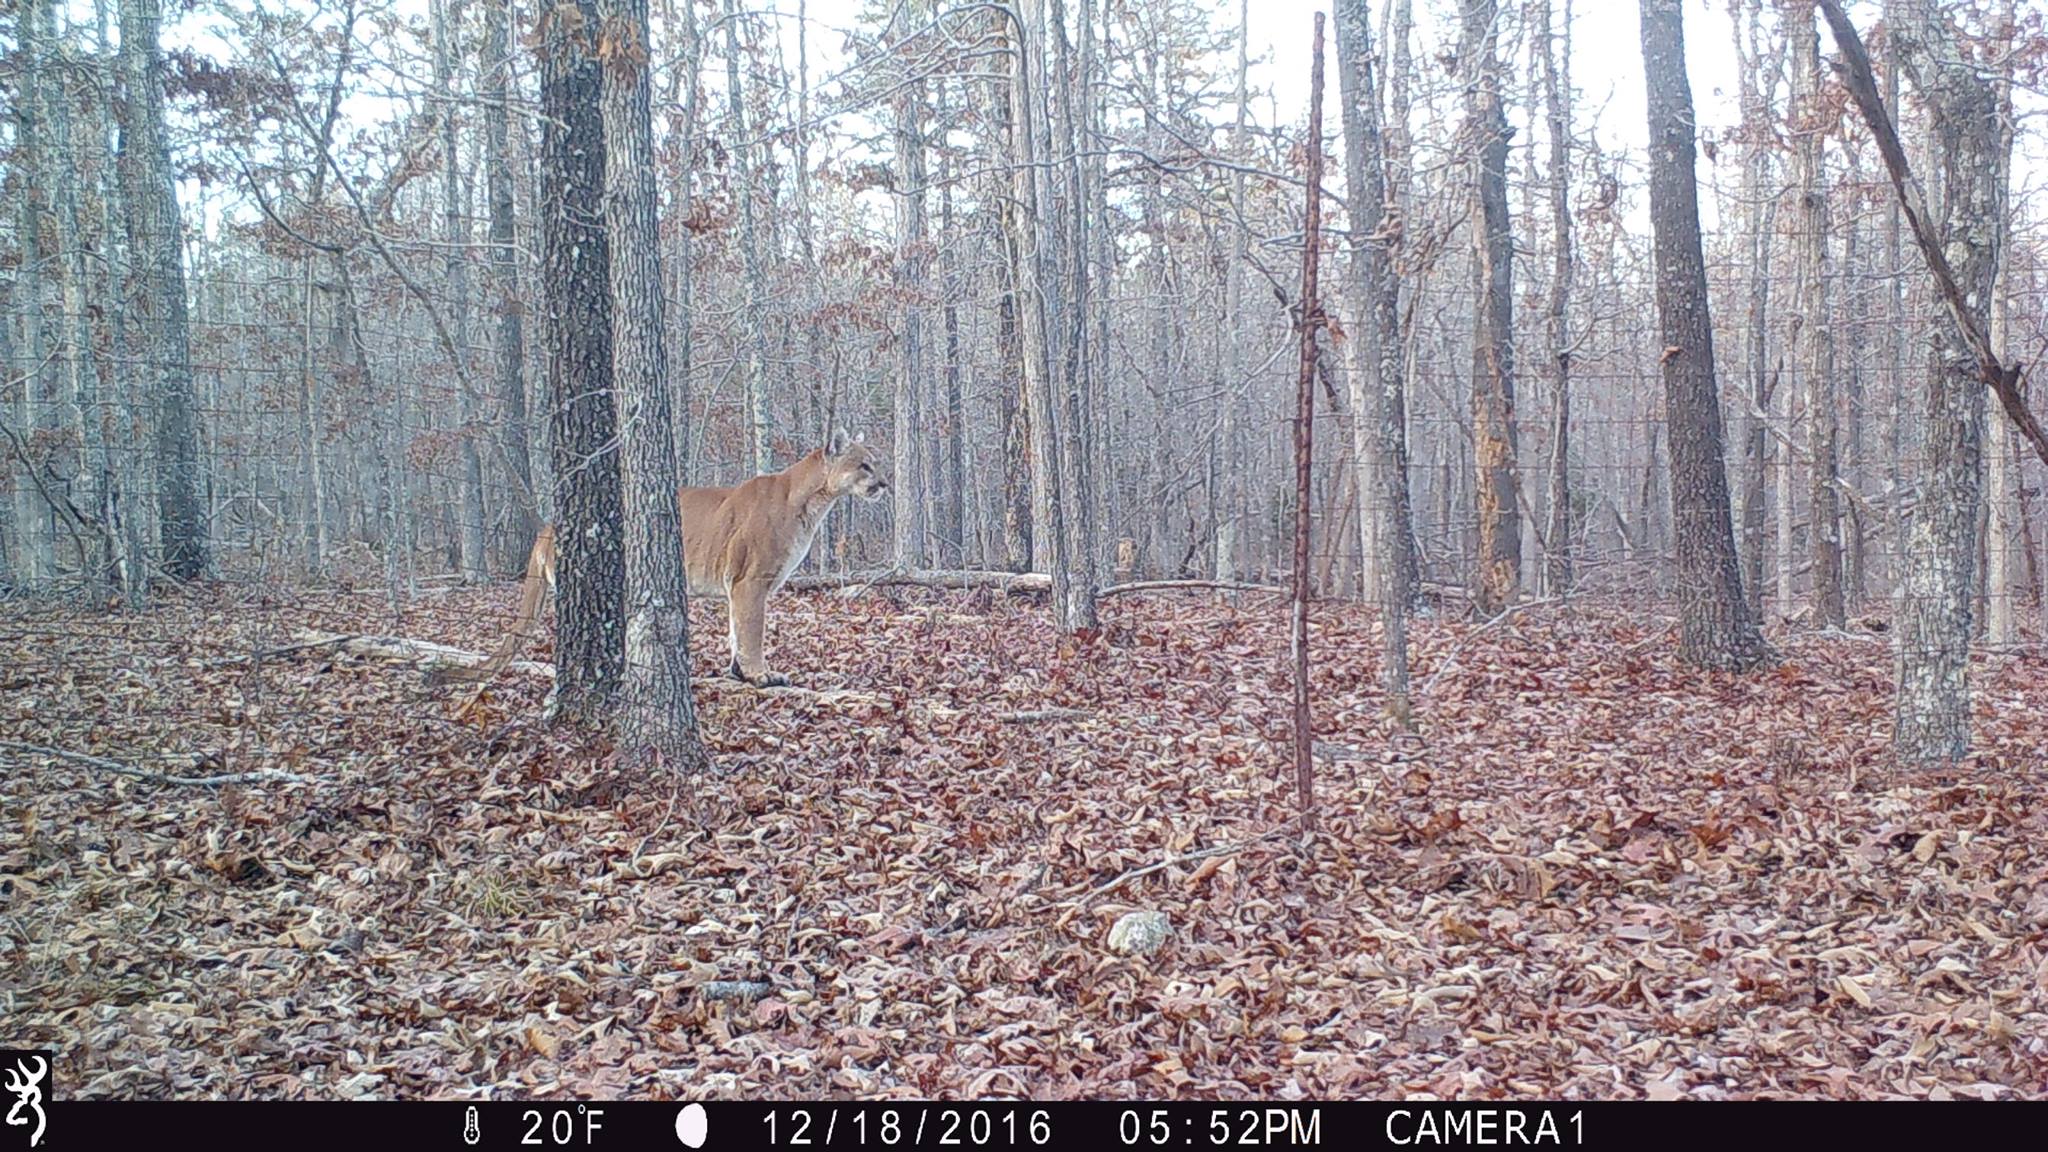
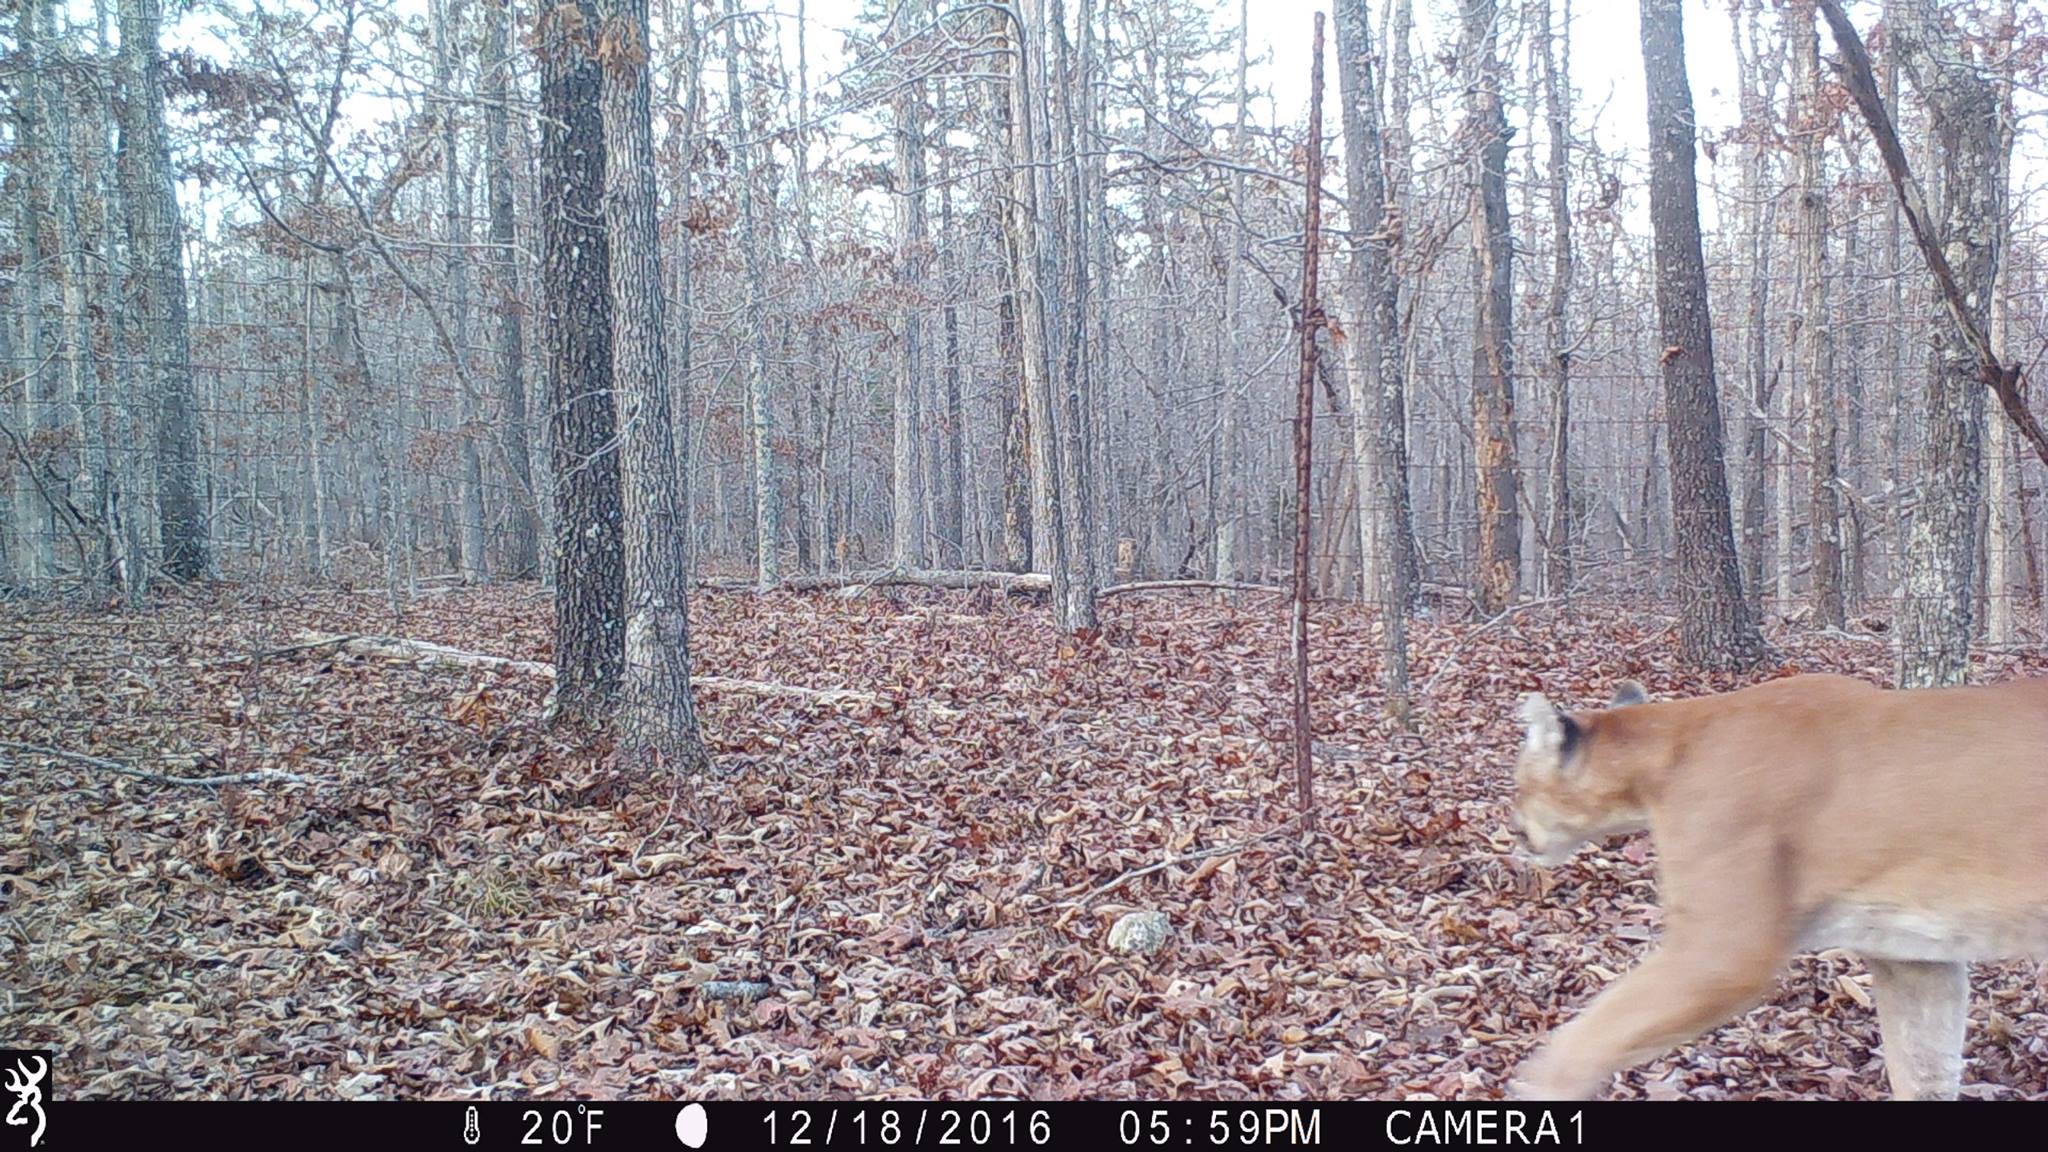
According to Darryl, he went to his hunting property in Oregon County, Missouri for his final deer hunt of the year on 1/02/2017. That afternoon, he pulled his SD cards on his Browning Strike Force Trail Cameras and found this series of mountain lion pictures on one of them. He then contacted the Missouri Department of Conservation (MDC) who sent their Mountain Lion Response Team to investigate the “possible” sighting, later officially confirming that this indeed is a mountain lion.

Darryl states that they were very thorough in gathering their evidence. They asked to see the original SD card that the mountain lion pictures were on, which Darryl presented to them. They saved the mountain lion photos, as well as the two photos before and the two photos after, to help support their evidence.
Next, the Mountain Lion Response Team asked to see the location that Darryl’s Browning Trail Camera was hung. They spotted the different landmarks that were in the photo: the fence, the rock & the log, and verified that it was the same location that the mountain lion pictures were taken. Darryl states that the “high fence” that is in the photos is actually an old fox pen from years ago that was there when he bought the property. He has cut 5-6 foot holes all along the fence to allow wildlife to pass through, as you can see in the photos.
After verifying the location was the same as in the photos, they then looked for mountain lion hair, scat and tracks in the area, but so far none were found. All of the gathered evidence was then presented to the entire Mountain Lion Response Team and was later officially confirmed as a mountain lion sighting in Missouri.
About a week later, Darryl also got a video of a gray fox, and what could possibly be another mountain lion in the bottom right-hand corner. The Mountain Lion Response Team looked at this video as well but they were not able to confirm that it was a mountain lion. They advised Darryl that once all the evidence is gathered after investigating a possible sighting, it is then voted on by the Mountain Lion Response Team. Each member of the team must vote “yes” in order for it to be a confirmed sighting. Even if the majority of the team believes it is, it’s not officially confirmed unless 100% of the team is positive that what they are looking at is a mountain lion.
(Click here to see a list of all of the confirmed sightings in Missouri.)
Other Evidence
Trail camera photos aren’t the only recent evidence of mountain lions in Missouri. According to an article in the Springfield News-Leader dated 1/27/17, the first confirmed female mountain lion in Missouri since 1994 killed an elk in Shannon County. Here are a couple of excerpts from the article:
“DNA from the cat’s saliva showed it likely originated from the Black Hills of Wyoming and South Dakota and northwest Nebraska. Conlee (A furbearer biologist for the MDC) said it’s a significant find because female mountain lions typically don’t travel long distances, preferring to live and hunt near where they were born.”
“There’s no indication the female mountain lion is staying in Shannon County, Conlee said, and it’s possible the cat will continue moving…Conlee emphasized there is still no evidence that Missouri has a breeding population of mountain lions.”
According to the Missouri Department of Conservation, there have been 68 confirmed mountain lion sightings in Missouri since 1994, becoming more common in recent years. This could be due to the growing number of mountain lions out west, making their way into Missouri, or could possibly be due to an increasing number of trail cameras out in the woods.
I have lived in Missouri all my life and I have never personally seen a mountain lion or gotten pictures of one on my game cameras, though I have heard stories of our neighbors seeing some behind our home for years now. My husband said his great-grandfather told his family he was riding his horse on our property one day and the horse he was on was attacked by a mountain lion. How true that is we may never know!
Part of the excitement of running trail cameras is never knowing what you’ll get pictures of. If you’ve already taken down your game cameras for the year, I suggest hanging a few back up to see what types of wildlife you get pictures of! Although it is still extremely rare, mountain lion sightings are becoming more common in Missouri. If you think you’ve seen one and have a good amount of evidence, follow this link for instructions on how to report it to the Missouri Department of Conservation.
By Andrea Haas
Andrea Haas is a Pro-Staffer from Missouri who enjoys hunting deer, turkeys, and upland birds. She is also the founder of the Huntress View, an organization formed to help strengthen the ever growing community of women hunters.
Shed Hunting: Tips & Benefits
January 1st, 2017 by BTC Editor
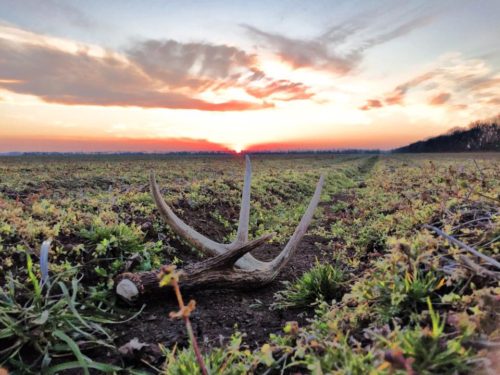
Anyone that knows me knows I’m a whitetail freak. I’m in love with hunting whitetail deer and everything that goes with it. However, as much as I love to hunt the actual deer, I am just as crazed about hunting their sheds after season is over. Picking up a shed antler gives me just as big of a rush as sitting in my stand and hearing a deer walking around on the fallen leaves in the timber.
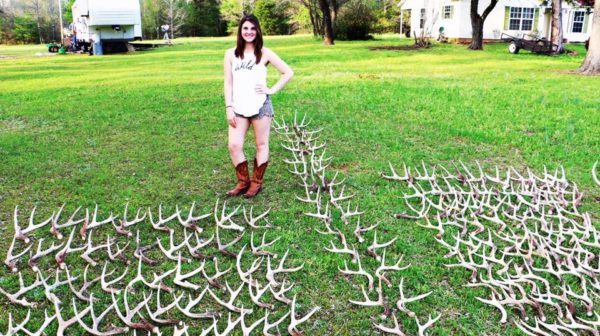
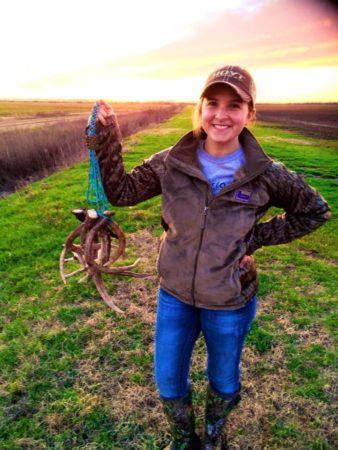
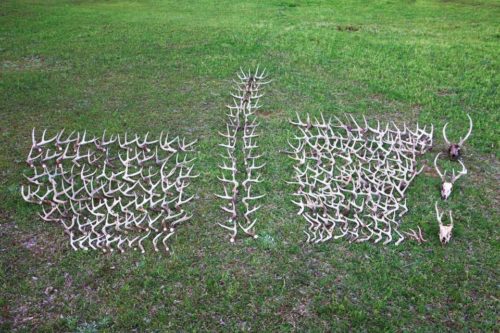
This past shed season, my husband and I found over 200 shed antlers and 3 dead heads. I can’t begin to tell you how rewarding it has been. We were able to spend so much quality time together doing what we love, got in some serious leg workouts, and we even introduced our little girl to the sport. She came along on every shed outing and will have an eye for them before we know it.
In this article, I will be discussing benefits, tips, and ideas for what to do with your sheds.
Benefits:
There are so many benefits involving shed hunting. First and foremost, it’s a wonderful way to get in some quality time with family and friends. Finding shed antlers to an outdoor enthusiast is the equivalent to a child’s Easter egg hunt: extremely exciting, full of fun and the amount of pride that fills your soul when you pick one up. I’ll add, also, that it’s an excellent way to get in some serious exercise. Successful shed hunting requires a lot of walking, though some are lucky enough to have terrain accessible enough for four wheelers and/or horseback riding– both of which are effective ways to be successful. However, for those that don’t have land that is ATV accessible, get walking. Walk your food plots. Walk your trails. Walk your fence lines. Walk, walk, walk, walk, walk. Getting outside and walking your property for sheds gives you other advantages, like getting to know your deer herd’s travel patterns, and also what deer made it through the season. Plus, it’s just flat out fun.
Tips:
Like I stated previously, walking and/or driving/riding your property is key. You have to put in the time to be successful. Think like a deer, just as you would when considering what location to hang a tree stand or trail camera. Go places the deer go. Find their bedding areas and their feeding areas and you will be golden. Places where you know bucks will have to make hard landings, like jumping over fences or ditches are excellent places to look. Just because the rut has come and gone, doesn’t mean bucks don’t spar. With that being said, walk your food plots. Walk the open areas where deer congregate.
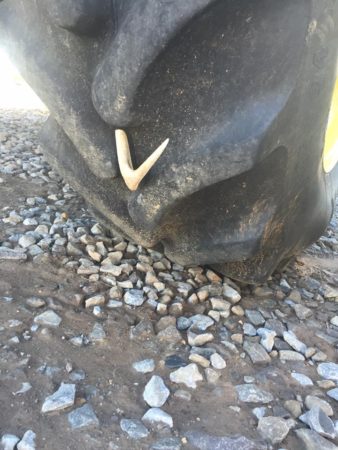
Something I also understand is that not everyone has their own land to go look on, which brings me to my next tip. Just ask. You would be surprised at how many people just don’t care for sheds, or better yet, want them off of their property: farmers especially. This past season, about 90 percent of the property I shed hunted on was from people that I had never met a day in my life, most of them being farmers. Sheds pose a threat to tractor tires and most farmers hate them. Almost every response we got when we asked for permission from farmers was, “find them all and take them all,” and most of them even gave us names and numbers of other farmers.
What to do with your sheds:
The fun doesn’t stop after you’ve picked up a load of bone. There are countless ideas to explore with your antlers. Decorating is my favorite thing to do, as I have sheds laying everywhere around the house. Nowadays, with websites like Pinterest, the creative opportunities are endless. I’ve seen everything from jewelry holders and fall decorations, to chandeliers and doorway entries. Believe it or not, there is actually a lot of money potential in your shed antlers if you’re willing to sell them. This year, while out, there were a couple of guys from Colorado in the area where we were hunting that were searching for sheds as well, and were willing to pay $16 dollars per pound. Crazy, right? I, for one, like to keep the ones I find.
With all that being said– get out there this upcoming shed season. It’s very rewarding and an experience that will develop into an obsession.
By Cajun Bradley
Cajun Bradley is a lifelong lover of hunting and the outdoors, especially waterfowl hunting. She is a member of the Huntress View team, an organization formed to help strengthen the ever growing community of women hunters.
Using Trail Cameras in Trapping
December 18th, 2016 by BTC Editor
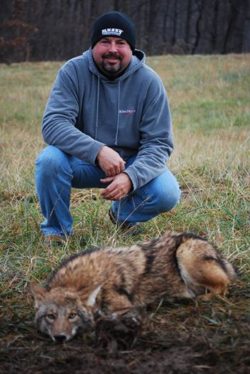
“Sometimes people wonder if animals are suffering or what exactly happens after they’re trapped. After an initial period of attempting to get away — which is why trappers run multiple swivel points and laminate the trap jaws so no paw damage occurs — the animal lies peacefully until the trapper arrives to check his traps. At that point, the trapper can decide to turn it loose or harvest it, depending on the conservation goals for the property he or she is trapping.
“Trappers are the best outdoorsmen there are,” the game warden replied when I told him I trapped. It was a routine license check while deer hunting, and once that formality was out of the way we began chatting. I don’t know if I fit into THAT category, but I certainly strive to learn all I can from those who’ve gone before me. Trappers settled this country, and their skillset often determined living or dying in those days. It’s a time-honored tradition where not much has changed: the methods, the techniques and even the equipment could easily be interchanged with those who came before us more than 200 years ago.
But there’s been one concession to modern, cutting-edge technology that has advanced the trapper’s knowledge more than any other single item: the trail camera. For years, we trappers have studied the tracks left behind of an animal at our sets, trying to figure out why he stepped here and not there. Snow is like a God-send to the trapper, and we’ll get out and follow a set of tracks for miles just to study the species we love to go after. What caused him to stray from the path he was walking there, and what attracted his attention enough to cause him to deviate from his destination?
Staggs first recorded this nice bobcat visiting his set four days before the second time it made an appearance; another added benefit of using trail cameras while ‘cat trapping is helping to pattern them, as big males will often make a 5-day loop around their territory.
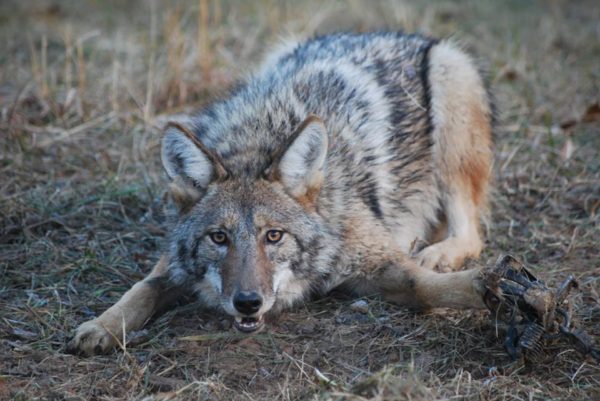
With the technical advances in trail cameras over the past decade or so, a treasure-trove of information is now readily available to the average person, and chief among those questions that get asked more than any other: How does animal XYZ work a set? Tracks give clues, but there’s nothing like actually WATCHING a bobcat tip-toe gingerly through your walk-through set… or a coyote approach your dirt-hole set from the side, because he didn’t know that the “front” of your set was the front.
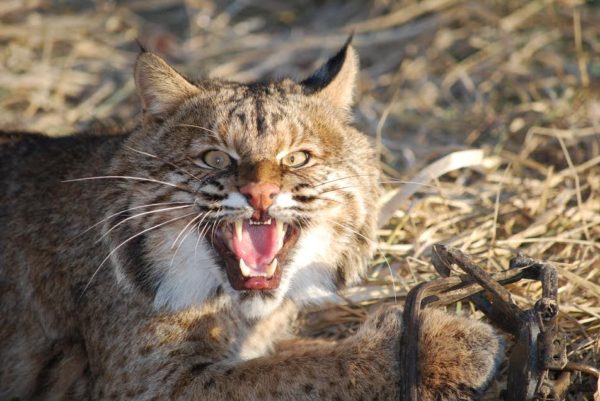
Pictures are great, but video mode and the information it captures is priceless. Invisible night-vision infrared LED illumination is a must when capturing predators on video like this; if they see a red glow light up the area, they’re gone … and unlikely to return. Give it a try sometime if you’re a trapper, and see how much your knowledge base is increased. Or, even if you’re not a trapper, you may enjoy expanding your horizons beyond merely trying to capture deer on camera. The next time you’re in a Bass Pro or Cabela’s, or even an old hardware store that may have a trapping section, pick up a bottle of gland lure. Dip a bit out with a Q-tip and place it under a fallen limb on the forest floor. You may be amazed to see the number of predators you get video of which you had no idea were around.
Greg Staggs is the former back-page columnist for Inside Archery, and his writing regularly appears in such magazines as Outdoor Life and Petersen’s Bowhunting. Staggs loves introducing his two boys to all things outdoors, including fishing, trapping, canoeing and camping, and has been chasing turkeys and big game exclusively with archery equipment for over 20 years.
Estimating Whitetail Deer Score
August 28th, 2016 by BTC Editor
With the right camera and settings, photos captured can help immensely to accurately gauge a buck’s net score well before it hits the ground.
Hunting stores like Cabela’s have a wide range of trail cameras and filtering through pictures is quickly becoming a favorite past time of hunters. Like Christmas morning, each memory card filled with thousands of pictures is waiting to be opened and scanned. Every hunter will have a different level of “acceptable” target deer to hunt. For rookie hunters, anything that moves will usually suffice. Bow hunters might be interested in the Pope and Young minimum qualifying score as a target buck for the season. For others, it may be that elusive net score of 150 inches(“). And for the seasoned trophy hunters it’s likely to be upwards of 170” (the Boone and Crockett all time net typical minimum). Either way, it depends on what hunting stage the individual is in, where their hunting territory is and perhaps how much time they can afford to dedicate towards hunting season. No matter who you are, where you hunt or what your goals are, Boone and Crockett and Pope and Young conversation clubs established a consistent method of measuring deer antlers many years ago.
Previous to the 1990’s, trail cameras were non-existent. Now a days, it is hard to find a hunter without one. Trail cameras scout 24 hours a day, 7 days a week providing great information regarding:
- herd population
- herd age classes
- frequency of movement
- buck to doe ratio
- target bucks
- largest antlers
- worst genetics
Scoring a deer is the act of adding up all the qualifying inches the buck has. Scoring a live buck is difficult at best as they usually do not stand motionless for long or in the right position to properly gauge their score. This is where trail cameras can really help out, especially models with burst mode that take many pictures in rapid succession. A whitetail deer’s net typical score is composed of 5 components from the antler rack they possess:
- Length
- Height
- Thickness (mass)
- Spread
- Length of abnormal points
Length is measured as the total distance from where the antler start on the head to the tip, referred to as the main beam. If the length of the right main beam is shorter than the left, or vice versa, estimate the shortest. Antler symmetry is a factor, so an official score sheet will add the actual length of both sides and subtract the difference. Therefore, starting with the shorter main beam eliminates the step of adding and subtracting the inches that are not present on both main beams. To get a good estimate of length you need a picture of the buck from the front (looking at the camera) or top (facing the camera head on, but sniffing the ground). This orientation clearly outlines the main beam, how far it goes out towards/past the ears and will also help identify the shorter one (if any). A helpful second picture is a side profile of the deer’s head on alert (head up). This gives great indication of how far past the nose the main beam goes. The distance from the eyes to the tip of the nose on a mature buck in Alberta is 7”. Visit some mounted deer from your local hunting area and take measurements of this same distance and use it as a reference point. At the end you should have one number – the length of the shortest main beam.
Using the outer distance between the eyes atop the skull as a gauge (6”), I estimated each main beam to extend outwardly 7.5” and then turn back inward 6.5”. Photo also give a clear view of the spread estimated at 19” (6.5 + 6 + 6.5) using the same gauge. Excellent photo to show the difference in the first tine set (G1’s) and to confirm this buck is a 4×4. I estimated the shortest G1 tine at 4”, again with the same gauge.
Using the distance from the eye to the snout tip as a gauge (7”), I estimated the middle part of the main beam to be 8”. I also used this picture (and same gauge) to estimate the second tine (G2) at 9”and the third tine (G3) at 7”. Estimated total tine height is 20.5” (9” + 7.5” + 4”). The main beams look very symmetrical but I estimated the right one at 22” (7.5” + 6.5” + 8”).
Net typical height is the total length of all tines (points) that come off the main beam, minus any differences between the sets. To begin, choose the first tine (starting from the head) sprouting from each main beam and estimate the length of the shortest one. Then use the same process on the next set of tines, until you are done. If one main beam has more tines than the other, ignore the extra tines. Only measure the typical tines, meaning where you’d expect the buck to have a tine coming off the main beam. You will need as many pictures as possible with the buck looking in all directions with his head held high. Use a reference like the distance from the eye to the tip of the nose to gauge the length of each tine. In the end you should have one number created by adding the estimated length of the shortest tine in each set. For example, if it was a 5×4 typical buck, you would have: (Shortest G1(brow) tine) + (Shortest G2 tine) + (Shortest G3 tine) + 0. Note: The tip of each main beam is not a tine and was already accounted for when estimating the main beam length. Official scoresheets have an excellent visual representation of the tines and their common names (G#).

Photo gives a good indication of how many tines are on the antlers. In this case, an even three per side.
Mass (or thickness) of each antler is measured before each tine sprouts until you reach four measurements. Add those four number together for total mass. Again, use the antler that looks to be the smallest. More often than not I don’t bother with estimating this measurement and just use 18” on mature deer as a baseline. If the deer antlers look really thick, I will add up to 3” and vice versa for skinny antlers. Be cautious of bucks that move during photo capture causing them to appear ‘heavier’ (more mass) than they actually are. Browning trail cameras shoot the fastest shutter speed (even at night), minimizing motion blur and provided crisp photos to estimate mass. I have used both the snout and eye socket as a reference to diameter of the main beam because they both measure around 1.5 – 2”, but like I said, I usually just go with 18” as a conservative estimate.

Unabstracted view of main beam thickness against grass, however this deer is in velvet (which counts). Compare it to the eyeball and snout.
Excellent photo to show symmetry because tine sets. This deer appears to have the same tine length on both the right and left antler.
Spread is the width between the left and right antler. Spread is measured by finding the longest distance between the inside of the right and left main beam. Unlike length, mass and height, spread is only counted once, not twice (for each antler side), therefore it contributes the least towards final score. A really wide 4×4 buck will be most impressive at first glance, but a narrower 5×5 buck should have a better score because it’s far easier to have 8 additional inches by having a forth 4” tine on each side as opposed to 8” between the right and left antler. A picture showing the ears and the buck looking at the camera is great to estimate spread. I have also used the skull as a good gauge to estimate spread.
Once you have estimated length, height, mass and spread, the final number required is the total length of all abnormal points. Any picture you have will help find these hidden deductions. Estimate the length of each one and tally them up to one number for both the right and left antler. If you have more than 15” of abnormal points, it qualifies for non-typical scoring instead of typical scoring.
For your final estimated net score do the following:
- Length + Height + Mass
- Double it
- Add Spread
- Subtract length of abnormal points (if less than 15 otherwise add)
The burst mode on this Browning trail camera took 8 pictures of this buck in rapid succession, providing various camera angles to accurately estimate the buck net typical score at 140”. ([22(length) + 20.5(height) + 18(mass)] x 2 + 19(spread) – 0(non-typical deductions)). I never did shoot this buck, so I’ll never know fore sure though.
An official score sheet is much more precise when it comes to deductions but since estimating the shorter and smaller side of the antlers eliminates those differences (from non-symmetry) immediately.
Remember, score is just a number, it does not consider effort, method of hunting, determination or atmosphere which all contribute to making a deer hunt memorable. Trail cameras are an excellent tool for estimating buck scores before a hunter decides to target that particular deer. I know I still enjoy “if it’s brown it’s down” hunts but I have enjoyed holding out for specific bucks captured on trail cameras that I know will qualify for Pope and Young records book based on the estimating process described above.
By Gord Nuttall
Gord Nuttall is an enthusiastic outdoorsmen and award-winning freelance writer that spends countless hours sorting through Browning trail camera pictures of western big game animals to pursue. Follow all his adventures at www.facebook.com/prostaffgordn