Nighttime Trail Camera Images – Putting Light On The Subject
August 15th, 2016 by BTC Editor
The evolution of the trail camera has been simply remarkable over the last several years, from taking 35mm film to the photo shop to the almost instant gratification of looking at them on your phone, things are simply in a place that was once only a dream.
With that said, there are still some factors in play when it comes to nighttime images that make them seem behind the times. With all of the advances in technology, why have nighttime images not been perfected yet? Well, in this format, we’ll do our best to explain the basic science of nighttime images on trail cameras.
Seeing the Waves
Nope. We’re not at the beach. But to develop a basic understanding of what’s going on with nighttime images you will want to make sense of the following to help differentiate between the various types of flashes:
- Our eyes can only see light that exists within a small range of the electromagnetic spectrum.
- That electromagnetic spectrum is measured in wavelengths.
- Those wavelengths are measured in nanometers.
Ultimately, these nanometers are your take away from this section because this is the measurement that you can use to understand how each type of flash impacts the quality of your game camera pictures.
If you need a visual aide to help you more effectively wrap your head around the concept of nanometers, NASA has created a handy below:

SOURCE: http://science-edu.larc.nasa.gov/EDDOCS/Wavelengths_for_Colors.html
Measuring the Flash?
Well, we’ve given you the basics on nanometers, but now you’re asking: why do I care? Well, we’ll do our best to explain that here as simply as possible across all three types of flashes found on trail cameras:
White Flash Cameras
If you look at the chart from NASA, you will see that they define “visible light” as being in the range of 400nm to 700nm. That’s pretty much what you get with a “white flash” camera and that’s how you get to see the full color images.
SOURCE: http://www.trailcampro.com/collections/shop-trail-cameras/products/reconyx-hyperfire-hc550
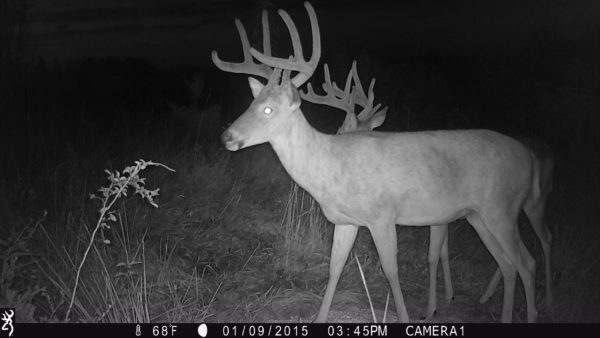
Low-Glow/Standard Infrared (IR) Flash
Now it starts to get a little more complex, because we’re going to step outside the range of “visible light” and move into the infrared range. For cameras that fall into the “low-glow” or “standard” infrared (IR) category, it’s reasonable to suggest that most of these cameras measure around 850 nanometers.
Now, even though these camera flashes technically fall in the “Infrared” category, they are still close enough to the red in the “visible light” range that (A) if someone is looking in the general direction of the LED bulbs when it takes a nighttime image they will see a “low red glow” and (B) the flash still generates enough illumination to take a reasonably good nighttime images.
Obviously, you sacrifice the color of the images here since you are using a flash outside of the spectrum found in the “visible light” range, but you are still getting a reasonably crisp image without the “flash of lightning” effect you get with a white flash camera.
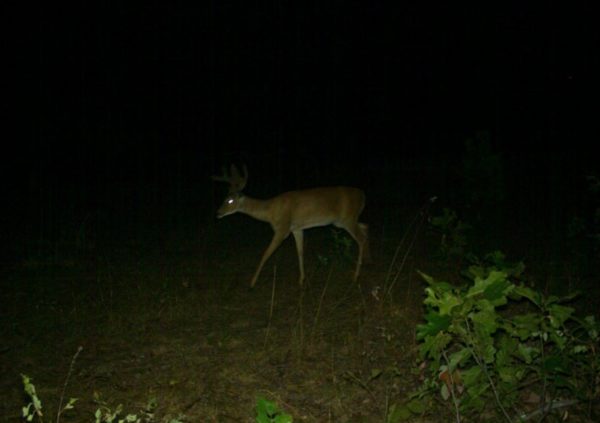
Invisble/No Glow/Black Flash
As we discuss this type of flash, it is worth noting that it still falls within the infrared light range. It is simply further away from the “visible light” range than the low-glow infrared flash cameras. With flashes in this category, it is reasonable to assume that most of them can be measured around 950 nanometers.
The net result of this is that the LED bulbs are not visible when taking a nighttime image, BUT in exchange for that “invisibility” you are sacrificing image quality when compared to the other types of flashes. This is because invisible flash cameras simply do not illuminate the subject matter as much as the other two.
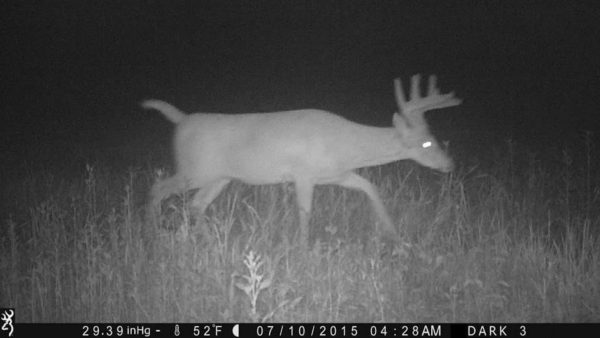
In this image below, if you look back up to the one we used for the “low-glow” images you’ll notice that the image captured by the “invisible flash” camera is a little grainier and has a little more “white noise.” They are both still good images, but you can see that one is a little clearer than the other.
Speed Matters
Now, we could get into a long dissertation about the impact that SHUTTER SPEED has on trail camera images, but for today we’ll just provide you with a few quick notes and save the essay on “shutter speeds” for another day.
In this context we only want to relate shutter speed to the amount of light that is available for capturing images. So here goes: the more light you have available, the faster the shutter speed can be. The less light/illumination you have available, the slower the shutter speed must be.
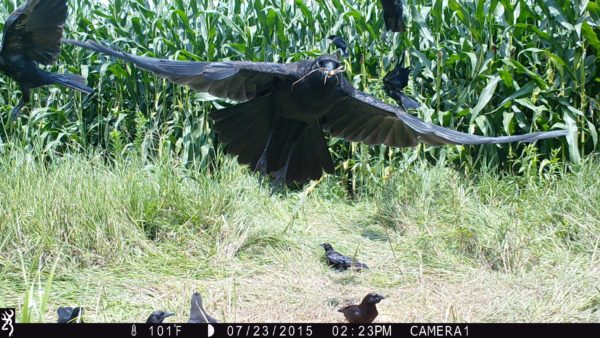
Basically that means this: during the day you have enough light for the shutter speeds to be super-fast and capture cool images of deer jumping and birds flying. This is why most of the cool action shots we see in trail cam pics are daytime pics.
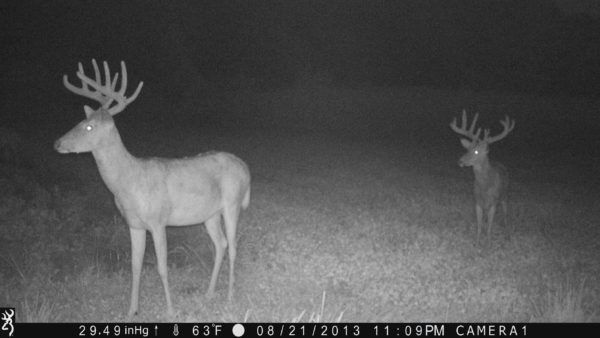
It also means that as you move further away for the visible light range with your flash (i.e From 700 nanometers to 850 nanometers to 950 nanometers…), the shutter speed must slow down to allow enough light inside the camera to capture nighttime photos. In layman’s terms, as you move from a white flash to a low glow IR flash to an invisible flash, you are increasing the likelihood of blurred images because the shutter speeds needs to slow down. While this example isn’t horribly blurred, it still demonstrates that the illumination from an invisible flash camera accompanied by the slower shutter speed, doesn’t always give you the cleanest image in the world.
What Do I Really Need to Remember?
Well, here is the gist of it, starting with the very basic premise that there are two types of trail camera pictures: daytime pictures and nighttime pictures.
Beyond that, based simply on game cameras, there are 3 types of nighttime images: those taken with a white flash, those taken with a standard/low-glow IR flash, and those taken with an invisible/black flash.
So if we take those four types of images and rank them based on potential quality of the images based on the lighting, they would be ranked as follows:
- Daytime Images
- White Flash Images
- Low Glow/Standard IR Images
- Invisible/Black Flash Images
Obviously, there can be a lot more depth to the discussion on flashes and nanometers and shutter speeds and everything else that leads to the trail camera pictures you find on your SD cards, but hopefully this gives you a little bit more of a foundation for understanding why some of the pictures you find on your SD cards look the way they do and helps you with you game planning when it comes to where you put your different types of trail cameras!
Tom Rainey
Tom Rainey has been with Browning Trail Cameras ever since they were introduced at retail and enjoys hunting everything from squirrels to whitetail deer…but his obsession is turkey hunting. His grandfather purchased him a Belgium Browning 20-Gauge A-5 prior to his birth and he has been a fan of the Browning brand ever since…
