Trail Camera Motivation
November 26th, 2017 by BTC Editor
I’m not a morning person. At all.
I know people say that a lot, but it matters when it hurts what you love to do the most. That trait surely hurts my deer-hunting efforts. You see, I’ve been chasing my beloved whitetails for over 25 years now. I average over 100 stand sits each season — if you break up the morning and afternoon hunts, because often they’re in different locations. But the bulk of that number is generated with afternoon hunts… a large bulk of that number.
I’ve got a trophy room chock-full of heavy antlered Midwest whitetail giants, and I enjoy admiring well over 1,000 inches of bone adorning the mounts which stare at me every night as I unwind watching t.v. All but one of those trophies were killed in the afternoon. So what’s the problem with that, you may ask? I wonder if there could be more. I wonder what that room would look like if I’d been motivated enough over the years to set my alarm earlier? What if I were more motivated? Frankly, it’s hard to imagine what could motivate me more than I already am.
Then it happened… I decided to leave some cameras up this year during the season. I’ll be very candid here: I don’t run a lot of trail cameras once opening day rolls around. Never have. Why? Because I hunt public land, pretty much exclusively. Highly pressured public land – the kind that when you pull up to park, you hope there’s a spot left to squeeze your vehicle into. That probably gives you a good idea of why I don’t like leaving $150-200 prizes out in the woods for the first winner to take home with him when he finds it.
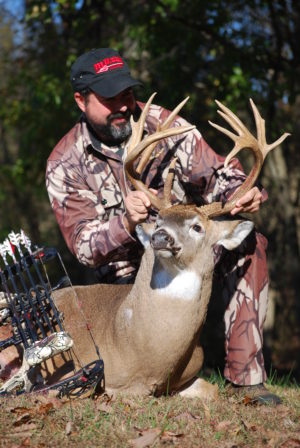
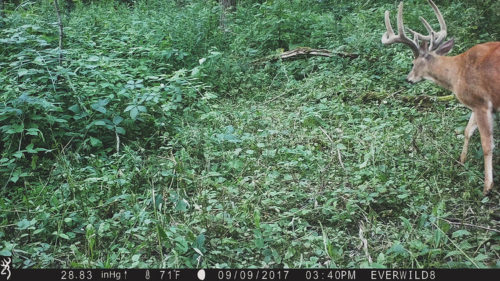
But I took a chance this year. After a couple weeks of leaving them out, I slid one of my SD cards into my laptop and I couldn’t believe my eyes: Wide 8, a deer I’d captured on camera only after dark for three straight years, walked up to a scrape guarded by my Browning Spec Ops HD and began working it at 7:30 a.m.! Talk about motivation!!
Wide 8, a buck that Staggs has watched for three years straight, strolls directly into a scrape at 7:30 on the morning of October 29th:
And that is my point… Yes, I know hunters have long used trail cameras to “inventory” their bucks, even creating special folders for them and sometimes being able to watch them progress over the years as I had done with Wide 8. But I’d truly never thought about using a trail camera for motivation – until now. Now before I slide between the covers and wonder if I should get up tomorrow morning and get in a stand, all I’ve got to do is watch that video. I don’t have to wonder if he ever slips up in the morning, I KNOW he does. And that motivates me.
Greg Staggs is the former back-page columnist for Inside Archery, and his writing regularly appears in such magazines as Outdoor Life and Petersen’s Bowhunting. Staggs loves introducing his two boys to all things outdoors, including fishing, trapping, canoeing and camping, and has been chasing turkeys and big game exclusively with archery equipment for over 20 years.
Shifting Deer, Shifting Cameras
September 24th, 2017 by BTC Editor
We’re beginning to get some early fall temps and the taste of clean, cool air. The skies are beginning to look a little different and we are both beginning to feel a bit different. We are anticipating…
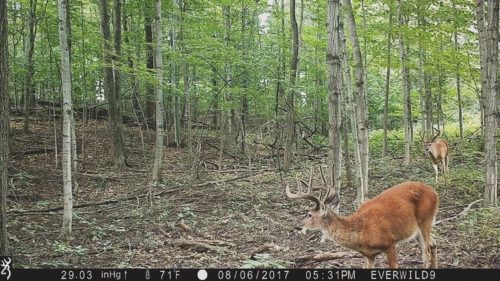
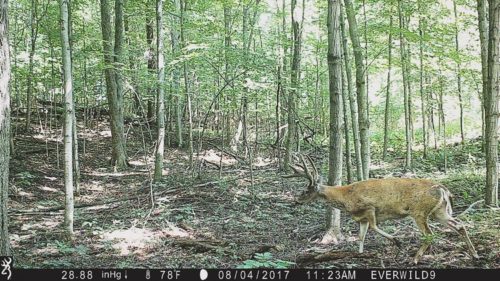
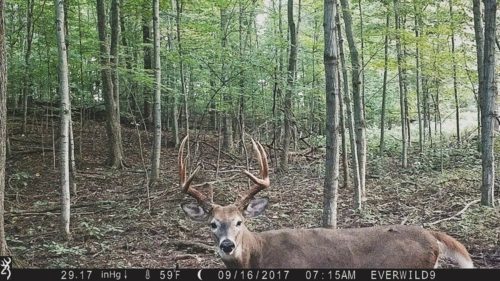
Having found a new core bedding area via trail camera recon (photos below) we are now closing in on exactly how this section of property functions and we are stoked for the postseason and the chance to move cameras into this area and establish precise buck bedding locations. However, we still have the ENTIRE NY deer season in front of us and we now know that we have a prime buck bedding location nailed down adjacent to an area the local does bed in. As we continue to work on peeling the layers off that scenario we will ramp up our mock scrape game using our cameras to tell the story of these locations. This year we are adding into our equation several rubbing posts with overhead licking branches where we will begin to test the waters of the local big boys and hopefully provide ourselves another late October/early November tool for our arsenal. As all these fellas begin to take on their fall ranges and each personality begins to show we become probably a little too eager as we wait for the right time to make our next card pull, but hey, this stuff is what it’s all about.

Blog originally posted on EverWild.
EverWild is an online journal of the outdoor adventure’s of two friends from New York – Justin Michau and DJ Tosh – who are passionate about the outdoors.
5 Tips for Elk Season Success
July 30th, 2017 by BTC Editor
I recently moved from Kentucky to Idaho, so instead of focusing on whitetails this hunting season, it’s all about the elk. I harvested my first elk last year, and I’m ready to put number two in the freezer this year.

Hunting elk on public landing in Idaho is definitely different than hunting whitetails on my farm in Kentucky. We aren’t using feeders, minerals and supplements or food plots to bring the elk in, and hunting elk typically requires much more physical effort than hunting whitetails where you have long periods of sitting in tree stands or ground blinds.
In preparation for the upcoming season, I’ve put together 5 tips that will help you have a successful elk hunting season:
Scouting for Elk – Before you can harvest an elk, you have to know where they are. Pre-season scouting can mean the difference between packing out meat or going home to tag soup!
- Use maps to get a lay of the land – I use the Hunt App by onXmaps to research my hunting unit. It identifies each hunting unit, private and public land, roads and trails and more.
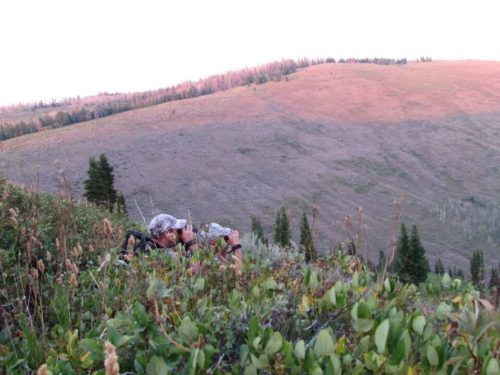
- Glassing – A quality pair of binoculars or a spotting scope is a must for glassing. During summer scouting, look for herds of elk in fields in the evening and watch where they’re coming from and where they’re going.
- Look for rubs and game trails – If you find an area that has rubs from several years ago to the most recent season, that’s a good indicator that the area consistently has elk. Game trails provide insight on where elk are coming from and going to, and will likely lead to food, water or bedding areas.
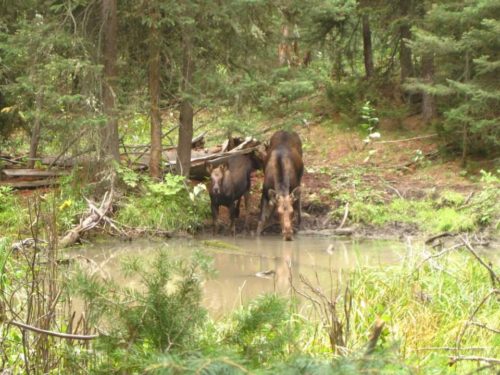
Look for Water – Animals need water. That’s a fact. Find water, and you’ll find animals. By the time fall arrives in the west, water is limited. There isn’t much rain during the summer months, and many of the small ponds and watering holes in the mountains that form from snow melt are dried up.
- Find a watering hole and see what kind of tracks you can identify. The photo below shows two moose drinking from a mountain-top pond in Idaho; this pond is also frequented by elk and mule deer.
- Elk will travel from high in the mountains to lakes and reservoirs at lower elevations, so look for game trails to determine where they’re coming from.
- Look for beaver ponds, as elk and other game will use these too since they will hold water throughout the summer and fall seasons.
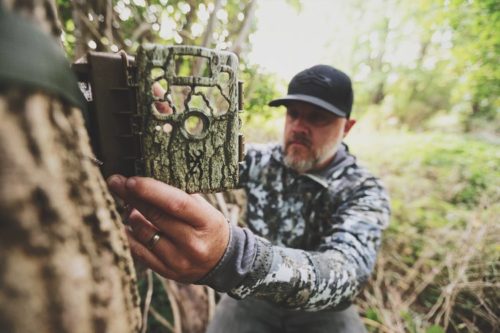
Use Game Cameras – Game cameras are useful when trying to pattern elk and other game. Place cameras in high-traffic areas, around watering holes or in bedding areas. Put cameras out early in the season to watch bulls growing their antlers, cows with new calves and identify if there are predators in the area.
Here are a few things to consider when selecting a game camera:
- Battery life – You most likely won’t be checking cameras frequently, so it’s important to select a camera that has a good battery life. I prefer cameras that take AA batteries; Not only are AA batteries usually cheaper, but they seem to last longer.
- Picture quality – A camera in the 2-6mp range should be sufficient for most people. Higher mega pixels do not necessarily mean better quality.
- Infrared or flash for night-time pictures – Infrared cameras don’t seem to spook animals and are not noticed by humans. Additionally, an infrared flash seems to help preserve battery life.
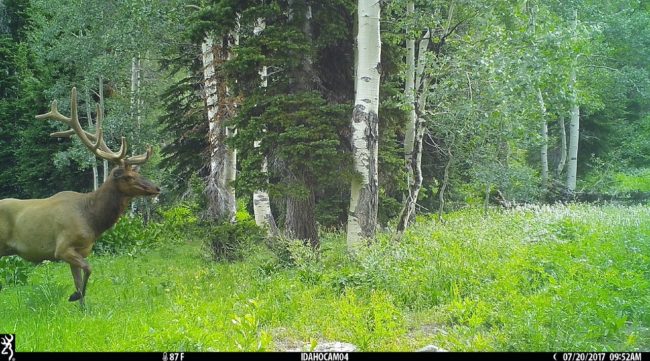
CAPTION: Image courtesy of @idahotrailcameras, Cassidy Golightly
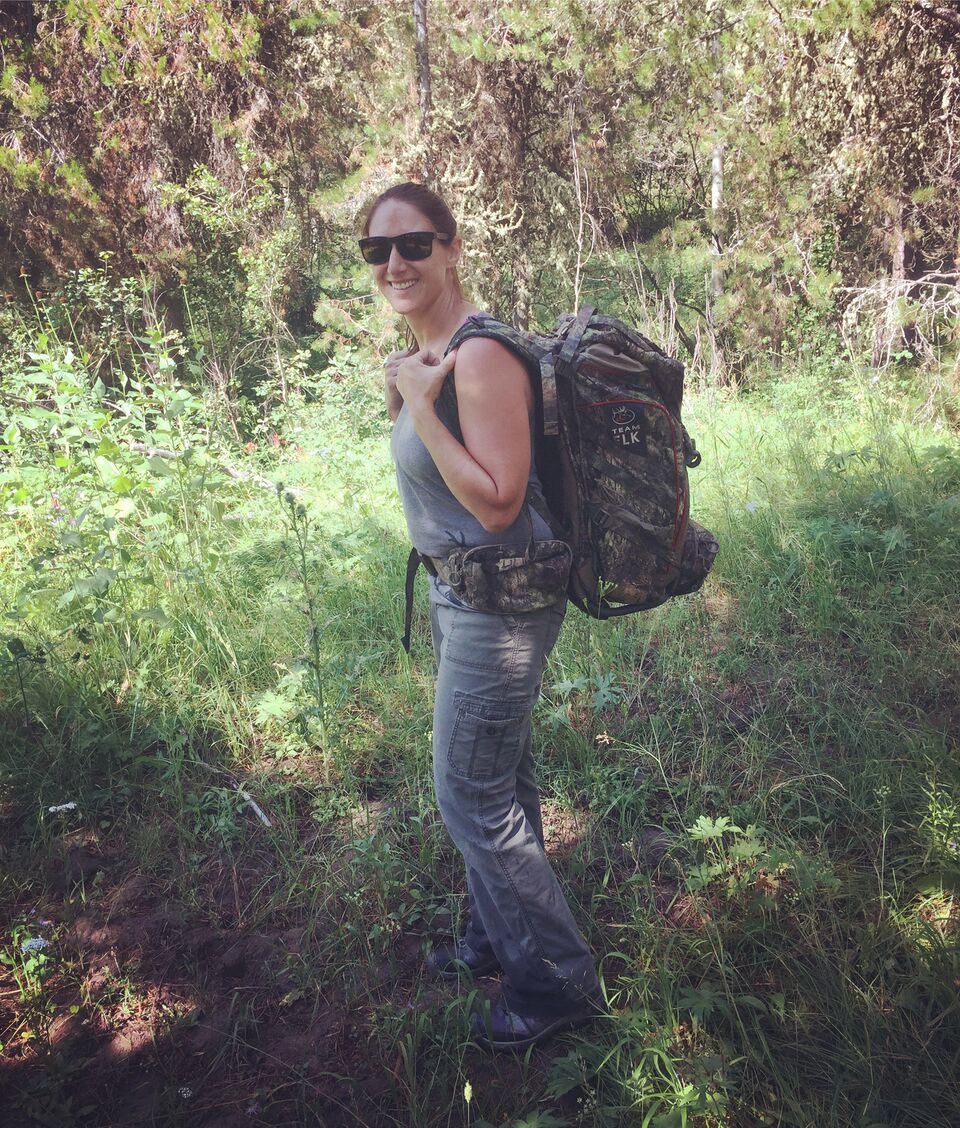
Prepare Yourself Physically – As I mentioned already, I learned through my personal experience that elk hunting is more physically demanding than hunting whitetails. Elk hunting is spot-and-stalk hunting, rather than a sit-and-wait hunting. Listening for a bull bugle, spotting elk from across a ridge—then going after it. This means you could be hiking up and down steep inclines, stepping over a lot of downed trees, walking through high brush, and hopefully packing out a heavy load of meat. Because of this, it’s important to train yourself and get into shape for the hunt.
To prepare:
- If you’re everyday life doesn’t include much physical activity, start walking, jogging or climbing stairs.
- Spend time in the woods prior to hunting season hiking trails of various distances and inclines. This is a great way to scout!
- Hike to your cameras instead of riding your 4-wheeler.
- Carry a weighted pack to simulate packing meat from the mountains.
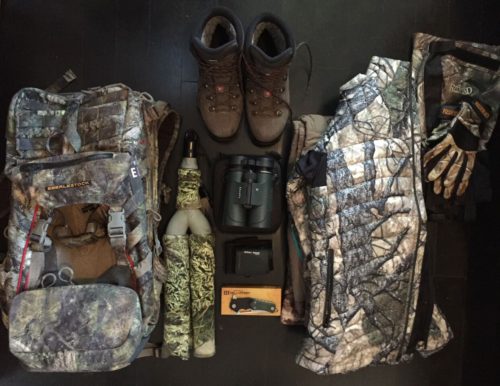
Get Your Gear in Order – Prior to season, take inventory of your hunting gear to identify new items you need, what needs to be replaced and what you have that you no longer need.
The gear you’ll need depends on your hunt—whether you’re going on single day hunts, multi-day backcountry hunts or if you’ll be hunting with a guide/outfitter; it also depends on whether you will be bow hunting or rifle hunting. The Rocky Mountain Elk Foundation has a helpful checklist available on their website.
Sarah Honadel is an avid outdoorswoman from Kentucky, now living in Idaho, who enjoys huntingelk, deer and turkey. She is a Team Member at Huntress View and Brand Champion for ReelCamo Girl, two organizations that work to support, encourage and empower women in the outdoors. Follow her on Instagram @waddysarah and @arrowridgecreations.
5 Summertime Trail Camera Tips
May 21st, 2017 by BTC Editor
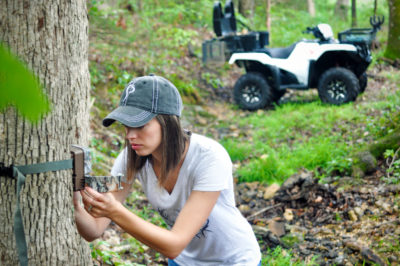
1- Summertime is when most hunters get their trail cameras out of storage and hang them to start taking inventory of their whitetail herd. It’s also a great time to take inventory of your trail cameras. Make note of how many you have, how many more you may need for the upcoming season, and also keep a list of each camera model and serial number in the rare case of theft. It can, and does, happen so keeping a record of this could help get your cameras back eventually if they do get stolen. Browning Trail Cameras also has a Security Box that makes it more difficult for thieves to take your cameras, if even at all.
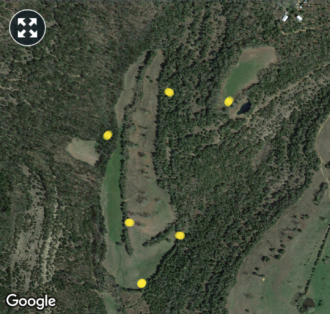
2- Look at an aerial map of your hunting property beforehand so you have a good idea of where you’d like to hang your cameras. This way, you’re not driving or walking all over your property, disturbing the game and working up a sweat. If you have a weather app on your phone you can easily locate your property via the radar portion of the app. If you don’t have that, Google Earth is what I recommend. It’s probably a good idea to take a screenshot of your property and from there mark where you are placing cameras using the paint/draw tool on your phone in case you forget where you hung the cameras later on.
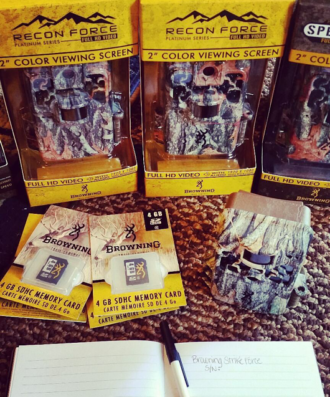
3- Summertime is obviously hot, even first thing in the morning, so in order to be out in the heat as little as possible it’s best to have everything ready to go before you head out. Have your trail cameras already set up with the correct date/time/camera settings, full with batteries and the SD card in so all you have to do is hang them, turn them on, and go!
A Browning Trail Camera feature that really helps get your camera positioned quicker is the viewing screen on some of the camera models. (See photo below.)

4- Everyone has their own system for transferring and storing trail camera pictures to their computer. I like to stay organized from the start by putting my SD cards in 2 separate cases – one for blank SD cards, and one for full SD cards – and then loading the pictures to my computer once I’m home. A baggie works just as good, just make sure you label each one to avoid confusion. Some prefer to bring a laptop and transfer the pictures there in the field, but I like to get in and out as quickly as possible and this works best for me.

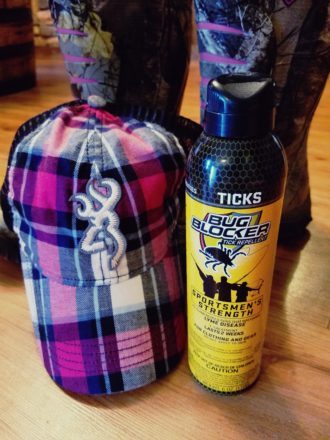
5- Last but not least, don’t forget the tick spray! So far this year has been one of the worst I’ve seen for ticks. Using a tick spray with Permethrin has worked well for me. Spray down your clothes and boots and make sure they’re dry before putting them on. You do not want this on your skin! For those worried about scent control, this kind is supposedly odorless once it dries. My nose is of course nowhere near as good as a whitetail’s, but I don’t smell it at all once it’s dry and would prefer to be tick free over scent free anyways, so to me it’s worth it. It also doesn’t hurt to spray it on some of your trail cameras to avoid ant infestations, which are very common in the summer months.
By Andrea Haas
Andrea Haas is a Pro-Staffer from Missouri who enjoys hunting deer, turkeys, and upland birds. She is also the founder of the Huntress View, an organization formed to help strengthen the ever growing community of women hunters
“Land and Wildlife Field Day”
April 23rd, 2017 by BTC Editor
Making and setting up Wood Duck boxes is not only a great way to get the next generation involved in conservation and wildlife management, it’s an excellent way to gain insight into the nesting and reproduction habits of Wood Ducks, with an ultimate goal of increasing their population. Scott Cronin, a Pro-Staffer from Kentucky, holds an annual event with a local High School called the “Land & Wildlife Field Day”. Junior and Senior High School students in the Wildlife Forestry Programs participate in this field event in which Wood Duck boxes and trail cameras are installed and studied.
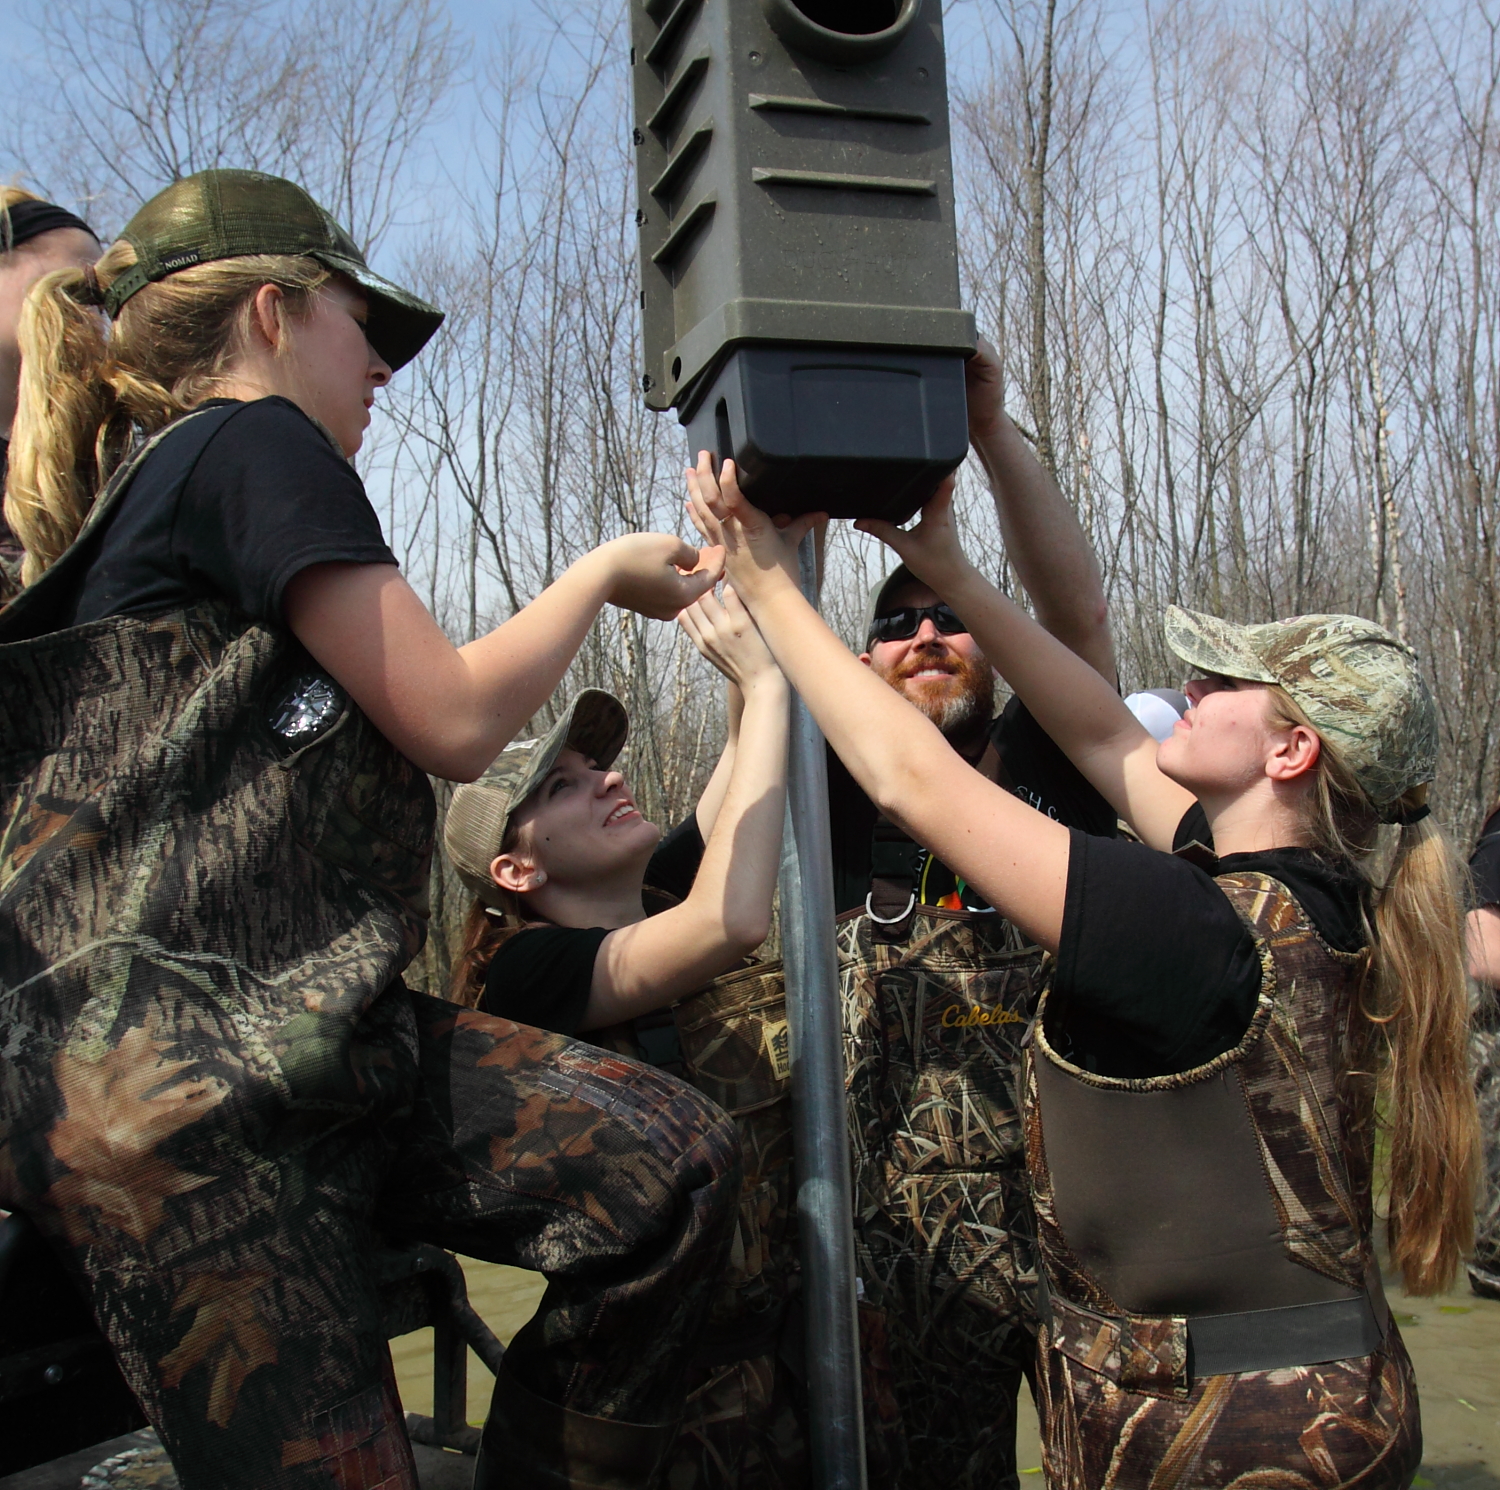
The goal of this project is to pinpoint which locations are best for the Wood Duck boxes, what box styles and designs are the most effective, and the rate of nesting in the boxes. Scott has found that using his Browning Trail Cameras to watch the boxes gives them actual data to use, rather than just going back in a few months to see if there’s any eggs. The project also allows them to spend time with the students, teaching them about using trail cameras as a game management tool to get data and to see how successful the projects are.
Scott has been using trail cameras on this conservation project for the past 15 years, but has been using Browning Trail Cameras exclusively for the past 4 years, for several reasons: the durability, versatility and the camera features. Naturally, the locations of the Wood Duck boxes and trail cameras are very wet (swamp areas, flood timber, etc.) but Scott shares that his Browning Trail Cameras have been very maintenance free and has had very little issues with fog and moisture, which is a common problem with any trail camera in these types of locations.
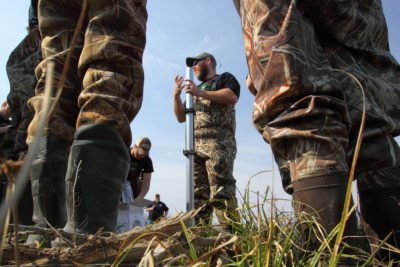
This year Scott started using the new Browning Strike Force HD Pro, which features an incredible .3 second trigger speed, a 1.5” color viewing screen and an adjustable mount, all of which have been a tremendous asset on this project. Scott shares: “I selected the Strike Force HD Pro based on the fact that we’ve had tremendous success over the past 4 years with the Browning Strike Force, and now that it has the viewfinder and the bracket it makes it so much easier to set up the cameras and pinpoint the exact area that you’re wanting to center your frame on from the start.”

Side view of the 2017 Strike Force HD Pro
Trail Cameras are our eyes in the woods, or in this case the wetlands, when we can’t physically be there. They have been especially helpful on this project since they often go a few months before going back to check on these locations. The “Land & Wildlife Field Day” project is an excellent way to teach the next generation about using trail cameras and Wood Duck boxes as tools to help grow the Wood Duck population. While trail cameras are used most often to aid in hunting, don’t overlook how valuable they can be in collecting data for conservation efforts as well.
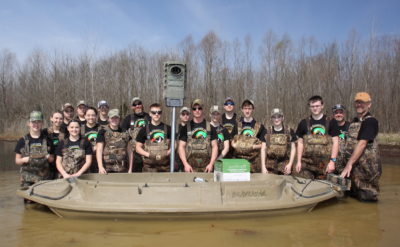
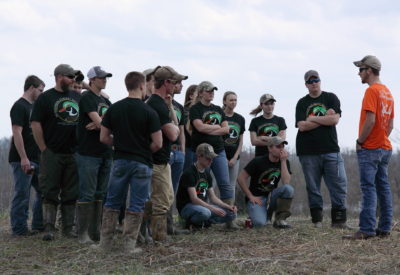
Kentucky Afield Magazine was there to cover the event this year. Here are a few more photos from their field day!

By Andrea Haas
Andrea Haas is a Pro-Staffer from Missouri who enjoys hunting deer, turkeys, and upland birds. She is also the founder of the Huntress View, an organization formed to help strengthen the ever growing community of women hunters.
Using Trail Cameras to Scout for Turkeys
March 26th, 2017 by BTC Editor
Knowing where to hang your trail cameras and what kind of settings to use when scouting for turkeys is important, as it can vary a little from using cameras for deer hunting. When hanging my trail cameras, whether I’m using them for deer or turkey hunting, I pretty much keep 3 things in mind when determining where to put them: bedding, food and travel routes. So, for deer I often like to hang my cameras where I know they will be coming from their bedding area to their feeding area, and vice versa. For turkeys, I like to do essentially the same thing: find where they are roosting and figure out where they are going when coming off the roost. These locations for deer are often different than they are for turkeys, so scouting is a must.
A few things to look for when you are scouting for good turkey trail camera locations are roosting sites, travel routes, strut zones, and feeding areas.
Roosting Sites
You will know a roosting site when you see one. I have found several on our property, and they have always been in tall, dead trees and have lots of turkey droppings underneath them. You may find some primary wing feathers as well. When hunting last year, I actually spotted a couple of toms still up on the roost, which further confirmed their roost site. I found another spot this spring while shed hunting – it was a dead tree in on the edge of our food plot – and found quite a bit of droppings and a wing feather underneath it.
Camera Setup:
If I know where a roosting site is, I personally like to set my trail camera where I expect they will be landing when they fly down from the roost. From observing turkeys while out hunting I have a good idea of where they usually land when they fly down. On my property, this is usually in one of our fields planted in wheat and clover.
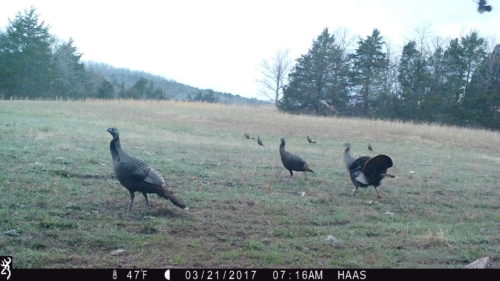
Time-Lapse mode is a great option for fields this size so you don’t miss anything further out where turkeys may not trigger the camera. I have this Browning Strike Force trail camera set up quite a bit higher to have a better view of the field. As you can see in this photo, the turkeys are flying in off the roost.
Travel Routes
I’ve noticed a couple of similarities in how both deer and turkey travel from my experiences hunting, and it seems they often prefer to take the easiest route possible. Some examples of routes I have seen both deer and turkeys using often is logging roads in the woods, creek crossings, openings in the timber, and holes in fences.
Camera Setup:
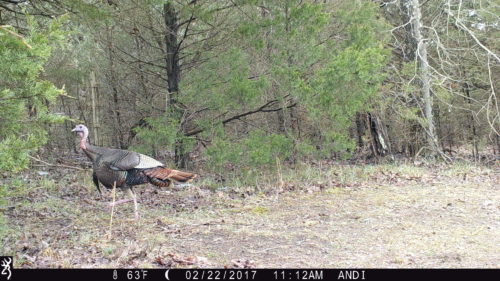
These are usually in small, tight spots so I prefer to hang my camera pretty low here and will often put my camera on burst mode so I don’t miss any action. I have this Browning Strike Force set to take 4 multi-shot images every 5 seconds.
Strut Zones
The best way to find these is to actually see a turkey using it in person. I know where a couple are on our property from observing the turkeys while out hunting. If you haven’t seen your turkeys using one, try looking for wing drag marks in the dirt while you’re scouting. On my property, our turkeys love to strut on the edge of one of our food plots where the sun hits them, so keep that in mind when looking for strut zone locations.
Camera Setup:
If you are looking to get some neat footage from your trail cameras, a Strut Zone is the perfect opportunity to switch your trail camera to Video Mode! Make sure you have a larger SD card in this instance as they can fill up pretty quickly on video mode.
This Browning Strike Force camera is actually in the same location as the “Roosting Site” listed above and Time-Lapse mode is what I prefer in this location due to the field size.

Feeding Areas
Food plots planted in chicory, wheat and/or clover are excellent options for hanging your trail cameras to scout for turkeys. We have one field planted in clover and chicory, and another planted in wheat and clover, both of which really seem to hold the turkeys on our property.
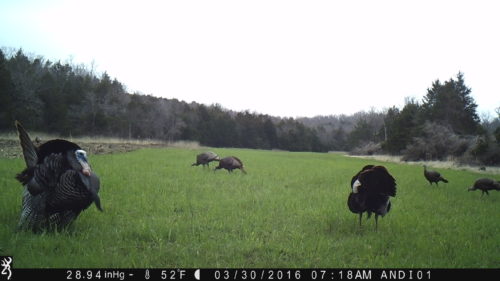
We also experimented one year by plowing up some of the ground on the edge of one of our food plots and the turkeys loved the easy access to insects there! You can see the plowed part in the photo below from the Browning Spec Ops:
Camera Setup:
Once again, a good option in a field this size is Time Lapse mode so you can still catch turkey movement outside of the camera’s detection zone, and setting the camera a little higher up.
If you already have a pretty good idea of where the turkeys are feeding at, regular Trail Camera mode works just fine here as well, and I would probably up the picture delay to 20 or 30 seconds here so you aren’t filling up the SD card as quickly with tons of feeding pictures.
When making your game plan for opening day of Spring Turkey Season, keep in mind what you have learned from studying your trail camera pictures prior to season opener. Using trail cameras to scout for turkeys will give you a good idea on your flock size, how many different groups of turkeys you may have, and where you need to be setting up on opening day. You will be one step ahead of the turkeys and by using the right settings, will likely get some amazing trail camera pictures and/or videos along the way!
By Andrea Haas
Andrea Haas is a Pro-Staffer from Missouri who enjoys hunting deer, turkeys, and upland birds. She is also the founder of the Huntress View, an organization formed to help strengthen the ever growing community of women hunters.
D.E.E.R. Project
October 9th, 2016 by BTC Editor
D.E.E.R. Project
By Matthew Hayes
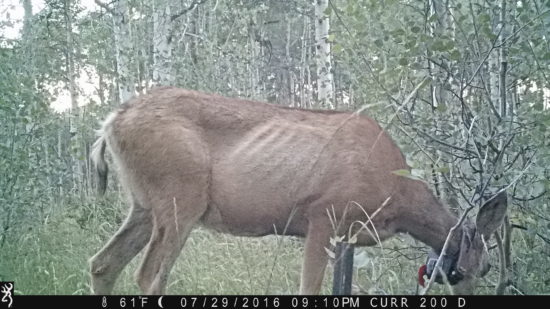
Mule deer have a complex history throughout the western United States. In the days of the early settlers and pioneers, mule deer were relatively scarce; many trappers and explorers reported only occasional sightings of mule deer whereas other big game species were regularly observed. At the beginning of the 20th century, mule deer populations had been drastically reduced in number due largely to overharvest, market hunting, and overgrazing. Protections were put in place in the early to mid-1900s, eventually leading to ideas such as the North American Model of Wildlife Conservation, which was followed by a dramatic increase in mule deer populations. Mule deer populations peaked between the 1940s to the early 1960s throughout the western US.
Fast forward a few decades to the present day. With a lens to examine population fluctuations over the past 40+ years, a clear pattern has emerged. Populations, at least in Wyoming, appear to go through cyclical periods of increase followed by sharp declines. In reviewing literature and historical documents, concerns about mule deer populations tend to follow huge decreases in populations and when they subsequently rise, research and management become less important. Another point that seems clear in Wyoming is that although we have this see-saw in population numbers, there is a general declining trend since at least the 1970s. On average, Wyoming has seen a roughly 20% reduction in mule deer populations.
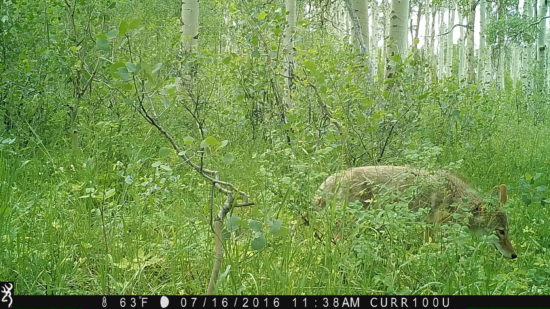
The population swings, and general decline, of mule deer since the 1970s has been difficult to understand. A variety of factors have been proposed to explain these declines, including: overharvest, harsh winters, habitat, drought, predation, disease and burgeoning elk populations. Managers have long noted that many areas that mule deer inhabit face different pressures and that populations are likely being driven by a variety of factors. All factors are not influencing populations in each portion of their range. This complication has meant that gaining a more complete understanding of reasons for fluctuations or stagnant growth in population numbers has been elusive. Without a solid understanding of the why and how associated with population fluctuations, it is incredibly difficult for targeted management to be beneficial.

Researchers and managers have made great strides to better understand mule deer ecology and factors relating to their survival and reproduction. In the early 2000’s Global Positioning Systems (GPS) became small enough to fit onto a collar sized for ungulates. Since then, studies have been conducted examining migration and use of the landscape in summer and winter. The effects of drought and shifting precipitation regimes have been investigated as well as determining when, where and how animals are dying. Wyoming has been at the forefront of this research and has helped to better understand the ecology and management of mule deer. A key ecological process that has remained poorly understood are the interactions between mule deer and elk (though some work has been done at the Starkey Experimental Forest).
Mule Deer with GPS tracking collar.
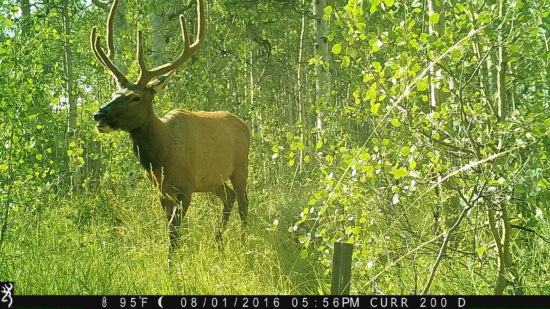
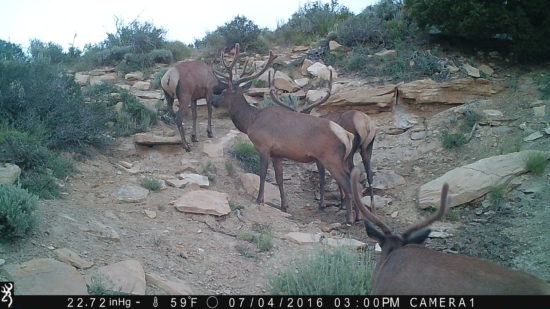
Both mule deer and elk are highly cherished big game species. Wyoming and her residents rely on these animals for hunting, tourism and as a part of our cultural heritage. Nevertheless, at the same time those mule deer populations have generally declined, elk populations have increased dramatically across the same geographical range. Managers and researchers have long wondered if mule deer and elk could be competing for space and resources but, until recently, the ability to study these interactions was almost impossible. Potential for interactions between these 2, highly valued species to affect one another’s abundance has been a bit of a conundrum for decades, probably given the challenges associated with addressing such a complex question. The Deer-Elk Ecology Research Project (DEER) was ultimately incepted out the need to unravel the head-scratching complexities of poor performing mule deer populations, while a similar big game animal continues to grow in the same country.
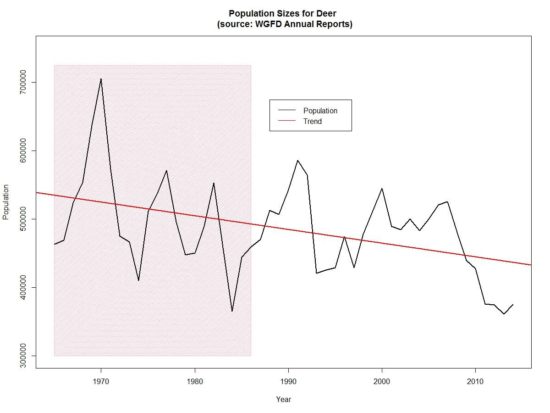
Population sizes for Deer

Population sizes for Elk
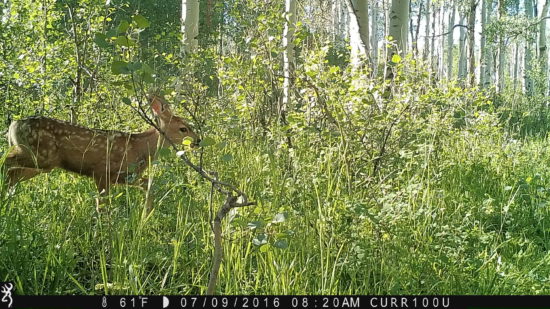
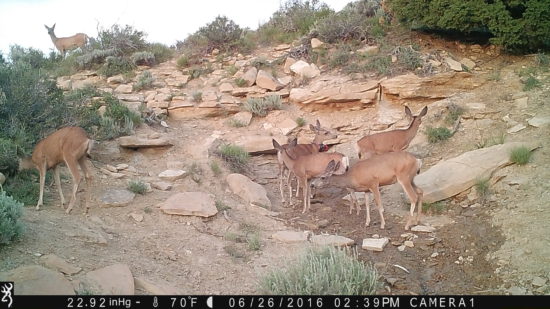
The DEER Project, located in the Greater Little Mountain Area of southwestern Wyoming, aims to increase our understanding of both mule deer and elk. This project is examining parturition timing and location of mule deer, mortality and recruitment of fawns, nutritional condition of adult female mule deer, summer diet overlap between elk and mule deer, space use, recruitment of male mule deer, survival, migration, and dispersal. We also are implicitly examining winter severity, habitat use, precipitation patterns, predation and disease. One of the greatest strengths of this work is the rigorous monitoring of both mule deer and elk in the same system. Many studies prior have examined one species or the other with inference to supposed interactions, but the DEER project will be able to analyze these interactions at a much finer scale. Another added benefit of this project is that it occurs in a high-desert system—an ecosystem ubiquitous throughout Wyoming but less studied compared to high-elevation systems. Far from being a one-off or unique system, the results from this work will be applicable to mule deer and elk throughout their shared range.
Future articles will focus on updates from the DEER project. You can follow along with the project, donate and subscribe for updates at www.deerproject.org.
The Western Association of Fish and Wildlife Agencies (WAFWA) has explored the issue of mule deer decline in depth and has published a very approachable book on the topic; you can check out the website at www.wafwa.org and navigate to the Mule Deer Working Group for more information.


FOR MORE INFORMATION: 
UNIVERSITY OF WYOMING
Kevin Monteith 307-766-2322 kevin.monteith@uwyo.edu
Matthew Hayes 307-766-5417 mhayes1@uwyo.edu

WYOMING GAME & FISH DEPARTMENT
Patrick Burke 307-875-3223 patrick.burke@wyo.gov
Mark Zornes 307-875-3223 mark.zornes@wyo.gov
Kevin Spence 307-875-3223 kevin.spence@wyo.gov
Five Things I Learned Going Rural
September 25th, 2016 by BTC Editor
Five things I learned going rural
By Kristen A. Schmitt
A few years ago, we moved away from the city, trekking 14 hours east of Detroit to the rural mountains of Vermont. My husband’s job brought us out that way and, while I was looking forward to the change, my previous life experiences didn’t really prepare me for the switch. I didn’t grow up camping, hiking, or hunting. In fact, my entire outdoors experience revolved around sidewalks, bicycles and complaining. Fast forward to 2016 and I not only spend at least 50% of my day outside (no matter the weather), but I’ve channeled my newfound enjoyment for the outdoors into writing for a variety of publications about bowhunting, archery, local food and backyard poultry, among other things.
The irony is that before our move, I wouldn’t have recommended going “rural” to anyone. And now? Not only did this move help me break free of my chain-link fence mentality, but it also gave me new knowledge and confidence that I bring to other areas of my life. So, in the tradition of Dave Letterman’s top ten lists, here’s the top five things I’ve learned since going rural:
5 ) Nature can be incredibly surprising.
Our property in Vermont was surrounded by forest, field and water. While we owned roughly 8 acres, the back of the property butted up to an 11-acre pond and the other sides were bordered by hardwood forest. It was more than just a switch from pavement to dirt roads. My nearest neighbors were bobcats (that tried to kill my chickens – twice), porcupines, peregrine falcons, eagles, and hawks; vultures, wild turkeys, juncos and herons. One particular incident involved a few nighttime visits from an ornery black bear interested in our trash.
We now have a 36-acre farm in upstate NY with a similar landscape.
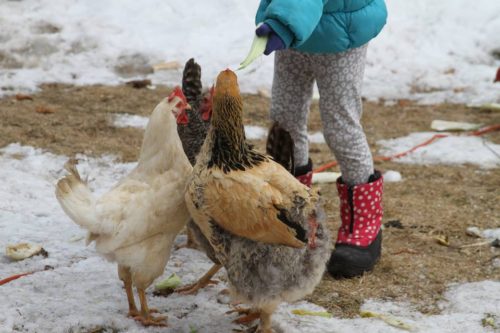
4 ) Chickens are more than just tiny egg machines.
Being able to grab fresh eggs from your own chickens for breakfast is an unbelievable treat. Chickens are easier than any other type of livestock and mine did amazingly well in negative temperatures last winter. We’ve only lost one (to a bobcat); the others are hearty and healthy. As a writer, I work out of my house and have the ability to listen to the chicken “conversation” daily. I read somewhere that chickens have their own language and I can attest to that fact. Sitting on my porch with a mug of tea (or glass of wine, depending on the time of day) to watch them peck and chatter is one of my favorite activities.
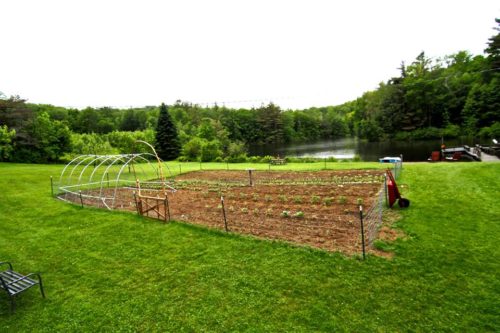
3 ) Eating vegetables that you grow yourself is an amazing experience.
My parents raised me well with a small backyard garden and fresh vegetables daily. But the significance of planting our own fruits and vegetables and maintaining our garden – especially one as large as we have – is priceless. Our young daughter seems way more connected to where her food comes from than I ever was until I became an adult. Picking that first piece of spinach or watching corn plump up on the stalks is exciting each and every time.
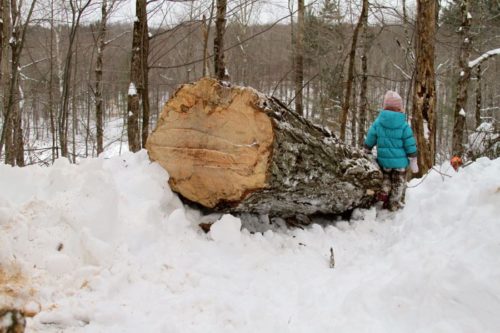
2 ) It takes a lot of wood to heat a house, especially with temperatures in the negatives for weeks. Prior to our move, we relied on city gas to heat our house in the suburbs like the majority of the country. Once we realized we could harvest our own heat from the forest on our property, we had a wood stove installed in the living room. Little did we realize that it takes a lot of wood to keep even a smaller house warm when the temperatures don’t go higher than -16 for weeks. Yet, if I had to do it again, I would. I like being able to see the physical amount of wood I used for heat rather than paying a faceless gas bill. Besides, splitting and stacking wood may not be a ton of fun, but it’s not bad. In fact, it warms you twice: once when you stack the wood; later, when you sit in front the fire.
1 ) I’m not helpless.
The main thing that I have learned from going “rural” is that I am not a helpless person. I am stronger than I’ve ever been and my passion and dedication to keeping up with this new lifestyle choice has me learning how to do new things every single day. If we hadn’t moved I wonder if I would feel this empowered in the physical aspects of life as well as the mental. This move has changed me for the better – and I can’t imagine ever living anywhere where I can’t see the stars.
Kristen A. Schmitt writes about wildlife, sustainable agriculture, environmental issues and the outdoors. Her work has appeared in National Geographic, Fast Company, Audubon, Eating Well,USA Today, Hunt & Fish and others. Follow her @Kristen_Schmitt.
DIY Trail Camera Stand
September 1st, 2016 by BTC Editor
No tree around to hang your Browning Trail Camera? No problem! Pro-Staffer Kinsey Edmunds gives step-by-step instructions on how to make a homemade game camera stand that can be placed anywhere!
Kinsey Edmunds is a pro-staffer from Missouri. Being raised on a farm and surrounded by wildlife, her love for the outdoors began at a young age. Kinsey enjoys bowhunting whitetails, turkeys, hogs and gators, just to name a few. She is also a team member of Huntress View, a team dedicated to strengthening the ever-growing community of women hunters.
Nighttime Trail Camera Images – Putting Light On The Subject
August 15th, 2016 by BTC Editor
The evolution of the trail camera has been simply remarkable over the last several years, from taking 35mm film to the photo shop to the almost instant gratification of looking at them on your phone, things are simply in a place that was once only a dream.
With that said, there are still some factors in play when it comes to nighttime images that make them seem behind the times. With all of the advances in technology, why have nighttime images not been perfected yet? Well, in this format, we’ll do our best to explain the basic science of nighttime images on trail cameras.
Seeing the Waves
Nope. We’re not at the beach. But to develop a basic understanding of what’s going on with nighttime images you will want to make sense of the following to help differentiate between the various types of flashes:
- Our eyes can only see light that exists within a small range of the electromagnetic spectrum.
- That electromagnetic spectrum is measured in wavelengths.
- Those wavelengths are measured in nanometers.
Ultimately, these nanometers are your take away from this section because this is the measurement that you can use to understand how each type of flash impacts the quality of your game camera pictures.
If you need a visual aide to help you more effectively wrap your head around the concept of nanometers, NASA has created a handy below:

SOURCE: http://science-edu.larc.nasa.gov/EDDOCS/Wavelengths_for_Colors.html
Measuring the Flash?
Well, we’ve given you the basics on nanometers, but now you’re asking: why do I care? Well, we’ll do our best to explain that here as simply as possible across all three types of flashes found on trail cameras:
White Flash Cameras
If you look at the chart from NASA, you will see that they define “visible light” as being in the range of 400nm to 700nm. That’s pretty much what you get with a “white flash” camera and that’s how you get to see the full color images.
SOURCE: http://www.trailcampro.com/collections/shop-trail-cameras/products/reconyx-hyperfire-hc550
Low-Glow/Standard Infrared (IR) Flash
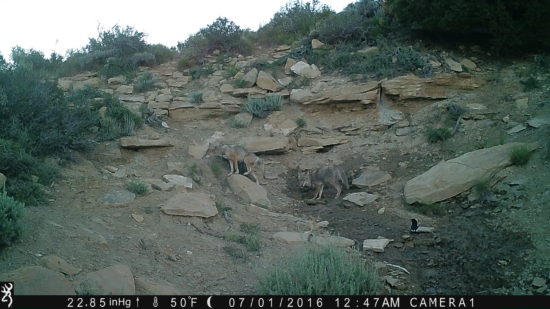
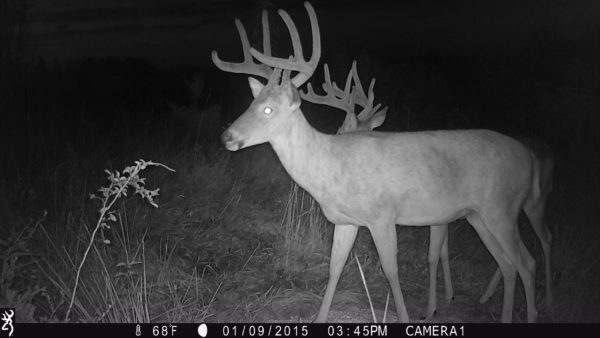
Now it starts to get a little more complex, because we’re going to step outside the range of “visible light” and move into the infrared range. For cameras that fall into the “low-glow” or “standard” infrared (IR) category, it’s reasonable to suggest that most of these cameras measure around 850 nanometers.
Now, even though these camera flashes technically fall in the “Infrared” category, they are still close enough to the red in the “visible light” range that (A) if someone is looking in the general direction of the LED bulbs when it takes a nighttime image they will see a “low red glow” and (B) the flash still generates enough illumination to take a reasonably good nighttime images.
Obviously, you sacrifice the color of the images here since you are using a flash outside of the spectrum found in the “visible light” range, but you are still getting a reasonably crisp image without the “flash of lightning” effect you get with a white flash camera.
Invisble/No Glow/Black Flash
As we discuss this type of flash, it is worth noting that it still falls within the infrared light range. It is simply further away from the “visible light” range than the low-glow infrared flash cameras. With flashes in this category, it is reasonable to assume that most of them can be measured around 950 nanometers.
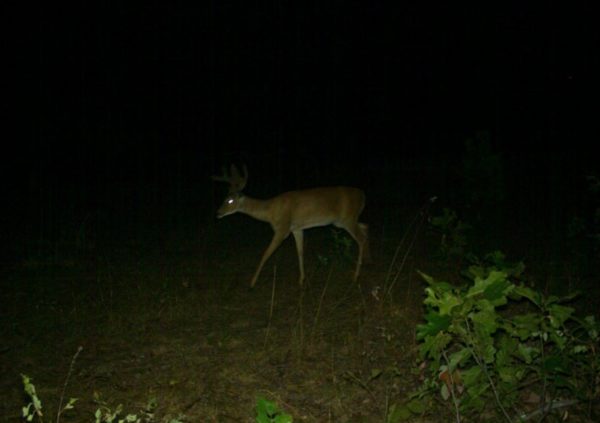
The net result of this is that the LED bulbs are not visible when taking a nighttime image, BUT in exchange for that “invisibility” you are sacrificing image quality when compared to the other types of flashes. This is because invisible flash cameras simply do not illuminate the subject matter as much as the other two.
In this image below, if you look back up to the one we used for the “low-glow” images you’ll notice that the image captured by the “invisible flash” camera is a little grainier and has a little more “white noise.” They are both still good images, but you can see that one is a little clearer than the other.
Speed Matters
Now, we could get into a long dissertation about the impact that SHUTTER SPEED has on trail camera images, but for today we’ll just provide you with a few quick notes and save the essay on “shutter speeds” for another day.
In this context we only want to relate shutter speed to the amount of light that is available for capturing images. So here goes: the more light you have available, the faster the shutter speed can be. The less light/illumination you have available, the slower the shutter speed must be.
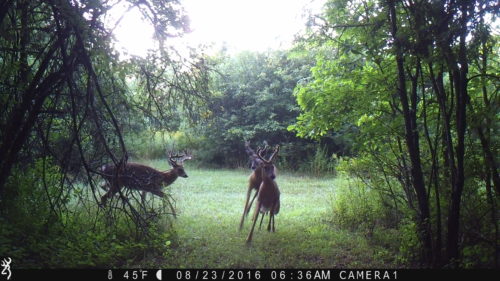
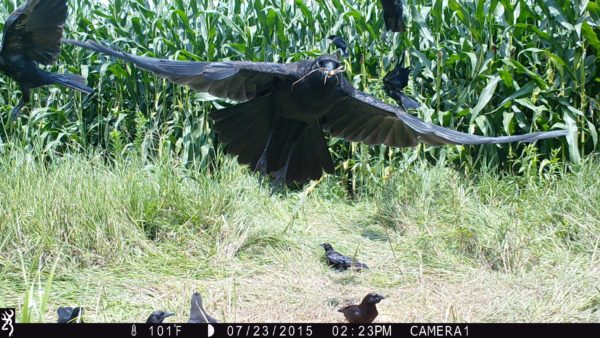
Basically that means this: during the day you have enough light for the shutter speeds to be super-fast and capture cool images of deer jumping and birds flying. This is why most of the cool action shots we see in trail cam pics are daytime pics.
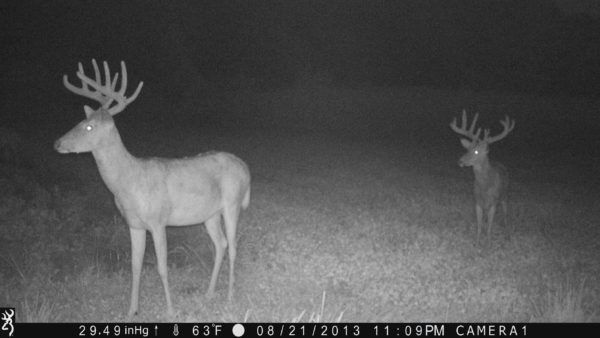
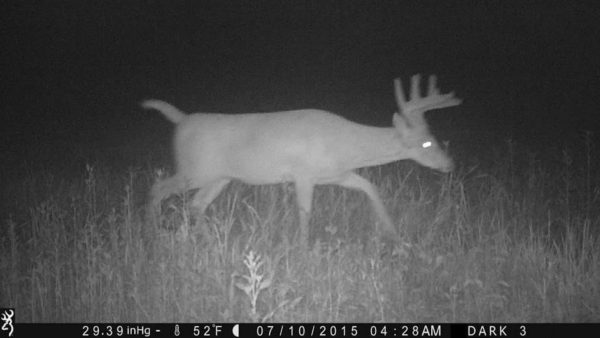
It also means that as you move further away for the visible light range with your flash (i.e From 700 nanometers to 850 nanometers to 950 nanometers…), the shutter speed must slow down to allow enough light inside the camera to capture nighttime photos. In layman’s terms, as you move from a white flash to a low glow IR flash to an invisible flash, you are increasing the likelihood of blurred images because the shutter speeds needs to slow down. While this example isn’t horribly blurred, it still demonstrates that the illumination from an invisible flash camera accompanied by the slower shutter speed, doesn’t always give you the cleanest image in the world.
What Do I Really Need to Remember?
Well, here is the gist of it, starting with the very basic premise that there are two types of trail camera pictures: daytime pictures and nighttime pictures.
Beyond that, based simply on game cameras, there are 3 types of nighttime images: those taken with a white flash, those taken with a standard/low-glow IR flash, and those taken with an invisible/black flash.
So if we take those four types of images and rank them based on potential quality of the images based on the lighting, they would be ranked as follows:
- Daytime Images
- White Flash Images
- Low Glow/Standard IR Images
- Invisible/Black Flash Images
Obviously, there can be a lot more depth to the discussion on flashes and nanometers and shutter speeds and everything else that leads to the trail camera pictures you find on your SD cards, but hopefully this gives you a little bit more of a foundation for understanding why some of the pictures you find on your SD cards look the way they do and helps you with you game planning when it comes to where you put your different types of trail cameras!
Tom Rainey
Tom Rainey has been with Browning Trail Cameras ever since they were introduced at retail and enjoys hunting everything from squirrels to whitetail deer…but his obsession is turkey hunting. His grandfather purchased him a Belgium Browning 20-Gauge A-5 prior to his birth and he has been a fan of the Browning brand ever since…
