Easy Wild Turkey Tacos Recipe
May 7th, 2017 by BTC Editor
Of all the game meats, wild turkey is by far my favorite. I love making wild turkey nuggets—small chunks rolled in egg and covered in Italian breadcrumbs, then fried. Yum! But lately, I’ve been looking for new, healthier ways to cook my turkey harvest. I decided to try making crockpot turkey tacos. Good decision, because they were delicious…and super easy!
What you need:
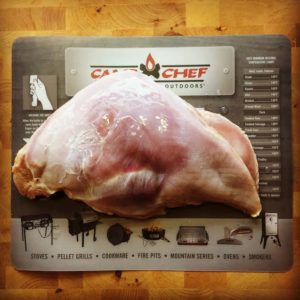
- 1-1/2 lbs. wild turkey breast meat
- 1 tbsp. chili powder
- 1/2 tsp. paprika
- 1-1/2 tsp. ground cumin
- 1/4 tsp. onion powder
- 1 tsp. minced garlic (can replace with 1/4 tsp. garlic powder)
- 16 oz. of your favorite salsa
- Optional: 1/2 tsp. hot pepper flakes*
- Optional: 1/2 cup water
*I like spicy food, so I use a mix of dried cayenne and habanero peppers. You can substitute with red pepper flakes, or eliminate for less spice.
Instructions:
- Place whole chunk of wild turkey breast in crockpot
- Mix all dry ingredients together in small bowl, then sprinkle onto turkey breast
- Pour salsa over turkey; if the salsa is extra chunky, add water
- Cook on low 5-6 hours (or high for 3-4 hours)
- Before serving, use two forks to shred the meat and stir all ingredients together
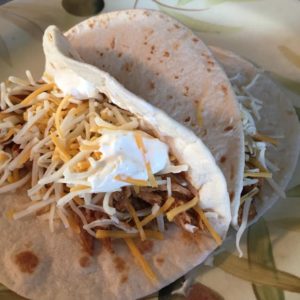
Serve immediately with desired taco toppings such as shredded cheese, sour cream, avocado or guacamole, lettuce, tomato, hot sauce, rice, corn, etc. There are so many options, and you can personalize it to whatever you prefer.
Ingredients can be adjusted to your personal tastes, or you can also use store-bought taco seasoning in place of the listed dry ingredients (I prefer to make my own to eliminate the salt and preservatives).
Sarah Honadel is an avid outdoors-woman from Kentucky who enjoys hunting turkey, deer and elk. She is a Team Member at Huntress View and Brand Champion for ReelCamo Girl, two organizations that work to support, encourage and empower women in the outdoors. Follow her on Instagram @waddysarah and @arrowridgecreations.
Using Trail Cameras to Scout for Turkeys
March 26th, 2017 by BTC Editor
Knowing where to hang your trail cameras and what kind of settings to use when scouting for turkeys is important, as it can vary a little from using cameras for deer hunting. When hanging my trail cameras, whether I’m using them for deer or turkey hunting, I pretty much keep 3 things in mind when determining where to put them: bedding, food and travel routes. So, for deer I often like to hang my cameras where I know they will be coming from their bedding area to their feeding area, and vice versa. For turkeys, I like to do essentially the same thing: find where they are roosting and figure out where they are going when coming off the roost. These locations for deer are often different than they are for turkeys, so scouting is a must.
A few things to look for when you are scouting for good turkey trail camera locations are roosting sites, travel routes, strut zones, and feeding areas.
Roosting Sites
You will know a roosting site when you see one. I have found several on our property, and they have always been in tall, dead trees and have lots of turkey droppings underneath them. You may find some primary wing feathers as well. When hunting last year, I actually spotted a couple of toms still up on the roost, which further confirmed their roost site. I found another spot this spring while shed hunting – it was a dead tree in on the edge of our food plot – and found quite a bit of droppings and a wing feather underneath it.
Camera Setup:
If I know where a roosting site is, I personally like to set my trail camera where I expect they will be landing when they fly down from the roost. From observing turkeys while out hunting I have a good idea of where they usually land when they fly down. On my property, this is usually in one of our fields planted in wheat and clover.
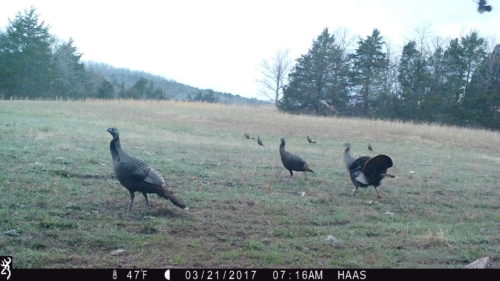
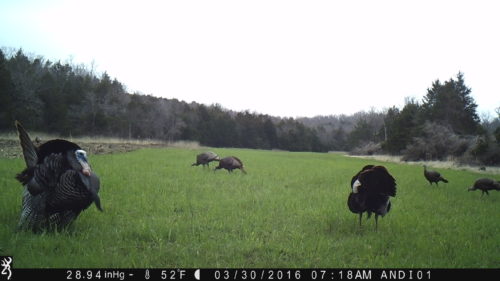
Time-Lapse mode is a great option for fields this size so you don’t miss anything further out where turkeys may not trigger the camera. I have this Browning Strike Force trail camera set up quite a bit higher to have a better view of the field. As you can see in this photo, the turkeys are flying in off the roost.
Travel Routes
I’ve noticed a couple of similarities in how both deer and turkey travel from my experiences hunting, and it seems they often prefer to take the easiest route possible. Some examples of routes I have seen both deer and turkeys using often is logging roads in the woods, creek crossings, openings in the timber, and holes in fences.
Camera Setup:
These are usually in small, tight spots so I prefer to hang my camera pretty low here and will often put my camera on burst mode so I don’t miss any action. I have this Browning Strike Force set to take 4 multi-shot images every 5 seconds.
Strut Zones
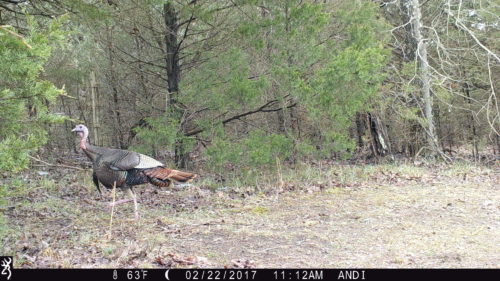
The best way to find these is to actually see a turkey using it in person. I know where a couple are on our property from observing the turkeys while out hunting. If you haven’t seen your turkeys using one, try looking for wing drag marks in the dirt while you’re scouting. On my property, our turkeys love to strut on the edge of one of our food plots where the sun hits them, so keep that in mind when looking for strut zone locations.
Camera Setup:
If you are looking to get some neat footage from your trail cameras, a Strut Zone is the perfect opportunity to switch your trail camera to Video Mode! Make sure you have a larger SD card in this instance as they can fill up pretty quickly on video mode.
This Browning Strike Force camera is actually in the same location as the “Roosting Site” listed above and Time-Lapse mode is what I prefer in this location due to the field size.

Feeding Areas
Food plots planted in chicory, wheat and/or clover are excellent options for hanging your trail cameras to scout for turkeys. We have one field planted in clover and chicory, and another planted in wheat and clover, both of which really seem to hold the turkeys on our property.
We also experimented one year by plowing up some of the ground on the edge of one of our food plots and the turkeys loved the easy access to insects there! You can see the plowed part in the photo below from the Browning Spec Ops:
Camera Setup:
Once again, a good option in a field this size is Time Lapse mode so you can still catch turkey movement outside of the camera’s detection zone, and setting the camera a little higher up.
If you already have a pretty good idea of where the turkeys are feeding at, regular Trail Camera mode works just fine here as well, and I would probably up the picture delay to 20 or 30 seconds here so you aren’t filling up the SD card as quickly with tons of feeding pictures.
When making your game plan for opening day of Spring Turkey Season, keep in mind what you have learned from studying your trail camera pictures prior to season opener. Using trail cameras to scout for turkeys will give you a good idea on your flock size, how many different groups of turkeys you may have, and where you need to be setting up on opening day. You will be one step ahead of the turkeys and by using the right settings, will likely get some amazing trail camera pictures and/or videos along the way!
By Andrea Haas
Andrea Haas is a Pro-Staffer from Missouri who enjoys hunting deer, turkeys, and upland birds. She is also the founder of the Huntress View, an organization formed to help strengthen the ever growing community of women hunters.
