Trail Camera Motivation
November 26th, 2017 by BTC Editor
I’m not a morning person. At all.
I know people say that a lot, but it matters when it hurts what you love to do the most. That trait surely hurts my deer-hunting efforts. You see, I’ve been chasing my beloved whitetails for over 25 years now. I average over 100 stand sits each season — if you break up the morning and afternoon hunts, because often they’re in different locations. But the bulk of that number is generated with afternoon hunts… a large bulk of that number.
I’ve got a trophy room chock-full of heavy antlered Midwest whitetail giants, and I enjoy admiring well over 1,000 inches of bone adorning the mounts which stare at me every night as I unwind watching t.v. All but one of those trophies were killed in the afternoon. So what’s the problem with that, you may ask? I wonder if there could be more. I wonder what that room would look like if I’d been motivated enough over the years to set my alarm earlier? What if I were more motivated? Frankly, it’s hard to imagine what could motivate me more than I already am.
Then it happened… I decided to leave some cameras up this year during the season. I’ll be very candid here: I don’t run a lot of trail cameras once opening day rolls around. Never have. Why? Because I hunt public land, pretty much exclusively. Highly pressured public land – the kind that when you pull up to park, you hope there’s a spot left to squeeze your vehicle into. That probably gives you a good idea of why I don’t like leaving $150-200 prizes out in the woods for the first winner to take home with him when he finds it.
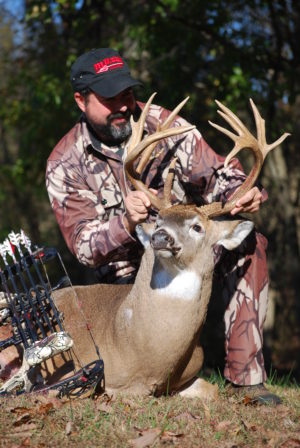
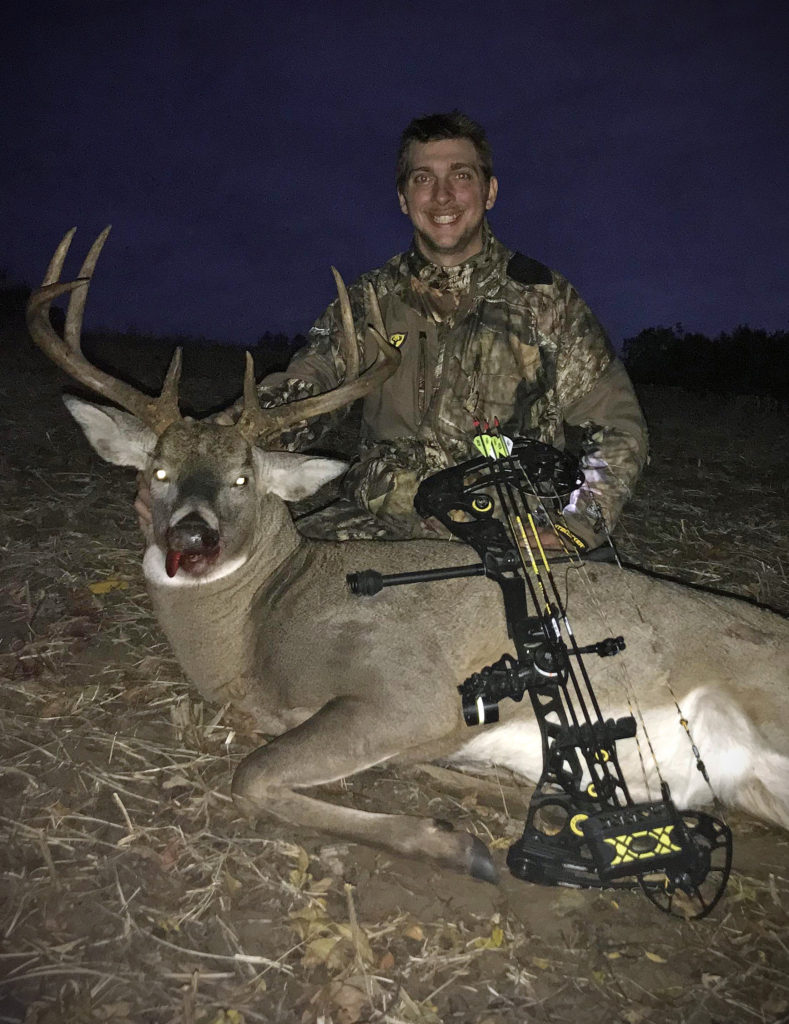
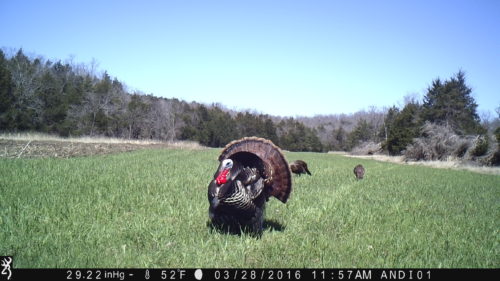
But I took a chance this year. After a couple weeks of leaving them out, I slid one of my SD cards into my laptop and I couldn’t believe my eyes: Wide 8, a deer I’d captured on camera only after dark for three straight years, walked up to a scrape guarded by my Browning Spec Ops HD and began working it at 7:30 a.m.! Talk about motivation!!
Wide 8, a buck that Staggs has watched for three years straight, strolls directly into a scrape at 7:30 on the morning of October 29th:
And that is my point… Yes, I know hunters have long used trail cameras to “inventory” their bucks, even creating special folders for them and sometimes being able to watch them progress over the years as I had done with Wide 8. But I’d truly never thought about using a trail camera for motivation – until now. Now before I slide between the covers and wonder if I should get up tomorrow morning and get in a stand, all I’ve got to do is watch that video. I don’t have to wonder if he ever slips up in the morning, I KNOW he does. And that motivates me.
Greg Staggs is the former back-page columnist for Inside Archery, and his writing regularly appears in such magazines as Outdoor Life and Petersen’s Bowhunting. Staggs loves introducing his two boys to all things outdoors, including fishing, trapping, canoeing and camping, and has been chasing turkeys and big game exclusively with archery equipment for over 20 years.
The “30/30” Trail Camera Setting
October 22nd, 2017 by BTC Editor
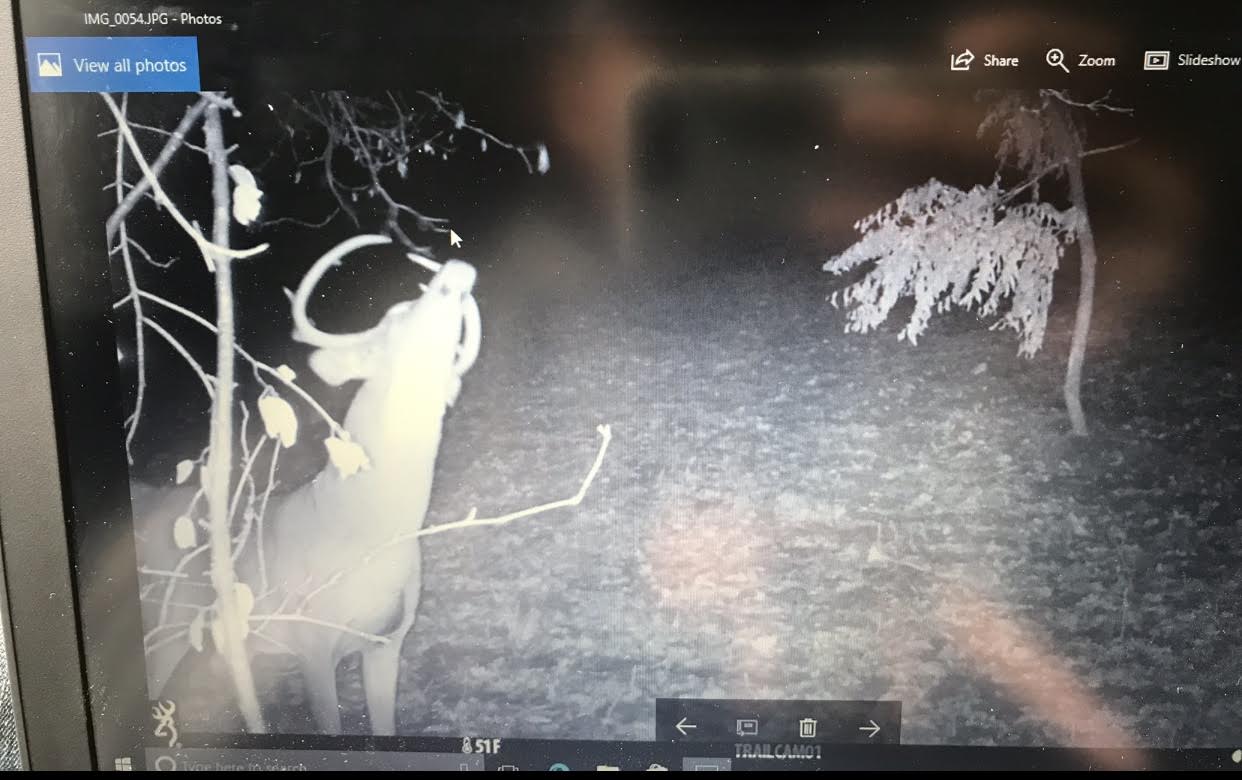
Just a couple weeks ago I made my first series of mock scrapes for the year and placed my Browning Trail Cameras on all of them using what I call the “30/30 setting”: Video mode set on 30 second clips with 30 sec delay. It didn’t take long before the first mature buck found one in less than 24 hours of being made, and within a couple days they all started to heat up. I noticed one series of the three was showing more activity from a specific deer than the others. I knew right away this was a deer I wanted to target, but how was I going to be able to do so? The October lull was here and everything was happening at night. I knew if I wanted to harvest this deer I would have to do so fast, before love pulled him away.
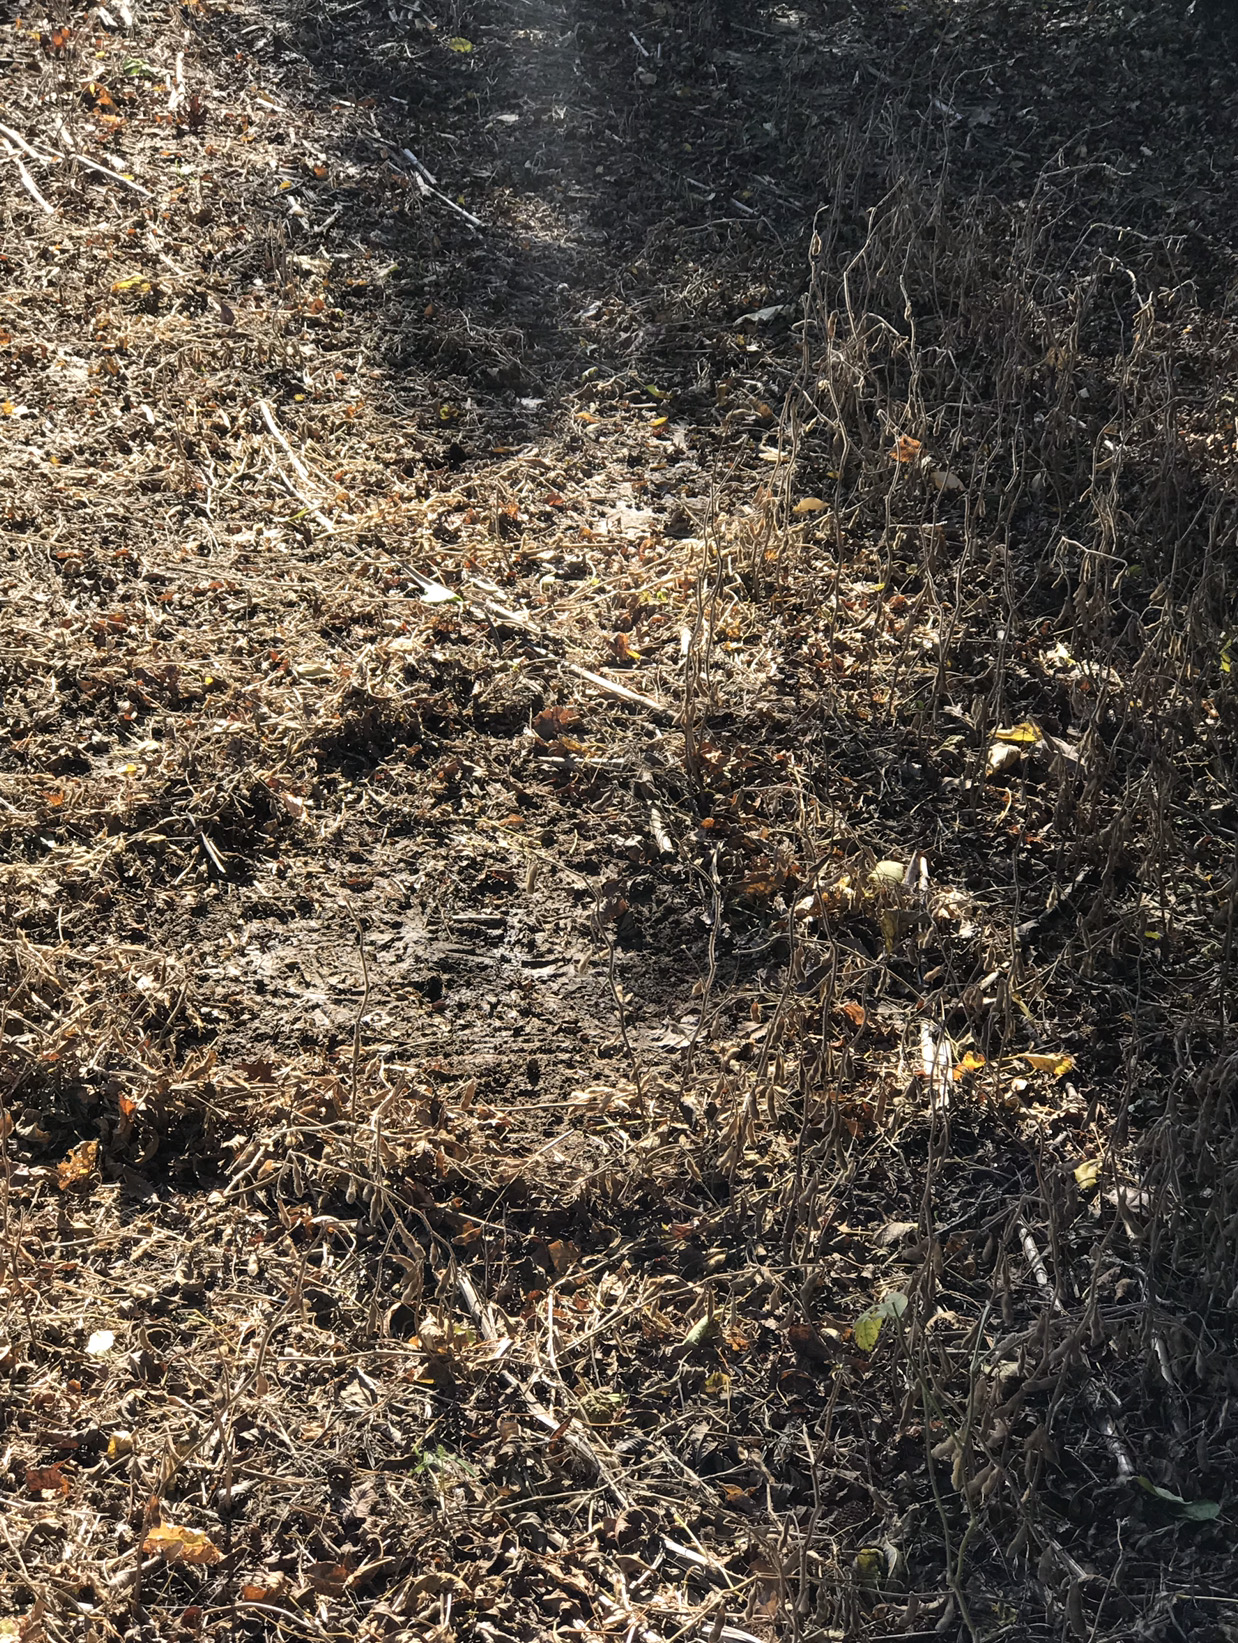
I chose to focus on checking that series of three cameras the most frequently, using wind and time of day to my advantage. By having them on the “30/30 setting”, I was able to see direction of travel and study the specific behavior of the deer I was targeting. Once I was able to get a general direction of travel, I used what I refer to as the “leapfrog method”: moving 2-3 cameras in the direction of travel, leapfrogging them as I checked them. This helps me stay on where I had him last while exploring my thoughts with the newly moved camera. I gained a very solid direction of what I thought was his daily routine – deer of a mature age class are very much creatures of habit – but even having a solid route of travel, I feared I was getting too close to his bedroom. I elected to not move in any further and let my Browning cameras continue to do my homework for me.
Over the course of a couple weeks I checked the cameras in a three-day rotation, as long as the wind stayed true to checking them. The pattern was there but since he was still moving after dark I was going to have to get aggressive, yet smart, if I was to win this chess match. I checked the weather on a site I live by called Weather Underground. This site lays it all out in a graph for me. I noticed an upcoming front with precipitation was a few days out. It was calling for rain for almost an entire day, ending the next day mid-morning with a temperature drop, wind drop, and rising barometric pressure. I knew this had to be the time to make my move!
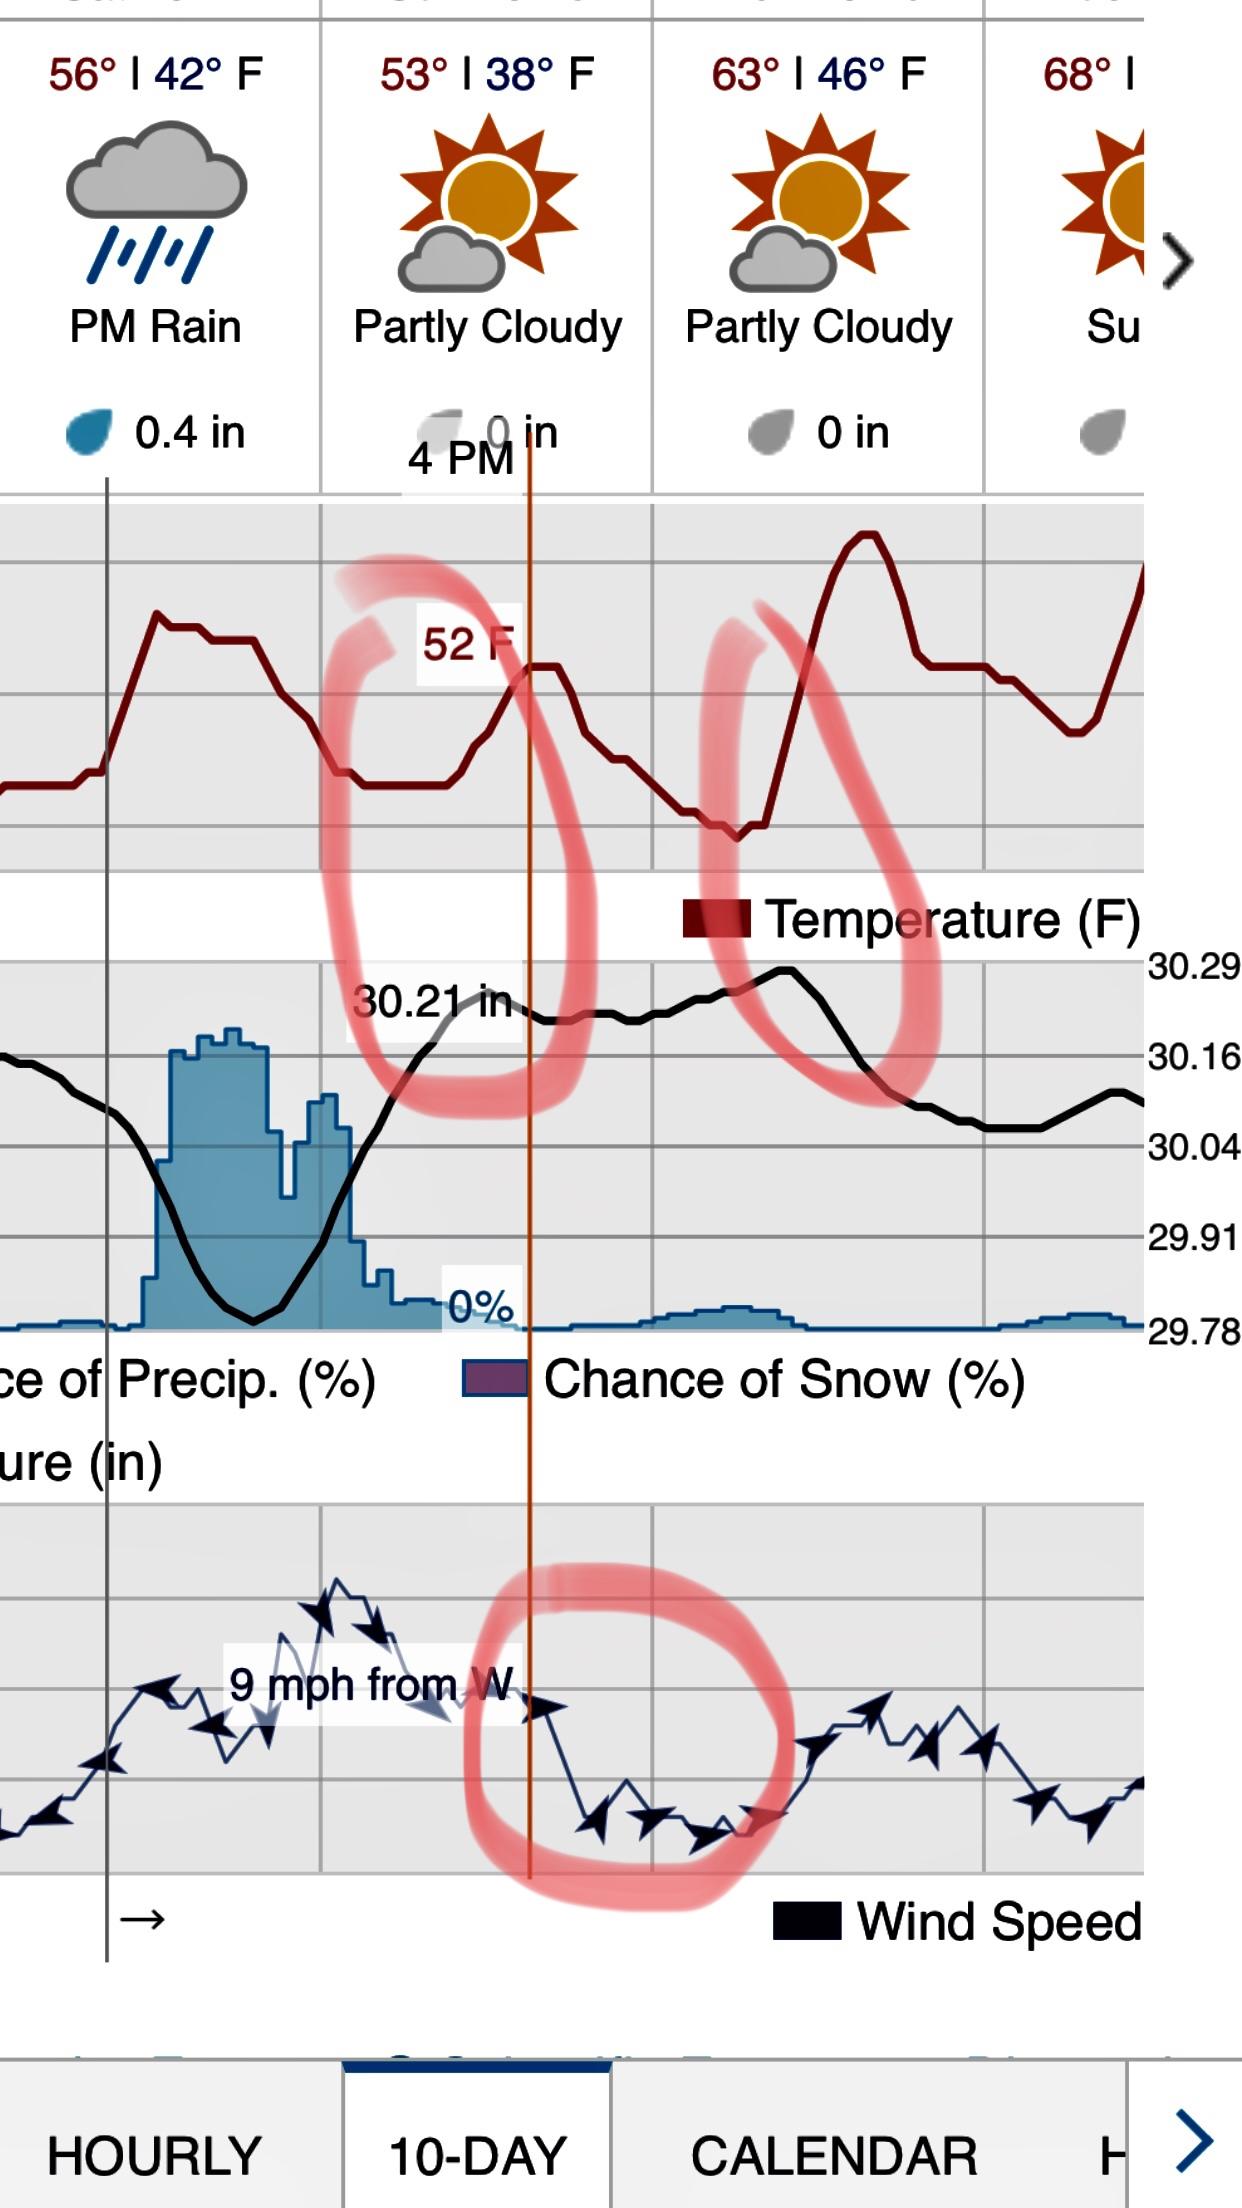
A couple of days went by and the rain set in. I was going to move in and hang a stand under the cover of good wind. The noise from the rain would cover me, and the wet forest floor would make for sneaking in an easy task. I was able to get my stand hung while staying undetected and pulled all the SD cards on my way out. My thoughts were staying true. My trail cameras showed he moved daily until the front hit and didn’t move that night or morning at all. I knew that after the rain he would likely move, as barometric pressure would be rising with a sudden drop in wind. I was going to hunt the following afternoon.
The following day rolled around and the weather stayed true, my information from my cameras were spot on, and I was able to harvest a beautiful mature 8 point.
When targeting scrapes, deer will likely want to freshen them up after precipitation. If you accompany that with a drop in temperature, high barometric pressure and a wind drop, it can often be the ticket to bucks getting on their feet a little sooner. I relied heavily on my Browning Trail Cameras to help me pattern this particular buck. Without being able to further pin down direction of travel I don’t think I would have been able to catch him during legal shooting hours, let alone a full hour before dark.
By John Steinhauer
Defender 850: Changing How You Hunt
October 8th, 2017 by BTC Editor
For 2017, Browning Trail Cameras came up with a new concept in trail cameras: the Defender 850. When they first unveiled this camera at ATA, I knew it was going to be a game changer. The Defender has some unique features and technology that set it apart from the rest and that can take your deer hunting to the next level. Here are 3 features on the Defender 850 trail camera that will allow you to change the way you hunt this season.
1 – Bluetooth and WiFi Connectivity Via the Browning Trail Cameras Mobile App
You can connect to the Defender on your mobile device from about 60 yards away via the new Browning Trail Cameras app. Through the app you can control the camera settings and download images and video straight to your phone or tablet, allowing you to keep your favorite hunting areas undisturbed and free of scent.
I have my Defender’s set up close to a few of my favorite tree stands so I can check the camera while I’m in my stand without actually having to touch the camera and leave my scent in the area where I am expecting the deer to walk out.

2 – Adjustable IR Flash
This feature is also new for 2017 and allows you to control the range of your LED’s on your nighttime images. There are 3 different flash settings – Power Save, Long Range, and Fast Motion – that allow you to maximize the performance of your Browning Trail Cameras, no matter where they are set up.
–Power Save: This is the most economical of the 3 flash modes. The flash goes out to about 70 feet, which is perfect for wooded areas.
–Long Range: The flash goes out to about 120 feet. This is perfect for open areas, such as larger fields or food plots where the game may be a good distance away from the camera.
–Fast Motion: The exposure time is much faster in this mode, allowing you to capture game that are moving faster, while eliminating motion blur. Think fence crossings, trails, pinch-points and travel corridors, etc. This mode will really come in handy when new bucks start showing up on your hunting property during the whitetail rut!
Here’s a link for a YouTube video for more info on this setting: https://www.youtube.com/watch?v=eWva5ReMbKo

3 – Capable of Holding Up To 128 GB Micro SD Card
I wanted to point out this feature for 2 reasons:
1) The camera also features 1080P HD video technology, so having the ability to use an SD card with larger storage capacity means that you can leave the camera out in the field on video mode without having to worry about the memory card filling up in between camera checks.
2) If you wanted to set up your Defender 850 in a location that you may not hunt or visit often, once again you can rest assured that most likely your memory card will not be full by the time you make it there to hunt or check the camera. This is perfect for those whose hunting property is a long distance away, or if your favorite hunting location isn’t easily accessible.
Whether I end up getting a deer this season or not, I already feel like I am one step further with my hunting game plan than I was this time last year, and that is due to the unique features on the Browning Defender 850 that allow me to hunt smarter, not harder.
By Andrea Haas
Andrea Haas is a Pro-Staffer from Missouri who enjoys hunting deer, turkeys, and upland birds. She is also the founder of the Huntress View, an organization formed to help strengthen the ever growing community of women hunters
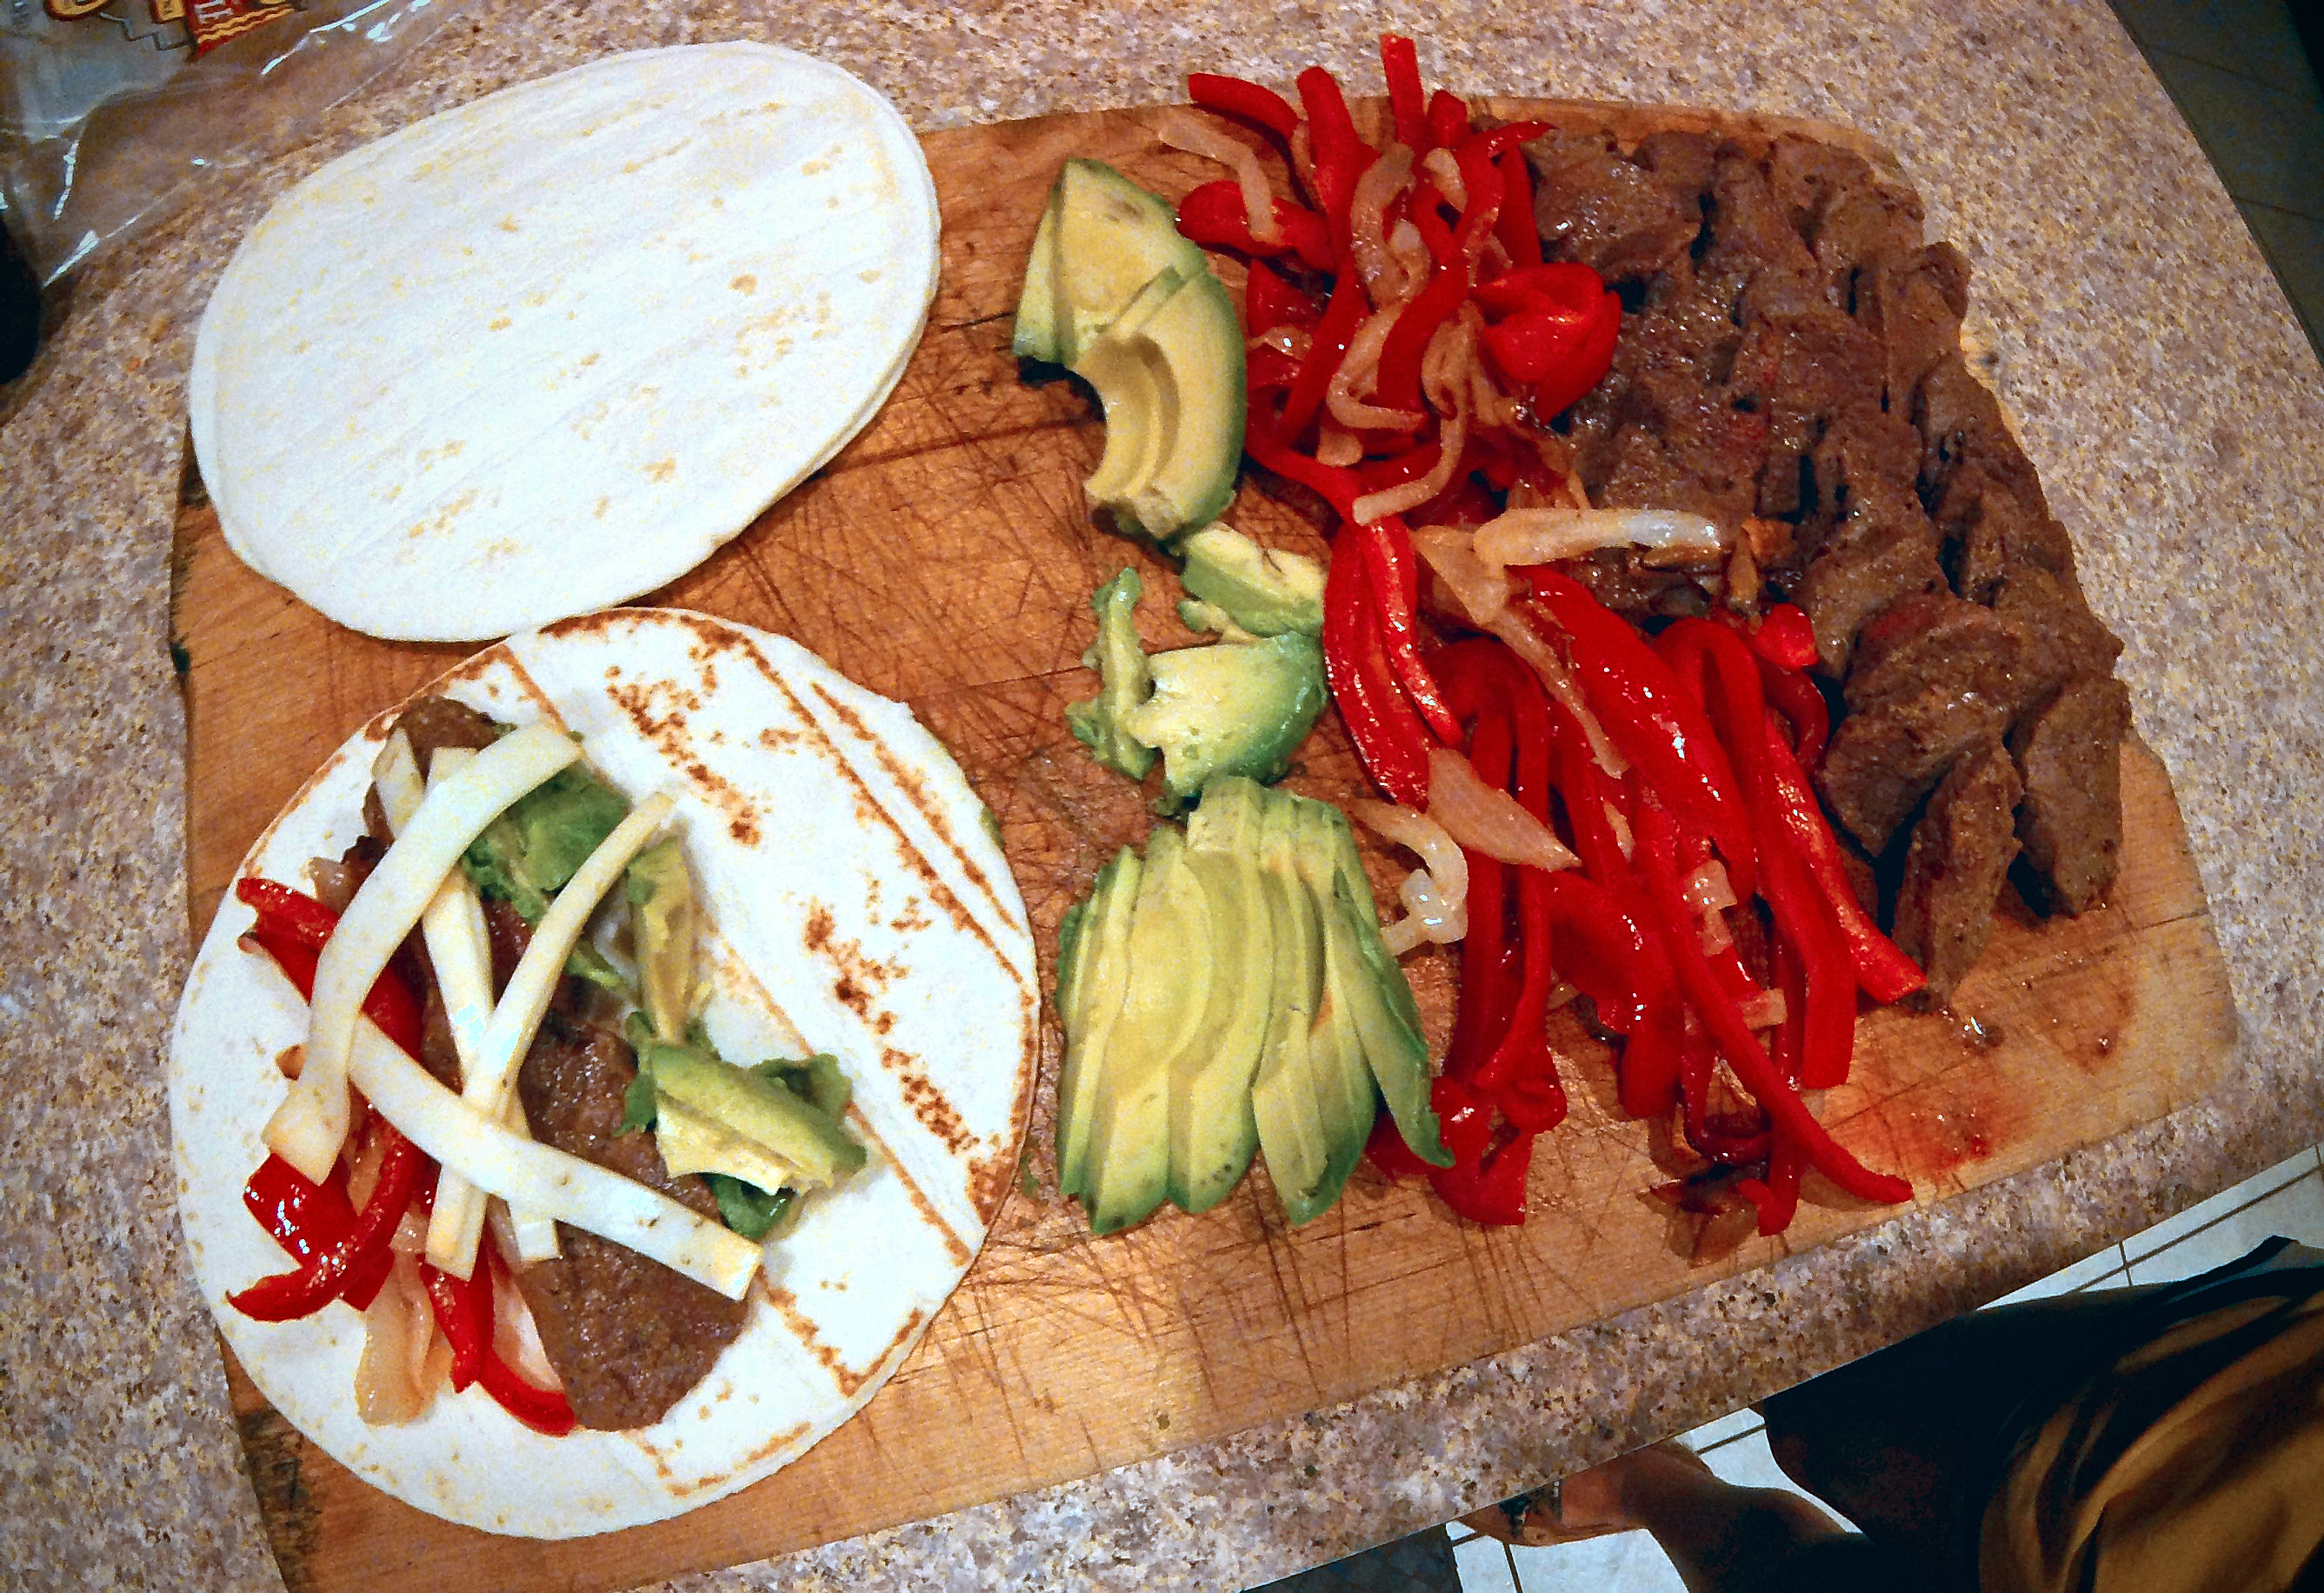
Southwestern Backstrap Fajitas Recipe
September 10th, 2017 by BTC Editor
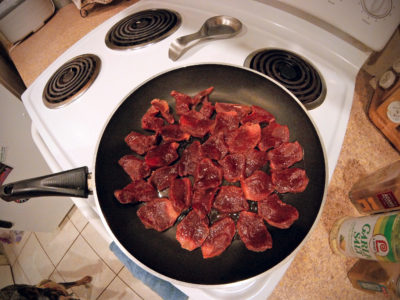
When it comes to fresh venison, the meal I most look forward to is fajitas! For this meal, I used the backstrap from my 8-point taken during last archery season. I love taking all that fresh, organic, grass fed meat into my kitchen and turning out this Tex-Mex classic. It’s filling, full of protein, includes fresh veggies, (my favorite- avocado!), and goes great with chips and salsa, and a cold beer if you want one!
Making them is super simple as well. We process our own deer and package it in portion sizes big enough for serving 2, which in this case is about 1lb of meat. (If you don’t have a FoodSaver for preserving your harvest, do yourself a favor and get one!)
Ingredients:
-1lb venison backstrap, fresh or frozen
-1 Bell Pepper (red, green, or any color)
-1/2 white onion
-1 Hass Avocado
-Flour Tortillas
-Cheese- your choice. This recipe used Jalapeno Munster
-Garlic Salt
-Worcestershire Sauce
-Southwestern Seasoning (or mix of cumin, coriander, oregano, paprika, chili powder, garlic powder, salt and pepper)
-Chips and Salsa, of course
-2-3 tablespoons of butter
Recipe:
-Take your meat and slice it in 1/2in thick medallions. Add the Worcestershire Sauce, Southwestern Seasoning, Garlic Salt, to taste. If you can, marinate your meat in the spices overnight, but if you can’t it will still taste great.
-Add butter or olive oil to your pan and turn to medium heat. When hot, add your meat and sear on both sides to medium doneness.
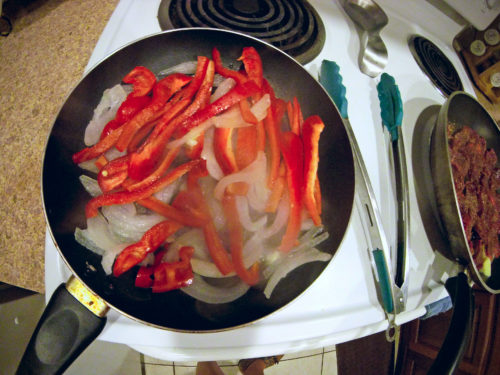
-Add butter to a second pan (or use your current pan after removing the meat) and saute your sliced onion and bell pepper once you have sliced them in strips. Saute until tender and easy to bite through.
-Dice/shred your cheese, slice your avocado, and prep your fixins’! I arrange the ingredients along the bar and let everyone (and by that, I mean, all of this is just for my husband and I….mostly me!) Warm your tortillas, top with meat, veggies, avocado, cheese, and throw in some salsa if you’re feeling fancy. Then chow down!
-This should make enough for about 6 fajitas, and these are great as leftovers as well for lunch the next day. Crack open a Cerveza with salt and lime, and enjoy!
Jenny Burden is a successful competitive triathlete through the Spring and Summer, but Fall and Winter are all about hunting for her. She is an avid hunter and is also a member of Huntress View, a team dedicated to strengthening the ever-growing community of women hunters.
St. Jude Heroes Event
August 27th, 2017 by BTC Editor
Chances are, either you or someone you know has been affected by childhood cancer. One of my young, distant cousins passed away from cancer recently, as did the son of one of my co-workers. It breaks my heart to see children suffering from cancer, but thankfully St. Jude Children’s Research Hospital is there to help treat and cure these children and to help support their families during the treatment process.
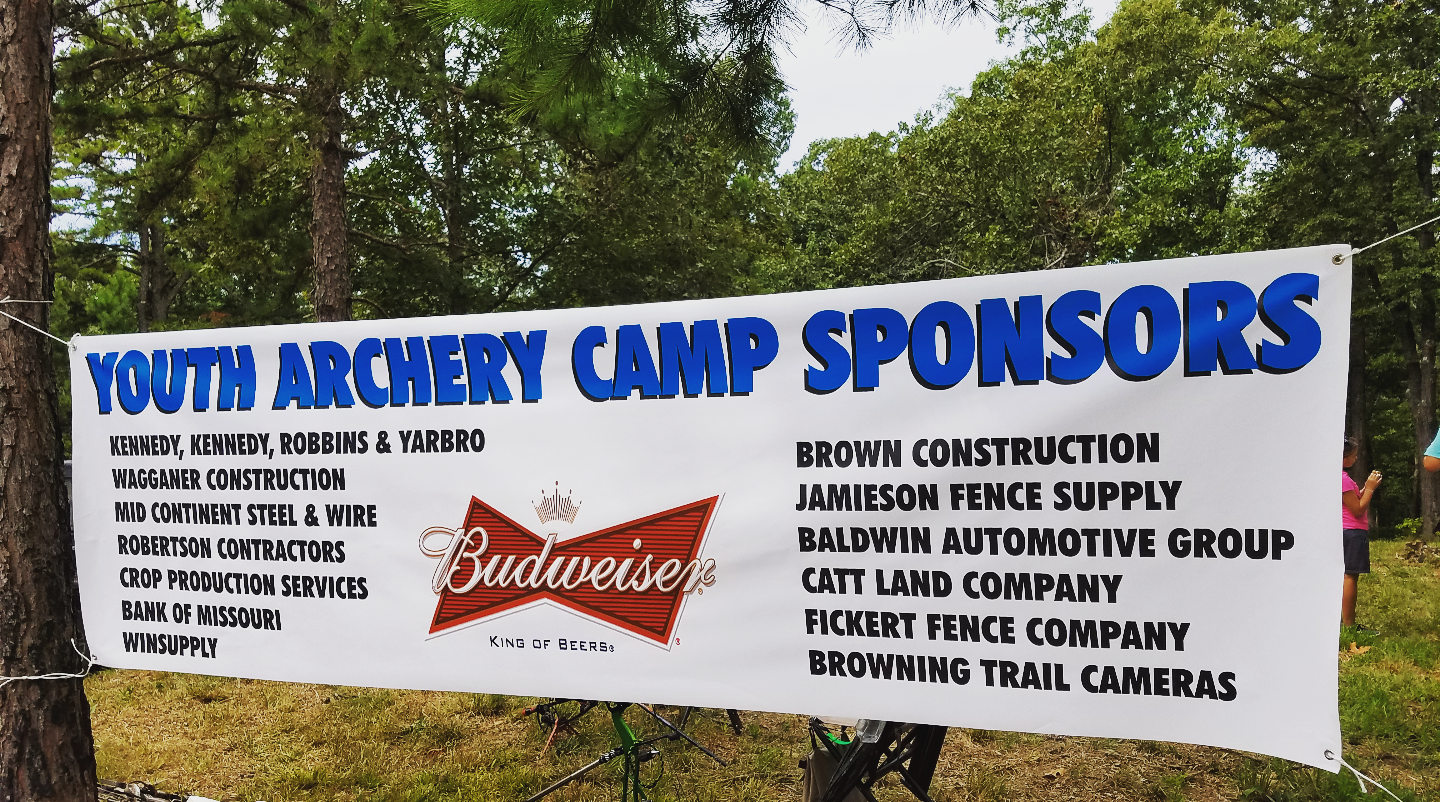
Families never receive a bill for the treatment their child receives or for their travel expenses, housing or food. This is made possible, in part, by fundraising events like the St. Jude Heroes event in Poplar Bluff, MO that I attended a couple weekends ago, sponsored by Browning Trail Cameras. This is an annual 2-day event featuring a VIP Party, silent auction and meet-and-greet with outdoor celebrities on Day 1 and a benefit archery shoot and silent auction on Day 2.
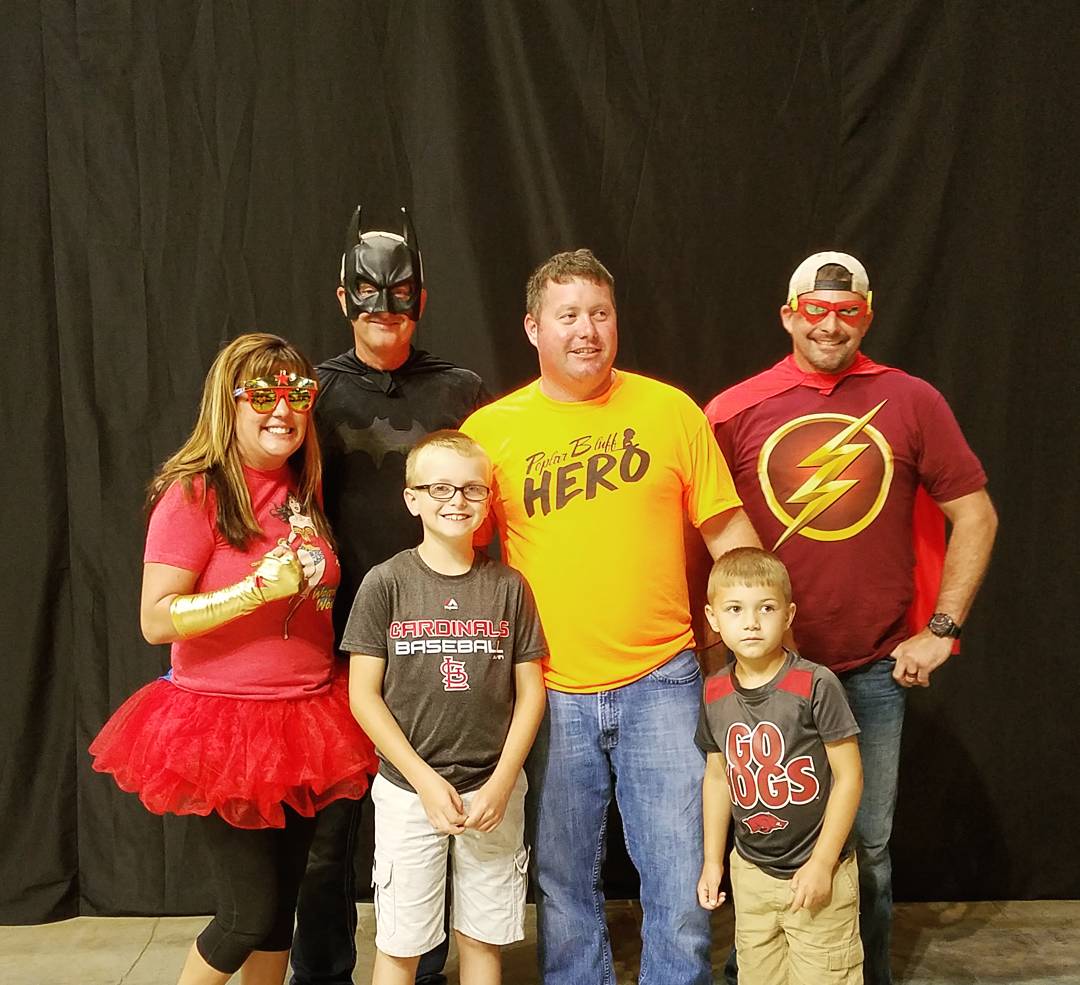
This year the VIP Party included dinner & drinks, live and silent auctions, raffles, a meet-and-greet with outdoor celebrities (including Browning Trail Camera team members Don & Kandi Kisky of Whitetail Freaks, Jon & Gina Brunson of Addicted to the Outdoors, and Derek Dirnberger of The Break TV), and live music from Nate Hosie of Headhunters TV. The best part of the VIP Party was meeting a family that had been affected by and overcome cancer, thanks to St. Jude Children’s Hospital, and listening to their story.
During the VIP Party, there was also a celebrity auction. The outdoor celebrities split up into teams of 2 to compete in a rear-steering tricycle race. Guests had the opportunity to bid on each team and the bidder of the winning team won an AR-15. Don Kisky and Jason Bosaw of the Whitetail Freaks took first place and the proceeds went to St. Jude’s!
Here’s a Boomerang video clip of Jon Brunson competing in the race:
Day 2’s events included a 3D archery range, a pop up range & tournament, free youth archery camps, Cornhole/Horseshoes/Dunking booth and a silent auction all day. The outdoor celebrities also attended the archery shoot on Day 2 to interact with the guests and participate in some of the 3D shoots as well.
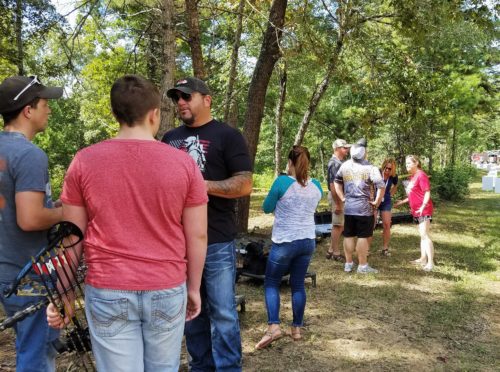
Jon Brunson chatting with guests at the 3-D Archery Shoot on Day 2.
The greatest thing is that ALL of the proceeds from this event go to St. Jude Children’s Research Hospital, and this year the event brought in over $100,000 in donations to St. Jude! We all had so much fun at this event and knowing that it was for such a great cause made it that much better. If you are a hunter, an archer, or if you just have a passion for helping others in need, please plan to attend the St. Jude Heroes event next year in Poplar Bluff, MO and help put an end to childhood cancer!
By Andrea Haas
Andrea Haas is a Pro-Staffer from Missouri who enjoys hunting deer, turkeys, and upland birds. She is also the founder of the Huntress View, an organization formed to help strengthen the ever growing community of women hunters
Intro to 3D Archery
June 4th, 2017 by BTC Editor
Off season blues? No problem! 3D Archery is a great way to keep you occupied while waiting for your next hunting season. If you’ve never shot a 3D archery range then keep reading, this post is for beginners and what they will need to know before starting 3D archery.
I started competing in 3D tournaments this year to challenge myself, to continue shooting my bow during the off season, and to keep myself active outside. Not only do these tournaments help with my consistency but they have also helped improve my ability to judge yardage. Depending on your location, you could probably look online to find a local archery organization. If you can’t seem to find one online usually your bow shop can help you out by referring you to a few.
Once you find an archery association/organization you can then ask them for a copy of their tournament schedule if it’s not listed online. You will also need to know that specific organization’s available shooting classes, rules for shooting and what scoring system they will use.
I want to mention all the necessities you may need to start shooting competitively.
Essentials:
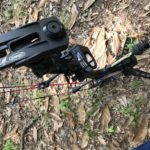
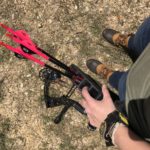
- Bow (obviously)
- Release aid
- Quiver or archery stool that can hold arrows, keys and accessories
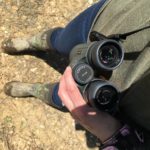
- Binoculars (I love my Vortex Viper HD’s in 8x42mm –Has plenty of magnification and lets in tons of light in order to see targets efficiently)
- A bow kick stand that stands bow upright so you don’t have to lay it down on the ground
- At least 5 arrows, possibly more if you believe you will miss targets or damage a few on other shooters’ arrows
- Pencil (if one’s not provided)
- Rubber boots as a backup in case your range is muddy
- Tick/Mosquito spray (We like to spray Scentblocker’s Tick spray on our shoes the day before and it usually last a few weeks)
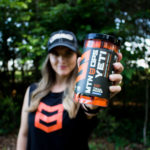
- Sports drink to keep you hydrated (I prefer Mtn Ops Yeti or Enduro)
- Snacks are usually available at a small cost but it’s probably a good idea to bring either a granola bar or PB cracker type snack
- Water (This is usually provided for free throughout our range but sometimes they’re all gone by the time we go through the course)

Before you shoot in a tournament it may not be a bad idea to find someone that actually shoots them first and just do a walk through with them while they shoot. I did this to make myself more comfortable in knowing how things ran and how the targets are scored. I was less intimidated when I actually shot in my first since I knew how everything worked. If you can’t find someone to walk through with, no biggie, shooters at 3D tournaments are usually very nice and encouraging. I can honestly say I have not ran into a single person that wasn’t willing to help a beginner. It was very calming to be able to get advice from people that not only shot in them regularly but seemed to not be bothered at all by a newbie trying to figure out how the tournaments worked. Again, this is part of the reason I have fallen in love with archery. The archery community is so supportive and educational.
Most 3D tournaments have a variety of classes to shoot in based on your level of skill and your bow setup. For example, the tournaments I have been shooting in have:
- PeeWee
- Cubs
- Longbow
- Traditional
- Youth
- Women’s Youth
- Women’s Bowhunter
- Women’s Open
- Novice
- Bowhunter
- Bowhunter Outlaw
- Senior Open
- Open Class
- KNOWN 45
- Pro Class
Each class will have general rules for being able to shoot in it and will also have different colored stakes to shoot from at the archery range.
Some rules to keep in mind: (Rules may vary slightly depending on the archery club)
- Each club will have a max arrow speed and also have the right to chronograph any shooter at any time
- Rangefinders are prohibited unless shooting in the KNOWN class. All other classes require distances to be judged by the naked eye.
- Binoculars/spotting scopes may be used determining shot placement
- Bowhunter class is restricted to a 12” or less stabilizer, screw in or glued in tips, and may shoot a movable sight (but it must be a HUNTING sight with NO magnification)
- Bowhunter Outlaw class is restricted to bowhunter equipment ONLY with hunting sights and NO magnifications. This is the only class with no max speed limits
- Exchanging yardage information is strictly prohibited
- Each shooter must be touching the appropriate shooting stake for their class with some part of their body
- A “controlled letdown” must be verbally announced
- Once your sights are set and bow has been drawn you cannot reset your sights after a controlled letdown
Here are a few tips I would recommend doing before tournament day:
- Make sure your sight pins are sighted in to ranges that vary for your shooting class
- For example, I shoot in Women’s Bowhunter and the ranges will vary but usually the farthest distance is 25-30 yards at our specific archery club
- There are also moveable hunting sights that are great for 3D tournaments so you can easily adjust the distance per target.
- I practiced at home shooting the distances my pins were set at and really looking at the animal to help myself with judgement of distances. Sometimes I would walk at a random distance, look at the target and guess in my head and then use my rangefinder to see how close I am to guessing correctly. I continue to do this until I am comfortable with my guesses
- Make sure gear is all together and ready to go
- Make sure to get plenty of sleep the night before
- Make sure to eat a healthy breakfast before
Upon arrival:
- I usually sign in/register and get my score card
- I then head to the practice bags and shoot at each one that I have a pin set up for to make sure they’re all sighted in. I double check my arrows, release and bow to make sure everything is in good shape
- We usually shoot in a group with friends and “draw cards” for our shooting order. We will mix them up (faced down) and get one person to draw one card at a time and we will use that as our shooting order. This helps keep it fair because some targets are harder to see where to aim and being the first one to shoot those types of targets can be a little tough. Some shooters will have bright colored fletchings so that makes it easier for the next person to use as a guide on aiming.
- Side note: Our group sizes vary from 3-5 but I personally believe a group size of 3 is the best. Groups of 5 tend to take longer shooting each target and going through the whole course in general
When shooting at a target I usually go through a series of steps to help myself make a good shot. I like to going by these steps in order to be consistent. These steps may be a little different for each person but once you start doing things in a way that works keep doing them the same way EVERY TIME. I promise they make a difference.
When shooting at a target:
- I find the appropriate shooting stake and place a foot on one of the sides of it. It doesn’t matter where as long as some form of your body is touching it.
- I usually go ahead and nock an arrow and prepare my arrow rest.
- I then look at the target through my binoculars and try to find where I need to aim. The best way to do this for me is to look for specific things like: the shape of the target, which way it’s facing, if it’s leaning backward or forward, if there are any distinctive parts on it such as areas that are shot up or if it has spots you can use to help as a guiding tool. Aim small, miss small is a very accurate statement in this case.
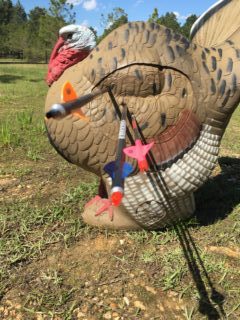
- I then look at the target through my binoculars and try to find where I need to aim. The best way to do this for me is to look for specific things like: the shape of the target, which way it’s facing, if it’s leaning backward or forward, if there are any distinctive parts on it such as areas that are shot up or if it has spots you can use to help as a guiding tool. Aim small, miss small is a very accurate statement in this case.
- I make sure my feet are shoulder width apart and as flat as possible.
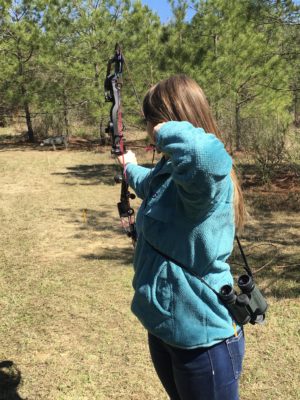
- Draw bow.
- Find aiming location in peep and match it with appropriate pin.
- I make sure my peep sight meets up perfectly with my sight housing. If I’m shooting uphill/downhill and will have to lean some way I make sure to lean with my waist and not just with the bow as this would affect how my peep sight and sight housing meet up.
- Relax bow hand and rest pointer finger on my trigger.
- Continue to breath, relax muscles and release.
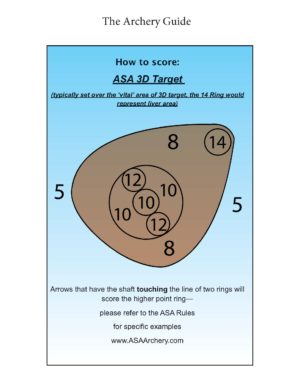
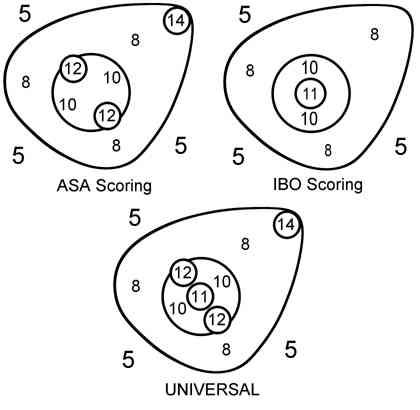
When scoring targets, it’s important to know which scoring system the archery club/organization is using. There are two primary organizations that have their own scoring systems: Archery Shooters Association (ASA) and International Bowhunting Organization (IBO). The tournaments we shoot in only use ASA scoring system and the “Upper 12” can only be called or used if the targets specifically shows it can. Here are a few pictures that show the difference in the two.
If you’re a beginner or not shooting in a Pro class, it’s important to remember these tournaments are for fun and to help you improve. Bad shots will definitely come and you’ll more than likely miss a few targets. Don’t stress too much about those because they have happened to everyone at some point and they help you learn from your mistakes. So good luck to all you beginners and remember to have fun!
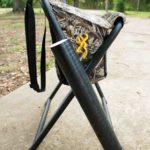
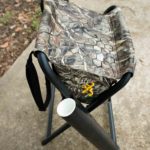
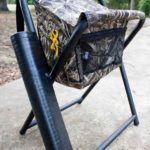
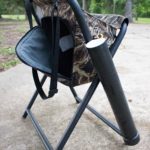
Note: If you plan to consistently shoot year after year I suggest investing in an “archery stool” of some sort. I currently use the Browning Steady Ready Stool with PVC pipe attached to the leg. We taped the pipe with black electrical tape and glued a cap on the bottom so that it can be used as an arrow holder. The stool has a mesh zipper pocket on one side and an insulated cooler pocket on the other. You can put ice and drinks in the cooler but we didn’t want to make the stool too heavy to carry so it’s used to hold our extra accessories (keys, binoculars case, back up release, snacks, etc.).
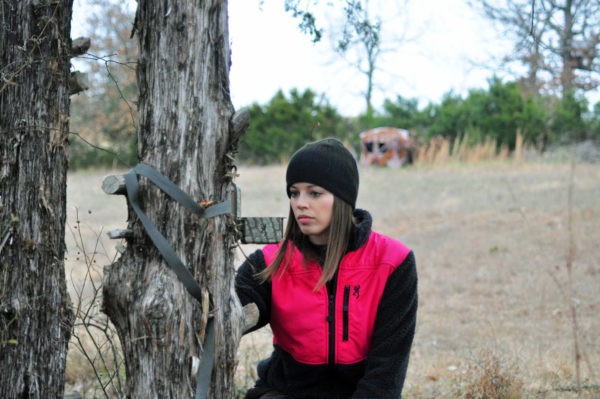
Courtney is an avid hunter from Louisiana. She has a passion all things outdoors and is an avid hunter. She is also a team member of Huntress View, an organization formed to help strengthen the ever growing community of women hunters.
5 Summertime Trail Camera Tips
May 21st, 2017 by BTC Editor
1- Summertime is when most hunters get their trail cameras out of storage and hang them to start taking inventory of their whitetail herd. It’s also a great time to take inventory of your trail cameras. Make note of how many you have, how many more you may need for the upcoming season, and also keep a list of each camera model and serial number in the rare case of theft. It can, and does, happen so keeping a record of this could help get your cameras back eventually if they do get stolen. Browning Trail Cameras also has a Security Box that makes it more difficult for thieves to take your cameras, if even at all.
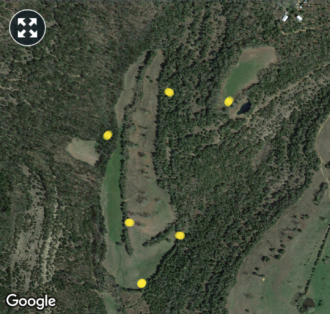
2- Look at an aerial map of your hunting property beforehand so you have a good idea of where you’d like to hang your cameras. This way, you’re not driving or walking all over your property, disturbing the game and working up a sweat. If you have a weather app on your phone you can easily locate your property via the radar portion of the app. If you don’t have that, Google Earth is what I recommend. It’s probably a good idea to take a screenshot of your property and from there mark where you are placing cameras using the paint/draw tool on your phone in case you forget where you hung the cameras later on.
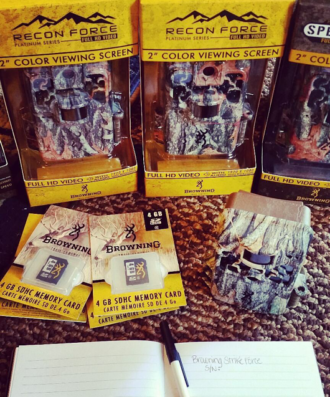
3- Summertime is obviously hot, even first thing in the morning, so in order to be out in the heat as little as possible it’s best to have everything ready to go before you head out. Have your trail cameras already set up with the correct date/time/camera settings, full with batteries and the SD card in so all you have to do is hang them, turn them on, and go!
A Browning Trail Camera feature that really helps get your camera positioned quicker is the viewing screen on some of the camera models. (See photo below.)

4- Everyone has their own system for transferring and storing trail camera pictures to their computer. I like to stay organized from the start by putting my SD cards in 2 separate cases – one for blank SD cards, and one for full SD cards – and then loading the pictures to my computer once I’m home. A baggie works just as good, just make sure you label each one to avoid confusion. Some prefer to bring a laptop and transfer the pictures there in the field, but I like to get in and out as quickly as possible and this works best for me.

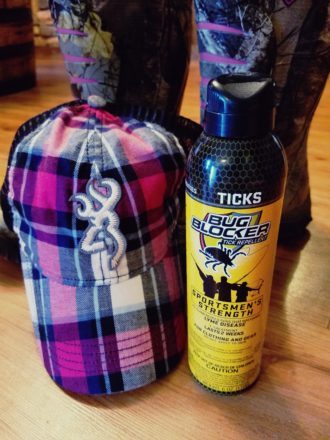
5- Last but not least, don’t forget the tick spray! So far this year has been one of the worst I’ve seen for ticks. Using a tick spray with Permethrin has worked well for me. Spray down your clothes and boots and make sure they’re dry before putting them on. You do not want this on your skin! For those worried about scent control, this kind is supposedly odorless once it dries. My nose is of course nowhere near as good as a whitetail’s, but I don’t smell it at all once it’s dry and would prefer to be tick free over scent free anyways, so to me it’s worth it. It also doesn’t hurt to spray it on some of your trail cameras to avoid ant infestations, which are very common in the summer months.
By Andrea Haas
Andrea Haas is a Pro-Staffer from Missouri who enjoys hunting deer, turkeys, and upland birds. She is also the founder of the Huntress View, an organization formed to help strengthen the ever growing community of women hunters
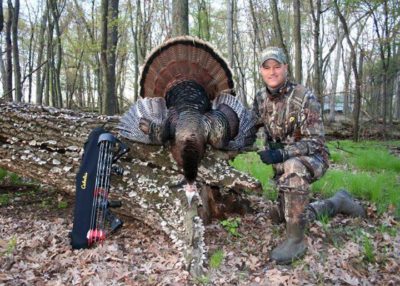
5 Tips For Bowhunting Turkeys
March 12th, 2017 by BTC Editor
Planning on using your bow to harvest a turkey this spring? If you’ve ever hunted turkeys before then you know it will be no easy task. Hunting turkeys with a shotgun is often enough to drive a hunter crazy, let alone adding the challenge of a stick and string. Successfully harvesting a turkey with your bow is perhaps one of the hardest, yet most rewarding hunts you will ever be a part of.
Browning Trail Cameras Pro Staff members Don and Dan Pickell have been bowhunting for years and make bagging a gobbler with a bow look like a piece of cake.
Here are a few of their tips for bowhunting turkeys this spring:
1) Scouting
Spend some time in the woods before season starts so you can be as prepared as possible before opening day. Look for roosting sites, turkey feathers & droppings, feeding areas and travel routes. Once you’ve found some turkey sign or what looks like some good locations, it’s time to hang your trail cameras.
2) Trail Cameras
Get your Browning Trail Cameras out now and keep them out throughout turkey season. Trail cameras will help pinpoint the time of day the turkeys are in certain locations so you know when you should target these specific areas while hunting.
When setting up your cameras, keep the location in mind and set them accordingly. For example, you may want to set your camera on Time Lapse mode while watching large fields or new locations where you aren’t sure where the turkeys are entering or leaving. The camera will take images of the entire field, so you will end up capturing game at 200 + yards away, where a conventional game camera would not normally trigger a picture.
3) Setup
Pattern the birds with your trail cameras and set up your ground blinds accordingly. If they aren’t coming into your call it’s usually best to just sit and wait them out; Remember, you’re hunting with a bow, not a shotgun, so run and gun is a lot more difficult. More often than not, your trail cameras will tell you where you need to be. Remember what you learned about their behavior while studying your trail camera photos and stick with that.
4) Decoys
A decoy will often help bring the birds within bow range while keeping their eyes off of you, but we have also had toms skirt our decoys at times. When this happens we usually pull the decoys and set up in a proven spot where we have them patterned with our Browning Trail Cameras and ambush them. It just depends on the bird’s moods.
5) Shot Placement & Recovery
With a shotgun we aim at the bottom of the neck to allow for the pattern to cover both his head and neck. With a bow, we prefer a broadside shot through the wings if possible so an injured bird can’t fly off, making it harder to recover. Whether we use a bow or a shotgun, as soon as a shot is made we go after the bird and get a foot on its head, just in case.
Going into turkey season, it’s best to have a positive outlook and lots of patience! Turkeys are fickle creatures and even having the “perfect setup” is often not enough to harvest a tom. Make sure you’re as prepared as possible ahead of time by scouting with your trail cameras and keeping the above tips in mind. Harvesting a big longbeard with your bow is worth all of the hassle. Stay safe and have fun this turkey season!
By Andrea Haas
Andrea Haas is a Pro-Staffer from Missouri who enjoys hunting deer, turkeys, and upland birds. She is also the founder of the Huntress View, an organization formed to help strengthen the ever growing community of women hunters.
Venison Meatball Recipe
February 26th, 2017 by BTC Editor
INGREDIENTS:
1 lb ground venison
¼ cup half and half
Extra Virgin Olive Oil
1 medium white onion – finely chopped
3 tablespoons chopped garlic
2 large eggs
1/4 cup dried parsley flakes
1 tsp dried oregano
1/4 cup freshly grated Parmesan cheese
salt and pepper to taste
DIRECTIONS
This recipe is by far the best wild game recipe I’ve ever tasted! I must preface this by saying that up until a few of years ago, I was actually a vegetarian. Not because I was trying to save the animals. I did it because I just didn’t care for meat. However, what I realized when I met my husband, who is a hunter and ultimately the one whom got me into hunting as well, is that what actually bothered me about meat is that I didn’t always know where the meat from the grocery store had come from. I was growing a few veggies in my backyard, and purchasing the rest through a farmers market or local CSA. So I have always been aware of where my food came from; but the meat remained a mystery. Then along comes hunting. The first time my husband brought a whitetail deer home for us to process I started asking questions. I began cooking it for my family and realized my kids could never tell the difference between ground venison and ground beef. Thus began my journey in creating wild game friendly recipes.
Now I am extremely picky with how my food tastes. I do not like having a gamey taste to it at all. This meatball recipe is so perfect. Every time I make it, it gets better and better as I modify ingredients.
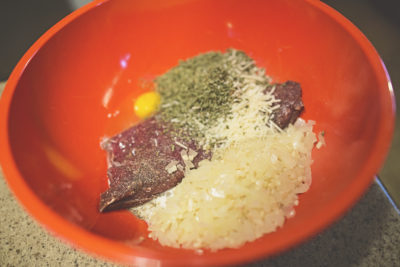
Begin by preheating your oven to 425 degrees and coating the bottom of your 9×12 baking dish with olive oil. Next, place 1 pound of ground venison in a large mixing bowl. Add ¼ cup half and half (regular milk works as well, however I have not tried this recipe with dairy substitutes) and then set this bowl aside.
In a medium skillet, heat 2 tablespoons of olive oil over medium heat. Add 1 diced onion and 3 tablespoons of chopped garlic to the skillet. Be sure to dice your onion into very small pieces. Saute until the onion is clear. I tend to like a lot of onion, so this may look like more than 1 medium onion. Never enough onion or garlic in my house!
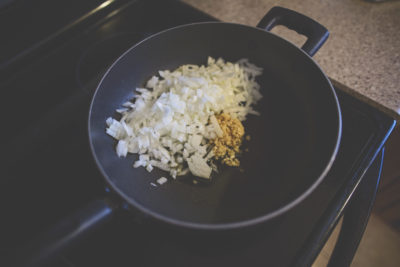

Then, add the onion mixture to the ground venison bowl. Add 2 eggs, ¼ cup dried parsley flakes, ¼ cup freshly grated Parmesan cheese, and 1 teaspoon oregano to this same mixture. Salt and pepper to taste. You are now ready to mix with a wood spoon or your hands. I typically use my hands, but am careful for the hot onion/garlic mixture. Don’t burn your fingers!
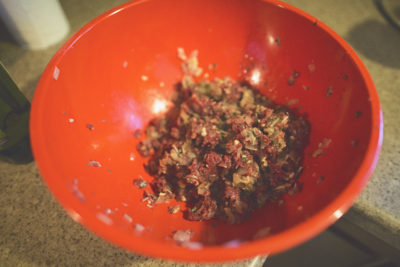
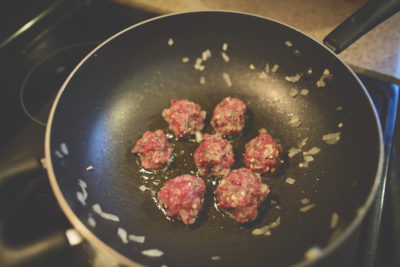
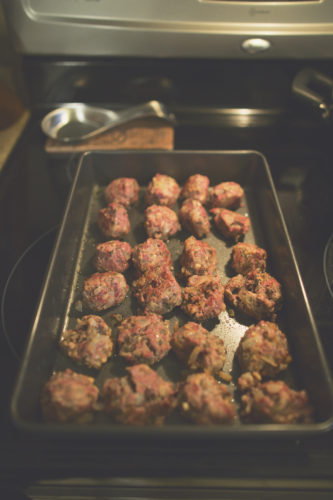
Using the same medium skillet as you cooked the onions (as you can see in the photo I do not clean out the skillet), add 2 tablespoons olive oil and turn on heat to medium. Roll meat mixture into 1” diameter meatballs. Don’t look to close at mine. They are never perfectly round because my kids are always starving. Place meatballs into heated skillet; browning on at least 2 sides. You are not cooking them all the way through, just browning the edges. This makes the outside of the meatballs yummy and slightly crispy. Once you have browned the meatballs on 2 sides, place meatballs into your greased baking dish. Bake 20 minutes, turning once after 10 minutes.
My husband and I tend to eat them plain (that’s how good they are) or dipped in barbecue sauce. My kids like to put them on Hawaiian rolls with cheese and barbecue sauce. Either way, I think you will love them! Enjoy!
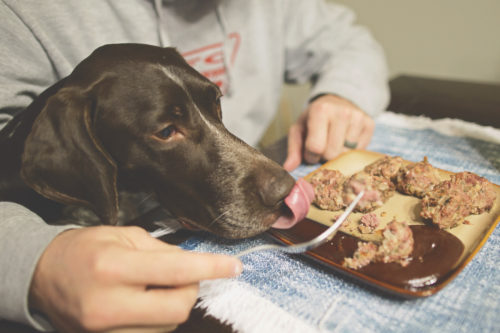
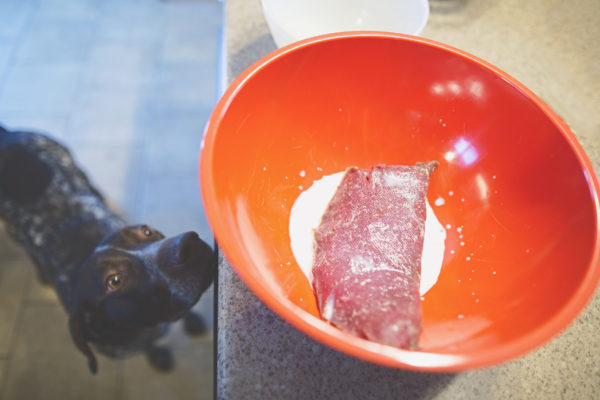
By Tammy Bashore

Tammy Bashore is an outdoor enthusiast from South Dakota. She is a professional photographer, the wife of a professional walleye angler and the mother of 2 kids, plus one fur baby, a GSP named Bentley (pictured above). Tammy is also a member of the Huntress View team, an organization formed to help strengthen the ever growing community of women hunters.
Late Season Trail Camera Placement
December 11th, 2016 by BTC Editor
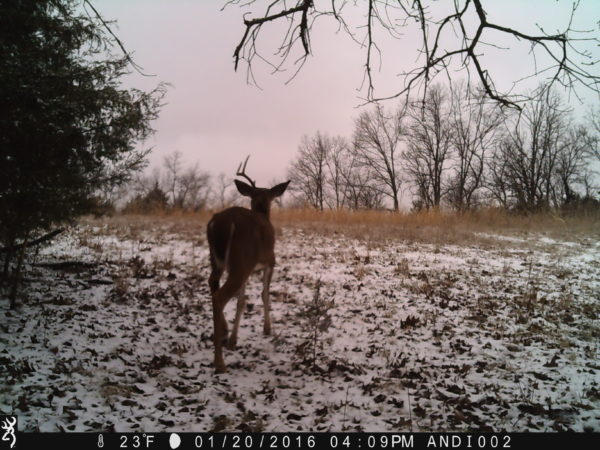
As deer season is winding down and will soon be coming to an end, now is the perfect time to re-position your trail cameras and change your game plan for hunting late season whitetail bucks. As the seasons change, so does a whitetail’s pattern as they shift their focus from the rut to food once again. Here are a couple of tips on trail camera setup and placement to help you get the most out of your cameras before deer season closes.
Camera Location: Pinch Points and Travel Corridors
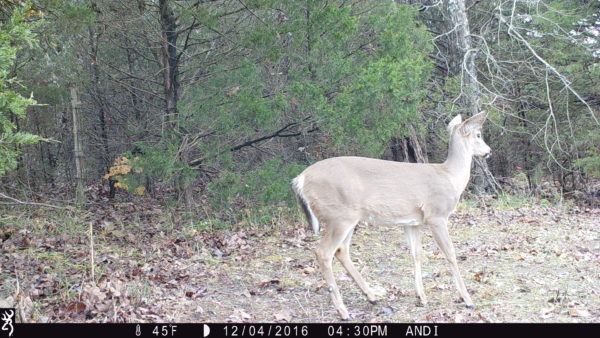
While I move most of my cameras to new locations post-rut, I still like to leave one or two at prior locations like pinch points, known deer trails and travel corridors to catch any bucks that may still be out cruising for does. As the fawns come into estrous late in the season, often referred to as the “Second Rut”, these locations are great for catching buck movement in the daylight. It appears to me that is exactly what is going on in the next series of pictures.
![1632:120416:45F:0000:ANDI :2E[097:0494]G[024:0x0016]](http://btc-omrc.com/wp-content/uploads/2016/12/IMG_0047-e1481494823717.jpg)
![1700:120416:45F:0000:ANDI :2E[099:0453]G[024:0x0016]](http://btc-omrc.com/wp-content/uploads/2016/12/IMG_0069-e1481496091319.jpg)
![1704:120416:45F:0000:ANDI :2E[097:0494]G[024:0x0016]](http://btc-omrc.com/wp-content/uploads/2016/12/IMG_0089-e1481496451232.jpg)
My Setup
- Camera: Browning Strike Force
- Mode: Burst Mode, 4 shots
When placing my cameras at the above locations, I like to set them up on burst mode to make sure I don’t miss any deer activity. For example, say I had my camera set up to take a picture every 5 seconds, but in normal mode. If this buck would have been trailing this fawn right on its tail, I may not have gotten a picture of him. In burst mode the camera takes several images, one after another, before stopping to reset.
Camera Location: Food Sources
Moving trail cameras to the remaining food sources is a good strategy for late season scouting. By now most of the acorns have either rotted or been eaten, so I like to move more of my cameras from the woods to our food plots in the fields. We have a couple of fields planted in winter wheat, clover and chicory, and another one planted in turnips. These have proven year after year to be the hot spots on our property for hunting late season bucks, and this year is no different! After checking my cameras this weekend, this buck has shown up in the daylight hours almost every day in one of our wheat and chicory plots.
![1440:120616:52F:0000:HAAS :2E[142:0070]G[008:0x0006]](http://btc-omrc.com/wp-content/uploads/2016/12/IMG_0578-e1481470633184.jpg)
![1615:120816:29F:0000:HAAS :2E[140:0076]G[008:0x0006]](http://btc-omrc.com/wp-content/uploads/2016/12/IMG_3681-e1481497272261.jpg)
My Setup
- Camera: Browning Strike Force
- Mode: Timelapse Mode
The Timelapse mode on my Browning Trail Cameras is perfect for watching bigger open areas, like our food plots. For the most part, we know where our deer are entering this field, which is why I put this camera where I did. But, deer will often be in that same location and you’d never know it because they are too far away to trigger the camera. Timelapse Mode solves that problem since it can capture game at 200+ yards away. Plus, you can easily view a full day’s worth of pictures in just minutes, thanks to the Buck Watch Timelapse Viewer Plus software that is included with every Browning Trail Camera.
If you still have a deer tag you’re trying to fill, utilize your trail cameras as best you can. They are a deer hunter’s most valuable scouting tool! I shot my biggest buck to date on the last day of Missouri’s 2014 archery season as he was making his way into our turnip plot. Had I not been watching and patterning him with my trail cameras, I may have picked a different stand in that food plot and missed my chance at him.
Aside from avoiding tag soup, there are other benefits to keeping your trail cameras out during late season. Use them to help take inventory of what deer survived the season, determine your buck to doe ratio, and age of your deer. Looking over this season’s pictures, as well as pictures from prior season, will help you determine your game plan for next season. Another benefit to keeping your cameras set up so late in the year is to aid with shed hunting. Once you start getting pictures of bucks dropping their antlers, you’ll have a better idea of when and where to start looking for sheds.
Deer season isn’t over until it’s over, so if you’ve already taken down your game cameras for the year, I recommend getting them back out! The above late season trail camera locations and setups have helped me fill my deer tags in the past. Even if I don’t fill my archery tags this year, I have already gained some valuable information to carry over into next season, thanks to my Browning Trail Cameras!
By Andrea Haas
Andrea Haas is a Pro-Staffer from Missouri who enjoys hunting deer, turkeys, and upland birds. She is also the founder of the Huntress View, an organization formed to help strengthen the ever growing community of women hunters.
