Intro to 3D Archery
June 4th, 2017 by BTC Editor
Off season blues? No problem! 3D Archery is a great way to keep you occupied while waiting for your next hunting season. If you’ve never shot a 3D archery range then keep reading, this post is for beginners and what they will need to know before starting 3D archery.
I started competing in 3D tournaments this year to challenge myself, to continue shooting my bow during the off season, and to keep myself active outside. Not only do these tournaments help with my consistency but they have also helped improve my ability to judge yardage. Depending on your location, you could probably look online to find a local archery organization. If you can’t seem to find one online usually your bow shop can help you out by referring you to a few.
Once you find an archery association/organization you can then ask them for a copy of their tournament schedule if it’s not listed online. You will also need to know that specific organization’s available shooting classes, rules for shooting and what scoring system they will use.
I want to mention all the necessities you may need to start shooting competitively.
Essentials:
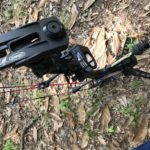
- Bow (obviously)
- Release aid
- Quiver or archery stool that can hold arrows, keys and accessories
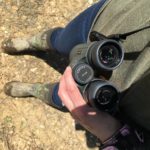
- Binoculars (I love my Vortex Viper HD’s in 8x42mm –Has plenty of magnification and lets in tons of light in order to see targets efficiently)
- A bow kick stand that stands bow upright so you don’t have to lay it down on the ground
- At least 5 arrows, possibly more if you believe you will miss targets or damage a few on other shooters’ arrows
- Pencil (if one’s not provided)
- Rubber boots as a backup in case your range is muddy
- Tick/Mosquito spray (We like to spray Scentblocker’s Tick spray on our shoes the day before and it usually last a few weeks)
- Sports drink to keep you hydrated (I prefer Mtn Ops Yeti or Enduro)
- Snacks are usually available at a small cost but it’s probably a good idea to bring either a granola bar or PB cracker type snack
- Water (This is usually provided for free throughout our range but sometimes they’re all gone by the time we go through the course)

Before you shoot in a tournament it may not be a bad idea to find someone that actually shoots them first and just do a walk through with them while they shoot. I did this to make myself more comfortable in knowing how things ran and how the targets are scored. I was less intimidated when I actually shot in my first since I knew how everything worked. If you can’t find someone to walk through with, no biggie, shooters at 3D tournaments are usually very nice and encouraging. I can honestly say I have not ran into a single person that wasn’t willing to help a beginner. It was very calming to be able to get advice from people that not only shot in them regularly but seemed to not be bothered at all by a newbie trying to figure out how the tournaments worked. Again, this is part of the reason I have fallen in love with archery. The archery community is so supportive and educational.
Most 3D tournaments have a variety of classes to shoot in based on your level of skill and your bow setup. For example, the tournaments I have been shooting in have:
- PeeWee
- Cubs
- Longbow
- Traditional
- Youth
- Women’s Youth
- Women’s Bowhunter
- Women’s Open
- Novice
- Bowhunter
- Bowhunter Outlaw
- Senior Open
- Open Class
- KNOWN 45
- Pro Class
Each class will have general rules for being able to shoot in it and will also have different colored stakes to shoot from at the archery range.
Some rules to keep in mind: (Rules may vary slightly depending on the archery club)
- Each club will have a max arrow speed and also have the right to chronograph any shooter at any time
- Rangefinders are prohibited unless shooting in the KNOWN class. All other classes require distances to be judged by the naked eye.
- Binoculars/spotting scopes may be used determining shot placement
- Bowhunter class is restricted to a 12” or less stabilizer, screw in or glued in tips, and may shoot a movable sight (but it must be a HUNTING sight with NO magnification)
- Bowhunter Outlaw class is restricted to bowhunter equipment ONLY with hunting sights and NO magnifications. This is the only class with no max speed limits
- Exchanging yardage information is strictly prohibited
- Each shooter must be touching the appropriate shooting stake for their class with some part of their body
- A “controlled letdown” must be verbally announced
- Once your sights are set and bow has been drawn you cannot reset your sights after a controlled letdown
Here are a few tips I would recommend doing before tournament day:
- Make sure your sight pins are sighted in to ranges that vary for your shooting class
- For example, I shoot in Women’s Bowhunter and the ranges will vary but usually the farthest distance is 25-30 yards at our specific archery club
- There are also moveable hunting sights that are great for 3D tournaments so you can easily adjust the distance per target.
- I practiced at home shooting the distances my pins were set at and really looking at the animal to help myself with judgement of distances. Sometimes I would walk at a random distance, look at the target and guess in my head and then use my rangefinder to see how close I am to guessing correctly. I continue to do this until I am comfortable with my guesses
- Make sure gear is all together and ready to go
- Make sure to get plenty of sleep the night before
- Make sure to eat a healthy breakfast before
Upon arrival:
- I usually sign in/register and get my score card
- I then head to the practice bags and shoot at each one that I have a pin set up for to make sure they’re all sighted in. I double check my arrows, release and bow to make sure everything is in good shape
- We usually shoot in a group with friends and “draw cards” for our shooting order. We will mix them up (faced down) and get one person to draw one card at a time and we will use that as our shooting order. This helps keep it fair because some targets are harder to see where to aim and being the first one to shoot those types of targets can be a little tough. Some shooters will have bright colored fletchings so that makes it easier for the next person to use as a guide on aiming.
- Side note: Our group sizes vary from 3-5 but I personally believe a group size of 3 is the best. Groups of 5 tend to take longer shooting each target and going through the whole course in general
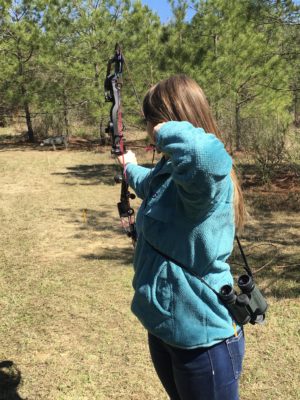
When shooting at a target I usually go through a series of steps to help myself make a good shot. I like to going by these steps in order to be consistent. These steps may be a little different for each person but once you start doing things in a way that works keep doing them the same way EVERY TIME. I promise they make a difference.
When shooting at a target:
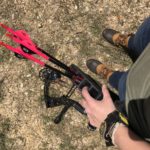
- I find the appropriate shooting stake and place a foot on one of the sides of it. It doesn’t matter where as long as some form of your body is touching it.
- I usually go ahead and nock an arrow and prepare my arrow rest.
- I then look at the target through my binoculars and try to find where I need to aim. The best way to do this for me is to look for specific things like: the shape of the target, which way it’s facing, if it’s leaning backward or forward, if there are any distinctive parts on it such as areas that are shot up or if it has spots you can use to help as a guiding tool. Aim small, miss small is a very accurate statement in this case.
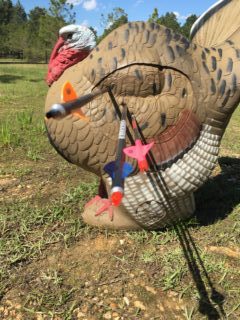
- I then look at the target through my binoculars and try to find where I need to aim. The best way to do this for me is to look for specific things like: the shape of the target, which way it’s facing, if it’s leaning backward or forward, if there are any distinctive parts on it such as areas that are shot up or if it has spots you can use to help as a guiding tool. Aim small, miss small is a very accurate statement in this case.
- I make sure my feet are shoulder width apart and as flat as possible.
- Draw bow.
- Find aiming location in peep and match it with appropriate pin.
- I make sure my peep sight meets up perfectly with my sight housing. If I’m shooting uphill/downhill and will have to lean some way I make sure to lean with my waist and not just with the bow as this would affect how my peep sight and sight housing meet up.
- Relax bow hand and rest pointer finger on my trigger.
- Continue to breath, relax muscles and release.
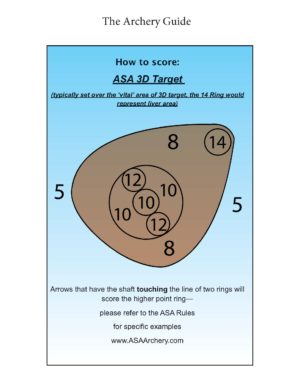
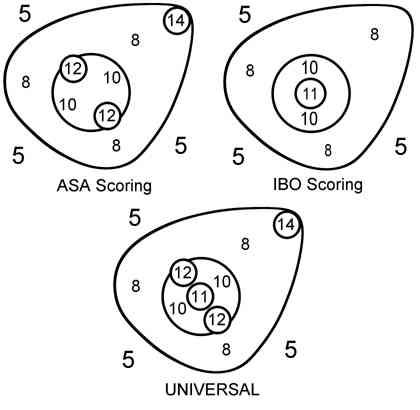
When scoring targets, it’s important to know which scoring system the archery club/organization is using. There are two primary organizations that have their own scoring systems: Archery Shooters Association (ASA) and International Bowhunting Organization (IBO). The tournaments we shoot in only use ASA scoring system and the “Upper 12” can only be called or used if the targets specifically shows it can. Here are a few pictures that show the difference in the two.
If you’re a beginner or not shooting in a Pro class, it’s important to remember these tournaments are for fun and to help you improve. Bad shots will definitely come and you’ll more than likely miss a few targets. Don’t stress too much about those because they have happened to everyone at some point and they help you learn from your mistakes. So good luck to all you beginners and remember to have fun!
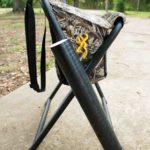
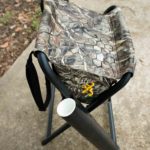
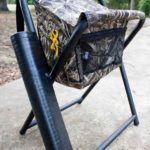
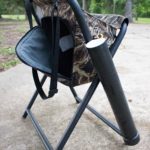
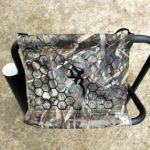
Note: If you plan to consistently shoot year after year I suggest investing in an “archery stool” of some sort. I currently use the Browning Steady Ready Stool with PVC pipe attached to the leg. We taped the pipe with black electrical tape and glued a cap on the bottom so that it can be used as an arrow holder. The stool has a mesh zipper pocket on one side and an insulated cooler pocket on the other. You can put ice and drinks in the cooler but we didn’t want to make the stool too heavy to carry so it’s used to hold our extra accessories (keys, binoculars case, back up release, snacks, etc.).
Courtney is an avid hunter from Louisiana. She has a passion all things outdoors and is an avid hunter. She is also a team member of Huntress View, an organization formed to help strengthen the ever growing community of women hunters.
