Choosing Your First Trail Camera
July 16th, 2017 by BTC Editor
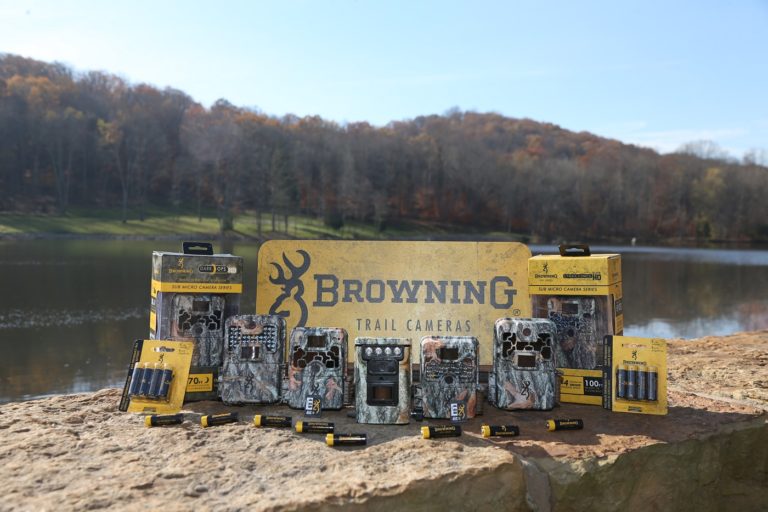
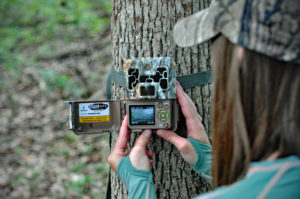
Trail camera technology has really improved over the years and there are more features than ever, allowing you to customize your trail camera experience to your liking. For someone who is new to hunting or the trail camera world, picking out your first game camera can be somewhat overwhelming, especially if you don’t know what features you need or what the features even do. After someone recently asked me for advice on what they need to look for when purchasing their first camera, I decided to share a few things that I feel are “must-haves”, as well as some bonus features and accessories that may be an asset to you.
Features
I really feel a lot of features on trail cameras are user specific and depend on user preference. I’ll briefly explain the features that I feel are the most important when considering which camera to buy.
Flash Type
The flash types are: White flash, Black flash (Invisible, or No-Glow), and Standard IR (InfraRed / Low-Glow). Tom Rainey of Browning Trail Cameras wrote a really great article for this blog explaining each flash type and their effect on trail camera picture quality: http://btc-omrc.com/nighttime-trail-camera-images-putting-light-on-the-subject/
Basically, the highest quality nighttime photos will be from White Flash cameras, then IR cameras, and then Black Flash cameras, but that’s not to say that the quality of the nighttime images from Black Flash cameras are bad. You just may notice a little more motion blur on them.
So, a few things to consider when choosing the flash type:
Where will you be putting your cameras?
If you are going to be putting them on public land or in an area that is known to have a lot of trespassers, you will probably want to go with a Black Flash camera. Otherwise, one of the previous two flash options may be what you would prefer.
Do you feel a White Flash or Standard IR camera will spook the game you are hoping to get pictures of?
If so, a camera with Black Flash may be best for you. My personal experience with Standard IR and White Flash cameras is I feel the animals get used to them. I haven’t noticed them spooking deer in the years that I have been running trail cameras. Everyone has their own opinion on this and each location may be different, so again, go with your own personal preference here.
Detection Range
The location where you plan on putting your game cameras will help you decide which camera may be best for you in regards to detection range. If you are running trail cameras primarily in the woods or have it set up over pinch points and travel corridors, the detection range can be quite a bit lower. But, if you are watching over larger areas, such as fields, the detection range needs to be a little higher, especially if you aren’t quite sure where the wildlife are traveling.
For example, the Browning Command Ops has a detection range of 55 feet with a 60-foot flash range, which is great. But the Browning Recon Force Extreme has a detection range of 80 feet with a 120-foot flash range, which is quite a bit more. So, you can see how the higher detection range could be quite a bit more beneficial in certain situations.
Trail Camera Accessories
Obviously, SD Cards and batteries are must-have accessories for your trail cameras. But there are a couple other accessories that you may want to look into purchasing for your first trail camera, depending on the location the camera will be in and how often you plan on checking it.
Security Box
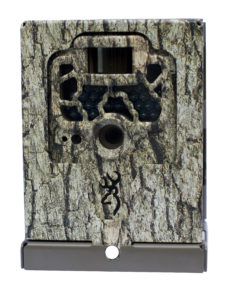 As I mentioned above, the location really is a key factor to consider when purchasing your trail camera. The same goes for deciding whether or not you need a trail camera Security Box. A couple things to keep in mind here: Do you expect there to be trespassers, or will the camera be on public land? Also, what types of animals are in your area? Do you have a high bear population? If you answered “Yes” to any of those questions, I recommend getting a Security Box. Browning makes one that fits all of their camera models (excluding the Defender 850). It can also be locked using a standard padlock or a Master Lock Python Cable so your camera stays safe and stays put.
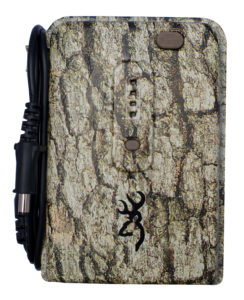
Trail Camera Power Pack
The Trail Camera Power Pack will extend the battery life of your Browning Trail Camera in the field. This is a great option if you don’t plan on checking your trail cameras very often. It holds holds 8 AA batteries in the same easy to use battery tray used in the trail cameras. Other features include a built-in battery tester and a twist lock plug to lock the power adapter to your Browning Trail Camera.
Bonus Trail Camera Features
Here are a few “bonus” features that you may also want to take into consideration when choosing your first trail camera. I personally don’t feel that these are features that you absolutely have to have, but I do feel they will enhance your trail camera experience. Personal preference comes into play here as well. Here are a few of my favorite features on the Browning Trail Cameras:
Viewing Screen
This is an internal viewing screen on some of the Browning Trail Camera models. It’s great for viewing trail camera photos in the field, and it really comes in handy when positioning the camera while you are setting it up.
Timelapse Mode
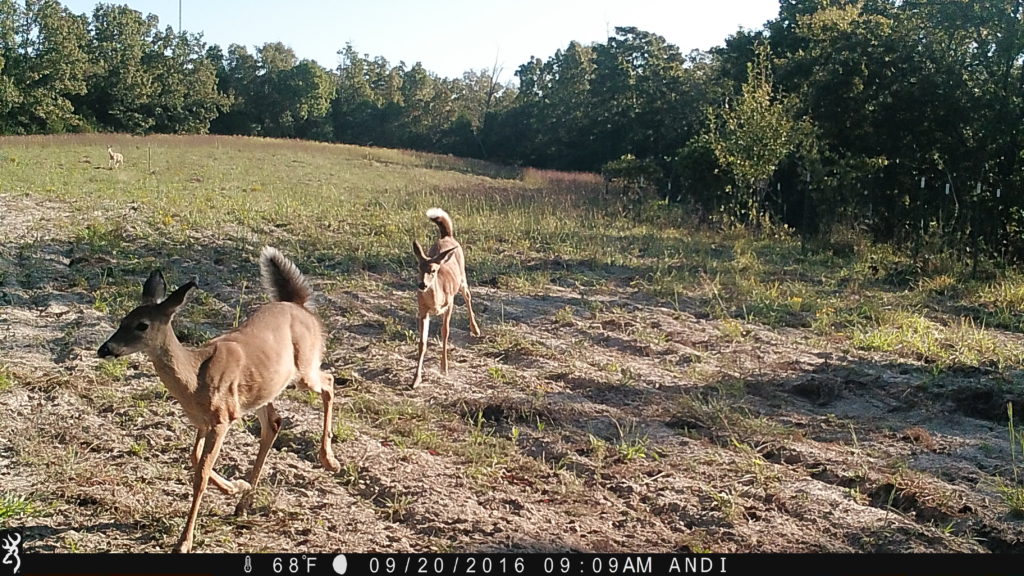
The Timelapse function allows you to set up your camera in the field, and program it to take pictures automatically at fixed intervals. This feature is helpful when you set a camera up in a new location such as a large field or food plot where you are not sure where the wildlife are entering the field. The camera will take images of the entire field, so you will end up capturing game at 200 + yards away, where a conventional game camera would not normally trigger a picture. All Browning Trail Camera models come with this feature, as well as the Timelapse Viewer Plus Software, so you can playback a whole day’s worth of activity in just a few minutes, much like watching a video.
Multi Shot / Rapid Fire Mode
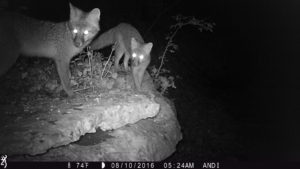
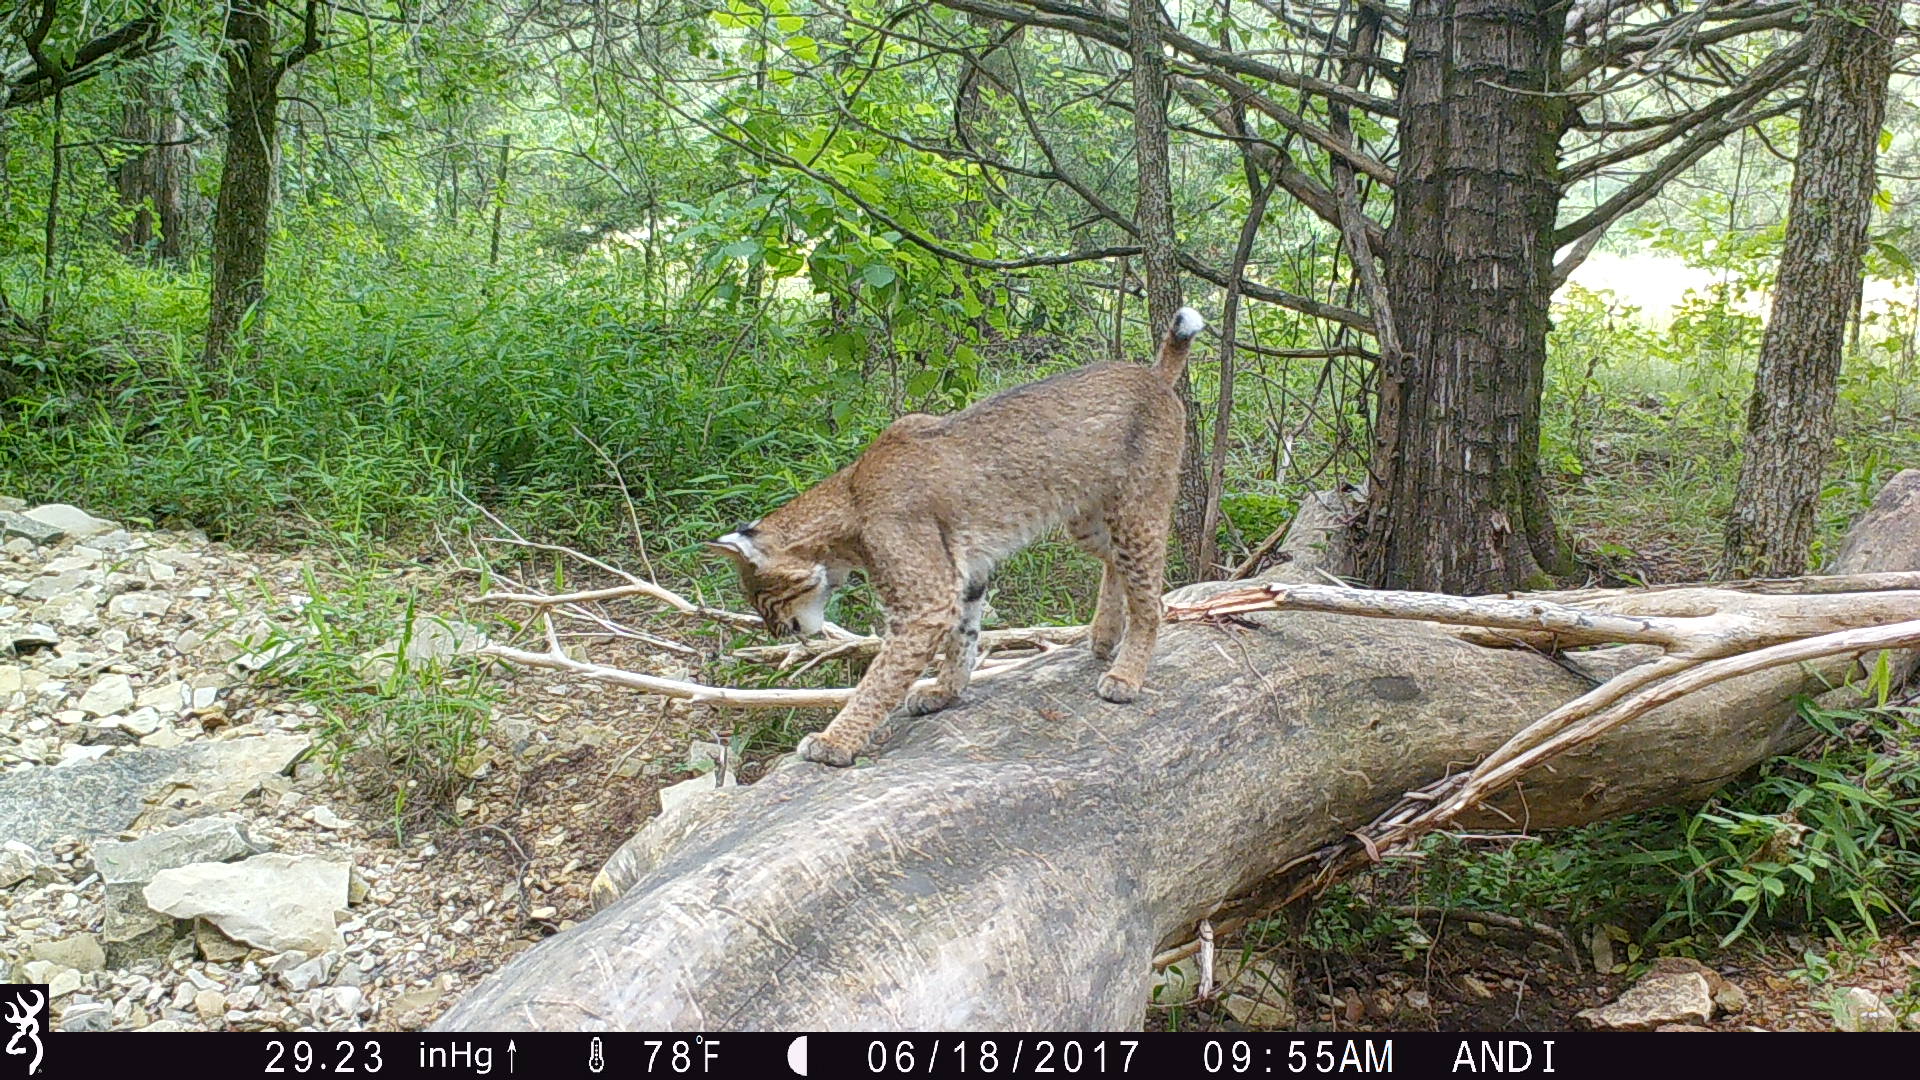
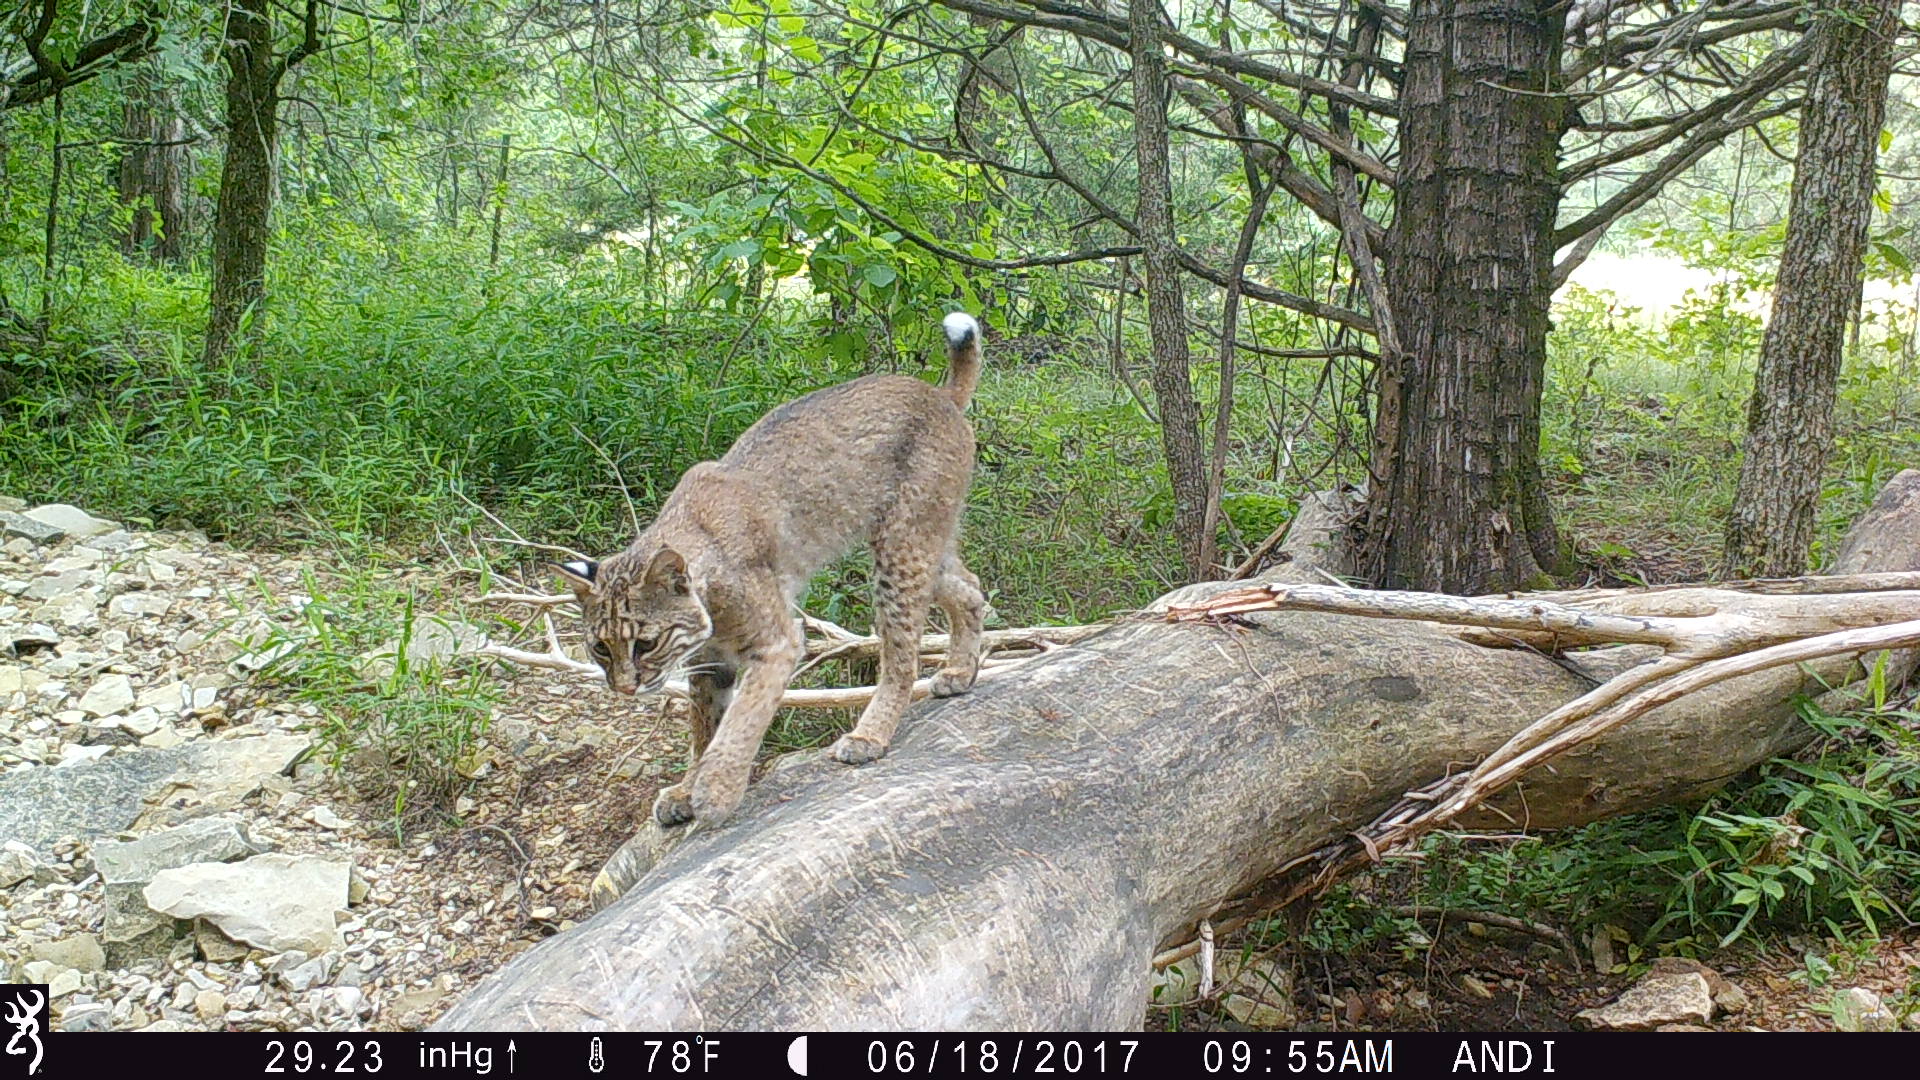
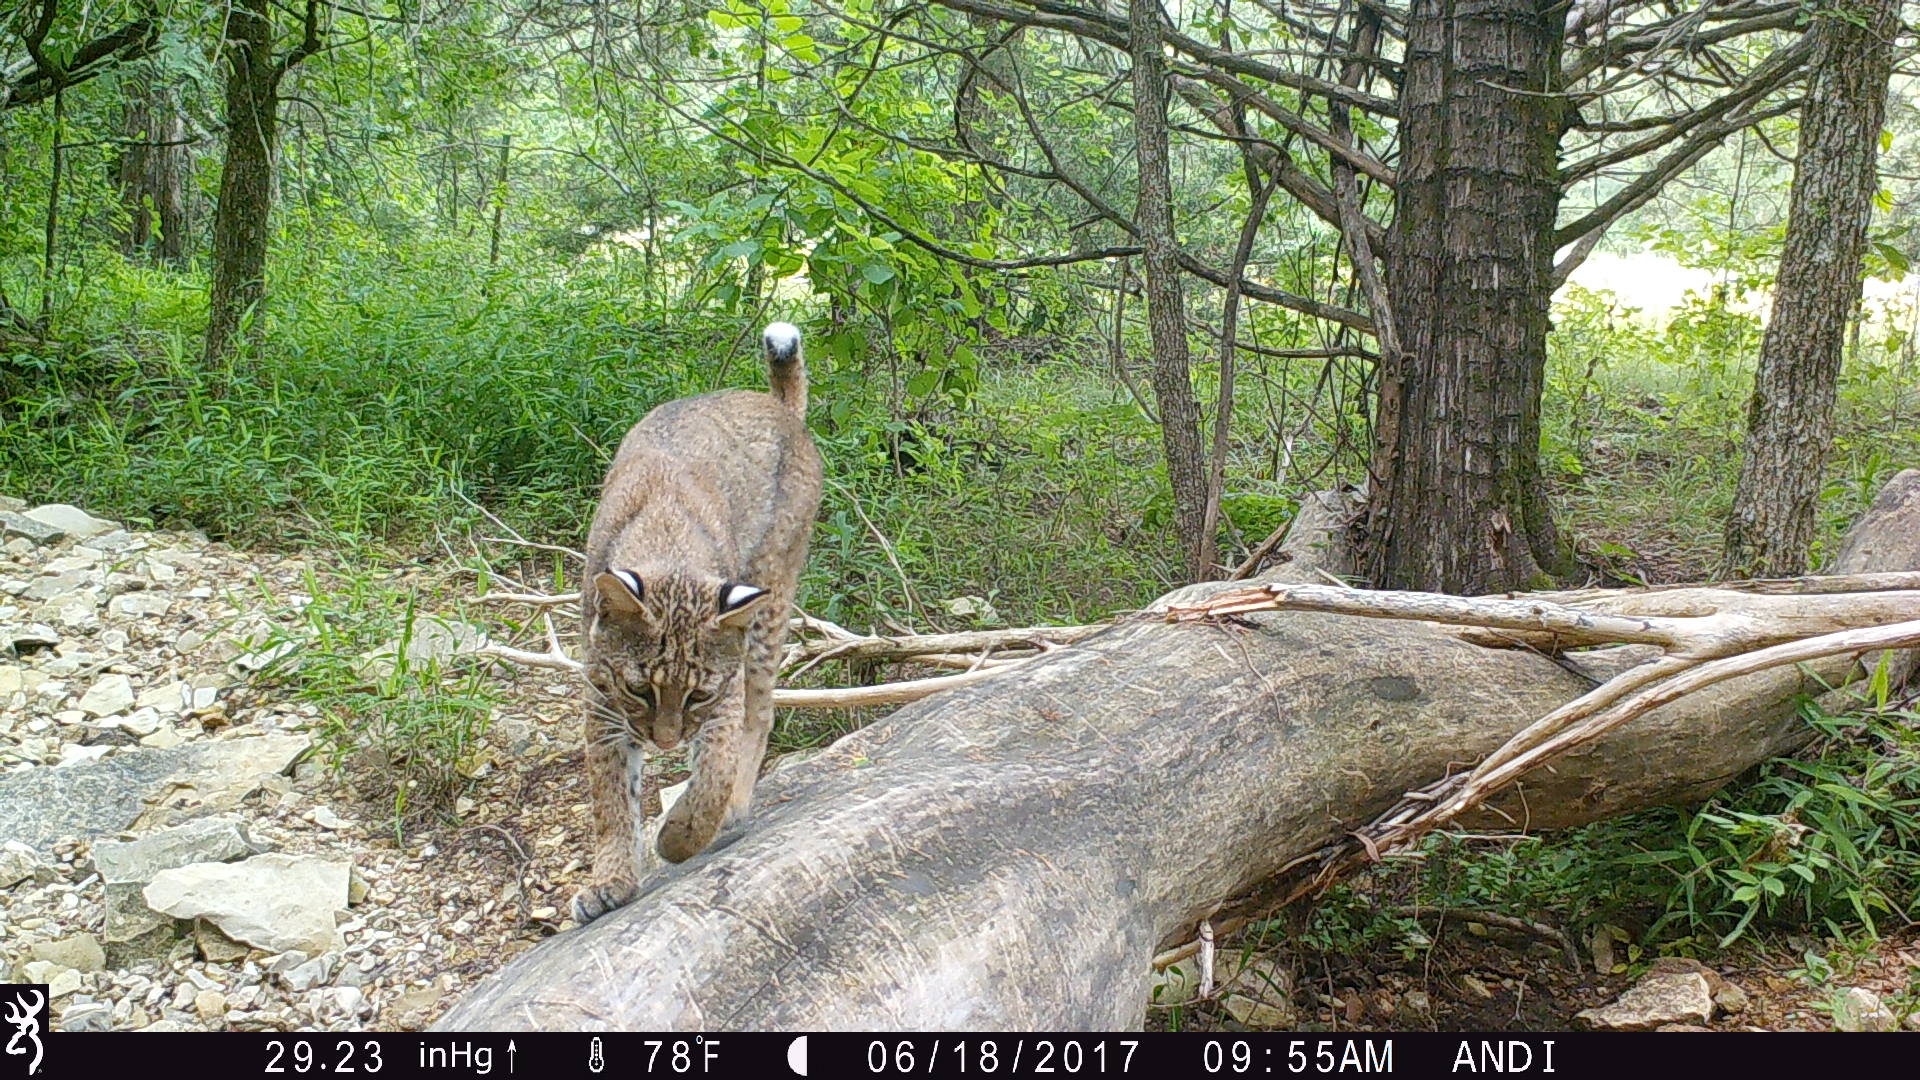
In certain situations, the 8-Shot Rapidfire mode is one of my favorites to use on my Browning Trail Cameras. It takes 8 shots in 2 seconds! I prefer to use this when I have a specific animal that I am targeting that I know will not be in the frame for long. For example, I wanted a Bobcat on this log setup, but I knew it would likely not use this log repeatedly and not stay on it for long, so I put it on Rapid-Fire mode to get as many photos of it as possible and pick my favorites to share. Rapidfire Mode is also great in deer season when you are watching a smaller area, such as pinchpoints and travel corridors, so you don’t miss any deer activity.
Video Mode
This is a really fun trail camera feature. It’s almost like watching the wildlife in person when playing the trail camera videos back! With 1920 X 1080P Full HD, the audio and the clarity in the Browning Trail Camera videos is really amazing. Additional new features for the 2017 model includes Smart IR video, which continues to record video footage while game is moving in front of the camera and SD card management options which allow you to overwrite older images on the SD card if the memory is full.
I hope this article helped you know where to start in shopping for your first trail camera! If you have any other questions that were not listed in this article please feel free to leave a comment below.
By Andrea Haas
Andrea Haas is a Pro-Staffer from Missouri who enjoys hunting deer, turkeys, and upland birds. She is also the founder of the Huntress View, an organization formed to help strengthen the ever growing community of women hunters
“Land and Wildlife Field Day”
April 23rd, 2017 by BTC Editor
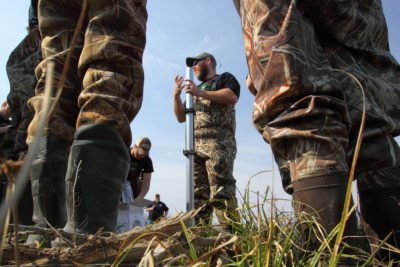
Making and setting up Wood Duck boxes is not only a great way to get the next generation involved in conservation and wildlife management, it’s an excellent way to gain insight into the nesting and reproduction habits of Wood Ducks, with an ultimate goal of increasing their population. Scott Cronin, a Pro-Staffer from Kentucky, holds an annual event with a local High School called the “Land & Wildlife Field Day”. Junior and Senior High School students in the Wildlife Forestry Programs participate in this field event in which Wood Duck boxes and trail cameras are installed and studied.
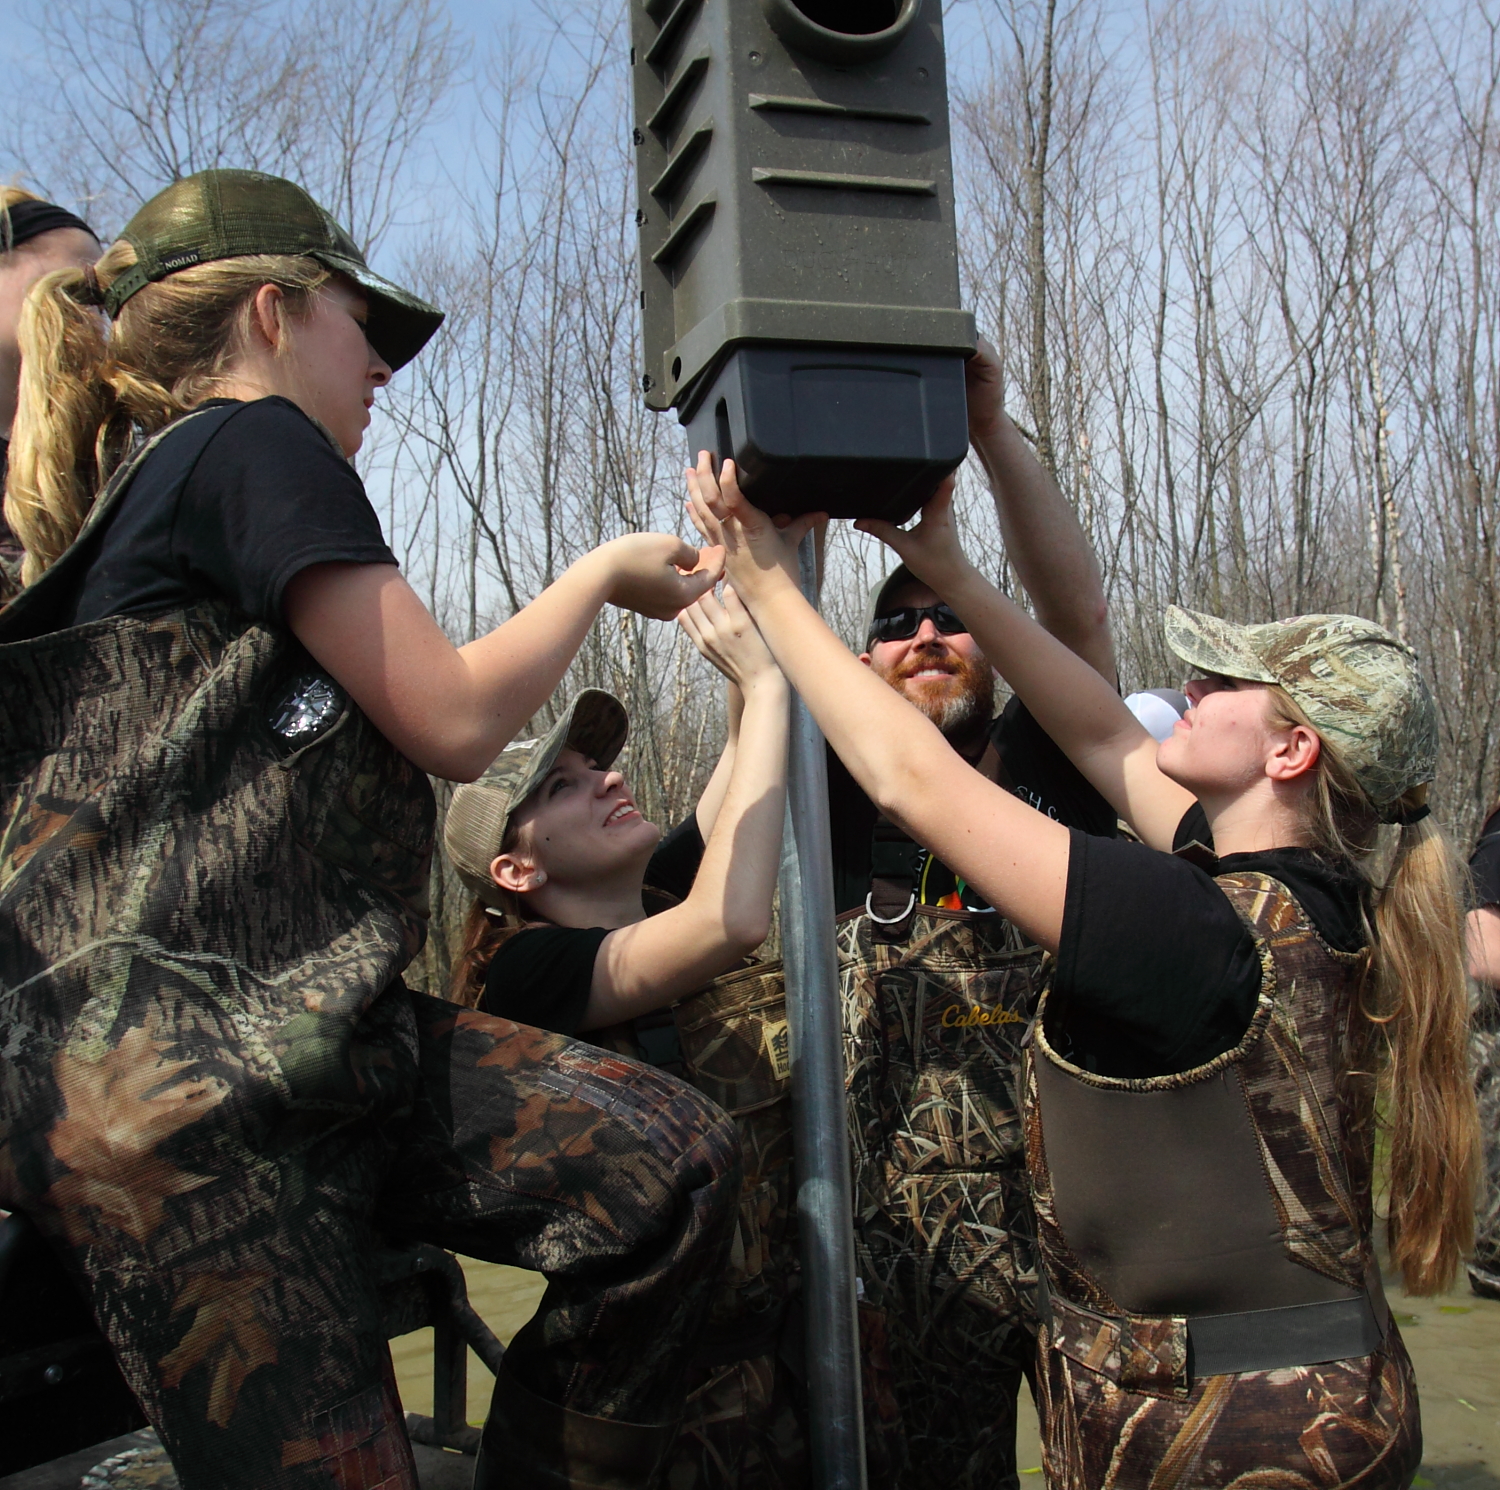
The goal of this project is to pinpoint which locations are best for the Wood Duck boxes, what box styles and designs are the most effective, and the rate of nesting in the boxes. Scott has found that using his Browning Trail Cameras to watch the boxes gives them actual data to use, rather than just going back in a few months to see if there’s any eggs. The project also allows them to spend time with the students, teaching them about using trail cameras as a game management tool to get data and to see how successful the projects are.
Scott has been using trail cameras on this conservation project for the past 15 years, but has been using Browning Trail Cameras exclusively for the past 4 years, for several reasons: the durability, versatility and the camera features. Naturally, the locations of the Wood Duck boxes and trail cameras are very wet (swamp areas, flood timber, etc.) but Scott shares that his Browning Trail Cameras have been very maintenance free and has had very little issues with fog and moisture, which is a common problem with any trail camera in these types of locations.
This year Scott started using the new Browning Strike Force HD Pro, which features an incredible .3 second trigger speed, a 1.5” color viewing screen and an adjustable mount, all of which have been a tremendous asset on this project. Scott shares: “I selected the Strike Force HD Pro based on the fact that we’ve had tremendous success over the past 4 years with the Browning Strike Force, and now that it has the viewfinder and the bracket it makes it so much easier to set up the cameras and pinpoint the exact area that you’re wanting to center your frame on from the start.”

Side view of the 2017 Strike Force HD Pro
Trail Cameras are our eyes in the woods, or in this case the wetlands, when we can’t physically be there. They have been especially helpful on this project since they often go a few months before going back to check on these locations. The “Land & Wildlife Field Day” project is an excellent way to teach the next generation about using trail cameras and Wood Duck boxes as tools to help grow the Wood Duck population. While trail cameras are used most often to aid in hunting, don’t overlook how valuable they can be in collecting data for conservation efforts as well.
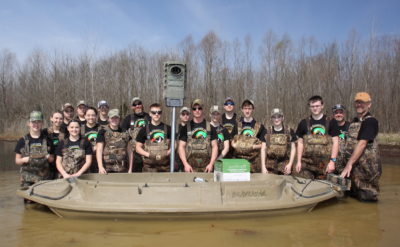
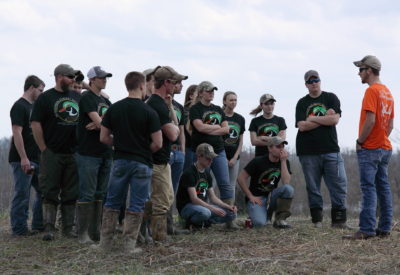
Kentucky Afield Magazine was there to cover the event this year. Here are a few more photos from their field day!

By Andrea Haas
Andrea Haas is a Pro-Staffer from Missouri who enjoys hunting deer, turkeys, and upland birds. She is also the founder of the Huntress View, an organization formed to help strengthen the ever growing community of women hunters.
4 Reasons to Start Hunting in 2017
January 29th, 2017 by BTC Editor
When making your list of New Years resolutions for 2017, I hope plenty of you have added “hunting” to the list of things you’d like to check off this year. Whether it turns into a life-long passion or something you decide may not be for you, I’m sure either way you will walk away a better person from the experience. Here are 4 positive things you can expect to happen from giving hunting a try.
Healthier Lifestyle
Almost everybody makes it a New Years Resolution to become healthier in the coming year, and being a hunter can help you reach that goal! Aside from the fact that the meat from the animals you harvest will be organic, leaner, and free from man-made intervention, most hunts require a good amount of physical activity as well. So you’re getting your exercise in while you are obtaining a healthier form of food. It’s a win-win!
Strengthen the Economy
You may not necessarily feel that you alone can help contribute to this, but check out this statistic: According to the National Shooting Sports Foundation (NSSF), hunting has generated 600,000 jobs in the United States. That’s a HUGE number. And just think, the more you and others hunt, the more purchases you will make within the hunting industry that will help that number continue to grow!
Conservation
If there is one thing that hunters and non-hunters can agree on, I feel it’s the fact that we all want to ensure that nature and wild animals will be around for future generations to enjoy. You can help contribute to that through hunting. Check out these excerpts from the NSSF Hunter’s Pocket Fact Card about how hunters contribute to conservation:
“License Revenues fund nearly half the budget, on average, for state fish and wildlife agencies. The money supports wildlife management and restoration programs, habitat improvement and general conservation efforts.”
“Excise Taxes on sporting equipment (such as firearms, ammunition and fishing tackle) provide more than one-fifth the revenue for state fish and wildlife agencies. The funds are used to acquire, maintain and improve wildlife habitat and to make the nation’s lands and waters more accessible and enjoyable to all its citizens, sportsmen and non-sportsmen alike.”
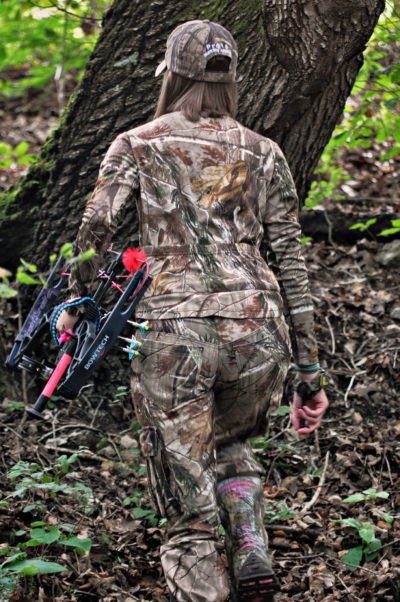
Allison Stegmann, Huntress View team member
“Hunters and anglers provide more than 75% of the annual funds of the 50 state conservation agencies. Sportsmen are clearly the largest contributors to conservation, paying for programs that benefit all Americans and all wildlife.”
Character Building
I have been hunting for years now, but I still remember how I felt after my very first whitetail hunt and what I learned from it. I remember climbing up in the tree and seeing 3 does walk underneath my treestand. At the time I didn’t want to shoot anything, I just wanted to observe them, and I’m glad I did. Just watching them in their natural environment, not having a clue that anyone else was there, was quite the experience for me.
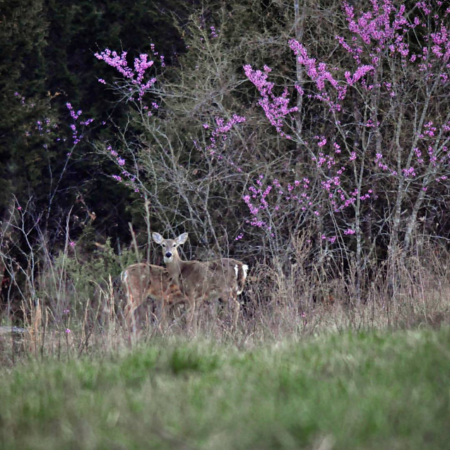
That day I learned to appreciate several things: Having land to hunt on, having the ability to get out and go hunting in the first place (which I feel a lot of people take for granted), and for life itself. While hunting can be very difficult, I realized how easily I could have taken one of those does with my rifle that day, had I wanted to, and it just made me have a new found respect for wildlife.
If you’ve been thinking about hunting for a while but haven’t taken the leap yet, please give it a try this year! There is always something positive that one can take away from hunting. I encourage you to see how it can help change you for the better!
By Andrea Haas
Andrea Haas is a Pro-Staffer from Missouri who enjoys hunting deer, turkeys, and upland birds. She is also the founder of the Huntress View, an organization formed to help strengthen the ever growing community of women hunters.
Taxidermy: Caring For Your Animal Pre-Mount
November 6th, 2016 by BTC Editor
As hunters and huntresses, we sometimes harvest that special animal that may be a first, a big buck, big fish, or beautifully plumed bird to get preserved and hang on the wall as a trophy. When you have that trophy in hand, what are the next steps to take to make sure it is properly cared for until it is safely in the hands of the taxidermist, and how do we care for the mounts when we get them back?
Growing up in a taxidermy family, I have seen everything from freezer burns and premature decay to faded and bug infested mounts. The care of an animal before and after it is mounted is key in keeping it beautiful for many, many years.
One of the first and very best things you can do before going afield is research taxidermists in your area and find one you are comfortable with. Most taxidermists will welcome you into their shops and showrooms that showcase their work. Talk to other hunters and find out what taxidermists they recommend. Do not go with the cheapest option because the mount will more than likely be poor quality. Bottom line, you’re going to get what you pay for.
Before the animal is mounted and before you are able to get it to the taxidermist, proper storage in the freezer is crucial to producing a good mount. Freezer burns are a common result of improper packing. On the other end, not getting the animal in the freezer soon enough can result in premature decay.
Mammal, bird and fish taxidermy are very different, so the way they are taken to the taxidermist will be different. When you collect any mammal, the first thing to know for field care is to avoid dragging the animal if at all possible. There are many tools/equipment out there to help you transport your animal. The second thing to know is to keep the animal cool until you can get it skinned or to the taxidermy shop no matter what kind of animal it is. Always consult with the taxidermist before skinning it. The quickest way to ruin a trophy is to skin it wrong. You may also want to wash off any excess blood or body fluids prior to freezing. The third thing is get it to the taxidermist as soon as possible. Carting a deer around is a bad idea, but a coyote or fox is an even worse idea. As nature rapidly takes it course, bacteria starts to grow as soon as the animal dies and the skin will start ‘turning green’ or rotting.

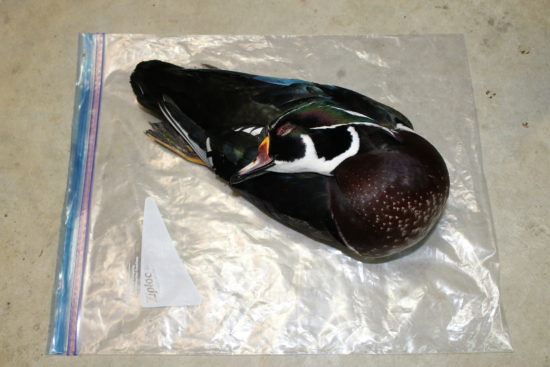
Birds will be put in the freezer exactly like they were shot. It’s not necessary to do any kind of skinning, so don’t take any of the meat or entrails out. The proper freezing position is to put the head on the chest of the bird and wrap it in a couple garbage bags and tightly seal it. Freezer Ziplock bags are also something good to use. Be careful to not bend or twist tail and wing feathers. One common misnomer is to put a bird in nylon hose and wrap it in newspaper. Many taxidermists cringe when a bird is brought to them inside a hose and even worse wrapped in newspaper. Newspaper will begin the process of dehydration and promote freezer burn, making the taxidermists job more difficult. Once you get a properly wrapped bird in the freezer, call your taxidermist and make arrangements to take it to them.
Fish have a completely different scenario than mammals and birds. The very first thing you should do when you pull the fish out of the water is take good quality, clear pictures of it. Take an overall profile picture and make sure to get any special markings or colors you want the finished mount to have. If you’re going to release the fish, measure it from the tip of the nose to the tip of the tail and the girth all around the body of the fish. If you are keeping the fish, do not skin or gut it and don’t put it on a stringer if you don’t absolutely have to. The best place to keep it is in a cooler or live well until it can be put in a freezer. When you’re ready to freeze it, get a wet t-shirt or towel and roll the fish in it. Wet towels or shirts are key in protecting the fish from freezer burn. Never use newspapers or paper towels. Put the wrapped fish into a trash bag and seal it tight. If you need to, double bag it. If it’s possible, freeze it on a flat board.
Try to have an idea of the position you want your animal mounted in. It will be that way forever. The taxidermist may be able to provide some ideas of positioning, but to avoid delays it is best to know what you want ahead of time.
When you see your mount for the first time, the memories come flooding back. You want it to look like that forever right? When placing your mount in your home, the best thing you can do is to keep it out of sunlight to prevent colors from fading and keep it dusted. Just like anything else sitting on the shelf, it will collect dust. Consult with your taxidermist about what is best to use for cleaning your particular mount. For fish and birds, a feather duster is most likely to be recommended along with never using any chemicals, as they will build up over time and cannot be removed. Dusting also applies to deer, however, some hair care type products are available.
Hopefully these tips will aid you in the process of preserving that special animal you were able to harvest, and to keep the memories of a hunt alive for years to come.
By Allison Stegmann
Allison is an avid waterfowl hunter from Iowa. She is currently a student at the University of Northern Iowa studying Leisure, Youth, and Human Services with an emphasis in Outdoor Recreation. Allison is also a member of of Huntress View, a team dedicated to strengthening the ever-growing community of women hunters.
Raising Chickens and Ducks
October 24th, 2016 by BTC Editor
Raising chickens and ducks (or the benefits of getting them out of your house by building a coop)
By Kristen A. Schmitt
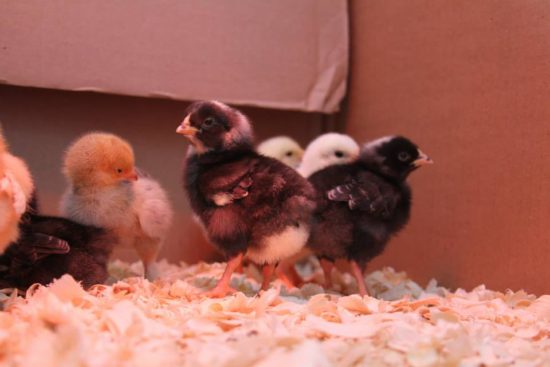
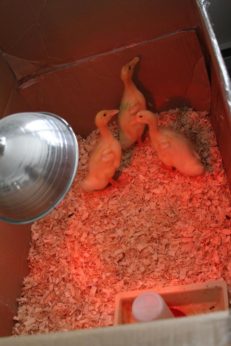
When we moved from city to country, we knew one thing: we wanted chickens. Organic eggs were expensive enough and already a big part of our lives. From both a cost and food standpoint it made sense to raise laying hens ourselves. Before long, we had 12 chicks nestled in a box in our living room that scratched and chirped in their nest of pine shavings, creating a dust storm that coated nearly every surface imaginable. Because it was only March – and they were only a few days old – we couldn’t exactly transport them outside. So we made due with our new chirpy acquaintances over the next couple of months.
Raising chickens isn’t rocket science. But if you haven’t done it before, here’s what you need to get started:
- Cardboard box (how big depends on how many chicks you have)
- Pine chips
- Heat lamp
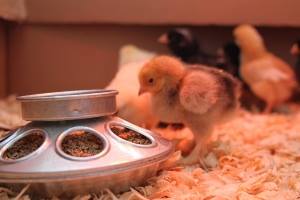
- Food (chick starter is available at Tractor Supply)
- Food dish
- Water dish
- Water
We weathered an indoor tiny rooster escape (he hung out under our piano feebly cockadoodling for about an hour before I could grab him and put him back in the box) and plenty of soggy pine chips, but, for the most part, once they were about six weeks old – and the weather was warm enough – we transitioned them out to their coop (bought off of craigslist from a local farmer). Since then, they have been pretty much maintenance free and even moved with us from Vermont to upstate New York this summer. While we left their digs behind, we’ve since converted a stall in our barn for the “girls” and they have adjusted easily to their new space.
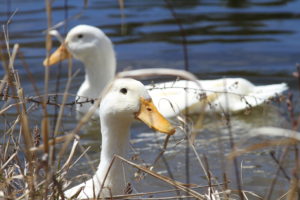
And then there were ducks
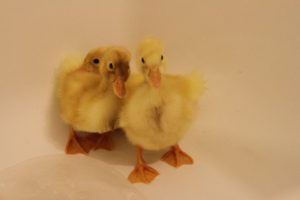
Last spring, we were so over winter – so much so that during a routine Tractor Supply stop to pick up chicken feed and dog food, we ended up with a rather odd impulse purchase: three tiny ducklings. They were a spring preview, so to speak, because even though there was still snow on the ground, the fact that ducklings were available for $2.49 each meant that warmer weather was just around the corner.
We didn’t anticipate a few things with our impulse buy:
- Ducks grow faster than chickens. They quickly outgrew the medium-sized box we had for them and, soon, we had a refrigerator box in our living room.
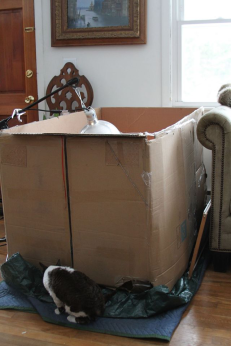
- Ducks are messy. Not only do they tip and spill water (so that we also had a tarp under the box in the living room), but they spent time in our bathtub, getting used to swimming. Cleanup afterwards was never a fun chore.
- Ducks are loud. Every night at 2 a.m. or so, they would start quacking. While we were thankful that our daughter managed to sleep through it, it drove my husband and me absolutely crazy.
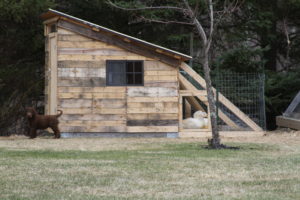
After a few weeks, I was counting down the days to spring thaw and a duck coop. While coop design can range from geodesic dome to princess castle, we went with a basic do-it-yourself concept that primarily utilized pallet wood and ended up looking rather rustic chic.
Supplies:
- Pallets
- Foam insulation
- Lumber for door and additional framing of structure (including outside attached yard if building one)
- Plywood for roof and interior to cover insulation
- Roofing material
- Linoleum for floor (ducks are messy)
- Door hardware
- Chicken wire (for outside attached yard)
Tools:
- Sawzall reciprocating saw with bi-metal blade
- Hammer
- Nails
- Power screwdriver
- Pliers
- Staple gun
- Staples
Here’s what we did:
- Found a pallet big enough for the base. Because we only have three ducks, our coop didn’t need to be as big as the chicken coop.
- Stockpiled other pallets. We used a sawzall reciprocating saw to take them apart. This method made it not necessary to remove the nails – we just sawed through them.
- Next, we framed in the coop, angling the roof for easy snow removal. The roof was a single piece of plywood – the standard size from Home Depot ended up fitting perfectly without any extra sawing.
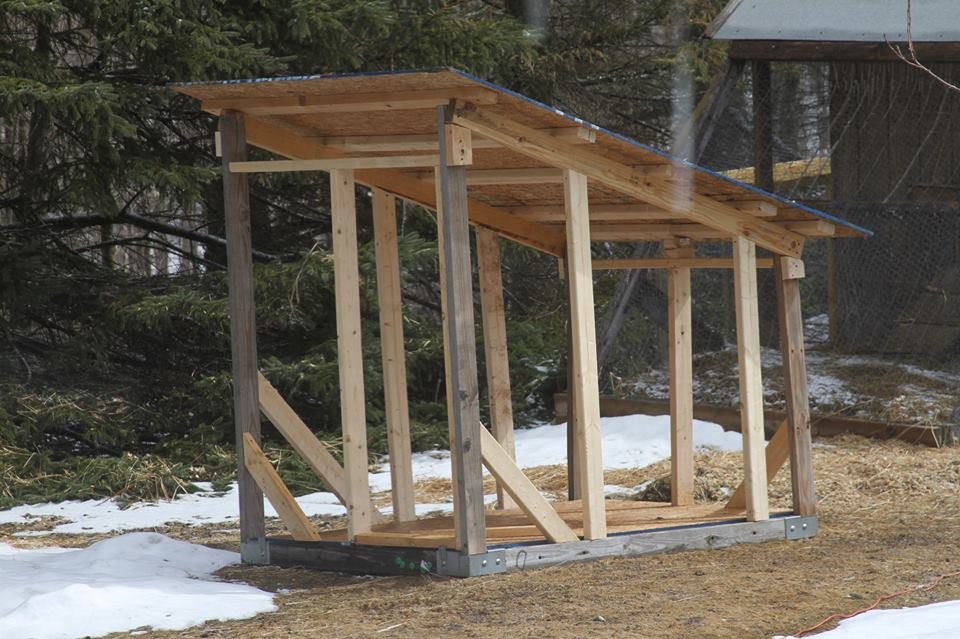
- With a pile of pallet wood already disassembled, we nailed the boards to the frame.
- On the interior, we lined the walls and ceiling with insulation before covering that with plywood.
- Once the structure was solid, we built simple doors: one big enough for us to get into the coop for cleaning and feeding and another smaller door on the other side to let the ducks in and out.
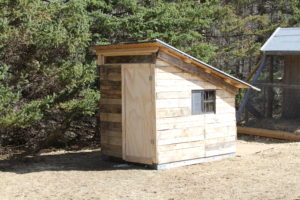
- Install thick linoleum floor to keep the place waterproof. Like I said above, ducks are messy. In fact, keep the water source out in the attached yard of the coop to minimize water inside.
- Framing in the outside yard was a matter of simply following the roof line and using some 2x4s and chicken wire.
- The final step was lining the inside of the coop with pine chips and hanging the feeder in the corner.

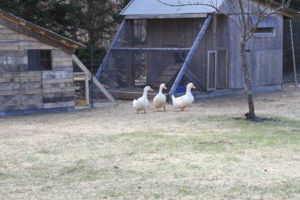
When it was time for the ducks to move out of my living room and into their coop, I’d been looking forward to it for a while. And I’d like to think that they were, too, considering how pleased they were with their new digs. That night, the silence in the house was absolutely priceless.
Kristen A. Schmitt writes about wildlife, sustainable agriculture, environmental issues and the outdoors. Her work has appeared in National Geographic, Fast Company, Audubon, Eating Well,USA Today, Hunt & Fish and others. Follow her @Kristen_Schmitt.
5 Tips For Capturing Unique Trail Camera Photos
July 24th, 2016 by BTC Editor

Using trail cameras to scout for wildlife can be rewarding in more ways than one. The most obvious reason to use a trail camera is to pattern and age deer so you have a better idea of where to hunt and which deer you would like to harvest. Aside from hunting purposes, my favorite use of a trail camera is just to get good, unique pictures of a variety of different wildlife. Targeting a specific species and getting quality pictures at the same time can often be challenging, but I have a few tips I’d like to pass along that have helped me get some interesting shots
- Explore
Explore your property to find spots you think are unique, pretty or have a good view. Find a spot you like, hang a trail camera and see what shows up! Our property has an old rock wall that has turned out to be a neat spot for pictures. It’s not a spot that has a ton of wildlife activity, but when they do show up I love the shots that I get. Here is a shot from this spot:

2. Water
Animals are drawn to water. Ponds and creek crossing are a couple of my favorite spots to hang a camera because of the wide variety of animals that show up there. Creek crossings are where I tend to get the most pictures of predators like bobcats, foxes, and coyotes. Turkeys and deer often show up there as well, making for some great photos.
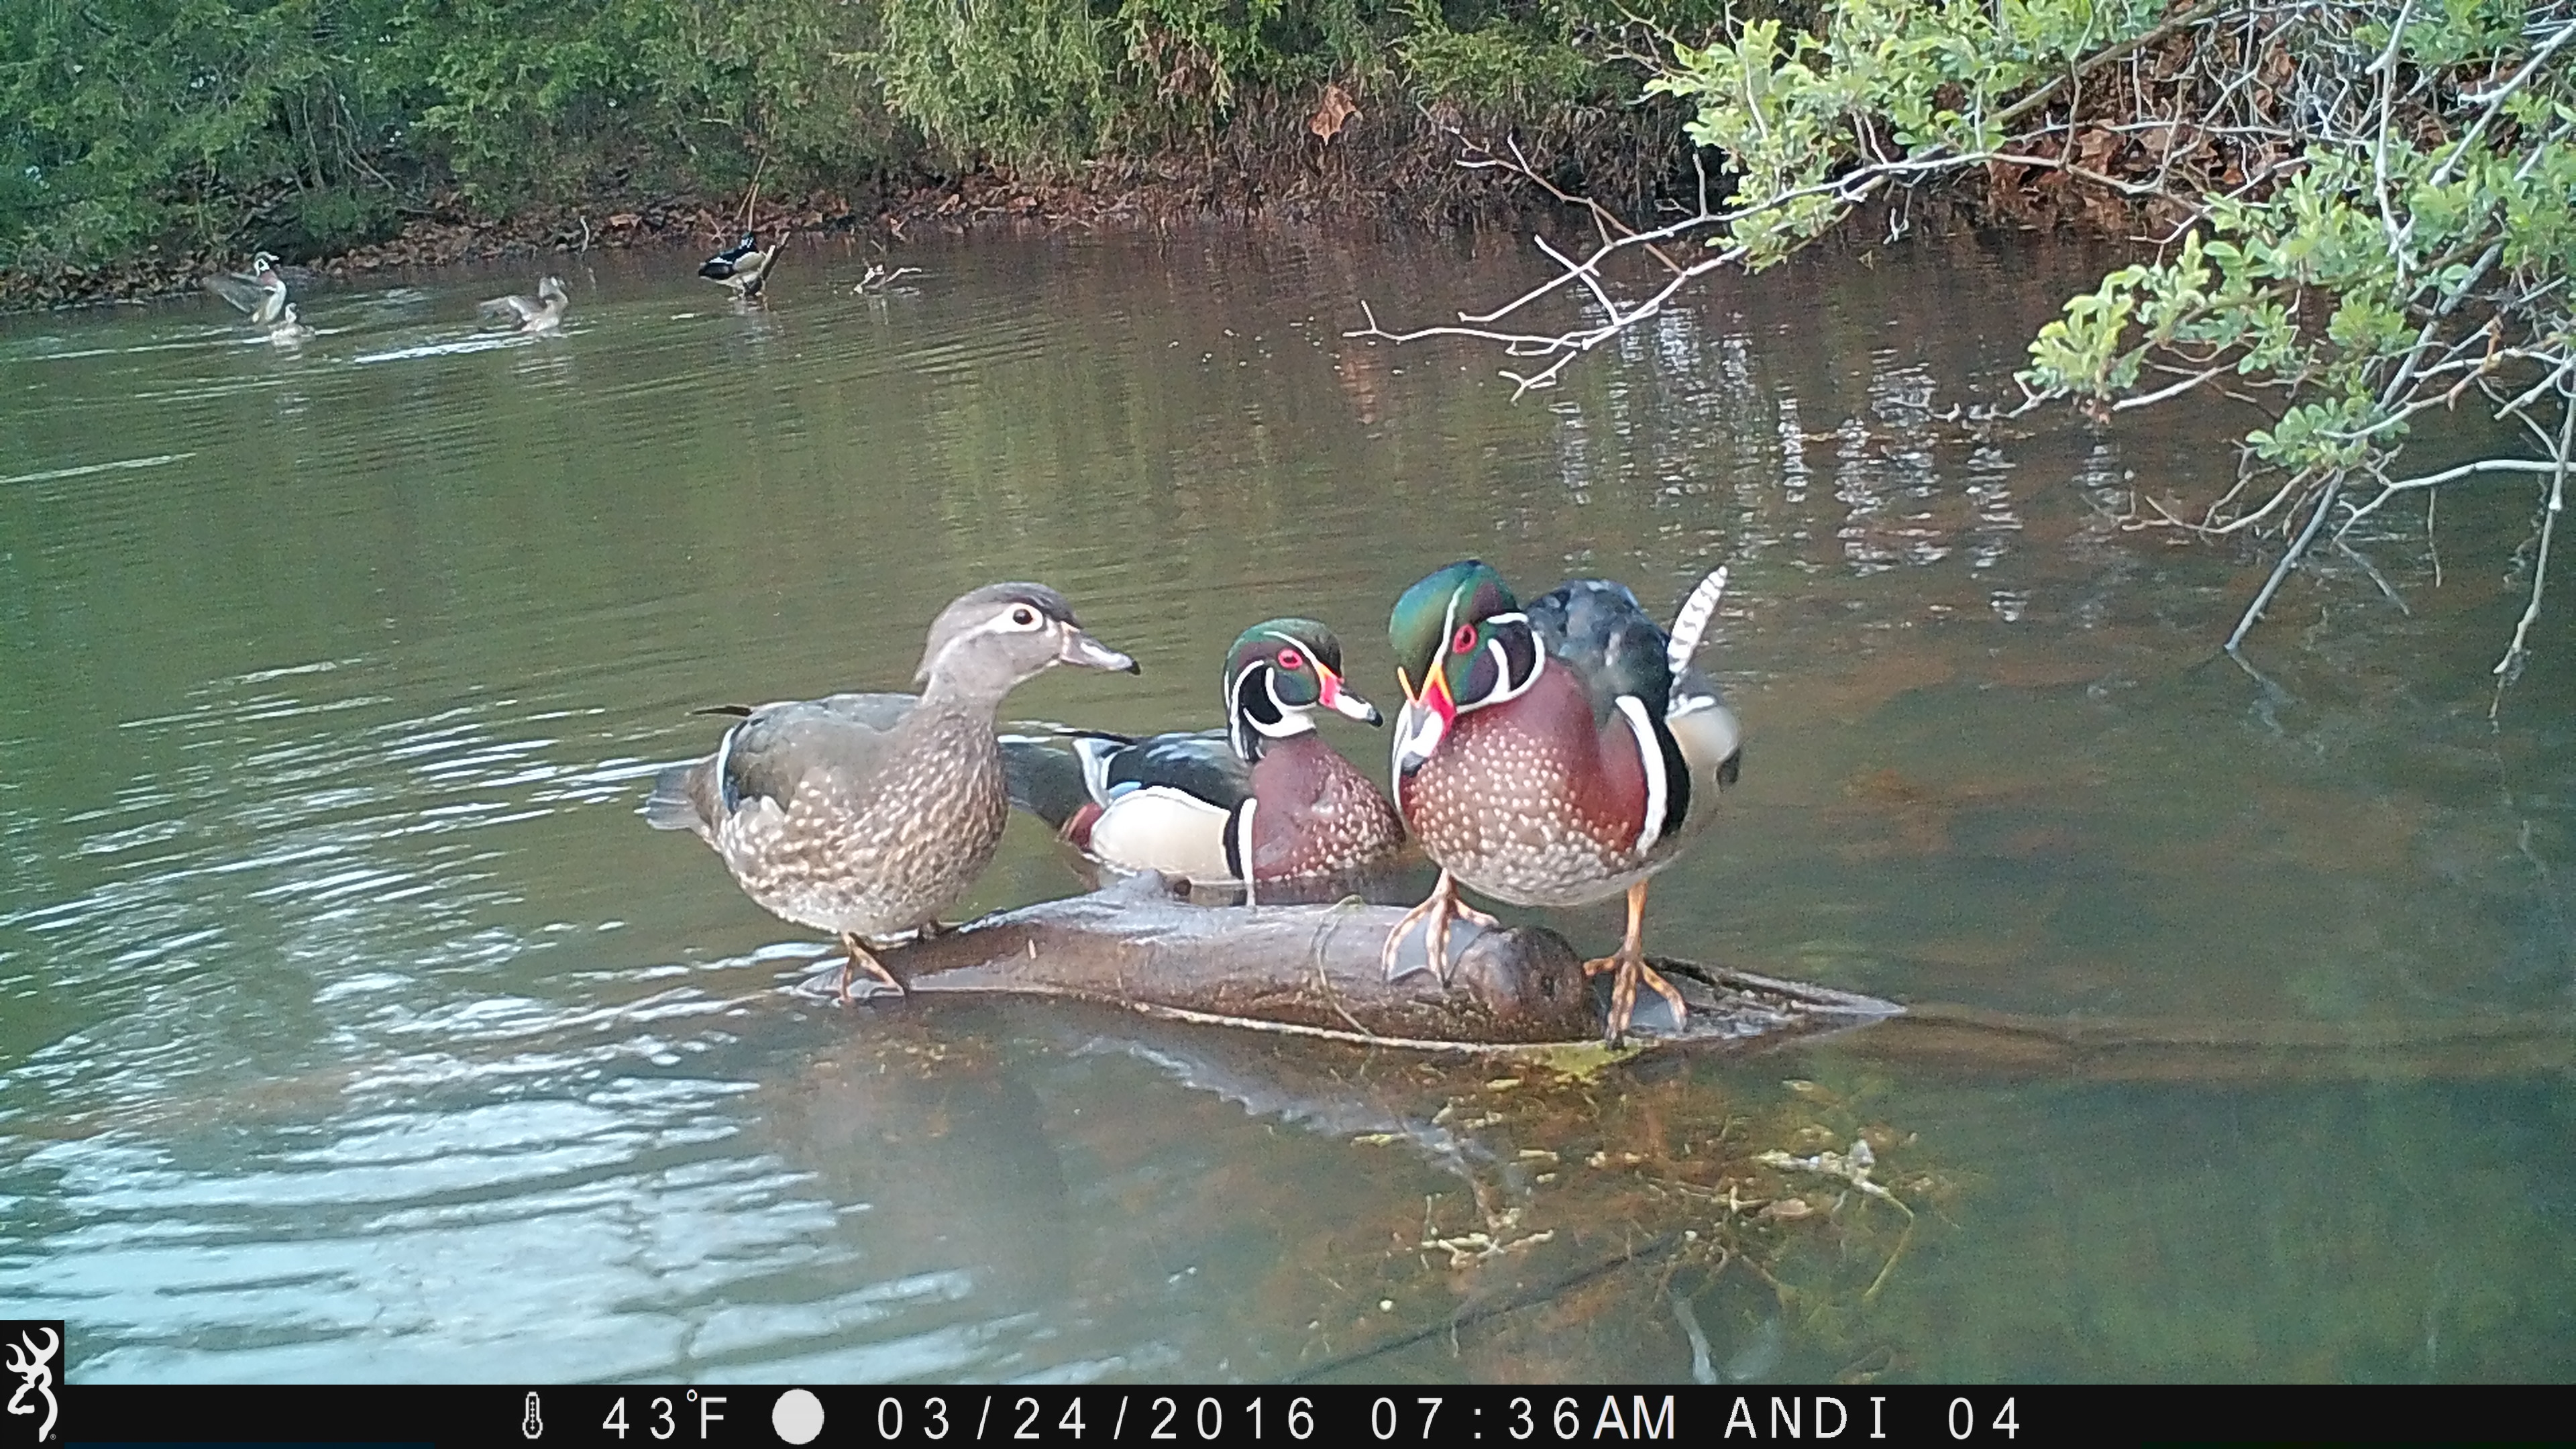
A pond is my favorite location in late winter and early spring to get pictures of waterfowl. A pond setup can be tricky, but placing a camera in front of logs or big rocks that stick up out of the water is what worked best for me, as the ducks seemed to hang out on those quite often.
3. Details
Pay attention to what will be in both the background and foreground of your photos. When trying to get beautiful pictures this is just as important as the wildlife species you’re targeting. For example, tall weeds or plants in front of the camera will block the view of the wildlife and can cause the camera to trigger when the wind blows, getting multiple pictures of just the weeds.
The weeds in the photo below get out of control really quickly in the summer and spring months and have to be mowed down often when putting trail cameras in this spot.
One of my favorite cameras, the Browning Spec Ops Full HD, has a 2” color view screen that can not only be used to view photos & videos in the field, it can also be used as a “live view” while positioning your camera. This helps ensure the images turn out how I envision them and keeps me from having to reposition the camera over and over again to get the shots I want.
4. Accessorize
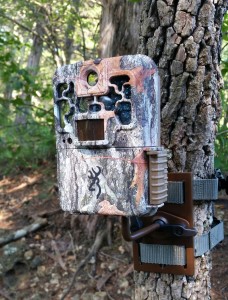
A camera tree mount is worth its weight in gold when it comes to getting good quality photos. Having a perfect tree to hang a camera on is not always an option. The Browning Trail Cameras Tree Mounts really help with positioning the camera and getting that perfect camera angle, especially when your only spot to hang a camera is in a crooked tree.
5. Experiment
Getting great trail camera photos will often require a lot of experimentation. Utilize the different options available on your cameras and play around with it until you figure out what works best for your setup and for the species you’re targeting.
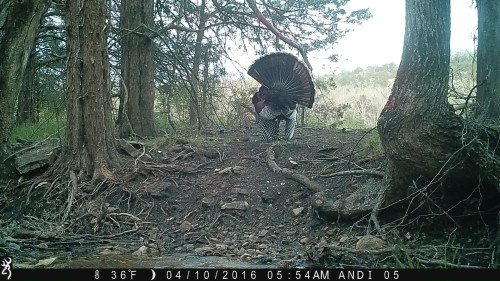
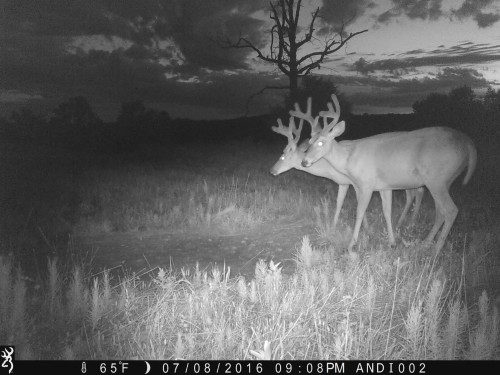
For turkeys, I’ve found that I love the Rapid-Fire mode on my Browning Recon Force, which takes a burst of 8 images in 2 seconds. It helped capture some neat shots of them spreading their wings and flying.

Timelapse mode is great for watching larger areas, like fields and food plots. In such a big open area the wildlife may not always walk right by your camera and set off the trigger, but that doesn’t mean they aren’t there. Timelapse mode will take a picture at set intervals (every 10 seconds, for example), allowing you to watch the animals that may be too far away to trigger your camera. This can help you decide where you would like to place a camera next to get more up close shots of the wildlife. Images from timelapse mode can be viewed quickly and easily, as all Browning Trail Cameras include the Buck Watch Timelapse Viewer Plus software that allows you to view a full day of activity in minutes.
Trail cameras are a great scouting tool, but don’t overlook how fun they can be even when there is no hunting season open! Getting photos of bobcats, foxes, waterfowl and turkeys in the spring and summer can be just as rewarding as getting photos of a nice buck in the fall. Plus, it extends your time outdoors and gives you something to do while waiting for deer season to come around again. It can be difficult at times, but it’s worth it when you get that one in a million shot.
Do you have any tips or tricks for getting unique trail camera photos? Share them with us by leaving a comment!
Andrea Haas
Andrea Haas is a Pro-Staffer from Missouri who enjoys turkey hunting, deer hunting and bowhunting. She is also the founder of the Huntress View, an organization formed to help strengthen the ever growing community of women hunters.
