Taxidermy: Caring For Your Animal Pre-Mount
November 6th, 2016 by BTC Editor
As hunters and huntresses, we sometimes harvest that special animal that may be a first, a big buck, big fish, or beautifully plumed bird to get preserved and hang on the wall as a trophy. When you have that trophy in hand, what are the next steps to take to make sure it is properly cared for until it is safely in the hands of the taxidermist, and how do we care for the mounts when we get them back?
Growing up in a taxidermy family, I have seen everything from freezer burns and premature decay to faded and bug infested mounts. The care of an animal before and after it is mounted is key in keeping it beautiful for many, many years.
One of the first and very best things you can do before going afield is research taxidermists in your area and find one you are comfortable with. Most taxidermists will welcome you into their shops and showrooms that showcase their work. Talk to other hunters and find out what taxidermists they recommend. Do not go with the cheapest option because the mount will more than likely be poor quality. Bottom line, you’re going to get what you pay for.
Before the animal is mounted and before you are able to get it to the taxidermist, proper storage in the freezer is crucial to producing a good mount. Freezer burns are a common result of improper packing. On the other end, not getting the animal in the freezer soon enough can result in premature decay.
Mammal, bird and fish taxidermy are very different, so the way they are taken to the taxidermist will be different. When you collect any mammal, the first thing to know for field care is to avoid dragging the animal if at all possible. There are many tools/equipment out there to help you transport your animal. The second thing to know is to keep the animal cool until you can get it skinned or to the taxidermy shop no matter what kind of animal it is. Always consult with the taxidermist before skinning it. The quickest way to ruin a trophy is to skin it wrong. You may also want to wash off any excess blood or body fluids prior to freezing. The third thing is get it to the taxidermist as soon as possible. Carting a deer around is a bad idea, but a coyote or fox is an even worse idea. As nature rapidly takes it course, bacteria starts to grow as soon as the animal dies and the skin will start ‘turning green’ or rotting.

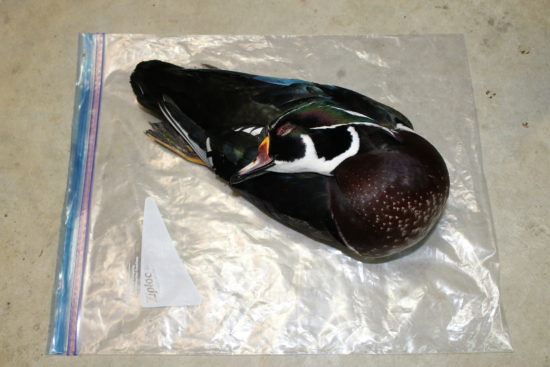
Birds will be put in the freezer exactly like they were shot. It’s not necessary to do any kind of skinning, so don’t take any of the meat or entrails out. The proper freezing position is to put the head on the chest of the bird and wrap it in a couple garbage bags and tightly seal it. Freezer Ziplock bags are also something good to use. Be careful to not bend or twist tail and wing feathers. One common misnomer is to put a bird in nylon hose and wrap it in newspaper. Many taxidermists cringe when a bird is brought to them inside a hose and even worse wrapped in newspaper. Newspaper will begin the process of dehydration and promote freezer burn, making the taxidermists job more difficult. Once you get a properly wrapped bird in the freezer, call your taxidermist and make arrangements to take it to them.
Fish have a completely different scenario than mammals and birds. The very first thing you should do when you pull the fish out of the water is take good quality, clear pictures of it. Take an overall profile picture and make sure to get any special markings or colors you want the finished mount to have. If you’re going to release the fish, measure it from the tip of the nose to the tip of the tail and the girth all around the body of the fish. If you are keeping the fish, do not skin or gut it and don’t put it on a stringer if you don’t absolutely have to. The best place to keep it is in a cooler or live well until it can be put in a freezer. When you’re ready to freeze it, get a wet t-shirt or towel and roll the fish in it. Wet towels or shirts are key in protecting the fish from freezer burn. Never use newspapers or paper towels. Put the wrapped fish into a trash bag and seal it tight. If you need to, double bag it. If it’s possible, freeze it on a flat board.
Try to have an idea of the position you want your animal mounted in. It will be that way forever. The taxidermist may be able to provide some ideas of positioning, but to avoid delays it is best to know what you want ahead of time.
When you see your mount for the first time, the memories come flooding back. You want it to look like that forever right? When placing your mount in your home, the best thing you can do is to keep it out of sunlight to prevent colors from fading and keep it dusted. Just like anything else sitting on the shelf, it will collect dust. Consult with your taxidermist about what is best to use for cleaning your particular mount. For fish and birds, a feather duster is most likely to be recommended along with never using any chemicals, as they will build up over time and cannot be removed. Dusting also applies to deer, however, some hair care type products are available.
Hopefully these tips will aid you in the process of preserving that special animal you were able to harvest, and to keep the memories of a hunt alive for years to come.
By Allison Stegmann
Allison is an avid waterfowl hunter from Iowa. She is currently a student at the University of Northern Iowa studying Leisure, Youth, and Human Services with an emphasis in Outdoor Recreation. Allison is also a member of of Huntress View, a team dedicated to strengthening the ever-growing community of women hunters.
Raising Chickens and Ducks
October 24th, 2016 by BTC Editor
Raising chickens and ducks (or the benefits of getting them out of your house by building a coop)
By Kristen A. Schmitt
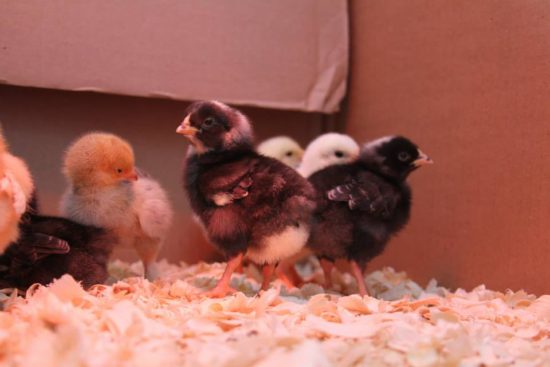
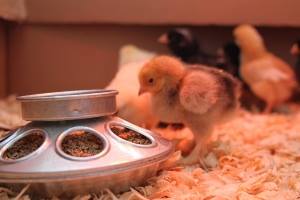
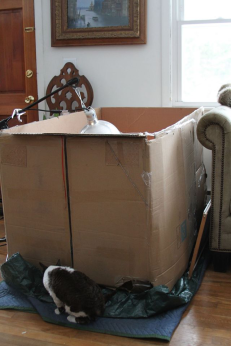
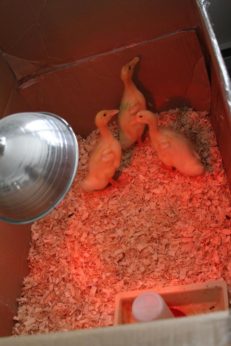
When we moved from city to country, we knew one thing: we wanted chickens. Organic eggs were expensive enough and already a big part of our lives. From both a cost and food standpoint it made sense to raise laying hens ourselves. Before long, we had 12 chicks nestled in a box in our living room that scratched and chirped in their nest of pine shavings, creating a dust storm that coated nearly every surface imaginable. Because it was only March – and they were only a few days old – we couldn’t exactly transport them outside. So we made due with our new chirpy acquaintances over the next couple of months.
Raising chickens isn’t rocket science. But if you haven’t done it before, here’s what you need to get started:
- Cardboard box (how big depends on how many chicks you have)
- Pine chips
- Heat lamp
- Food (chick starter is available at Tractor Supply)
- Food dish
- Water dish
- Water
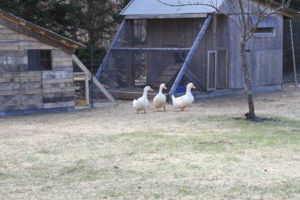
We weathered an indoor tiny rooster escape (he hung out under our piano feebly cockadoodling for about an hour before I could grab him and put him back in the box) and plenty of soggy pine chips, but, for the most part, once they were about six weeks old – and the weather was warm enough – we transitioned them out to their coop (bought off of craigslist from a local farmer). Since then, they have been pretty much maintenance free and even moved with us from Vermont to upstate New York this summer. While we left their digs behind, we’ve since converted a stall in our barn for the “girls” and they have adjusted easily to their new space.
And then there were ducks
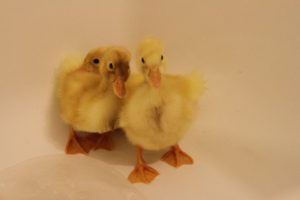
Last spring, we were so over winter – so much so that during a routine Tractor Supply stop to pick up chicken feed and dog food, we ended up with a rather odd impulse purchase: three tiny ducklings. They were a spring preview, so to speak, because even though there was still snow on the ground, the fact that ducklings were available for $2.49 each meant that warmer weather was just around the corner.
We didn’t anticipate a few things with our impulse buy:
- Ducks grow faster than chickens. They quickly outgrew the medium-sized box we had for them and, soon, we had a refrigerator box in our living room.
- Ducks are messy. Not only do they tip and spill water (so that we also had a tarp under the box in the living room), but they spent time in our bathtub, getting used to swimming. Cleanup afterwards was never a fun chore.
- Ducks are loud. Every night at 2 a.m. or so, they would start quacking. While we were thankful that our daughter managed to sleep through it, it drove my husband and me absolutely crazy.
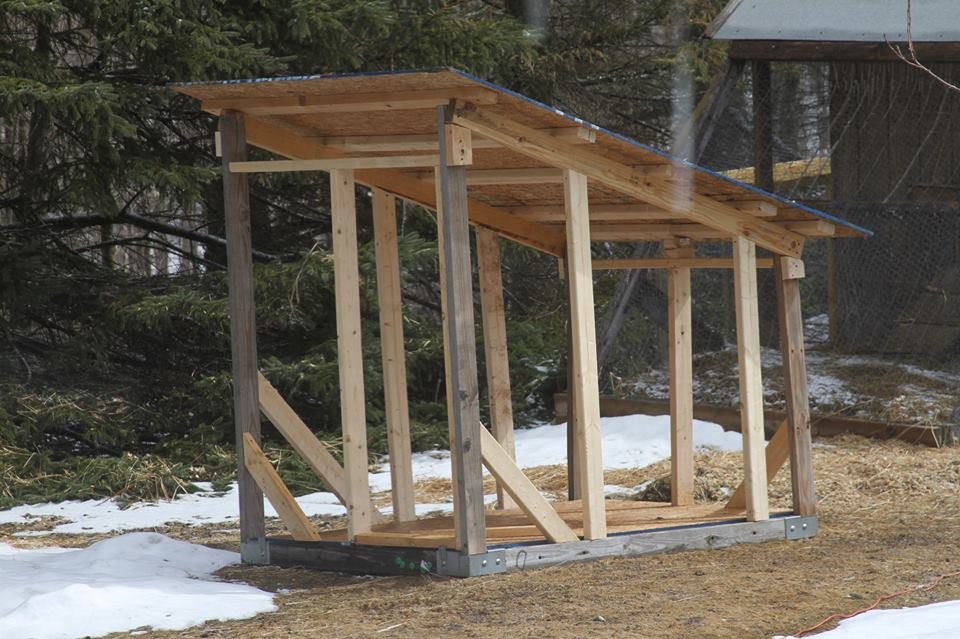
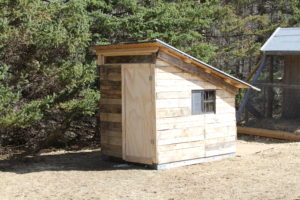
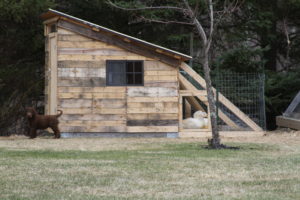
After a few weeks, I was counting down the days to spring thaw and a duck coop. While coop design can range from geodesic dome to princess castle, we went with a basic do-it-yourself concept that primarily utilized pallet wood and ended up looking rather rustic chic.
Supplies:
- Pallets
- Foam insulation
- Lumber for door and additional framing of structure (including outside attached yard if building one)
- Plywood for roof and interior to cover insulation
- Roofing material
- Linoleum for floor (ducks are messy)
- Door hardware
- Chicken wire (for outside attached yard)
Tools:
- Sawzall reciprocating saw with bi-metal blade
- Hammer
- Nails
- Power screwdriver
- Pliers
- Staple gun
- Staples
Here’s what we did:
- Found a pallet big enough for the base. Because we only have three ducks, our coop didn’t need to be as big as the chicken coop.
- Stockpiled other pallets. We used a sawzall reciprocating saw to take them apart. This method made it not necessary to remove the nails – we just sawed through them.
- Next, we framed in the coop, angling the roof for easy snow removal. The roof was a single piece of plywood – the standard size from Home Depot ended up fitting perfectly without any extra sawing.
- With a pile of pallet wood already disassembled, we nailed the boards to the frame.
- On the interior, we lined the walls and ceiling with insulation before covering that with plywood.
- Once the structure was solid, we built simple doors: one big enough for us to get into the coop for cleaning and feeding and another smaller door on the other side to let the ducks in and out.
- Install thick linoleum floor to keep the place waterproof. Like I said above, ducks are messy. In fact, keep the water source out in the attached yard of the coop to minimize water inside.
- Framing in the outside yard was a matter of simply following the roof line and using some 2x4s and chicken wire.
- The final step was lining the inside of the coop with pine chips and hanging the feeder in the corner.

When it was time for the ducks to move out of my living room and into their coop, I’d been looking forward to it for a while. And I’d like to think that they were, too, considering how pleased they were with their new digs. That night, the silence in the house was absolutely priceless.
Kristen A. Schmitt writes about wildlife, sustainable agriculture, environmental issues and the outdoors. Her work has appeared in National Geographic, Fast Company, Audubon, Eating Well,USA Today, Hunt & Fish and others. Follow her @Kristen_Schmitt.
