Raising Chickens and Ducks
October 24th, 2016 by BTC Editor
Raising chickens and ducks (or the benefits of getting them out of your house by building a coop)
By Kristen A. Schmitt
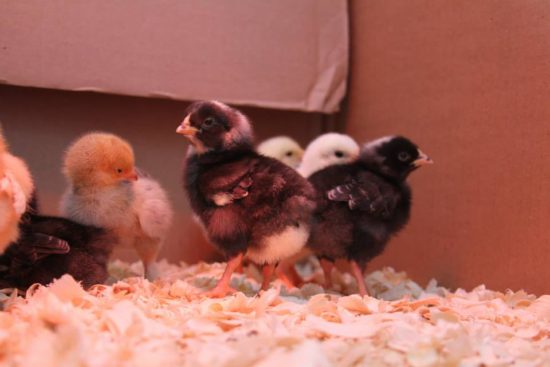
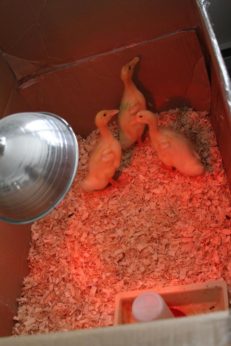
When we moved from city to country, we knew one thing: we wanted chickens. Organic eggs were expensive enough and already a big part of our lives. From both a cost and food standpoint it made sense to raise laying hens ourselves. Before long, we had 12 chicks nestled in a box in our living room that scratched and chirped in their nest of pine shavings, creating a dust storm that coated nearly every surface imaginable. Because it was only March – and they were only a few days old – we couldn’t exactly transport them outside. So we made due with our new chirpy acquaintances over the next couple of months.
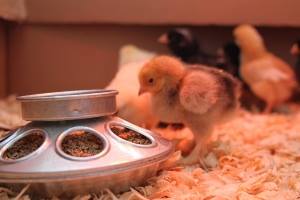
Raising chickens isn’t rocket science. But if you haven’t done it before, here’s what you need to get started:
- Cardboard box (how big depends on how many chicks you have)
- Pine chips
- Heat lamp
- Food (chick starter is available at Tractor Supply)
- Food dish
- Water dish
- Water
We weathered an indoor tiny rooster escape (he hung out under our piano feebly cockadoodling for about an hour before I could grab him and put him back in the box) and plenty of soggy pine chips, but, for the most part, once they were about six weeks old – and the weather was warm enough – we transitioned them out to their coop (bought off of craigslist from a local farmer). Since then, they have been pretty much maintenance free and even moved with us from Vermont to upstate New York this summer. While we left their digs behind, we’ve since converted a stall in our barn for the “girls” and they have adjusted easily to their new space.
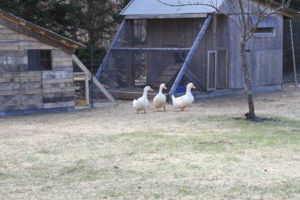
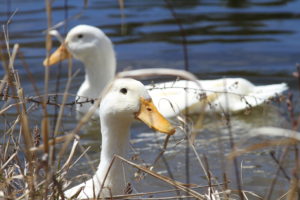
And then there were ducks
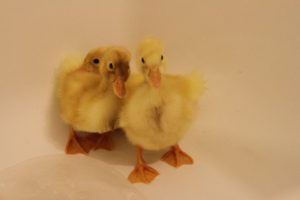
Last spring, we were so over winter – so much so that during a routine Tractor Supply stop to pick up chicken feed and dog food, we ended up with a rather odd impulse purchase: three tiny ducklings. They were a spring preview, so to speak, because even though there was still snow on the ground, the fact that ducklings were available for $2.49 each meant that warmer weather was just around the corner.
We didn’t anticipate a few things with our impulse buy:
- Ducks grow faster than chickens. They quickly outgrew the medium-sized box we had for them and, soon, we had a refrigerator box in our living room.
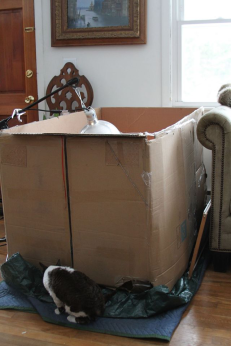
- Ducks are messy. Not only do they tip and spill water (so that we also had a tarp under the box in the living room), but they spent time in our bathtub, getting used to swimming. Cleanup afterwards was never a fun chore.
- Ducks are loud. Every night at 2 a.m. or so, they would start quacking. While we were thankful that our daughter managed to sleep through it, it drove my husband and me absolutely crazy.
After a few weeks, I was counting down the days to spring thaw and a duck coop. While coop design can range from geodesic dome to princess castle, we went with a basic do-it-yourself concept that primarily utilized pallet wood and ended up looking rather rustic chic.
Supplies:
- Pallets
- Foam insulation
- Lumber for door and additional framing of structure (including outside attached yard if building one)
- Plywood for roof and interior to cover insulation
- Roofing material
- Linoleum for floor (ducks are messy)
- Door hardware
- Chicken wire (for outside attached yard)
Tools:
- Sawzall reciprocating saw with bi-metal blade
- Hammer
- Nails
- Power screwdriver
- Pliers
- Staple gun
- Staples
Here’s what we did:
- Found a pallet big enough for the base. Because we only have three ducks, our coop didn’t need to be as big as the chicken coop.
- Stockpiled other pallets. We used a sawzall reciprocating saw to take them apart. This method made it not necessary to remove the nails – we just sawed through them.
- Next, we framed in the coop, angling the roof for easy snow removal. The roof was a single piece of plywood – the standard size from Home Depot ended up fitting perfectly without any extra sawing.
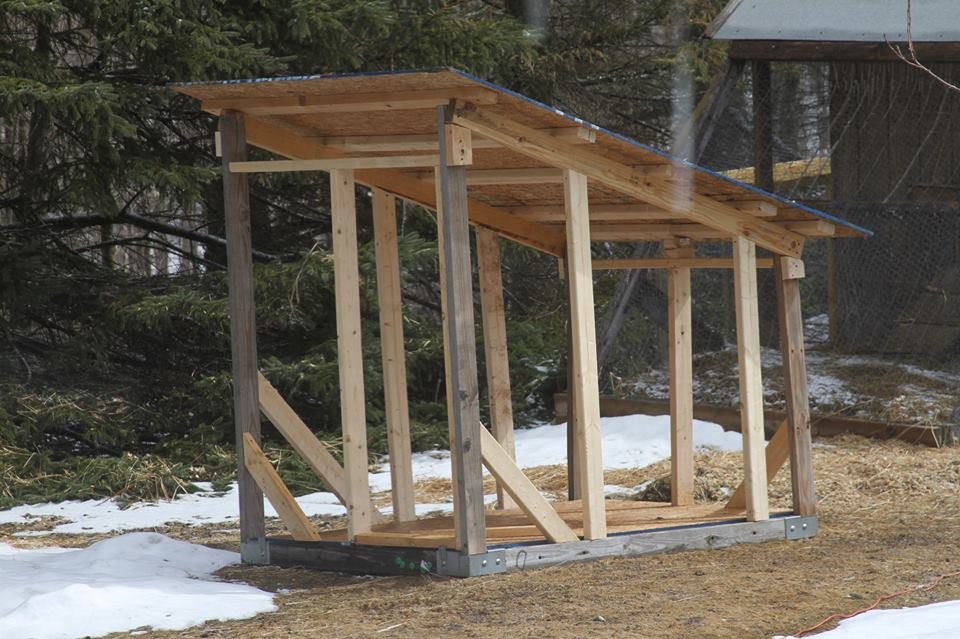
- With a pile of pallet wood already disassembled, we nailed the boards to the frame.
- On the interior, we lined the walls and ceiling with insulation before covering that with plywood.
- Once the structure was solid, we built simple doors: one big enough for us to get into the coop for cleaning and feeding and another smaller door on the other side to let the ducks in and out.
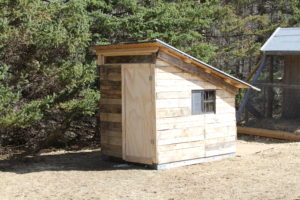
- Install thick linoleum floor to keep the place waterproof. Like I said above, ducks are messy. In fact, keep the water source out in the attached yard of the coop to minimize water inside.
- Framing in the outside yard was a matter of simply following the roof line and using some 2x4s and chicken wire.
- The final step was lining the inside of the coop with pine chips and hanging the feeder in the corner.

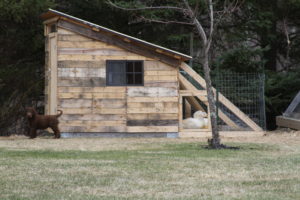
When it was time for the ducks to move out of my living room and into their coop, I’d been looking forward to it for a while. And I’d like to think that they were, too, considering how pleased they were with their new digs. That night, the silence in the house was absolutely priceless.
Kristen A. Schmitt writes about wildlife, sustainable agriculture, environmental issues and the outdoors. Her work has appeared in National Geographic, Fast Company, Audubon, Eating Well,USA Today, Hunt & Fish and others. Follow her @Kristen_Schmitt.
Early Season Bowhunting Tactics
October 2nd, 2016 by BTC Editor
By Greg Staggs
I turned and idled gently up the drive, palms getting clammy even as my breathing became shallower. Easing my truck to a stop, I quietly reached down and turned off the ignition and allowed the silence to envelope me. Going over my planned routine seemed to settle me a bit, and I took one last deep breath and opened the door. I had been thinking about this moment for weeks and it was finally here. Sliding off my seat, I walked as confidently as I could up to the door, knocked and asked if my date was ready.
First dates in high school probably provided as much nervous anticipation as anything I would experience for the first part of my life… until I started bowhunting. Today, I still idle gently into my parking spot. My palms may not be as clammy, but my senses are definitely heightened as adrenaline courses through my veins, thinking about the possibilities, the “what-ifs”… And my planned routine? It’s down to a science.
Chasing whitetails across the Midwest in September and October is truly a love of my life these days. Here are three things that have become a part of my routine that’s led to years of punched tags and filled freezers early in the season.
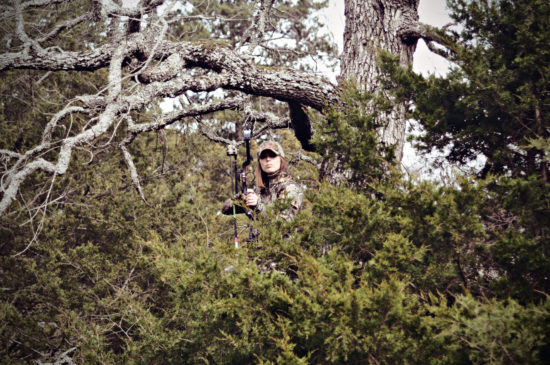
- Scout with a light footprint. Amazingly enough, I don’t spend a lot of time in the woods in the summer. Most of my whitetail hunting is done on public land with miles of corn and soybeans backing up to the woods. I’ve spent many a night tucked into a fence row on the opposite side of a field glassing to identify which corners the deer are using to enter the fields.
- Stay away as much as possible. If I can place a trail camera there on one visit and retrieve a card from it a month later, it’s harder for the deer to pattern me but I’m gaining valuable reconnaissance the whole time I wasn’t there. Taking it a step further, even my trail-camera placement leaves little presence. Ever walked into the woods and noticed a camera staring at you at eye-level? It can be obtrusive and stick out like a sore thumb. I’ve had deer think the same thing; I can tell by their reactions I’ve captured. A lot of times these days – especially on public land – I’ll take a lightweight climber with me and angle my camera down from twelve feet or so. It also keeps honest people honest, as my Dad used to say.
- Hunt with a light footprint. The first couple months of archery seasons in the Midwest can be downright hot. Deer don’t like to travel any farther than they have to, which means they’ll often bed less than 100 yards inside the woodline. If you plan to dive deeper in the woods this time of year, plan on bumping some deer. I’d rather sneak in and out of the edge a few times than blunder up once and alert every deer in the woods to your presence – especially a full month ahead of that magical November time-frame.
Greg Staggs is the former back-page columnist for Inside Archery, and his writing regularly appears in such magazines as Outdoor Life and Petersen’s Bowhunting. Staggs loves introducing his two boys to all things outdoors, including fishing, trapping, canoeing and camping, and has been chasing turkeys and big game exclusively with archery equipment for over 20 years.
Archery Tips with Levi Morgan
September 18th, 2016 by BTC Editor
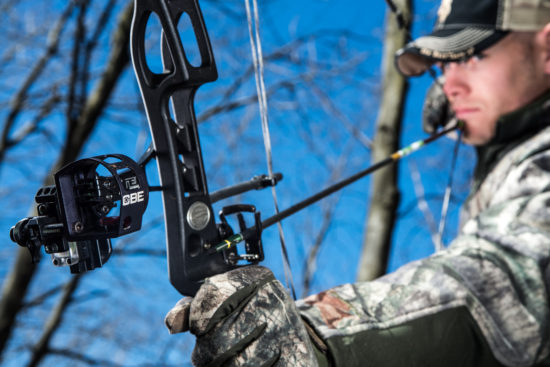
BTC: What steps do you go through mentally when you draw back on an animal to ensure your form is right and to help calm your nerves?
Levi: You know it’s funny, I don’t think. I think it’s all in practice when you do that because everybody, including myself, when you get out there in the woods and that buck of a lifetime steps out, no matter how hard I try or how much I tell myself, “Hey, I’m going to really slow down next time and I’m going to think about what I’m doing”, I look back and go “Man, that was a blur. You know, I don’t even remember that.” I don’t remember what I did, I don’t remember why I did it, so I think It’s so important to not just get your bow and go out and shoot just once every couple of weeks or get it & take it out 3 weeks before season, because you have to create that muscle memory and teach yourself to slow down and practice.
One thing I do is hunt with a caliper release. When a big deer would come out, I would draw back and get in such a hurry that when my pin got there I would just press the release off. I wasn’t really freaking out or anything, but I was rushing the shot every time. I was afraid the deer was going to run or it was going to see me, I was just nervous. So when I need to slow myself down, I started hunting with what’s called a back-tension release, or a hinge release, which forces you to slow down. You can’t shoot it fast or it’s an epic fail, so it forced me to slow down.
I really feel like it’s easy to say, I’m going to think about all these different steps when a big buck comes out. But the truth of the matter is, I really feel like people are going to do what comes naturally to them, which is why I think it’s so important beforehand to be prepared and have your equipment fit you perfect. Really get to know it and shoot it all the time because when you get nervous and everything goes blank, you’re going to revert back to what you do naturally with that bow and the way you practice with it. I really think that’s the best way to be prepared for the moment of truth.
Also, when I’m sitting in the stand or when I’m out hunting sheep, I imagine opportunities happening. For instance, if a buck comes down that trail, where am I going to shoot him at? Where am I going to stop him at? How is he going to be angled if he’s on that trail or if he walks out into the food plot? I try to imagine every scenario that could happen to me while I’m sitting there or while I’m hiking so when it does happen I’ve already kind of played it out in my mind that I’m going to stop him here and he’s going to be perfectly broadside or a little quartered away.
Obviously in hunting, you never know what’s going to happen, but that has helped me before. Nothing is as important as just being really prepared.
BTC: A lot of archers and bow hunters struggle with target panic. What advice do you have on how to overcome this?
Levi: Target panic is probably the most common thing in archery. I think almost everybody has been through it at one time or another if they’ve shot a bow long enough. There are so many causes of it and because of that there are a lot of cures. I think some of the main causes of target panic are too heavy poundage, too long of a draw length, or not having equipment that fits you. Also things like your peep being too small and things in your sights that are making you too uncomfortable, for example your pins being too small to see, the target being blurry…All of those things can cause it.
Another major cause is holding your breath when you shoot. I’ve talked to professional fighters and doctors about that. When you hold your breath the first muscle that starts to break down is your eyes. That’s a huge cause of target panic so that’s why it’s so important to keep breathing. I’ve seen people pull back, hold their breath and aim too long and just feeling like they HAVE to shoot now. That’s really all that target panic is, no matter what the cause, is when the pin hits the target they feel like they have to shoot now.
I think the best cure for target panic is to stand in your yard, pull back and aim at the target with your arrow loaded and finger on the release. Put your pin in the middle and leave it there but don’t shoot the arrow. When your pin starts to go, let it down. Take a few seconds to regroup, then pull back and aim at the target and let down again without shooting. Do that over and over for however long you normally practice for about a week or so. All that’s doing is letting your mind know, “It’s ok for my pin to sit there. I’m in control. I don’t have to fire this shot”. Also what it’s going to do, is you’re going to aim at the middle longer and longer, allowing you to build up that confidence and stamina to keep your pin in the middle longer to let you execute that perfect shot.
I think that’s one of the best drills there is. It lets you just focus on aiming, relaxes your mind and lets yourself know that it’s ok to aim at the target and not fire that arrow as soon as the pin gets in the middle.
BTC: What are some of the bad habits you’ve had as an archer and what helped you the most in overcoming them?
Levi: I think my worst habit, as a hunter and shooter, is when I get in a hurry. I go out and practice just to be practicing. Practicing numb is what I call it. I think when you stop trying to get better, you’re going backwards. For me, I think it’s really important to count on myself, even in practice. I don’t go out and shoot at 30 or 40 yards at the same dot every day. I try to challenge myself, whether that’s moving back further distances or trying to hit so many arrows in a row on a certain dot. Whatever games you can play to make it fun for you, that makes you challenge yourself and keep trying to get better every single time you practice and not get complacent. What should be 4 inch groups at 40 yards may be plenty good to go hunting, but it’s not the best that you can do. I think a lot of people say, “Well that’s good enough”. I’ve heard it so many times. It’s easy to do that when you’re shooting good enough but it’s important I think, for me especially, to keep challenging myself and keep trying to shoot better groups at further distances and really keep it fun and interesting during practice.
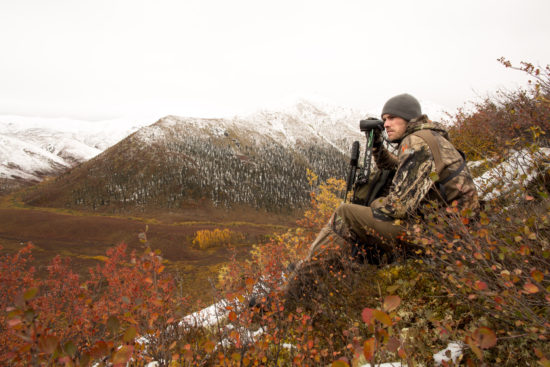
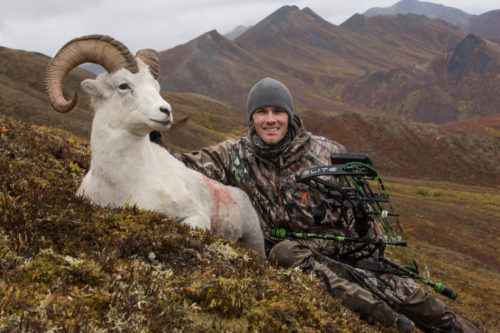
BTC: You’re going to Alaska soon to hunt sheep as part of your quest to complete the Super Slam with your bow. How far are you from completing the Super Slam?
Levi: There’s 29 animals in the Super Slam and I have killed 17 of the 29 with a bow, so I’ve got 12 left.
BTC: Which animal has been your favorite to hunt so far?
Levi: Probably my Dall Sheep in the Yukon. It was the hardest. I guess it felt the best when it was over. It was the most satisfying when the hunt was done because of how hard we had to work. We spent 14 days on horseback (The episode just aired the evening we talked on the Sportsmen Channel).
BTC: Do you have any advice for others who are wanting to complete the Super Slam?
Levi: Yes. Go to their website, www.superslam.org. The first thing I would say to do is to become a member of Super Slam because they give away hunts every month, and these adventure type of hunts are not cheap or easy to go about getting.
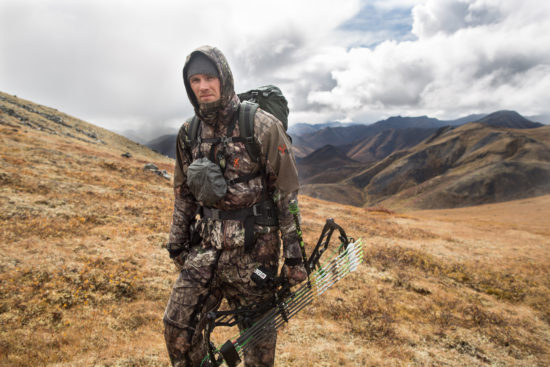
Also, do a lot of research. These are not your normal types of hunts. I grew up a whitetail guy, hunting whitetail in the Midwest. When I started doing these hunts, going to the Arctic, Mexico, the Yukon and all over the world, it was just a wakeup call on what gear I needed and how little I actually knew about my equipment. I think it really teaches you a lot when you go to those places and you’re riding on a horse for 14 days. You never know when something can go wrong, so get to know your equipment really well, do your research on what you need to take, and don’t cut corners on your gear. The weather is so uncontrollable out there on these adventure hunts.
Dove Hunting Basics
September 17th, 2016 by BTC Editor
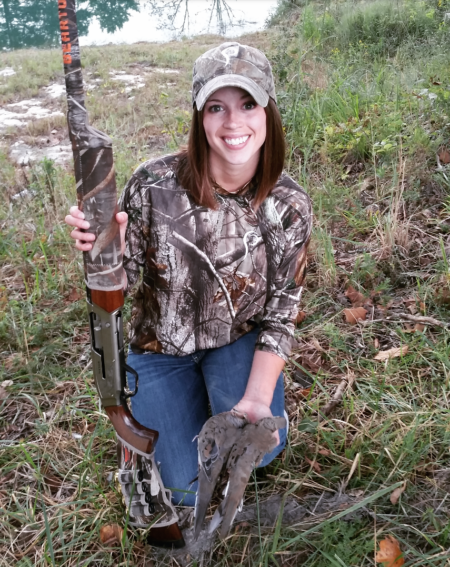
There has always been a lot of excitement surrounding the beginning of fall. Cooler weather, hoodies and bonfires are just a few things we start to hear about around the first of September. But to most hunters, September means dove hunting and marks the beginning of the fall hunting seasons!
For most states, dove season is now underway. If you are thinking about bird hunting for the first time this year, I highly suggest giving dove hunting a try. It’s one of the simplest types of bird hunting to get into, as far as obtaining the proper licenses and the cost of hunting equipment. Plus, the hunting atmosphere is generally pretty carefree and relaxed, which I find is much needed compared to how serious whitetail hunting can become.
Here are a few dove hunting basics to keep in mind when preparing for dove season.
Practice
While I do feel dove hunting is one of the easiest and cheapest types of bird hunting to get into, I think doves are one of the harder game birds to hit. Not only are they small and fast, they zigzag through the sky making for a fun, but challenging hunt.
To prepare for my first dove season I practiced shooting skeet in my backyard prior to the season opener. I was new to bird hunting altogether at that time, so that helped me get more comfortable with handling a shotgun. If you have a sporting clay course near you, that is probably one of the best ways to prepare for shooting live birds since the targets are thrown at varying angles and speeds, simulating a more real-world hunting experience.
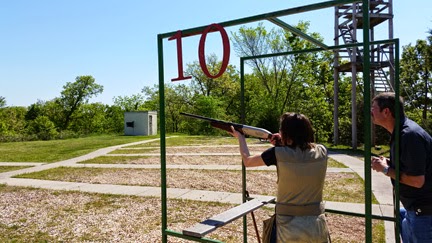
Shooting on a sporting clay course
Licenses and Equipment
For dove hunting you will need a hunting license and Migratory Bird permit, which are both relatively cheap. Always double check with your state conservation department to make sure you have the proper permits.
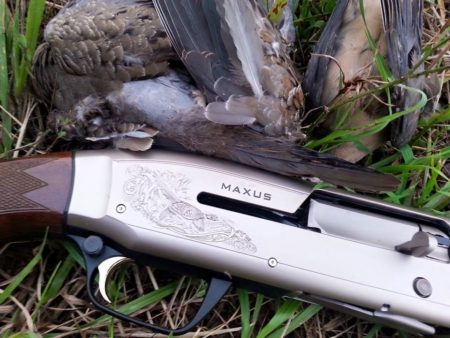
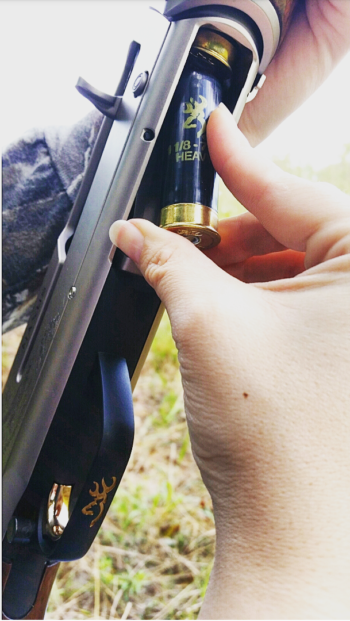
Besides your hunting permits, you will also need a shotgun and shotgun shells. I prefer my auto-loading Browning Maxus shotgun. Again, make sure you check the regulations with your state conservation department. Most states require you to have a plug in your shotgun that won’t allow you to have more than 3 shells in at at time.
A good shotshell size for dove hunting is a 1 or 1-1/8 ounce load of 7 1/2’s, like these shells from Browning Ammo. It really only takes a few pellets to down a dove so you shouldn’t need to go larger than a 7 ½ or 8. Like it or not, with dove hunting you are going to miss sometimes, so always bring more ammo than you think you will need!
You may want to purchase a small stool or seat to sit on while out hunting. When the doves are flying good, you could be out hunting for hours, so you may as well make yourself comfortable and at home! This Dove Shooter Stool from AlpsOutdoorz is a good option. It has a strap that makes it easy to carry to and from the field. There is a cooler underneath the seat so you can bring lunch and keep your drinks cool. It could also double as a way to carry your shells or your doves. The front pockets are great for holding boxes of shotgun shells, or holding a few decoys!
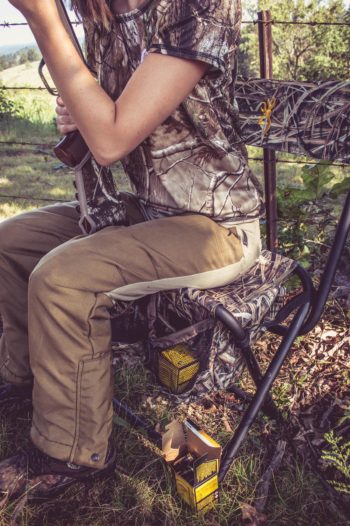
Dove Shooter Stool and Browning Ammo
Decoys
You don’t have to have decoys but they often help bring doves in for a closer shot when they would stay out of shooting range otherwise. Placing a few decoys on open ground, as well as a few on nearby tree branches or a fence row is generally a good setup. When placing decoys on tree limbs, the higher the better. Doves tend to fly into the wind, so you’ll want to place your decoys facing that way.
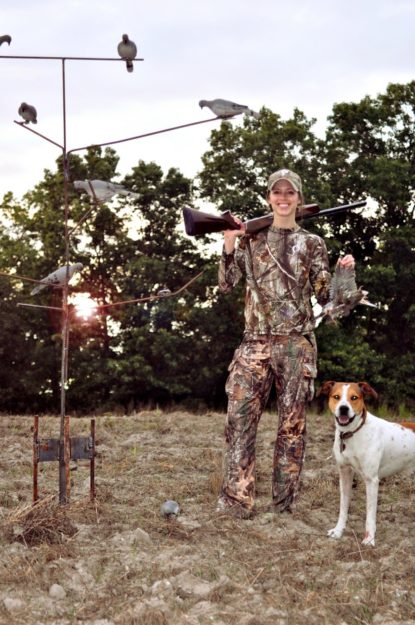
Concealment
Doves have good eyesight so you will want to wear camo that blends in with your surroundings. Where you and other hunters set up is also important. I like to set up along tree-lined edges and will often make a blind out of the surrounding brush or cedar tree limbs for added concealment. It’s also a good idea for your shotgun to be camouflaged, but is not always necessary.
Lead the Bird
What works for me is aiming ahead of the dove, squeezing the trigger and swinging through the shot. You may be surprised at how far you have to lead these speedy little birds, so if you keep missing I’d try leading the dove even more.
I admit that I missed every single dove I shot at during my first season. By the time my second season rolled around and I was able to connect on some birds, I learned what I had been doing wrong. Instead of leading the birds and swinging through the shot, I got anxious and was just flinging my shotgun up and forcing a bad shot. Once I actually hit a bird, I got a good feel for what I was doing right and it was much easier from there on out.
Locations
There are a few different places that are good for hunting doves. If you can find a location where there are food sources, watering holes, and plenty of trees for a good roosting spot you’ll be off to a good start. One other thing to keep in mind is doves need grit to help digest the different types of seeds they eat. The grit can be found on gravel roads or any location where sand and dirt may be, so if you can hunt field edges bordered by gravel roads you should be in a great spot.
Typically, doves will be located around the watering holes just after dawn and then as soon as they return to their roost at around dusk. In the daytime you might find them sitting on power lines near the gravel roads for a few hours before they return to their afternoon feeding spots.
Whether you have been bird hunting for years or are just getting started, dove hunting is a great way to sharpen your wingshooting skills. It’s also a good way to introduce your children to hunting and allows them to get in more shooting time than hunting deer and other big game. Plus, there’s no better way to ring in the fall hunting seasons than a good dove shoot!
Andrea Haas
Andrea Haas is a Pro-Staffer from Missouri who enjoys turkey hunting, deer hunting and bowhunting. She is also the founder of the Huntress View, an organization formed to help strengthen the ever growing community of women hunters.
DIY Trail Camera Stand
September 1st, 2016 by BTC Editor
No tree around to hang your Browning Trail Camera? No problem! Pro-Staffer Kinsey Edmunds gives step-by-step instructions on how to make a homemade game camera stand that can be placed anywhere!
Kinsey Edmunds is a pro-staffer from Missouri. Being raised on a farm and surrounded by wildlife, her love for the outdoors began at a young age. Kinsey enjoys bowhunting whitetails, turkeys, hogs and gators, just to name a few. She is also a team member of Huntress View, a team dedicated to strengthening the ever-growing community of women hunters.
Estimating Whitetail Deer Score
August 28th, 2016 by BTC Editor
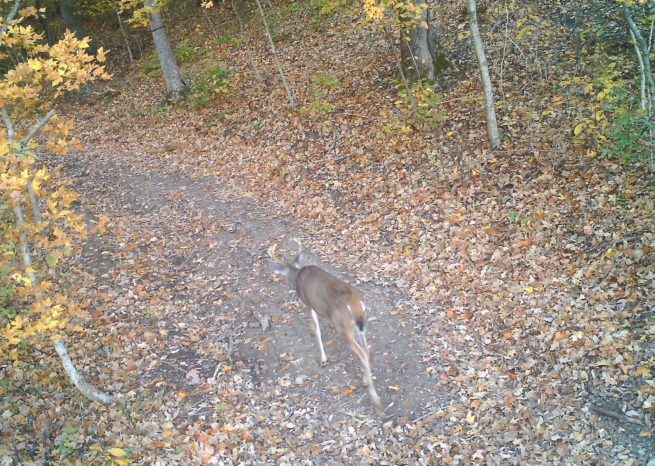
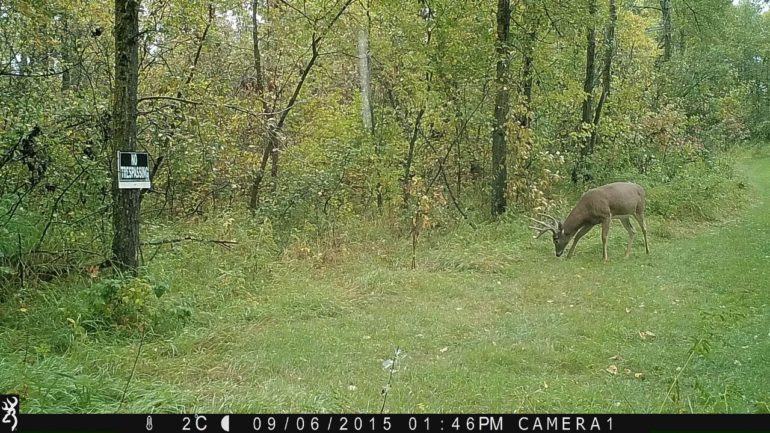
With the right camera and settings, photos captured can help immensely to accurately gauge a buck’s net score well before it hits the ground.
Hunting stores like Cabela’s have a wide range of trail cameras and filtering through pictures is quickly becoming a favorite past time of hunters. Like Christmas morning, each memory card filled with thousands of pictures is waiting to be opened and scanned. Every hunter will have a different level of “acceptable” target deer to hunt. For rookie hunters, anything that moves will usually suffice. Bow hunters might be interested in the Pope and Young minimum qualifying score as a target buck for the season. For others, it may be that elusive net score of 150 inches(“). And for the seasoned trophy hunters it’s likely to be upwards of 170” (the Boone and Crockett all time net typical minimum). Either way, it depends on what hunting stage the individual is in, where their hunting territory is and perhaps how much time they can afford to dedicate towards hunting season. No matter who you are, where you hunt or what your goals are, Boone and Crockett and Pope and Young conversation clubs established a consistent method of measuring deer antlers many years ago.
Previous to the 1990’s, trail cameras were non-existent. Now a days, it is hard to find a hunter without one. Trail cameras scout 24 hours a day, 7 days a week providing great information regarding:
- herd population
- herd age classes
- frequency of movement
- buck to doe ratio
- target bucks
- largest antlers
- worst genetics
Scoring a deer is the act of adding up all the qualifying inches the buck has. Scoring a live buck is difficult at best as they usually do not stand motionless for long or in the right position to properly gauge their score. This is where trail cameras can really help out, especially models with burst mode that take many pictures in rapid succession. A whitetail deer’s net typical score is composed of 5 components from the antler rack they possess:
- Length
- Height
- Thickness (mass)
- Spread
- Length of abnormal points
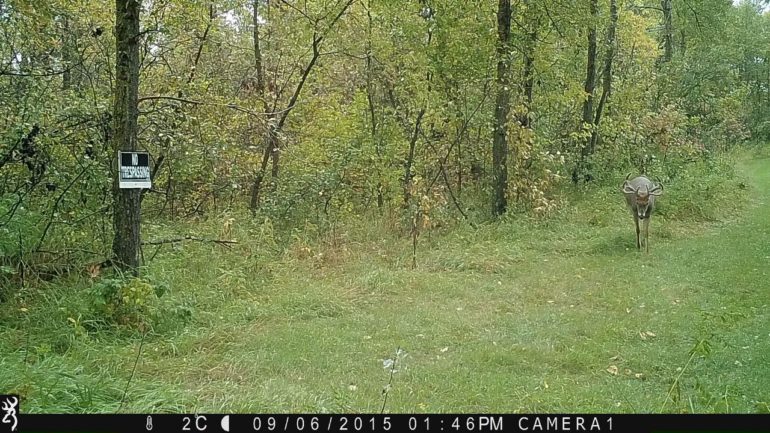
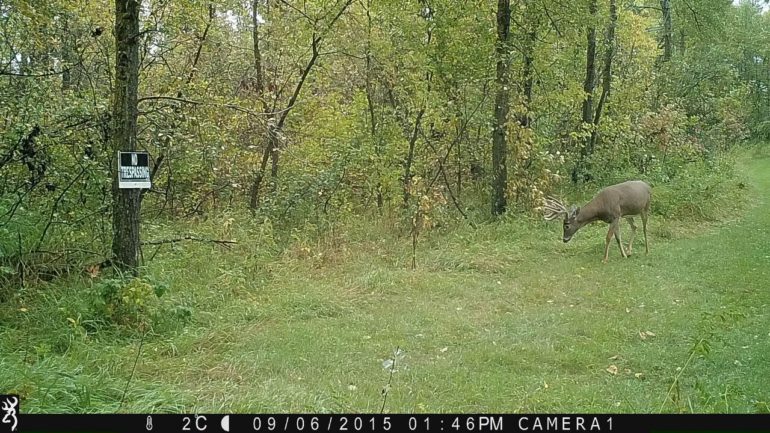
Length is measured as the total distance from where the antler start on the head to the tip, referred to as the main beam. If the length of the right main beam is shorter than the left, or vice versa, estimate the shortest. Antler symmetry is a factor, so an official score sheet will add the actual length of both sides and subtract the difference. Therefore, starting with the shorter main beam eliminates the step of adding and subtracting the inches that are not present on both main beams. To get a good estimate of length you need a picture of the buck from the front (looking at the camera) or top (facing the camera head on, but sniffing the ground). This orientation clearly outlines the main beam, how far it goes out towards/past the ears and will also help identify the shorter one (if any). A helpful second picture is a side profile of the deer’s head on alert (head up). This gives great indication of how far past the nose the main beam goes. The distance from the eyes to the tip of the nose on a mature buck in Alberta is 7”. Visit some mounted deer from your local hunting area and take measurements of this same distance and use it as a reference point. At the end you should have one number – the length of the shortest main beam.
Using the outer distance between the eyes atop the skull as a gauge (6”), I estimated each main beam to extend outwardly 7.5” and then turn back inward 6.5”. Photo also give a clear view of the spread estimated at 19” (6.5 + 6 + 6.5) using the same gauge. Excellent photo to show the difference in the first tine set (G1’s) and to confirm this buck is a 4×4. I estimated the shortest G1 tine at 4”, again with the same gauge.
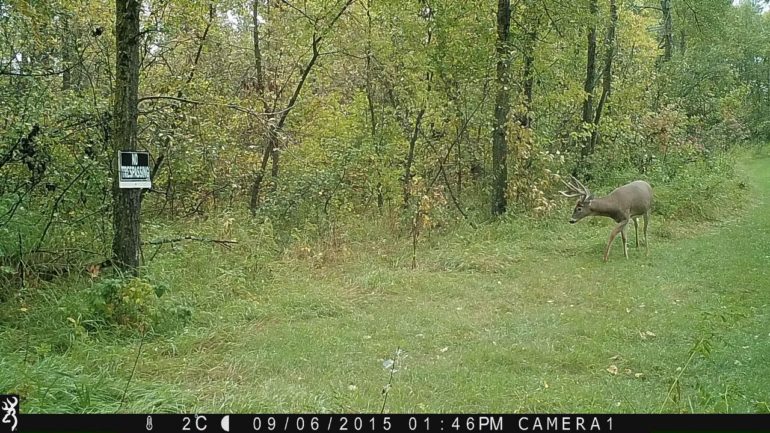
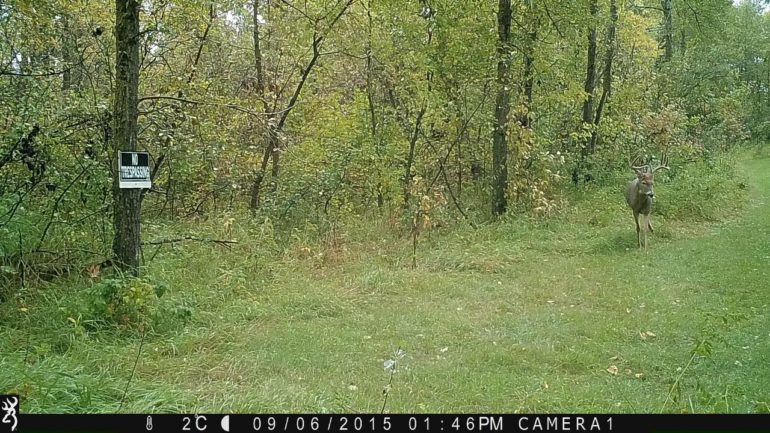
Using the distance from the eye to the snout tip as a gauge (7”), I estimated the middle part of the main beam to be 8”. I also used this picture (and same gauge) to estimate the second tine (G2) at 9”and the third tine (G3) at 7”. Estimated total tine height is 20.5” (9” + 7.5” + 4”). The main beams look very symmetrical but I estimated the right one at 22” (7.5” + 6.5” + 8”).
Net typical height is the total length of all tines (points) that come off the main beam, minus any differences between the sets. To begin, choose the first tine (starting from the head) sprouting from each main beam and estimate the length of the shortest one. Then use the same process on the next set of tines, until you are done. If one main beam has more tines than the other, ignore the extra tines. Only measure the typical tines, meaning where you’d expect the buck to have a tine coming off the main beam. You will need as many pictures as possible with the buck looking in all directions with his head held high. Use a reference like the distance from the eye to the tip of the nose to gauge the length of each tine. In the end you should have one number created by adding the estimated length of the shortest tine in each set. For example, if it was a 5×4 typical buck, you would have: (Shortest G1(brow) tine) + (Shortest G2 tine) + (Shortest G3 tine) + 0. Note: The tip of each main beam is not a tine and was already accounted for when estimating the main beam length. Official scoresheets have an excellent visual representation of the tines and their common names (G#).

Photo gives a good indication of how many tines are on the antlers. In this case, an even three per side.
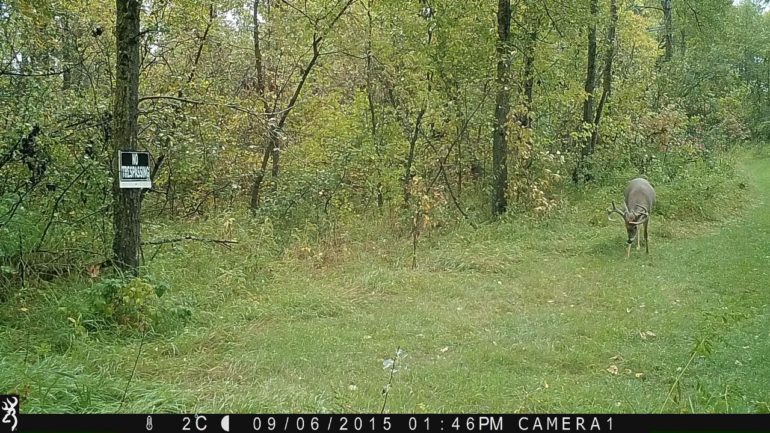
Mass (or thickness) of each antler is measured before each tine sprouts until you reach four measurements. Add those four number together for total mass. Again, use the antler that looks to be the smallest. More often than not I don’t bother with estimating this measurement and just use 18” on mature deer as a baseline. If the deer antlers look really thick, I will add up to 3” and vice versa for skinny antlers. Be cautious of bucks that move during photo capture causing them to appear ‘heavier’ (more mass) than they actually are. Browning trail cameras shoot the fastest shutter speed (even at night), minimizing motion blur and provided crisp photos to estimate mass. I have used both the snout and eye socket as a reference to diameter of the main beam because they both measure around 1.5 – 2”, but like I said, I usually just go with 18” as a conservative estimate.

Unabstracted view of main beam thickness against grass, however this deer is in velvet (which counts). Compare it to the eyeball and snout.
Excellent photo to show symmetry because tine sets. This deer appears to have the same tine length on both the right and left antler.
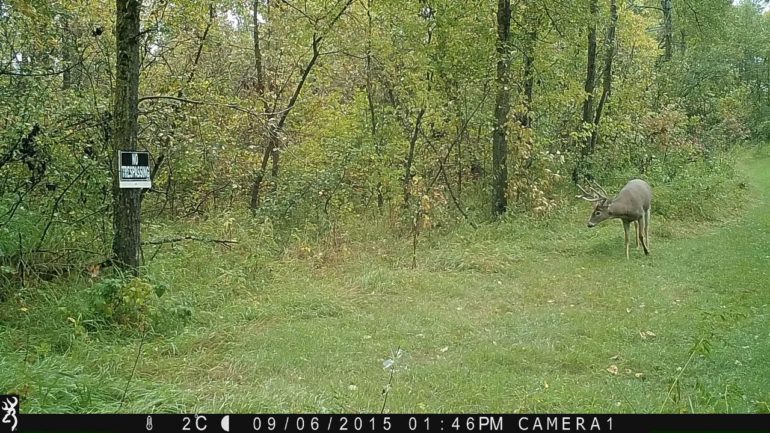
Spread is the width between the left and right antler. Spread is measured by finding the longest distance between the inside of the right and left main beam. Unlike length, mass and height, spread is only counted once, not twice (for each antler side), therefore it contributes the least towards final score. A really wide 4×4 buck will be most impressive at first glance, but a narrower 5×5 buck should have a better score because it’s far easier to have 8 additional inches by having a forth 4” tine on each side as opposed to 8” between the right and left antler. A picture showing the ears and the buck looking at the camera is great to estimate spread. I have also used the skull as a good gauge to estimate spread.
Once you have estimated length, height, mass and spread, the final number required is the total length of all abnormal points. Any picture you have will help find these hidden deductions. Estimate the length of each one and tally them up to one number for both the right and left antler. If you have more than 15” of abnormal points, it qualifies for non-typical scoring instead of typical scoring.
For your final estimated net score do the following:
- Length + Height + Mass
- Double it
- Add Spread
- Subtract length of abnormal points (if less than 15 otherwise add)
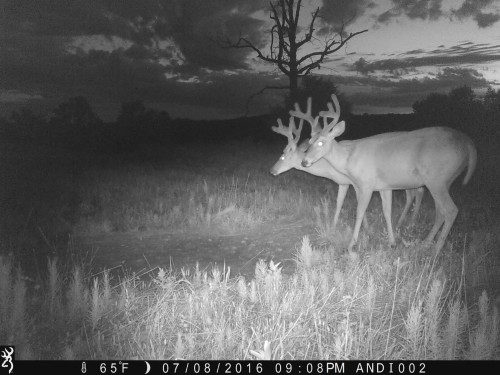
The burst mode on this Browning trail camera took 8 pictures of this buck in rapid succession, providing various camera angles to accurately estimate the buck net typical score at 140”. ([22(length) + 20.5(height) + 18(mass)] x 2 + 19(spread) – 0(non-typical deductions)). I never did shoot this buck, so I’ll never know fore sure though.
An official score sheet is much more precise when it comes to deductions but since estimating the shorter and smaller side of the antlers eliminates those differences (from non-symmetry) immediately.
Remember, score is just a number, it does not consider effort, method of hunting, determination or atmosphere which all contribute to making a deer hunt memorable. Trail cameras are an excellent tool for estimating buck scores before a hunter decides to target that particular deer. I know I still enjoy “if it’s brown it’s down” hunts but I have enjoyed holding out for specific bucks captured on trail cameras that I know will qualify for Pope and Young records book based on the estimating process described above.
By Gord Nuttall
Gord Nuttall is an enthusiastic outdoorsmen and award-winning freelance writer that spends countless hours sorting through Browning trail camera pictures of western big game animals to pursue. Follow all his adventures at www.facebook.com/prostaffgordn

Bowhunting: Tips For Mental Preparation
August 7th, 2016 by BTC Editor
Whitetail archery season is right around the corner! Most likely you’ve spent the past few months or more preparing yourself physically by practicing daily and getting into shape. Being physically fit definitely helps, especially for those who spot and stalk hunt. But being prepared mentally is just as important and is commonly overlooked while preparing for bow hunting.
If you’ve been hunting for a while, you probably have a good idea of how you typically react when a buck walks under your stand and how well you’re able to keep your cool. But if you’re new to hunting altogether, preparing for your first bow hunt can be a little more of a challenge. You’re still working on getting your shooting form down, on top of being nervous about what to expect during your first bow season.
Here are a few things that may help you when preparing yourself mentally for your first bow hunt, your first deer harvest with a bow, or even for those who have had some recent onsets of buck fever and are having trouble getting past that.
Practice
Keep in mind that shooting at a deer from your tree stand or blind is a totally different ball game than just practicing in your backyard. It’s much easier to make a great shot at a target while you’re not under any kind of pressure than it is at a live animal when your adrenaline is pumping. Plus, mother nature can throw some curve balls at you, making it that much more of a challenge.
I think one of the best ways to prepare yourself for shooting at a live animal is to force yourself to practice in ways that simulate real world hunting scenarios. Try shooting at low light, on a windy day or in an uncomfortable position. While you’re hunting you will very likely experience all 3 of those situations, and there’s a good possibility that’s when the buck of a lifetime will step out.
Envision The Shot
Bow hunting is definitely a mental game. If you go into a hunt with a negative attitude or start doubting yourself, you’re probably going to mess up a shot opportunity. Stay positive and visualize yourself making a great shot on a deer. I will often play out different scenarios in my head to better prepare myself. I check my surroundings and make mental notes on when I think I will be able to draw my bow if the deer were to come from my right, my left, or the front, etc. Whitetail have a mind of their own and you can bet that they probably won’t do what you have in mind. It’s good to expect the unexpected.
Just Breathe
When you are preparing to shoot, just take a few breaths to calm your nerves. I know you may not always have the time to do this, as deer can come in pretty fast and often give you just a few seconds to make a shot. But if you’re watching a deer slowly making its way towards you and you feel like your heart is going to beat out of your chest by the time it gets within shooting range, I highly recommend closing your eyes & just breathing for a few seconds. It really does help.
Know Your Limits
If a deer steps out and it’s too dark to make an ethical shot or it’s just a little farther than what you are comfortable with, don’t force it. One of the best ways to break your confidence is to make a bad shot on an animal. If you’ve been hunting long enough you will mess up sometimes, as none of us are perfect. Just make sure you aren’t messing up because you’re pushing yourself past your limits. When in doubt, just pass on the shot.
Hunt Alone If Necessary
This may not seem like an issue, but for me it is. I get more nervous when there’s someone in the stand watching me than if I were to just hunt alone. My first deer with both rifle and bow were during solo hunts and I preferred it that way. I had practiced enough that I was confident in my shooting ability and didn’t want to listen to another person’s voice telling me what to do, on top of trying to listen to the voice in my head as well. For me, that worked and I feel it helped me stay more focused. That may not work for everyone though, so if you feel you need someone there to help guide you through it, that’s ok too.
Experience is the best teacher with bow hunting, but unfortunately when you’re new to it you don’t have that luxury. The best thing you can do is just make sure you’re as prepared as possible, both physically and mentally, for whatever this bow season may throw at you.
Good luck this season!
Andrea Haas
Andrea Haas is a Pro-Staffer from Missouri who enjoys turkey hunting, deer hunting and bowhunting. She is also the founder of the Huntress View, an organization formed to help strengthen the ever growing community of women hunters.
5 Tips For Capturing Unique Trail Camera Photos
July 24th, 2016 by BTC Editor

Using trail cameras to scout for wildlife can be rewarding in more ways than one. The most obvious reason to use a trail camera is to pattern and age deer so you have a better idea of where to hunt and which deer you would like to harvest. Aside from hunting purposes, my favorite use of a trail camera is just to get good, unique pictures of a variety of different wildlife. Targeting a specific species and getting quality pictures at the same time can often be challenging, but I have a few tips I’d like to pass along that have helped me get some interesting shots
- Explore
Explore your property to find spots you think are unique, pretty or have a good view. Find a spot you like, hang a trail camera and see what shows up! Our property has an old rock wall that has turned out to be a neat spot for pictures. It’s not a spot that has a ton of wildlife activity, but when they do show up I love the shots that I get. Here is a shot from this spot:

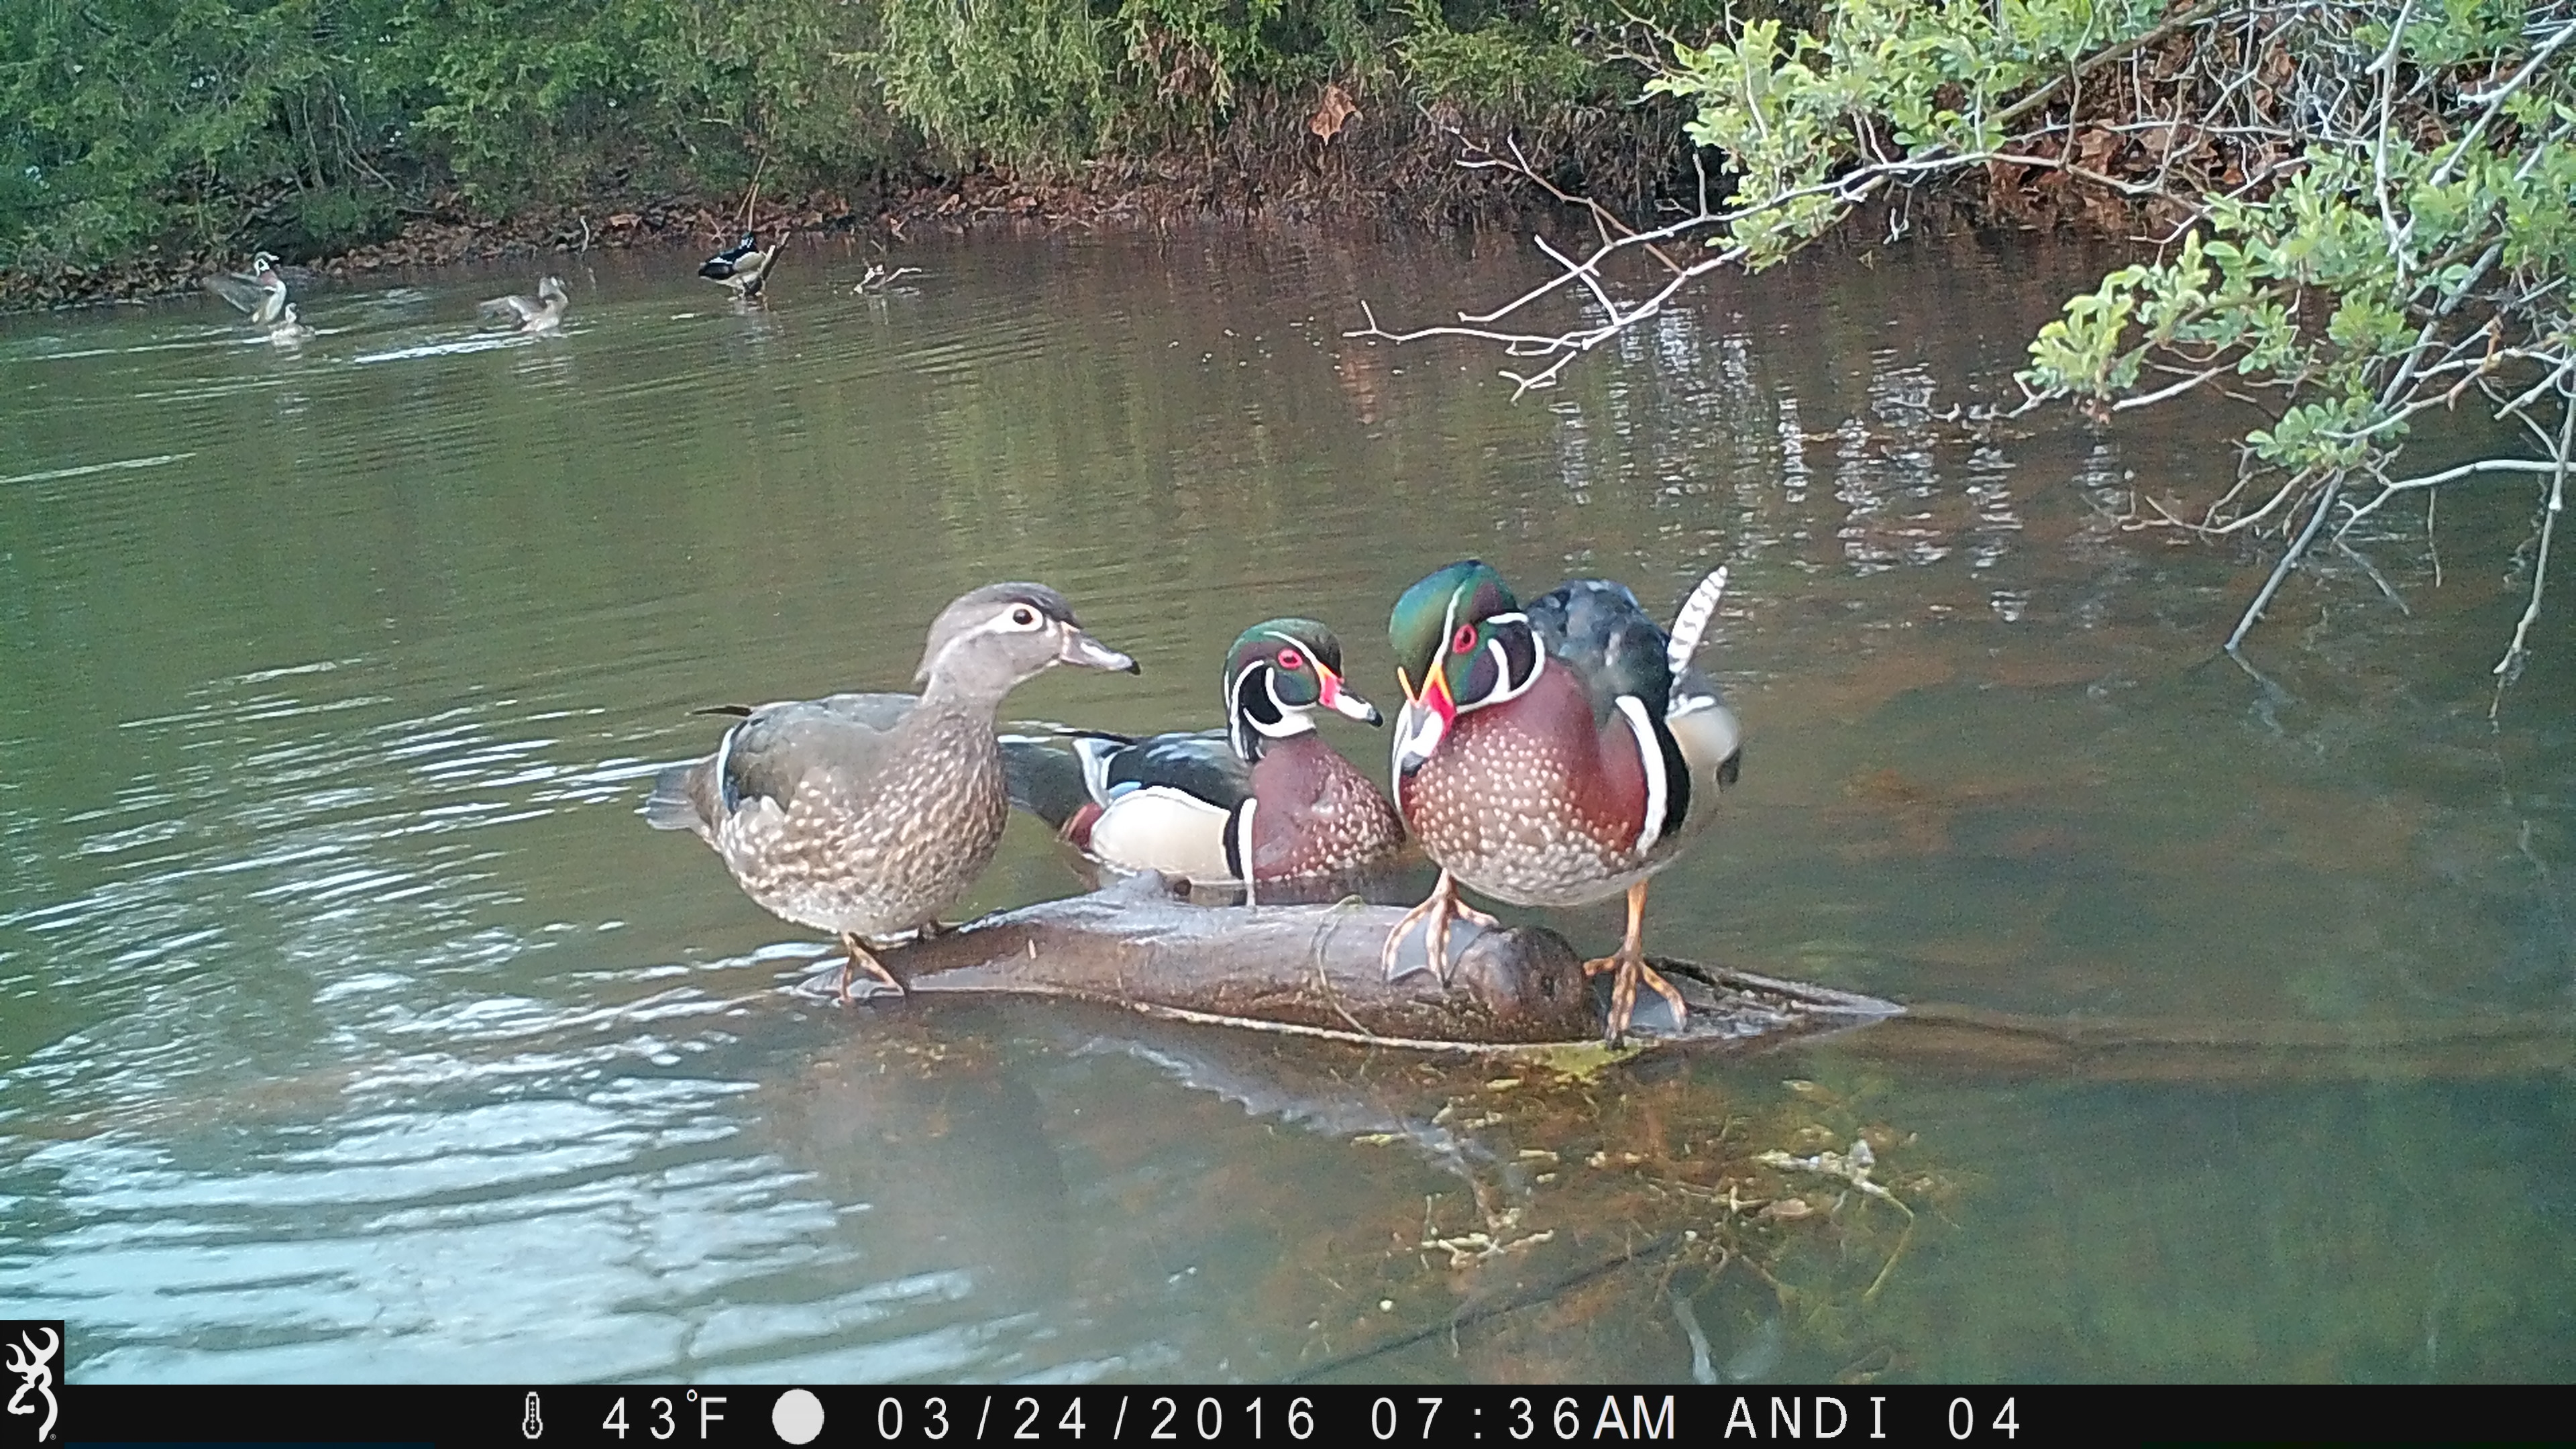
2. Water
Animals are drawn to water. Ponds and creek crossing are a couple of my favorite spots to hang a camera because of the wide variety of animals that show up there. Creek crossings are where I tend to get the most pictures of predators like bobcats, foxes, and coyotes. Turkeys and deer often show up there as well, making for some great photos.
A pond is my favorite location in late winter and early spring to get pictures of waterfowl. A pond setup can be tricky, but placing a camera in front of logs or big rocks that stick up out of the water is what worked best for me, as the ducks seemed to hang out on those quite often.
3. Details
Pay attention to what will be in both the background and foreground of your photos. When trying to get beautiful pictures this is just as important as the wildlife species you’re targeting. For example, tall weeds or plants in front of the camera will block the view of the wildlife and can cause the camera to trigger when the wind blows, getting multiple pictures of just the weeds.
The weeds in the photo below get out of control really quickly in the summer and spring months and have to be mowed down often when putting trail cameras in this spot.
One of my favorite cameras, the Browning Spec Ops Full HD, has a 2” color view screen that can not only be used to view photos & videos in the field, it can also be used as a “live view” while positioning your camera. This helps ensure the images turn out how I envision them and keeps me from having to reposition the camera over and over again to get the shots I want.
4. Accessorize
A camera tree mount is worth its weight in gold when it comes to getting good quality photos. Having a perfect tree to hang a camera on is not always an option. The Browning Trail Cameras Tree Mounts really help with positioning the camera and getting that perfect camera angle, especially when your only spot to hang a camera is in a crooked tree.
5. Experiment
Getting great trail camera photos will often require a lot of experimentation. Utilize the different options available on your cameras and play around with it until you figure out what works best for your setup and for the species you’re targeting.
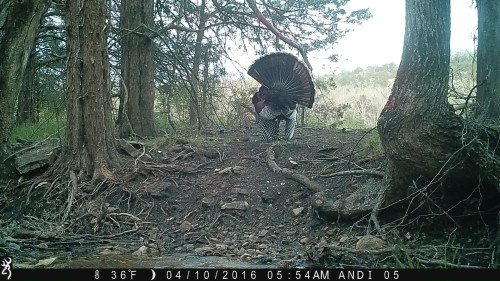
For turkeys, I’ve found that I love the Rapid-Fire mode on my Browning Recon Force, which takes a burst of 8 images in 2 seconds. It helped capture some neat shots of them spreading their wings and flying.

Timelapse mode is great for watching larger areas, like fields and food plots. In such a big open area the wildlife may not always walk right by your camera and set off the trigger, but that doesn’t mean they aren’t there. Timelapse mode will take a picture at set intervals (every 10 seconds, for example), allowing you to watch the animals that may be too far away to trigger your camera. This can help you decide where you would like to place a camera next to get more up close shots of the wildlife. Images from timelapse mode can be viewed quickly and easily, as all Browning Trail Cameras include the Buck Watch Timelapse Viewer Plus software that allows you to view a full day of activity in minutes.
Trail cameras are a great scouting tool, but don’t overlook how fun they can be even when there is no hunting season open! Getting photos of bobcats, foxes, waterfowl and turkeys in the spring and summer can be just as rewarding as getting photos of a nice buck in the fall. Plus, it extends your time outdoors and gives you something to do while waiting for deer season to come around again. It can be difficult at times, but it’s worth it when you get that one in a million shot.
Do you have any tips or tricks for getting unique trail camera photos? Share them with us by leaving a comment!
Andrea Haas
Andrea Haas is a Pro-Staffer from Missouri who enjoys turkey hunting, deer hunting and bowhunting. She is also the founder of the Huntress View, an organization formed to help strengthen the ever growing community of women hunters.
