Wild Game Thanksgiving Dinner
November 13th, 2016 by BTC Editor
It’s that time of year again, where we sit down with family and celebrate Thanksgiving. It’s a time to reflect on all that we are thankful for. For a hunter, this includes the memories in the field and the wild game that was harvested. In my opinion, there’s no better time than Thanksgiving to serve wild game. If you prefer a more non-traditional Thanksgiving dinner, here are a couple of simple recipes to try that you and your family are sure to appreciate.
The main course and side is a dinner kit from Hunter Gatherer Game Dinners.
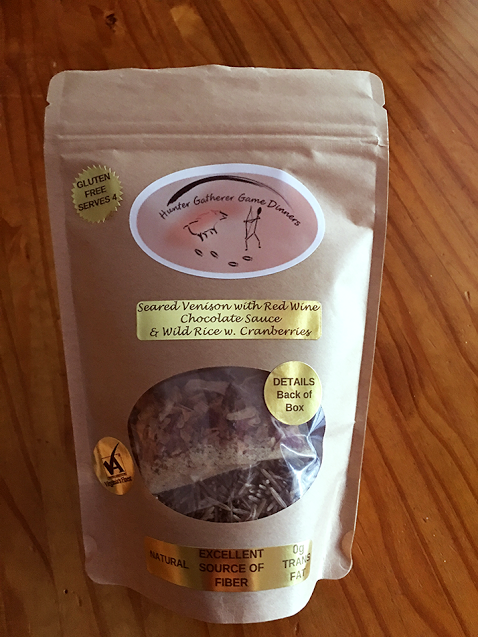
[Main course]
Seared Venison with Red Wine Chocolate Sauce
INGREDIENTS
- 12 oz. venison, elk, buffalo, filet mignon or rib eye steak (I prefer venison filet mignon)
- You’ll need to buy:
- 2 oz. pancetta or Italian bacon
- 1 – 8 oz. can low-sodium chicken broth
- 1 stick unsalted butter
- 1 cup Red Wine
- There are seasonings for the meat in individual packets labeled with numbers, as well as step-by-step instructions so it’s super easy to make!
[Side]
Wild Rice with Cranberries
- The wild rice and cranberries are also included in this kit, along with preparation instructions.

[Dessert]
Persimmon Bread
Most know that deer love to eat persimmons, but have you ever tried one? If you’ve ever tried one before they are ripe you probably think cooking anything with persimmons sounds like a bad idea, as they are awfully bitter. But once they turn ripe they are sweet and are great to use for pies, breads, cakes and cookies. Once they turn a purple/gray color and get soft they are ready for picking, usually after the first couple of frosts.
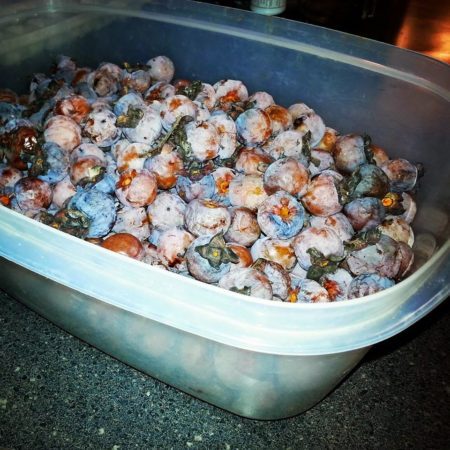
This recipe is my pumpkin bread recipe, but I swapped the 15 oz can pumpkin for 15 oz of persimmon pulp. To me, ripe persimmons taste very similar and have the same consistency as a pumpkin. To get the pulp you will want to smash the persimmons into a bowl through a cone shaped collander, this way you don’t get the skins or seeds in the pulp. We picked these and after smashing all of them through the collander we probably have about 4-5 cups of persimmon pulp. I put the pulp into zip-loc baggies, about 2 cups per baggie, and store them in the freezer until ready to use for cooking.
INGREDIENTS
- 3 cups sugar
- 1 cup cooking oil
- 4 eggs
- 3 1/2 cups all purpose flour
- 2 tsp baking soda
- 1 1/2 tsp salt
- 1 tsp ground cinnamon
- 1 tsp ground nutmeg
- 2/3 cup water
- 15 oz persimmon pulp
DIRECTIONS
- Preheat oven to 350 degrees. Grease 2 loaf pans.
- In an extra large mixing bowl, beat sugar and oil with electric mixer on medium speed. Add eggs & beat well; set sugar mixture aside
- In a large bowl, combine flour, baking soda, salt, cinnamon & nutmeg. Alternately add flour mixture & the water to sugar mixture, beating on low after each addition until just combined.
- Beat in the persimmon pulp.
- Spoon batter into pans
- Bake 55-65 minutes or until a toothpick comes out clean
- Cool in pan on wire rack for 10 minutes. Wrap & store overnight before slicing (The recipe calls for this, but I never do this. I absolutely love warm bread right out of the oven!)
By Andrea Haas
Andrea Haas is a Pro-Staffer from Missouri who enjoys hunting deer, turkeys, and upland birds. She is also the founder of the Huntress View, an organization formed to help strengthen the ever growing community of women hunters.
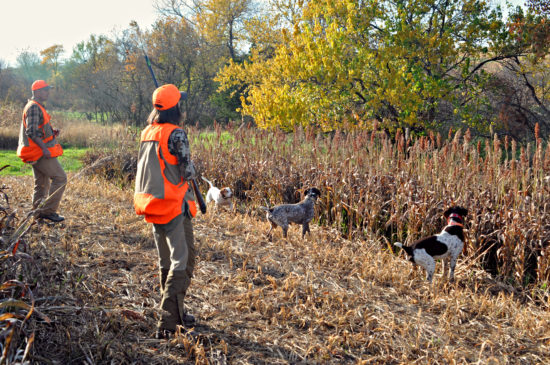
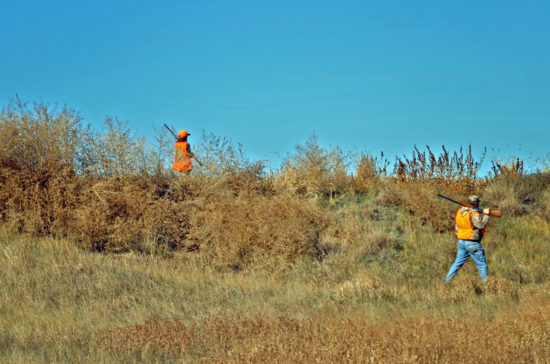
10 Pheasant Hunting Safety Tips
October 16th, 2016 by BTC Editor
10 Pheasant Hunting Safety Tips
I’ve only been pheasant hunting for about 4 years now, but one thing that has been clear to me from my very first hunt is the importance of safety. It’s your responsibility to handle your firearm safely so you keep yourself, your hunting buddies, and the hunting dogs safe. After witnessing a couple of accidents on my hunts (luckily nothing serious), I feel it’s important to share a few safety tips.
- 1) Always point the muzzle in a safe direction.
- 2) Don’t rely on your shotgun’s safety feature alone to prevent an accident. Keep your safety on and finger off of the trigger until ready to shoot.
- 3) Start each hunt with a few safety reminders. It may seem monotonous after hunting for years, but it’s something that needs to be reinforced each hunt.
- 4) Know where your hunting partners and dogs are at all times. One of our hunting partners ended up getting shot in the arm one year because he was downhill from the group who was walking out a field and he failed to tell anybody. Luckily he was far enough away that it didn’t cause much damage, but it could have ended very badly.
- 5) When walking out large fields make sure you and your hunting partners stay in an even line, paying attention not to get too far ahead or behind so no one is in the line of fire.
- 6) Make sure your shotgun barrel is free from obstruction. Have you ever been walking out a field and fall into a badger hole, smacking the end of your shotgun barrel into the ground? Well, I have a couple of times. My hunts could have taken a wrong turn after that had we not checked my barrel and cleaned the mud out.
- 7) Make sure you aim above the horizon and see sky before you pull the trigger. When a pheasant flushes the dogs will often jump up and try to catch it. It would be horrible to shoot a dog or a person, so always make sure you let the pheasant get up high enough before shooting. If you don’t have a clear shot, just pass.
- 8) Make sure you are putting the right size shell into your shotgun. For example, never put a 20 gauge shell into a 12 gauge shotgun.
- 9) Never climb/cross a fence with a loaded shotgun.
- 10) If your shotgun fails to fire, wait about 10 seconds, keeping it pointed in a safe direction and your finger off the trigger. Unload the gun and dispose of the ammo.
As with any hunt, safety when handling your firearm is the most important thing. Accidents are few and far between, but just remember that they can happen to anyone at any time. Remembering the above tips will make your pheasant season more safe and enjoyable for all involved.
By Andrea Haas
Andrea Haas is a Pro-Staffer from Missouri who enjoys hunting deer, turkeys, and upland birds. She is also the founder of the Huntress View, an organization formed to help strengthen the ever growing community of women hunters.
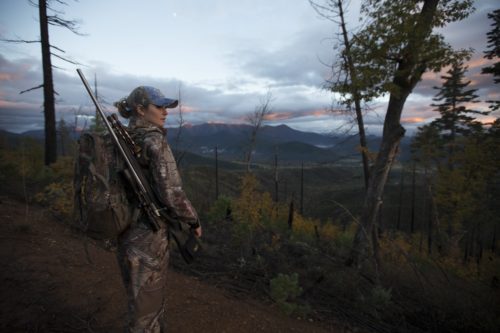
Five Things I Learned Going Rural
September 25th, 2016 by BTC Editor
Five things I learned going rural
By Kristen A. Schmitt
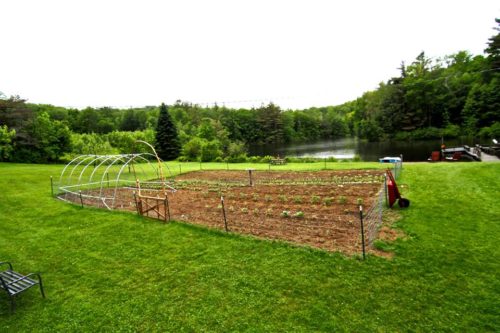
A few years ago, we moved away from the city, trekking 14 hours east of Detroit to the rural mountains of Vermont. My husband’s job brought us out that way and, while I was looking forward to the change, my previous life experiences didn’t really prepare me for the switch. I didn’t grow up camping, hiking, or hunting. In fact, my entire outdoors experience revolved around sidewalks, bicycles and complaining. Fast forward to 2016 and I not only spend at least 50% of my day outside (no matter the weather), but I’ve channeled my newfound enjoyment for the outdoors into writing for a variety of publications about bowhunting, archery, local food and backyard poultry, among other things.
The irony is that before our move, I wouldn’t have recommended going “rural” to anyone. And now? Not only did this move help me break free of my chain-link fence mentality, but it also gave me new knowledge and confidence that I bring to other areas of my life. So, in the tradition of Dave Letterman’s top ten lists, here’s the top five things I’ve learned since going rural:
5 ) Nature can be incredibly surprising.
Our property in Vermont was surrounded by forest, field and water. While we owned roughly 8 acres, the back of the property butted up to an 11-acre pond and the other sides were bordered by hardwood forest. It was more than just a switch from pavement to dirt roads. My nearest neighbors were bobcats (that tried to kill my chickens – twice), porcupines, peregrine falcons, eagles, and hawks; vultures, wild turkeys, juncos and herons. One particular incident involved a few nighttime visits from an ornery black bear interested in our trash.
We now have a 36-acre farm in upstate NY with a similar landscape.
4 ) Chickens are more than just tiny egg machines.
Being able to grab fresh eggs from your own chickens for breakfast is an unbelievable treat. Chickens are easier than any other type of livestock and mine did amazingly well in negative temperatures last winter. We’ve only lost one (to a bobcat); the others are hearty and healthy. As a writer, I work out of my house and have the ability to listen to the chicken “conversation” daily. I read somewhere that chickens have their own language and I can attest to that fact. Sitting on my porch with a mug of tea (or glass of wine, depending on the time of day) to watch them peck and chatter is one of my favorite activities.
3 ) Eating vegetables that you grow yourself is an amazing experience.
My parents raised me well with a small backyard garden and fresh vegetables daily. But the significance of planting our own fruits and vegetables and maintaining our garden – especially one as large as we have – is priceless. Our young daughter seems way more connected to where her food comes from than I ever was until I became an adult. Picking that first piece of spinach or watching corn plump up on the stalks is exciting each and every time.
2 ) It takes a lot of wood to heat a house, especially with temperatures in the negatives for weeks. Prior to our move, we relied on city gas to heat our house in the suburbs like the majority of the country. Once we realized we could harvest our own heat from the forest on our property, we had a wood stove installed in the living room. Little did we realize that it takes a lot of wood to keep even a smaller house warm when the temperatures don’t go higher than -16 for weeks. Yet, if I had to do it again, I would. I like being able to see the physical amount of wood I used for heat rather than paying a faceless gas bill. Besides, splitting and stacking wood may not be a ton of fun, but it’s not bad. In fact, it warms you twice: once when you stack the wood; later, when you sit in front the fire.
1 ) I’m not helpless.
The main thing that I have learned from going “rural” is that I am not a helpless person. I am stronger than I’ve ever been and my passion and dedication to keeping up with this new lifestyle choice has me learning how to do new things every single day. If we hadn’t moved I wonder if I would feel this empowered in the physical aspects of life as well as the mental. This move has changed me for the better – and I can’t imagine ever living anywhere where I can’t see the stars.
Kristen A. Schmitt writes about wildlife, sustainable agriculture, environmental issues and the outdoors. Her work has appeared in National Geographic, Fast Company, Audubon, Eating Well,USA Today, Hunt & Fish and others. Follow her @Kristen_Schmitt.
Dove Hunting Basics
September 17th, 2016 by BTC Editor
There has always been a lot of excitement surrounding the beginning of fall. Cooler weather, hoodies and bonfires are just a few things we start to hear about around the first of September. But to most hunters, September means dove hunting and marks the beginning of the fall hunting seasons!
For most states, dove season is now underway. If you are thinking about bird hunting for the first time this year, I highly suggest giving dove hunting a try. It’s one of the simplest types of bird hunting to get into, as far as obtaining the proper licenses and the cost of hunting equipment. Plus, the hunting atmosphere is generally pretty carefree and relaxed, which I find is much needed compared to how serious whitetail hunting can become.
Here are a few dove hunting basics to keep in mind when preparing for dove season.
Practice
While I do feel dove hunting is one of the easiest and cheapest types of bird hunting to get into, I think doves are one of the harder game birds to hit. Not only are they small and fast, they zigzag through the sky making for a fun, but challenging hunt.
To prepare for my first dove season I practiced shooting skeet in my backyard prior to the season opener. I was new to bird hunting altogether at that time, so that helped me get more comfortable with handling a shotgun. If you have a sporting clay course near you, that is probably one of the best ways to prepare for shooting live birds since the targets are thrown at varying angles and speeds, simulating a more real-world hunting experience.
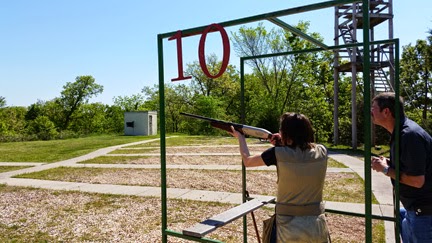
Shooting on a sporting clay course
Licenses and Equipment
For dove hunting you will need a hunting license and Migratory Bird permit, which are both relatively cheap. Always double check with your state conservation department to make sure you have the proper permits.
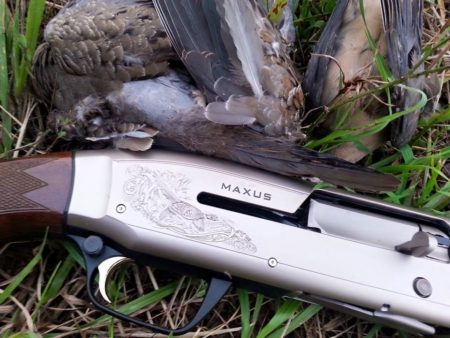
Besides your hunting permits, you will also need a shotgun and shotgun shells. I prefer my auto-loading Browning Maxus shotgun. Again, make sure you check the regulations with your state conservation department. Most states require you to have a plug in your shotgun that won’t allow you to have more than 3 shells in at at time.
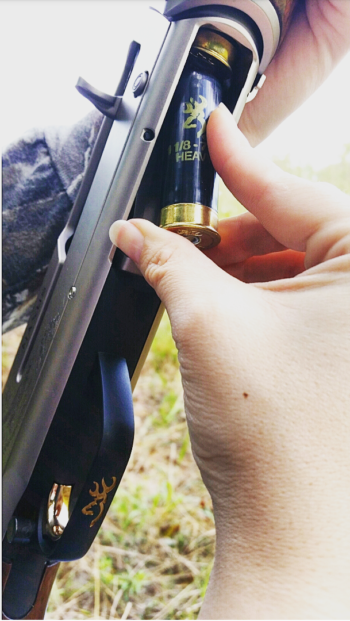
A good shotshell size for dove hunting is a 1 or 1-1/8 ounce load of 7 1/2’s, like these shells from Browning Ammo. It really only takes a few pellets to down a dove so you shouldn’t need to go larger than a 7 ½ or 8. Like it or not, with dove hunting you are going to miss sometimes, so always bring more ammo than you think you will need!
You may want to purchase a small stool or seat to sit on while out hunting. When the doves are flying good, you could be out hunting for hours, so you may as well make yourself comfortable and at home! This Dove Shooter Stool from AlpsOutdoorz is a good option. It has a strap that makes it easy to carry to and from the field. There is a cooler underneath the seat so you can bring lunch and keep your drinks cool. It could also double as a way to carry your shells or your doves. The front pockets are great for holding boxes of shotgun shells, or holding a few decoys!
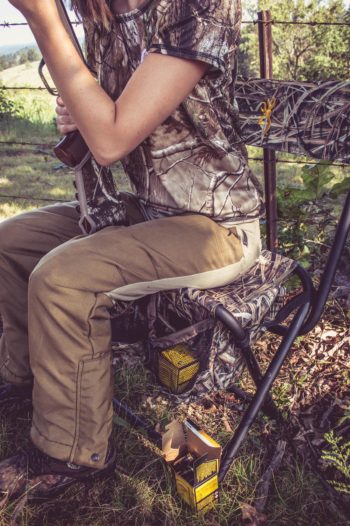
Dove Shooter Stool and Browning Ammo
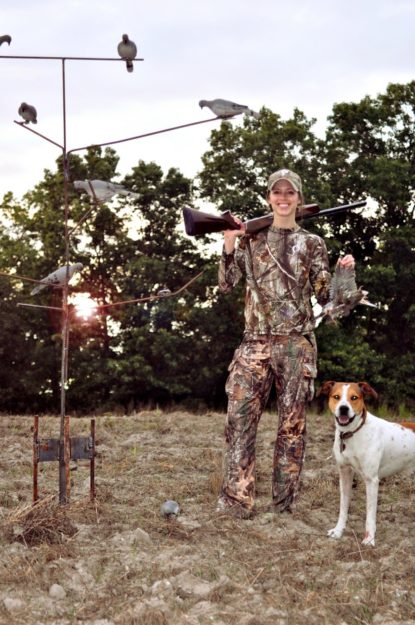
Decoys
You don’t have to have decoys but they often help bring doves in for a closer shot when they would stay out of shooting range otherwise. Placing a few decoys on open ground, as well as a few on nearby tree branches or a fence row is generally a good setup. When placing decoys on tree limbs, the higher the better. Doves tend to fly into the wind, so you’ll want to place your decoys facing that way.
Concealment
Doves have good eyesight so you will want to wear camo that blends in with your surroundings. Where you and other hunters set up is also important. I like to set up along tree-lined edges and will often make a blind out of the surrounding brush or cedar tree limbs for added concealment. It’s also a good idea for your shotgun to be camouflaged, but is not always necessary.
Lead the Bird
What works for me is aiming ahead of the dove, squeezing the trigger and swinging through the shot. You may be surprised at how far you have to lead these speedy little birds, so if you keep missing I’d try leading the dove even more.
I admit that I missed every single dove I shot at during my first season. By the time my second season rolled around and I was able to connect on some birds, I learned what I had been doing wrong. Instead of leading the birds and swinging through the shot, I got anxious and was just flinging my shotgun up and forcing a bad shot. Once I actually hit a bird, I got a good feel for what I was doing right and it was much easier from there on out.
Locations
There are a few different places that are good for hunting doves. If you can find a location where there are food sources, watering holes, and plenty of trees for a good roosting spot you’ll be off to a good start. One other thing to keep in mind is doves need grit to help digest the different types of seeds they eat. The grit can be found on gravel roads or any location where sand and dirt may be, so if you can hunt field edges bordered by gravel roads you should be in a great spot.
Typically, doves will be located around the watering holes just after dawn and then as soon as they return to their roost at around dusk. In the daytime you might find them sitting on power lines near the gravel roads for a few hours before they return to their afternoon feeding spots.
Whether you have been bird hunting for years or are just getting started, dove hunting is a great way to sharpen your wingshooting skills. It’s also a good way to introduce your children to hunting and allows them to get in more shooting time than hunting deer and other big game. Plus, there’s no better way to ring in the fall hunting seasons than a good dove shoot!
Andrea Haas
Andrea Haas is a Pro-Staffer from Missouri who enjoys turkey hunting, deer hunting and bowhunting. She is also the founder of the Huntress View, an organization formed to help strengthen the ever growing community of women hunters.
DIY Trail Camera Stand
September 1st, 2016 by BTC Editor
No tree around to hang your Browning Trail Camera? No problem! Pro-Staffer Kinsey Edmunds gives step-by-step instructions on how to make a homemade game camera stand that can be placed anywhere!
Kinsey Edmunds is a pro-staffer from Missouri. Being raised on a farm and surrounded by wildlife, her love for the outdoors began at a young age. Kinsey enjoys bowhunting whitetails, turkeys, hogs and gators, just to name a few. She is also a team member of Huntress View, a team dedicated to strengthening the ever-growing community of women hunters.
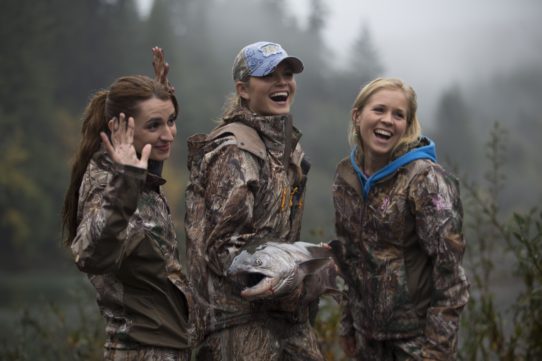
Kristy Lee Cook Q & A – Part 1
August 21st, 2016 by BTC Editor
Kristy Lee Cook is most known for being a top 10 Finalist on Season 7 of “American Idol”. She has since stayed in the spotlight and is currently co-hosting “The Most Wanted List” on the Sportsman Channel, along with her 2 friends Jess and Jessi Jo. We recently sat down with Kristy to find out more about her and her love for singing, hunting and all things Browning.
BTC: You are co-host for “The Most Wanted List” on the Sportsman Channel, along with your friends Jessi Jo and Jess. Tell us a little about the concept of this show.
KLC: The show is basically about just having adventures and bringing along friends and family. It’s really fun because we get to bring out a lot of different people on the show. I brought my brother on and we bring celebrities on. It’s just really about showing what it is to share adventures and doing everything you’ve wanted to do in life. A lot of people say there’s things they want to do, and then never do them. We actually go and do them. A lot of people just say it, and they never get the chance to do and see things, so the whole point of the show is to go on these adventures, everything we’ve wanted to do in life, like hunts and anything else we can think of and we go and do it.
BTC: You’re all 3 barrel racers and you (KLC) travel all over the country for that as well to compete in competitions?
KLC: Yes, I do. I’m actually in Texas right now for a competition and I was in Utah and California before that.
BTC: Which do you find to be more of a rush: barrel racing, singing in front of a big crowd, or shooting a big buck?
KLC: Oh boy! Well, I don’t get buck fever. I would say the most nerve-racking thing for me is singing the National Anthem. It’s such a hard song to sing and if you mess it up you’re known for life for messing it up. So that’s probably the most nerve-racking thing for me. I do get nervous
BTC: I’m sure you’ve had the opportunity to hunt with some well-known people. What is one person that you would like to hunt with one day that you haven’t yet & why?
KLC: I would really like to hunt with my sister again. That would be a lot of fun. I took her on her very first hunt and that’s the only hunt she’s ever been on so I’d like to take her again one day. I’m actually going to have one of my other best friends on the show. I kind of just want to bring on my friends and family and help people go on hunts and adventures that they’ve always wanted to do.
BTC: You had a Camaro completely wrapped in camo with the Browning Buck Mark on the hood, so it’s safe to say you’re in love with the Browning brand. How did your love for Browning start?
KLC: Well I’ve just always loved Browning. I came up to them one day and said I would love to put your logo on my car. It’s good advertising and I’m a Browning girl and I want to camouflage my car. So I talked to them about it and they said it would be great if I wanted to do that. I’ve always wanted a camouflage Camaro so I did it! It was just cool.
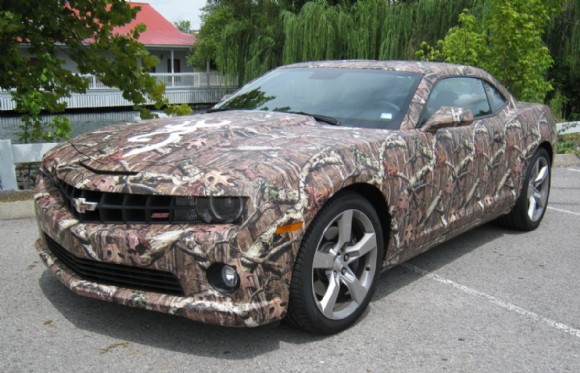
BTC: Was yours was the only one out there like that?
KLC: It was the only one in the world. I did see a few cars get done like that after I did mine, but it was pretty neat having the only car in the world like that. You’d find either people liked it, or didn’t like it. For the people that didn’t like it I was like, “Well, I have the ONLY one in the world like this”. I liked it!
BTC: Any good stories about that Camaro? Drag racing? Tickets? Burnouts?
KLC: Actually yes! I’m so used to driving trucks so when I had my Camaro, I was in Nashville and I was going 80 down the freeway in a 65 zone. I didn’t feel like I was going 83 at all because it just drove so fast and smooth. I got a ticket for that for sure.
I couldn’t take it anywhere without people wanting to take a picture of it. I would be in the gas station in my PJ’s and people would still want to stop and take a picture with me and my car.
I also have a little bit of road rage, so everybody knew it was me who was cutting them off!
Stay tuned for Part 2 of our Q & A with Kristy Lee Cook, to be posted at Huntress View
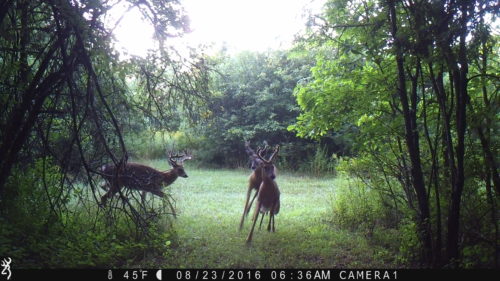
Nighttime Trail Camera Images – Putting Light On The Subject
August 15th, 2016 by BTC Editor
The evolution of the trail camera has been simply remarkable over the last several years, from taking 35mm film to the photo shop to the almost instant gratification of looking at them on your phone, things are simply in a place that was once only a dream.
With that said, there are still some factors in play when it comes to nighttime images that make them seem behind the times. With all of the advances in technology, why have nighttime images not been perfected yet? Well, in this format, we’ll do our best to explain the basic science of nighttime images on trail cameras.
Seeing the Waves
Nope. We’re not at the beach. But to develop a basic understanding of what’s going on with nighttime images you will want to make sense of the following to help differentiate between the various types of flashes:
- Our eyes can only see light that exists within a small range of the electromagnetic spectrum.
- That electromagnetic spectrum is measured in wavelengths.
- Those wavelengths are measured in nanometers.
Ultimately, these nanometers are your take away from this section because this is the measurement that you can use to understand how each type of flash impacts the quality of your game camera pictures.
If you need a visual aide to help you more effectively wrap your head around the concept of nanometers, NASA has created a handy below:

SOURCE: http://science-edu.larc.nasa.gov/EDDOCS/Wavelengths_for_Colors.html
Measuring the Flash?
Well, we’ve given you the basics on nanometers, but now you’re asking: why do I care? Well, we’ll do our best to explain that here as simply as possible across all three types of flashes found on trail cameras:
White Flash Cameras
If you look at the chart from NASA, you will see that they define “visible light” as being in the range of 400nm to 700nm. That’s pretty much what you get with a “white flash” camera and that’s how you get to see the full color images.
SOURCE: http://www.trailcampro.com/collections/shop-trail-cameras/products/reconyx-hyperfire-hc550
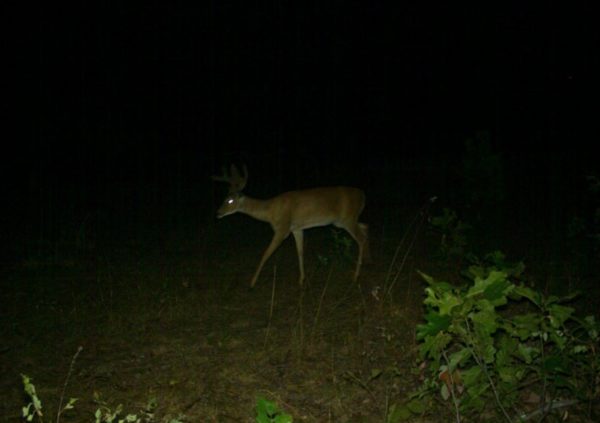
Low-Glow/Standard Infrared (IR) Flash
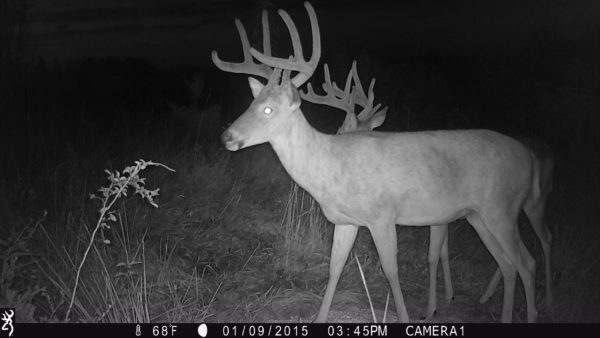
Now it starts to get a little more complex, because we’re going to step outside the range of “visible light” and move into the infrared range. For cameras that fall into the “low-glow” or “standard” infrared (IR) category, it’s reasonable to suggest that most of these cameras measure around 850 nanometers.
Now, even though these camera flashes technically fall in the “Infrared” category, they are still close enough to the red in the “visible light” range that (A) if someone is looking in the general direction of the LED bulbs when it takes a nighttime image they will see a “low red glow” and (B) the flash still generates enough illumination to take a reasonably good nighttime images.
Obviously, you sacrifice the color of the images here since you are using a flash outside of the spectrum found in the “visible light” range, but you are still getting a reasonably crisp image without the “flash of lightning” effect you get with a white flash camera.
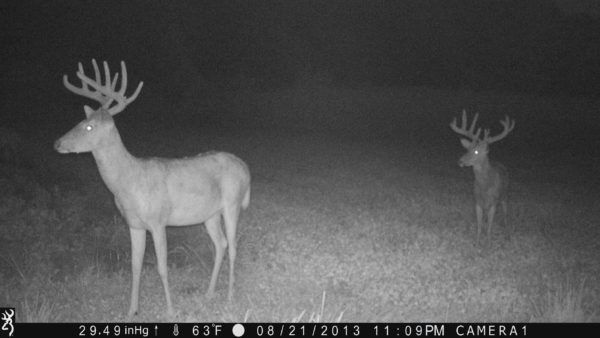
Invisble/No Glow/Black Flash
As we discuss this type of flash, it is worth noting that it still falls within the infrared light range. It is simply further away from the “visible light” range than the low-glow infrared flash cameras. With flashes in this category, it is reasonable to assume that most of them can be measured around 950 nanometers.
The net result of this is that the LED bulbs are not visible when taking a nighttime image, BUT in exchange for that “invisibility” you are sacrificing image quality when compared to the other types of flashes. This is because invisible flash cameras simply do not illuminate the subject matter as much as the other two.
In this image below, if you look back up to the one we used for the “low-glow” images you’ll notice that the image captured by the “invisible flash” camera is a little grainier and has a little more “white noise.” They are both still good images, but you can see that one is a little clearer than the other.
Speed Matters
Now, we could get into a long dissertation about the impact that SHUTTER SPEED has on trail camera images, but for today we’ll just provide you with a few quick notes and save the essay on “shutter speeds” for another day.
In this context we only want to relate shutter speed to the amount of light that is available for capturing images. So here goes: the more light you have available, the faster the shutter speed can be. The less light/illumination you have available, the slower the shutter speed must be.
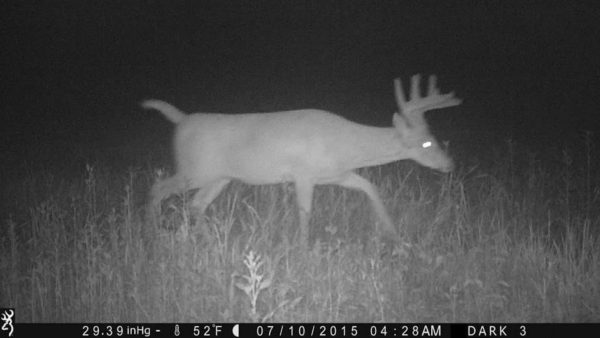
Basically that means this: during the day you have enough light for the shutter speeds to be super-fast and capture cool images of deer jumping and birds flying. This is why most of the cool action shots we see in trail cam pics are daytime pics.
It also means that as you move further away for the visible light range with your flash (i.e From 700 nanometers to 850 nanometers to 950 nanometers…), the shutter speed must slow down to allow enough light inside the camera to capture nighttime photos. In layman’s terms, as you move from a white flash to a low glow IR flash to an invisible flash, you are increasing the likelihood of blurred images because the shutter speeds needs to slow down. While this example isn’t horribly blurred, it still demonstrates that the illumination from an invisible flash camera accompanied by the slower shutter speed, doesn’t always give you the cleanest image in the world.
What Do I Really Need to Remember?
Well, here is the gist of it, starting with the very basic premise that there are two types of trail camera pictures: daytime pictures and nighttime pictures.
Beyond that, based simply on game cameras, there are 3 types of nighttime images: those taken with a white flash, those taken with a standard/low-glow IR flash, and those taken with an invisible/black flash.
So if we take those four types of images and rank them based on potential quality of the images based on the lighting, they would be ranked as follows:
- Daytime Images
- White Flash Images
- Low Glow/Standard IR Images
- Invisible/Black Flash Images
Obviously, there can be a lot more depth to the discussion on flashes and nanometers and shutter speeds and everything else that leads to the trail camera pictures you find on your SD cards, but hopefully this gives you a little bit more of a foundation for understanding why some of the pictures you find on your SD cards look the way they do and helps you with you game planning when it comes to where you put your different types of trail cameras!
Tom Rainey
Tom Rainey has been with Browning Trail Cameras ever since they were introduced at retail and enjoys hunting everything from squirrels to whitetail deer…but his obsession is turkey hunting. His grandfather purchased him a Belgium Browning 20-Gauge A-5 prior to his birth and he has been a fan of the Browning brand ever since…
5 Tips For Capturing Unique Trail Camera Photos
July 24th, 2016 by BTC Editor

Using trail cameras to scout for wildlife can be rewarding in more ways than one. The most obvious reason to use a trail camera is to pattern and age deer so you have a better idea of where to hunt and which deer you would like to harvest. Aside from hunting purposes, my favorite use of a trail camera is just to get good, unique pictures of a variety of different wildlife. Targeting a specific species and getting quality pictures at the same time can often be challenging, but I have a few tips I’d like to pass along that have helped me get some interesting shots
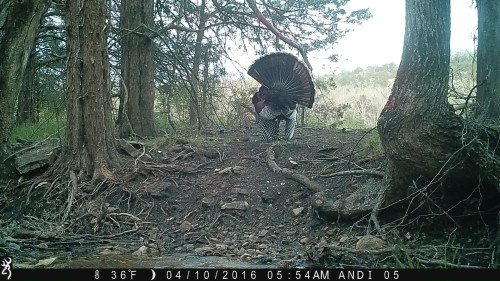
- Explore
Explore your property to find spots you think are unique, pretty or have a good view. Find a spot you like, hang a trail camera and see what shows up! Our property has an old rock wall that has turned out to be a neat spot for pictures. It’s not a spot that has a ton of wildlife activity, but when they do show up I love the shots that I get. Here is a shot from this spot:

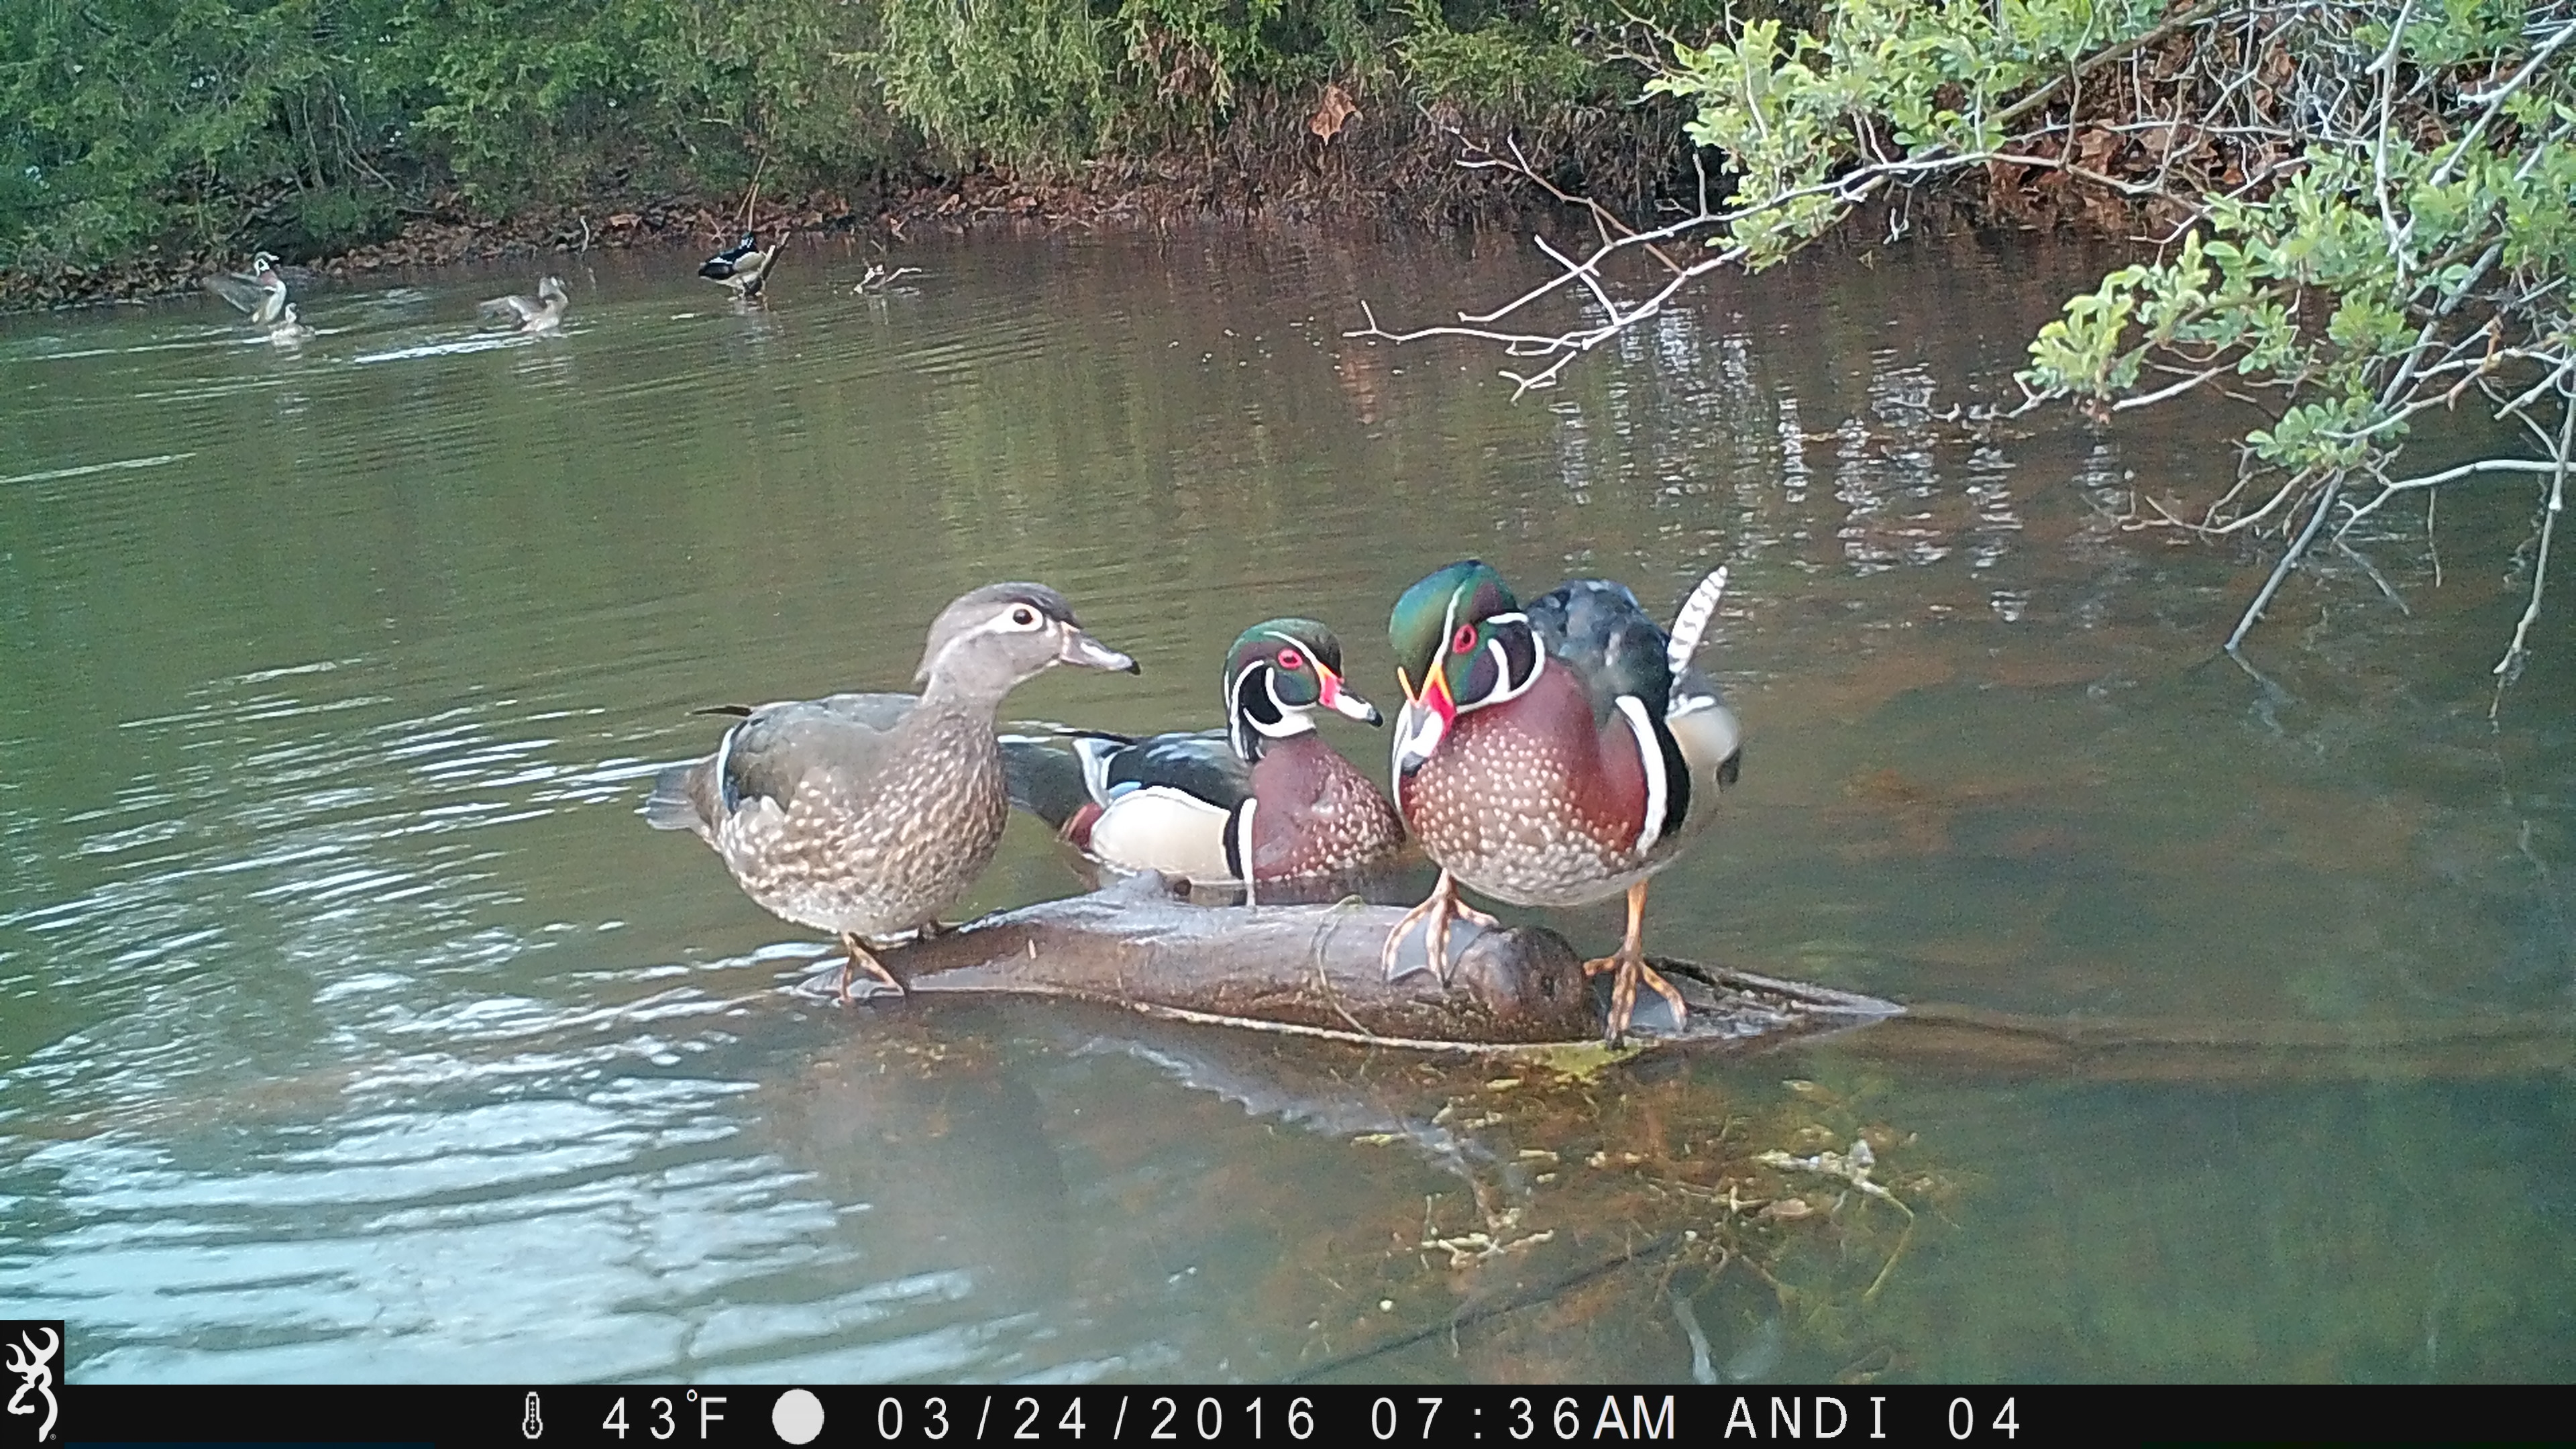
2. Water
Animals are drawn to water. Ponds and creek crossing are a couple of my favorite spots to hang a camera because of the wide variety of animals that show up there. Creek crossings are where I tend to get the most pictures of predators like bobcats, foxes, and coyotes. Turkeys and deer often show up there as well, making for some great photos.
A pond is my favorite location in late winter and early spring to get pictures of waterfowl. A pond setup can be tricky, but placing a camera in front of logs or big rocks that stick up out of the water is what worked best for me, as the ducks seemed to hang out on those quite often.
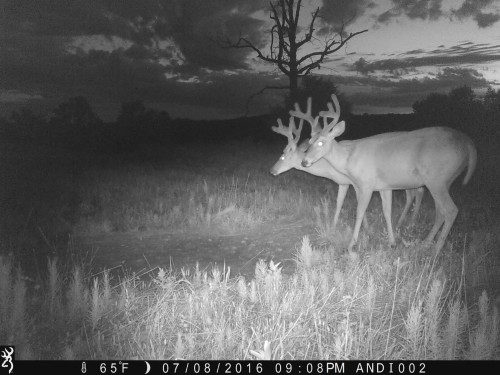
3. Details
Pay attention to what will be in both the background and foreground of your photos. When trying to get beautiful pictures this is just as important as the wildlife species you’re targeting. For example, tall weeds or plants in front of the camera will block the view of the wildlife and can cause the camera to trigger when the wind blows, getting multiple pictures of just the weeds.
The weeds in the photo below get out of control really quickly in the summer and spring months and have to be mowed down often when putting trail cameras in this spot.
One of my favorite cameras, the Browning Spec Ops Full HD, has a 2” color view screen that can not only be used to view photos & videos in the field, it can also be used as a “live view” while positioning your camera. This helps ensure the images turn out how I envision them and keeps me from having to reposition the camera over and over again to get the shots I want.
4. Accessorize
A camera tree mount is worth its weight in gold when it comes to getting good quality photos. Having a perfect tree to hang a camera on is not always an option. The Browning Trail Cameras Tree Mounts really help with positioning the camera and getting that perfect camera angle, especially when your only spot to hang a camera is in a crooked tree.
5. Experiment
Getting great trail camera photos will often require a lot of experimentation. Utilize the different options available on your cameras and play around with it until you figure out what works best for your setup and for the species you’re targeting.
For turkeys, I’ve found that I love the Rapid-Fire mode on my Browning Recon Force, which takes a burst of 8 images in 2 seconds. It helped capture some neat shots of them spreading their wings and flying.

Timelapse mode is great for watching larger areas, like fields and food plots. In such a big open area the wildlife may not always walk right by your camera and set off the trigger, but that doesn’t mean they aren’t there. Timelapse mode will take a picture at set intervals (every 10 seconds, for example), allowing you to watch the animals that may be too far away to trigger your camera. This can help you decide where you would like to place a camera next to get more up close shots of the wildlife. Images from timelapse mode can be viewed quickly and easily, as all Browning Trail Cameras include the Buck Watch Timelapse Viewer Plus software that allows you to view a full day of activity in minutes.
Trail cameras are a great scouting tool, but don’t overlook how fun they can be even when there is no hunting season open! Getting photos of bobcats, foxes, waterfowl and turkeys in the spring and summer can be just as rewarding as getting photos of a nice buck in the fall. Plus, it extends your time outdoors and gives you something to do while waiting for deer season to come around again. It can be difficult at times, but it’s worth it when you get that one in a million shot.
Do you have any tips or tricks for getting unique trail camera photos? Share them with us by leaving a comment!
Andrea Haas
Andrea Haas is a Pro-Staffer from Missouri who enjoys turkey hunting, deer hunting and bowhunting. She is also the founder of the Huntress View, an organization formed to help strengthen the ever growing community of women hunters.
